Table des Matières

Publicité

Les langues disponibles

Les langues disponibles

Liens rapides

DR 52 CA
Bedienungsanleitung
Deutsch / English / Français / Italiano

Publicité

Table des Matières
loading

Sommaire des Matières pour Albrecht Audio DR 52 CA

  • Page 1 DR 52 CA Bedienungsanleitung Deutsch / English / Français / Italiano...
  • Page 2: Table Des Matières

    Inhalt 1. Sicherheitshinweise .............. 3 2. Design und Tastenbeschreibung .......... 4 3. Erste Schritte ................ 6 4. DAB ..................8 4.1. Scannen nach DAB+-Sendern .......... 8 4.2. Senderliste................. 8 4.3. Manuelles Einstellen............8 4.4. Senderliste bereinigen ............8 4.5. DRC ................... 9 4.6.
  • Page 3: Sicherheitshinweise

    1. Sicherheitshinweise • Lassen Sie das DR 52 CA nicht fallen und setzen Sie es keiner Flüssigkeit, Nässe oder Luftfeuchtigkeit aus. Dies könnte zu Schäden am Gerät führen. • Wenn Sie das DR 52 CA aus kalter Umgebung in eine warme Umgebung bringen, lassen Sie es sich an die neue Temperatur anpassen, bevor Sie es in Betrieb nehmen.
  • Page 4: Design Und Tastenbeschreibung

    • Legen Sie das DR 52 CA in seine Originalverpackung, wenn Sie es transportieren müssen. Bewahren Sie deshalb bitte die Verpackung auf. • Ist das Gerät zu entsorgen, so beachten Sie bitte, dass es nicht mit dem normalen Haushaltsabfall entsorgt werden darf.
  • Page 5 Beschreibung Funktionen TFT-Anzeige Anzeige Standby-Taste Standby ein/aus Antennenanschluss Für die mitgelieferte Wurf- Antenne oder eine externe DAB/UKW-Antenne DC-Eingang Stromversorgung Audioausgang Cinch-Buchse L/R für den Audioausgang Setzen Sie 2 AAA-Batterien im Batteriefach ein. Achten Sie auf die korrekte Polung der Batterien, wie im Batteriefach gezeigt.
  • Page 6: Erste Schritte

    • Schließen Sie die mit gelieferte Wurfantenne oder eine externe DAB/FM Antenne, sowie das Netzteil an die Rückseite des DR 52 CA an und stecken Sie den Netzstecker in eine Netzsteckdose. • Die Uhrzeit, das Datum und die Symbole der aktivierten Wecker erscheinen danach auf der Anzeige.
  • Page 7 • Befindet sich das Gerät im Standby-Modus, drücken Sie die Taste , um den Standby-Modus zu verlassen. • Wenn Sie das erste Mal in den DAB-Modus wechseln, beginnt das Gerät automatisch mit dem Scannen nach DAB/DAB+- Sendern. • Durch Drücken der Taste „Mode“ gelangen Sie in das Hauptmenü...
  • Page 8: Dab

    4. DAB Hinweis: Bevor Sie Radio hören, richten Sie die DAB/FM- Antenne für einen guten Empfang entsprechend aus. Das Symbol in der oberen rechten Ecke der Anzeige zeigt die Stärke des vom Gerät erkannten DAB/DAB+-Signals an. 4.1. Scannen nach DAB+-Sendern Automatisches Scannen: Drücken Sie die Taste „Scan“, um einen vollständigen Scan nach allen Sendern durchzuführen.
  • Page 9: Drc

    zur Auswahl von „Prune invalid“ die Taste „Tuning ▲/▼“ und wählen Sie danach „Yes“ aus. Bestätigen Sie Ihre Auswahl durch Drücken der Taste „OK“. 4.5. DRC Wenn Sie Musik mit einem hohen Dynamikbereich in lauter Umgebung hören, können Sie den Audio-Dynamikbereich komprimieren.
  • Page 10: Aufrufen Gespeicherter Dab+-Sendestationen

    4.8. Aufrufen gespeicherter DAB+-Sendestationen Drücken Sie um ins Preset laden Menü zu gelangen, oder die Taste „Menu“ und wählen Sie dort „Preset laden“ zum Aufrufen der gewünschten abgespeicherten Sender aus. Wählen Sie mit der Taste „Tuning ▲/▼“ den Speicherplatz aus und rufen Sie den Sender danach durch Drücken der Taste „OK“...
  • Page 11: Suchlauf-Einstellung

    5.2. Suchlauf-Einstellung Wählen Sie diese Funktion, um nur Sender mit starkem Signal zu empfangen. Wenn das Radio während der Suche viele Sender mit schwachem Signal findet, wählen Sie „Ja“ aus, um nur die Sender mit starkem Signal zu empfangen. 5.3. Audioeinstellung Wählen Sie diese Funktion, um das UKW-Signal in Mono oder Stereo zu empfangen.
  • Page 12: Rds-Empfang (Radio Data System)

    5.6. RDS-Empfang (Radio Data System) Hier können Sie sich die von den UKW-Sendestationen zusätzlich bereitgestellten Informationen anzeigen lassen, wenn diese RDS-kompatibel sind. Drücken Sie die Taste „Info“, um sich Programminformationen, den Programmtyp, die Frequenz oder das Datum anzeigen zu lassen, wenn diese verfügbar sind.
  • Page 13: Hintergrundbeleuchtung

    6.2. Hintergrundbeleuchtung Wählt die Leuchtintensität der Hintergrundbeleuchtung (Hoch/ Niedrig/Aus) und den Abschaltzeitpunkt (Immer An/10/20/30/ 45/60/90/120/180 s) aus. Wurde ein Abschaltzeitpunkt eingestellt, wird die Hintergrundbeleuchtung nach Erreichen des Abschaltzeitpunktes automatisch gedimmt, wenn keine Bedienung innerhalb dieses Zeitraumes erfolgt ist. Hinweis: Sie können jederzeit durch Drücken der Taste „Licht“ die Hintergrundbeleuchtung der Anzeige direkt einstellen.
  • Page 14: Einstellung Von Uhrzeit/Datum

    6.3. Einstellung von Uhrzeit/Datum Uhrzeit/Datum einstellen: Die Ziffernstelle für den Tag blinkt und kann nun eingestellt werden. Drücken Sie zur Einstellung des Tages die Taste „Tuning ▲/▼“ und bestätigen Sie Ihre Auswahl durch Drücken der Taste „OK“. Wiederholen Sie diesen Schritt für die Einstellung des Monats, des Jahres, der Stunden und Minuten.
  • Page 15: Wecker

    6.4. Wecker Es stehen Ihnen zwei Wecker zur Verfügung. Drücken Sie zur Auswahl von Wecker 1 oder Wecker 2 die Taste „Tuning ▲/▼“. Drücken Sie „OK“, um die einzelnen Einstellungen einzugeben. Alarmmodus: Drücken Sie die Taste „Tuning ▲/▼“, um einen Weckalarm als Aus/Täglich/Einmal/Wochenende/Werktage zu planen und bestätigen Sie Ihre Auswahl durch Drücken der Taste „OK“.
  • Page 16: Schlafmodus

    Wurde ein oder beide Wecker eingestellt, erscheint ein Uhrensymbol unten in der Anzeige. Das Uhrensymbol wird auch dann angezeigt, wenn sich die Anzeige im Schlummermodus befindet. Wenn der Weckton ertönt, können Sie mit der Taste „Ein/Aus“ den Weckton ausschalten oder mit jeder beliebigen anderen Taste in den Schlummermodus wechseln.
  • Page 17: Zurücksetzen Auf Werkseinstellung

    6.6. Zurücksetzen auf Werkseinstellung Wählen Sie durch Drücken der Taste „Tuning ▲/▼“ „Nein/ Ja“ aus, um das DR 52 CA auf seine Werkseinstellungen zurückzusetzen. Bestätigen Sie Ihre Auswahl durch Drücken der Taste „OK“. Nach dem Zurücksetzen wird das System neu gestartet.
  • Page 18: Problembehebung

    7. Problembehebung Problem Lösung Das Gerät hängt 1. Ziehen Sie den Netzstecker für 1 sich auf Minute und starten Sie danach das Gerät neu. 2. Wenn der Fehler noch nicht behoben ist, setzen Sie das Gerät auf die Werkseinstellung (siehe Kapitel 6.6.) zurück.
  • Page 19: Technische Daten

    8. Technische Daten Modellname DR 52 CA Beschreibung DAB/DAB+- und UKW-Adapter Anzeige 2,4" TFT-Farbanzeige 87,5 bis 108,0 MHz, unterstützt RDS DAB/DAB+ Band III (174,928 – 239,200 MHz) Netzteil 6 V/600 mA Anschlüsse DC-IN (Netzversorgung) Audioausgang (2 x Cinch L/R) Leistungsaufnahme <1 W...
  • Page 20: Ce-Konformitätserklärung- Normen Und Vorschriften

    Nachweis über das Kaufdatum nicht und beschreiben Sie bitte den aufgetretenen Fehler möglichst genau 10. CE-Konformitätserklärung- Normen und Vorschriften Hiermit erklärt Alan Electronics GmbH, dass der Funkanlagentyp DR 52 CA der Richtlinie 2014/53/EU entspricht. Der vollständige Text der EU-Konformitätserklärung ist unter der folgenden Internetadresse verfügbar: www-alan-electronics.de/download.aspx...
  • Page 21: Serviceanschrift

    Elektroschrottgesetz und Recycling Europäische Gesetze verbieten das Entsorgen von defekten oder nicht mehr brauchbaren Geräten über den Hausmüll. Sollten Sie eines Tages Ihr Gerät ent- sorgen wollen, dann geben Sie es bitte nur bei den überall eingerichteten kommunalen Sammelstellen zum Recycling ab. Dieses Sammelsystem wird von der Industrie finanziert und sichert auch die umweltgerechte Entsorgung und das Recycling wertvoller Rohstoffe.
  • Page 22 DR 52 CA Manual English...
  • Page 23 Content 1. Safety Precautions ............. 24 2. Appearance and Key Descriptions ........25 3. Getting Started ..............26 4. DAB ..................28 4.1. Scanning for DAB+ stations ..........28 4.2. Station List ............... 28 4.3. Manual Tune ..............28 4.4. Prune Invaild..............29 4.5.
  • Page 24: Safety Precautions

    1. Safety Precautions • Do not drop the DR 52 CA and do not expose it to liquid, mois- ture or humidity. These might lead to damage to the device. • If the DR 52 CA is moved from a cold environment into a warm- er one, do let it adapt to the new temperature before operating the device.
  • Page 25: Appearance And Key Descriptions

    2. Appearance and Key Descriptions Desription Functions TFT screen Display Standby button Standby on/off Antenna connector For the supplied cable antenna or an external DAB / FM antenna DC In Power supply Audio Out RCA L/R jacks for audio out English...
  • Page 26: Getting Started

    3. Getting Started The packaging box contains the following items: DR 52 CA RCA to RCA audio cable RCA to 3.5mm audio adaptor Remote control Cable antenna...
  • Page 27 • Connect the supplied cable antenna or an external DAB/FM antenna, as well as the power adaptor to the back of the DR 52 CA and plug it into a power socket. • The time, date and any active alarm icon are then displayed on the screen.
  • Page 28: Dab

    • Press „Mode“ to go to the main menu, press „Tuning p/q“ to select different operation modes (DAB or FM). • At any operation mode, press „back“ to go to the previous screen. • When music is playing, press „+ / -“ to adjust the volume. Press to mute the sound, then press „+ / -“...
  • Page 29: Prune Invaild

    4.4. Prune Invaild Enter to remove the stations that are listed but not available. Press „Menu“ to go to system menu. Press „Tuning p/q“ to „Prune Invalid“ and then choose „Yes“. Press „OK“ to confirm. 4.5. DRC If you are listening to music with a high dynamic range in a noisy environment, you may wish to compress the audio dynamic range.
  • Page 30: Dab+ Information Display

    4.9. DAB+ information Display You can view the DAB+ service information. Press „Info“ to view the programme information, the programme type of the station, the frequency, signal strength, bit rate, codec, audio type, chan- nels, the date. If there is a picture shown for the station, you can press „OK“ to enlarge the picture to full screen.
  • Page 31: Preset The Fm Stations

    5.4. Preset the FM stations While listening to a FM station, long press until the „Preset Store“ Menu opens, or press „Menu“ to go to the menu, then select „Preset Store“ to save the current station. Press „Tuning p/q“ to choose the number and then press „OK“ to store the station.
  • Page 32: Main Menu And Settings

    6. Main Menu and Settings At any operation mode, press „Menu“ to enter the system menu in order to change the device configurations. Press „Tuning p/q“ to select the submenu and then press „OK“ to confirm. 6.1. Equalizer Press „Tuning p/q“ to choose EQ: Normal, Classic, Pop, Jazz, Rock, Flat, Movie or News.
  • Page 33: Backlight

    6.2. Backlight Select illuminated level of backlight (High/ Medium/ Low) and the duration of timeout (Always On/ 10/ 20/ 30/ 45/ 60/ 90/ 120/ 180 sec). With setting the timeout, the backlight will automatically change to dim if the device is not operated for the set amount of time.
  • Page 34: Alarms

    Set Format: Change the display of time to 12-hour mode or 24- hour mode. Press „Tuning p/q“ to adjust and press „OK“ to confirm. Auto update: Select to update time and date automatically from Radio (DAB or FM). Press „Tuning p/q“ to adjust and press „OK“...
  • Page 35 Alarm Sound: Set the alarm sound (Buzzer/DAB/FM). Press „Tuning p/q“ to select the mode and press „OK“ to confirm. Volume: Press „Tuning p/q“ or „+ / -“ to adjust the volume and press „OK“ to confirm. Press „back“ to complete the setting. When the alarm is set and saved, a clock icon will appear at the bottom of the display.
  • Page 36: Sleep

    75/ 90/ 105/ 120 minutes or set the sleep time to „Off“. Press „OK“ to confirm. 6.6. Factory Reset Press „Tuning p/q“ to select „Yes/No“ to reset the DR 52 CA to the factory default settings. Press „OK“ to confirm. The system will then restart after reset.
  • Page 37: Troubleshooting

    7. Troubleshooting Error Solution The device free- 1. Disconnect the power plug for 1 minute, then restart the device. 2. If the error has not yet been resolved, reset the unit to the factory setting (see chapter 6.6.). The device does 1.
  • Page 38: Specifications

    8. Specifications Model name DR 52 CA Description DAB/DAB+ and FM adaptor Display 2.4“ TFT Color Display 87.5 – 108.0 MHz, RDS sup- ported DAB/DAB+ Band III (174.928 – 239.200 MHz) Power adaptor 6V / 600mA Connections DC IN (power supply)
  • Page 39: Warranty And Recycling Information

    10. CE Declaration of Conformity Standards and Regulations Hereby, Alan Electronics GmbH declares that the radio equipment type DR 52 CA is in compliance with Directive 2014/53/EU. The full text of the EU declaration of conformity is available at the fol- lowing internet address: www.alan-electronics.de/download.aspx...
  • Page 40: Service Address

    WEEE and Recycling The European laws do not allow any more the disposal of old or defective electric or electronic devices with the household waste. Return your product to a municipal collection point for recycling to dispose of it. This system is financed by the industry and en- sures environmentally responsible disposal and the recycling of valuable raw materials.
  • Page 41 DR 52 CA Guide d’utilisation Français...
  • Page 42 Sommaire 1. Précautions de sécurité ............43 2. Présentation de la radio............44 3. Mise en route ..............46 4. DAB ..................47 4.1. Rechercher les stations DAB+ ........48 4.2. Liste des stations ............. 48 4.3. Recherche manuelle............48 4.4.
  • Page 43: Précautions De Sécurité

    Une tension inadaptée risque d’endommager la radio. • Il faut débrancher le DR 52 CA du courant s’il ne va pas être utilisé pendant une longue période. Cette précaution peut vous éviter des débuts d’incendie.
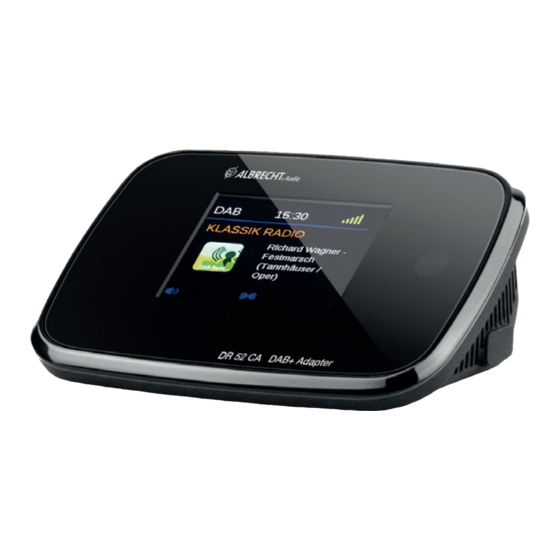
  • Page 44: Présentation De La Radio

    • Si vous devez expédier le DR 52 CA, placez-le dans son emballage d’origine. Pour cela, conservez-le. • Pour vous débarrasser de votre radio, ne la jetez surtout pas avec vos ordures ménagères. mais déposez-la auprès d’un point de collecte pour le recyclage des appareils électriques.
  • Page 45 N° Description Fonctions Écran TFT Affichage Touche Veille Mise en marche/veille Connecteur d‘antenne Pour l‘antenne de câble inclu- se ou une antenne externe DAB / FM Entrée alimentation Alimentation électrique courant continu (DC IN) Sortie audio Prise RCA G/D pour sortie audio Installez deux piles AAA dans le compartiment à...
  • Page 46: Mise En Route

    • Branchez une extrémité de l’adaptateur d’alimentation électrique à l’arrière de la radio DR 52 CA et branchez l’autre extrémité dans une prise secteur. • L’heure actuelle, la date d’aujourd’hui et l’icône du réveil qui est actif, le cas échéant, s’affichent sur l’écran.
  • Page 47: Dab

    • Quand l’appareil est en veille, appuyez sur pour mettre l’appareil en marche. • Si c’est la première fois que vous entrez en mode DAB, l’appareil effectuera une recherche automatique des stations DAB/DAB+. • Appuyez sur « Mode » pour entrer dans le menu principal, appuyez sur « Tuning ▲/▼ »...
  • Page 48: Rechercher Les Stations Dab

    4.1. Rechercher les stations DAB+ Recherche automatique : Appuyez sur « Scan » pour lancer une recherche complète de toutes les stations. Vous pouvez aussi appuyer sur « Menu » pour entrer dans le menu, dans lequel vous pouvez sélectionner « SCAN » pour effectuer la même opération.
  • Page 49: Trier Les Stations

    audio dynamique. La compression atténue les sons forts et amplifie les sons faibles. Appuyez sur « Tuning ▲/▼ » pour sélectionner l’amplitude de la compression DRC (élevée/faible/ désactivée), puis appuyez sur « ok » pour confirmer. 4.6. Trier les stations Vous pouvez trier les stations par ordre alphanumérique, ensemble, ou validité.
  • Page 50: Affichage D'informations Numériques

    4.9. Affichage d’informations numériques  Vous pouvez afficher diverses informations sur la diffusion numérique actuelle. Appuyez sur la touche « Info » pour accéder à des informations sur l’émission diffusée actuellement et connaître le type d’émission de la station, la fréquence, la force du signal, le débit binaire, le codeur/décodeur (codec), le type audio, les canaux et la date.
  • Page 51: Présélection D'une Station Fm

    5.4. Présélection d’une station FM Pendant l’écoute d’une station FM, appuyez sur jusqu’à ce que le menu «Preset Store» s’ouvre ou appuyez sur « Menu » pour aller dans le menu, puis sélectionnez « Preset Store » pour enregistrer la station courante. Appuyez sur « Tuning ▲/▼ »...
  • Page 52: Menu Princip Al Et Réglages

    6. Menu princip al et réglages Dans n’importe lequel des modes d’utilisation, appuyez sur « Menu » pour entrer dans le menu système afin de modifier la configuration de l’appareil. Appuyez sur « Tuning ▲/▼ » pour sélectionner le sous-menu, puis appuyez sur « ok » pour confirmer.
  • Page 53: Configuration De La Date Et De L'heure

    Sélectionnez le niveau lumineux du rétroéclairage (Élevé/ Moyen/Faible) et la durée de temporisation (Toujours allumé/10/20/30/45/60/90/120/180 s). Quand une temporisation est sélectionnée, le rétroéclairage s’affaiblit automatiquement si l’appareil n’est pas utilisé pendant la durée définie. Remarque : Vous pouvez aussi appuyer sur le bouton « Light » à...
  • Page 54: Fonction Réveil

    Mise à jour automatique : Sélectionnez cette option pour mettre à jour la date et l’heure à partir de la radio (DAB ou FM). Appuyez sur « Tuning ▲/▼ » pour régler, puis appuyez sur « ok » pour confirmer. À la réception des informations RDS appropriés émis par une station numérique ou une station FM, la radio mettra automatiquement à...
  • Page 55 Source sonore de réveil : Cette option vous permet de choisir la source audio de réveil (sonnerie/station numérique/station FM). Appuyez sur « Tuning ▲/▼ » pour sélectionner le mode, puis appuyez sur « ok » pour confirmer. Volume : Appuyez sur « Tuning ▲/▼ » ou « +/- » pour régler le volume, puis appuyez sur «...
  • Page 56: Arrêt Automatique

    6.6. Réinitialisation Appuyez sur « Tuning ▲/▼ » pour sélectionner « Yes » afin de réinitialiser le DR 52 CA vers les réglages d’usine par défaut ou « No » pour annuler. Appuyez sur « ok » pour confirmer. Le système redémarrera après la réinitialisation.
  • Page 57: Guide De Dépannage

    7. Guide de dépannage Erreur Suggestion L‘appareil se 1. Débranchez le cordon d‘alimentation bloque pendant 1 minute, puis redémarrez l‘appareil. 2. Si l‘erreur n‘a pas encore été résolu, réinitialiser l‘appareil au réglage d‘usine (voir chapitre 6.6.). L’appareil ne 1. Vérifiez si l’adaptateur d’alimentation est s’allume pas.
  • Page 58: Spécifications

    8. Spécifications Nom de modèle DR 52 CA Description Adaptateur DAB/DAB+ et FM Affichage Écran TFT couleur, 2,4 pouces 87,5 – 108,0 MHz, prise en charge de RDS DAB/DAB+ Bande III (174,928 – 239,200 MHz) Adaptateur 6 V/600 mA d’alimentation électrique...
  • Page 59: Information Importante

    DECLARATION CE Le soussigné, Alan Electronics GmbH, déclare que l‘équipement radioélectrique du type DR 52 CA est conforme à la directive 2014/53/UE. Le texte complet de la déclaration UE de conformité est disponible à l‘adresse internet suivante: www.alan-electronics.de/download.aspx...
  • Page 60 Déchets d’Equipements Electriques et Electroniques (DEEE) et recyclage La loi Européennes ne permet pas la mise au rebus des équipements électriques et électroniques usagés avec les ordures ménagères. Ramenez votre produit à un centre de collecte municipal pour être recyclé. Ce système de collecte est financé...
  • Page 61 DR 52 CA Manuale Italiano...
  • Page 62 Contenuto 1. Precauzioni di sicurezza ............. 63 2. Aspetto e descrizione dei pulsanti ........64 3. Per iniziare................65 4. DAB ..................67 4.1. Scansione delle stazioni DAB+ ........67 4.2. Elenco stazioni ..............67 4.3. Sintonizzazione manuale..........68 4.4. Eliminazione non valida ........... 68 4.5.
  • Page 63: Precauzioni Di Sicurezza

    1. Precauzioni di sicurezza • Non far cadere il DR 52 CA e non esporlo a liquido o umidità. Questo potrebbe danneggiare l'unità. • Se il DR 52 CA è spostato da un ambiente freddo a uno più caldo, lasciare che si adatti alla nuova temperatura prima di utilizzare il dispositivo.
  • Page 64: Aspetto E Descrizione Dei Pulsanti

    2. Aspetto e descrizione dei pulsanti Descrizione Funzione Schermo TFT Visualizzazione Pulsante Standby Accensione/Spegnimento Standby Connettore Per l‘antenna cavo in dotazione o d‘antenna un DAB / antenna FM esterna IN CC Alimentatore Uscita audio Jack L/R RCA per uscita audio Italiano...
  • Page 65: Per Iniziare

    Assicurarsi di inserirle con la corretta polarità come indicato nel vano. 3. Per iniziare La confezione contiene i seguenti elementi: DR 52 CA Cavo audio RCA a RCA Adattatore RCA ad audio 3,5 mm Telecomando Cavo antenna Alimentatore...
  • Page 66 • Collegare il cavo d‘antenna in dotazione o un‘antenna DAB / FM esterna, così come l‘adattatore di alimentazione al retro del DR 52 CA ed inserirlo in una presa di corrente. • Collegare l'adattatore al lato posteriore del DR 52 CA e attaccarne la spina alla presa di corrente.
  • Page 67: Dab

    • Se è la prima volta che si accede alla modalità DAB, il dispositivo effettua automaticamente la scansione delle stazioni DAB/DAB+. • Premere "Mode" per accedere al menu principale, premere "Tuning ▲/▼" per selezionare le diverse modalità operative (DAB o FM). •...
  • Page 68: Sintonizzazione Manuale

    4.3. Sintonizzazione manuale Se il dispositivo non riceve la stazione DAB+ che si desidera, premere "Tuning ▲/▼" per selezionare manualmente la frequenza della stazione. Una volta selezionato, premere "ok" per confermare e la frequenza della stazione sarà inserita nell'elenco delle stazioni. 4.4.
  • Page 69: Richiamare Le Stazioni Dab+ Preimpostate

    In alternativa, la stazione corrente può essere salvata in una preimpostazione premendo e tenendo premuto rispettivamente da "1" a "10". È possibile memorizzare fino a 10 preimpostazioni in modalità DAB. 4.8. Richiamare le stazioni DAB+ preimpostate Premere per passare al menu “Preset Recall” o premere "Menu"...
  • Page 70: Scansione Delle Stazioni Fm

    5.1. Scansione delle stazioni FM Premere "Tuning ▲/▼" per eseguire la sintonizzazione con 0,05MHz per passo o premere "Scan" per cercare la stazione FM successiva. 5.2. Impostazione di scansione Impostare per ricevere solo stazioni con segnale forte. Se la radio effettua scansione e riceve le stazioni con segnale molto debole, impostare "Yes"...
  • Page 71: Menu Principale E Impostazioni

    5.6. Ricezione RDS (Radio Data System) È possibile visualizzare le informazioni delle stazioni FM che trasmettono dati aggiuntivi compatibili con RDS. Premere "Info" per visualizzare le informazioni del programma, il tipo di programma, la frequenza o i dati se disponibili. 6.
  • Page 72: Retroilluminazione

    6.2. Retroilluminazione Selezionare il livello di retroilluminazione (Alta/Media/Bassa) e la durata del timeout (On/10/20/30/45/60/90/120/180 sec). Con l'impostazione del timeout, la retroilluminazione passa automaticamente a oscuramento se il dispositivo non è utilizzato per il tempo impostato. Nota: È possibile anche premere il pulsante "Luce" per regolare direttamente in qualsiasi momento la retroilluminazione dello schermo.
  • Page 73: Sveglie

    Imposta Formato: Modificare la visualizzazione dell'orario in modalità 12 o 24 ore. Premere "Tuning ▲/▼" per regolare e premere "ok" per confermare. Aggiornamento automatico: Selezionare per aggiornare automaticamente l'orario e la data da Radio (DAB o FM). Premere "Tuning ▲/▼" per regolare e premere "ok" per confermare.
  • Page 74 Modalità Sveglia: Premere "Tuning ▲/▼" per programmare la sveglia a Off/Daily/Once/Weekend/Weekday, premere "ok" per confermare. Ora sveglia: L'ora della sveglia può essere impostata con la stessa procedura di impostazione dell'orologio. Premere "Tuning ▲/▼" per impostare l'orario della sveglia e premere "ok"...
  • Page 75: Autospegnimento

    "Off". Preere "ok" per confermare. 6.6. Ripristino impostazioni fabbrica Premere "Tuning ▲/▼" per selezionare "Yes/No" per ripristinare DR 52 CA alle impostazioni predefinite di fabbrica. Preere "ok" per confermare. Il sistema di riavvierà dopo il ripristino.
  • Page 76: Risoluzione Dei Problemi

    7. Risoluzione dei problemi Errore Soluzione L‘unità si blocca 1. Staccare la spina di alimentazione per 1 minuto, quindi riavviare il dispositivo. 2. Se non è ancora stato risolto l‘errore, ripristinare l‘unità alle impostazioni di fabbrica (vedi capitolo 6.6.). L'unità non si 1.
  • Page 77: Specifiche Tecniche

    8. Specifiche tecniche Nome modello DR 52 CA Descrizione Adattatore DAB/DAB+ e FM Visualizzazione Display a colori TFT da 2,4" 87,5 – 108,0 MHz, RDS supportato DAB/DAB+ Banda III (174,928 – 239,200 MHz) Alimentatore 6 V/600mA Connessioni DC IN (alimentatore) Uscita audio (2 x RCA L/R) Potenza in modalità...
  • Page 78: Informazioni Smaltimento E Garanzia

    Dichiarazione di conformità Il fabbricante, Alan Electronics GmbH, dichiara che il tipo di apparecchiatura radio DR 52 CA è conforme alla direttiva 2014/53/UE. Il testo completo della dichiarazione di conformità UE è disponibile al seguente indirizzo Internet: www.alan-electronics.de/download.aspx...
  • Page 79: Contatti Assistenza Tecnica

    WEEE e smaltimento La legislazione europea non autorizza più lo smalti- mento di dispositivi elettrici ed elettronici vecchi o di- fettosi tra i normali rifiuti domestici. Restituire il prodot- to al punto di raccolta municipale per lo smaltimento. Questo sistema è finanziato dal settore e garantisce uno smaltimento nel rispetto dell’ambiente e il riciclaggio di ma- terie prime di grande valore.

Ce manuel est également adapté pour:

Dr 52 ba27254

Table des Matières