
Manuels Connexes pour Agri-Fab Lawn Care Made Easy 45-05183


Sommaire des Matières pour Agri-Fab Lawn Care Made Easy 45-05183
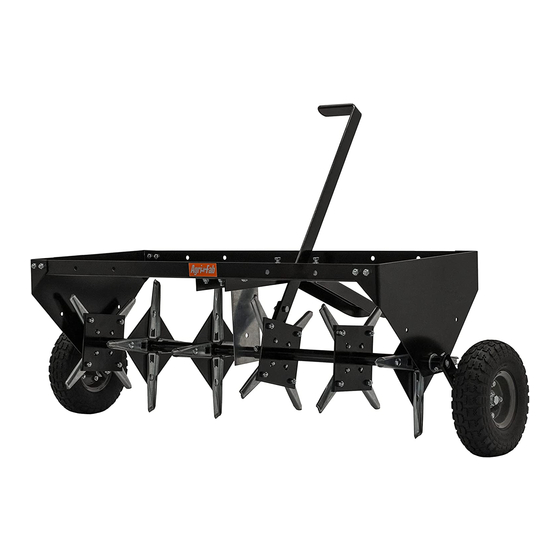
- Page 1 45-05183 40" PLUG AERATOR Want more information or assembly tips? Video Instruction Guide y o u t u b e . c o m / c / a g r i f a b the fastest way to purchase parts www.speedepart.com FORM NO.
- Page 2 REPAIR PARTS FOR 40" PLUG AERATOR MODEL 45-05183...
- Page 3 REPAIR PARTS FOR 40" PLUG AERATOR MODEL 45-05183 PART NO DESCRIPTION PART NO DESCRIPTION 23687BL1 Bracket, Hitch 44500 Spacer, .800Id X 1.00Od X 1.00Lg 24619BL3 End Plate, 40" Plugger 44685 Spacer, Shoulder 24623 Brace, Middle 45151 Spacer, .800Id X 1.00Od X 3.70Lg 24624BL1 Handle, Lift 45807...
-
Page 4: Carton Contents
ENGLISH RULES FOR SAFE OPERATIONS Remember, any power equipment can cause injury if operated improperly or if the user does not understand how to operate the equipment. CAUTION: VEHICLE BRAKING AND LOOK FOR THIS SYMBOL TO POINT OUT STABILITY MAY BE AFFECTED WITH THE IMPORTANT SAFETY PRECAUTIONS. - Page 5 ENGLISH HARDWARE PACKAGE CONTENTS REF PART NO QTY DESCRIPTION REF PART NO QTY DESCRIPTION 46526 Hex Bolt, 1/2" x 3-1/4" 44685 Shoulder Spacer 1509-69 Hex Bolt, 1/4" x 1-3/4" 43009 Flat Washer, 3/4" 43087 Hex Bolt, 3/8" x 1-1/4" HA456151 Thick Washer, .817 x 1.5 x .134 43001 Hex Bolt, 3/8-16 x 1"...
-
Page 6: Tools Required For Assembly
ENGLISH ASSEMBLY INSTRUCTIONS • Identify the short end of the shaft. Attach the wheel bracket to the hole in the middle of the shaft using a 1/4" x 1-3/4" hex bolt (B) and a 1/4" nylock nut (K). TOOLS REQUIRED FOR ASSEMBLY Tighten. -
Page 7: Rear View
ENGLISH • Assemble a 1" long spacer (R) and the middle brace • Assemble the tongue to the tray using two 3/8" x 1" (3) onto the long end of the shaft with the bent end of hex bolts (D) and 3/8" nylock nuts (I) as shown in the brace facing the wheel bracket. - Page 8 ENGLISH • Turn the tray upside down. • Assemble the hitch bracket to the tongue using two • Standing behind the tray, place the long end of the 3/8" x 1" hex bolts (D), and two 3/8" nylock nuts (I). shaft through the end plate on your right as shown in Tighten.
- Page 9 ENGLISH • Turn the lift handle as shown in figure 12 and attach it • Perform the following steps in sequence to tighten the to the side of the wheel bracket that is indicated. Use bolts and nuts that remain loose. Refer to figure 13. a shoulder spacer (M), two 3/8"...
-
Page 10: Lubrication
ENGLISH OPERATION MAINTENANCE Aerating means pulling small soil plugs, ranging up to three Plugger points can periodically be sharpened with a small inches in length, from the soil to create small reservoirs that grinder to maintain good penetration. Points should be will bring oxygen, fertilizer and water down into the roots. -
Page 11: Normas Para Una Operación Segura
ESPAÑOL NORMAS PARA UNA OPERACIÓN SEGURA Recuerde que los equipos eléctricos o motorizados pueden causar lesiones si no se operan correctamente o si el usuario no sabe cómo operar el equipo. P R E CAU C I Ó N : E L S I ST E M A D E F R E N O PRESTE ATENCIÓN A ESTE SÍMBOLO Y LA ESTABILIDAD DEL VEHÍCULO PUEDEN YA QUE INDICA PRECAUCIONES DE... - Page 12 ESPAÑOL 11. Ensamble una arandela plana de 3/4" (N) y un soporte Corte el césped y retire el césped cortado antes de usar el de rueda (2) en cada extremo del eje. Gire cada soporte aireador. de rueda para apuntar en la dirección que se muestra a Arranque el motor del tractor con los controles en neutro y continuación.
-
Page 13: Règles Pour La Sécurité De Fonctionnement
FRANÇAISE RÈGLES POUR LA SÉCURITÉ DE FONCTIONNEMENT Ne pas oublier qu’un matériel motorisé peut causer des blessures s’il est mal utilisé ou si son utilisateur ne comprend pas comment s’en servir. ATTENTION: LE FREINAGE ET LA STABILITÉ CE SYMBOLE INDIQUE DES CON- DU VÉHICULE RISQUENT D’ÊTRE AFFECTÉS SIGNES DE SÉCURITÉ... -
Page 14: Outils Nécessaire Au Montage
FRANÇAISE INSTRUCTIONS DE MONTAGE gauche. Assurez-vous que l’extrémité pliée de l’entretoise centrale repose à plat à l’intérieur de la languette (5). Assurez-vous que la plaque d’extrémité sur votre gauche soit OUTILS NÉCESSAIRE AU MONTAGE perpendiculaire au plateau, et serrez les boulons ainsi que (2) Clefs de 7/16 po les écrous qui fixent la plaque d’extrémité... -
Page 15: Fonctionnement
FRANÇAISE FONCTIONNEMENT ENTRETIEN L’aération consiste à extraire de petites « carottes » de terre, On pourra aiguiser périodiquement les louchets à la d’une longueur pouvant atteindre 8 cm, afin de créer de pierre pour maintenir la bonne pénétration du sol. Il est petits réservoirs qui apporteront de l’oxygène, de l’engrais nécessaire de déposer les louchets pour les aiguiser. -
Page 16: Repair Parts
Agri-Fab, Inc. Unauthorized uses and/or reproductions of this manual will subject such unauthorized user to civil and criminal penalties as provided by the United States Copyright Laws.