
Manuels Connexes pour AgfaPhoto AF5080W


Sommaire des Matières pour AgfaPhoto AF5080W
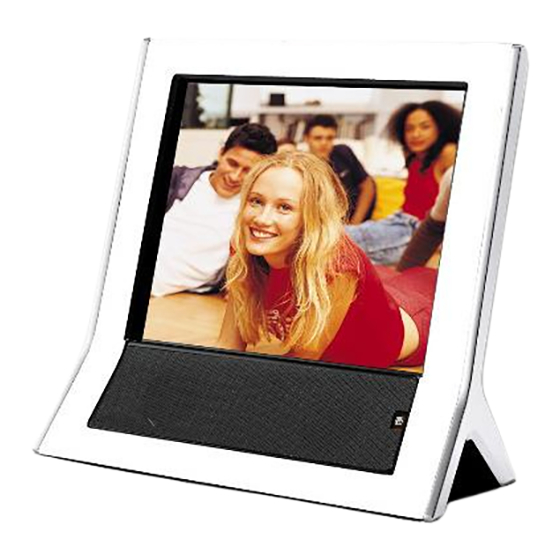
- Page 1 User Guide / Livret Utilisateur Digital Photo Frame AF5080W Livret Utilisateur Benutzerhandbuch Guía del usuario etc.
-
Page 3: Table Des Matières
Bienvenue ............. 1 Recommandations et consignes de sécurité... - Page 4 5 Configuration / Gestion des ressources....... . 19 Organisation des fichiers ............19 Copier des fichiers depuis un périphérique externe .
-
Page 5: Bienvenue
Bienvenue Vous venez d'acquérir un cadre photo numérique et nous vous remercions de la confiance que vous nous accordez. Votre cadre photo numérique s’intégrera parfaitement dans votre environnement familial. Vous pourrez désormais vivre des moments de convivialité avec votre famille ou vos amis en partageant vos fichiers multimédias (photos, vidéo, musique), soit stockés sur une clé... - Page 6 4, rue du Petit Albi - 95800 Cergy Saint-Christophe - FRANCE www.sagem.com AgfaPhoto Holding Gmbh: AGFAPHOTO is used under license of Agfa-Gevaert NV & Co. KG. Agfa-Gevaert NV & Co. KG does not manufacture these products or provide any product warranty or support.
-
Page 7: Avant-Propos
Avant-propos Avant toute utilisation, pour votre confort et votre sécurité, nous vous engageons à lire attentivement la section Recommandations et consignes de sécurité, page 1. Conventions Ce livret utilise des conventions destinées à aider le lecteur à identifier les informations délivrées. -
Page 8: Découverte Du Cadre Photo
Découverte du cadre photo Contenu de l’emballage Vous trouverez les éléments suivants : • le cadre photo • un bloc secteur • une télécommande • un adaptateur USB (mini-USB vers USB) • un cadre amovible • un guide d’installation rapide •... -
Page 9: Description De La Télécommande
Description de la télécommande Touche Description Menu Afficher le menu principal. Supprimer le fichier sélectionné. Copier un fichier vers la mémoire interne du cadre photo. Eteindre / Allumer l’écran (mode standby). Note : pour éteindre / allumer le cadre photo, utilisez le bouton Marche/ Arrêt situé... -
Page 10: Mise En Service
Mise en service Raccordement Avant d'effectuer connexions, veuillez consulter le paragraphe Recommandations et consignes de sécurité, page 1. Raccordez l’extrémité du cordon du bloc secteur fourni au cadre photo puis passez le cordon dans le guide câble. Raccordez le bloc secteur à la prise de courant. Positionnez le cadre amovible fourni sur le cadre photo numérique, si vous souhaitez le personnaliser, comme indiqué... -
Page 11: Première Mise Sous Tension
Première mise sous tension Appuyez sur le bouton Marche/Arrêt. Bouton Marche/Arrêt Pendant la phase de démarrage un écran d’accueil s’affiche. Patientez quelques instants jusqu’à affichage de l’écran d’installation. Sélectionnez la langue en utilisant les touches de la télécommande puis validez votre choix en appuyant sur la touche OK. -
Page 12: Connecter Votre Cadre Photo Au Réseau Wi-Fi
Connecter votre cadre photo au réseau Wi-Fi La connexion Wi-Fi peut être configurée avec la fonction Wi-Fi facile Livebox (détection automatique) ou manuellement. Connexion Wi-Fi automatique (Livebox uniquement) Mettez votre Livebox en mode association en appuyant plus de 5 secondes sur le bouton REG, 1 ou Wi-Fi. -
Page 13: Connexion Wi-Fi Manuelle
Connexion Wi-Fi manuelle La configuration manuelle doit être utilisée dans les cas de figure suivants : • l’installation Wi-Fi facile Livebox a échoué ; • la fonction Wi-Fi facile Livebox n’est pas disponible ; • vous souhaitez connecter votre cadre photo à un autre modem ou Box. Avant de commencer, vous devez : •... - Page 14 Selon la configuration de votre modem ou Box, il peut être nécessaire de rentrer une clé WEP ou une clé WPA : Si votre modem ou alors... Box possède une... 1. Dans le champ clé WEP qui apparaît, sélectionnez votre clé...
-
Page 15: Découverte De L'interface Utilisateur
Découverte de l’interface utilisateur Navigation dans l’interface utilisateur La navigation dans les menus est assurée par la télécommande. Utilisez principalement les touches pour vous déplacer et la touche OK pour valider un choix. Lorsque la saisie est nécessaire, le cadre photo met à votre disposition un clavier virtuel qui permet de saisir du texte, des nombres, des caractères de ponctuation, etc. -
Page 16: Description De L'interface Utilisateur
Description de l’interface utilisateur Le cadre photo est composé de 2 menus principaux, le menu Media et le menu Réglages. Pour accéder à cet écran, appuyez sur la touche Menu de la télécommande. Il vous suffit alors de sélectionner le menu souhaité avec les touches de la télécommande puis d’appuyer sur la touche OK pour valider. -
Page 17: Présentation Du Menu Réglages
Aidez-vous de ce tableau pour identifier rapidement une ressource. Attention, une ressource s’affiche uniquement lorsqu’elle est disponible (par exemple, clé USB connectée, carte mémoire insérée, etc.). Dossier Description Accédez aux photos téléchargées depuis le compte Livephoto. Note : site d’échange multimédia nécessitant une connexion Livephoto Internet et un compte utilisateur. -
Page 18: Prise En Main Rapide
Prise en main rapide Lancer un diaporama Lancer un diaporama depuis une clé USB ou une carte mémoire Insérez la carte mémoire dans le logement prévu. Si vous souhaitez connecter une clé USB, retirez le cache pour libérer l’accès au port mini-USB du cadre photo, branchez l’adaptateur USB fourni au port mini-USB du cadre photo, puis connectez votre clé... -
Page 19: Actions Possibles Pendant L'exécution Du Diaporama
Actions possibles pendant l’exécution du diaporama Vous pouvez à tout moment agir sur le diaporama grâce aux touches de navigation et de contrôle de la télécommande. Vous pouvez ainsi vous déplacer parmi les photographies affichées, agrandir une photographie, suspendre temporairement le diaporama ou encore l’arrêter. - Page 20 Pour effectuer les réglages, procédez comme suit : Pendant l’exécution du diaporama, appuyez sur la touche OK. Effectuez les réglages désirés en vous aidant du tableau suivant : Si vous souhaitez.. alors... 1. Sélectionnez le champ Délai avec les touches puis appuyez sur la touche OK.
-
Page 21: Diffuser Une Musique D'accompagnement
Diffuser une musique d’accompagnement Le cadre photo permet de diffuser une musique d’accompagnement pendant l’exécution d’un diaporama. La musique d’accompagnement peut être un fichier audio ou une playlist. Appuyez sur la touche Menu de la télécommande pour accéder au menu principal. Sélectionnez le menu Réglages avec les touches puis validez par la touche OK. - Page 22 L’écran affiche les dossiers identifiés par le cadre photo. N’oubliez pas d’insérer la clé USB ou la carte mémoire si ce Note support contient le fichier à lire. Sélectionnez le dossier contenant les fichiers multimédia à lire puis validez par la touche OK.
-
Page 23: Configuration / Gestion Des Ressources
Configuration / Gestion des ressources Vous trouverez dans cette section les informations nécessaires pour gérer les ressources de votre cadre photo et principalement les procédures pour : • alimenter la mémoire interne en fichiers ; • définir les ressources utilisées (télécharger depuis le service Internet, copier) ; •... -
Page 24: Télécharger Des Fichiers Depuis Le Site D'échange Multimédia
Pour copier des fichiers vers la mémoire interne du cadre photo, procédez comme suit : Appuyez sur la touche Menu de la télécommande. Sélectionnez le menu Media avec les touches puis validez par la touche OK. L’écran affiche les dossiers identifiés par le cadre photo. Sélectionnez le dossier source, contenant le(s) fichier(s) à... -
Page 25: Téléchargement Des Fichiers
Dans le champ Fréquence qui apparaît, sélectionnez avec les touches fréquence à laquelle le cadre photo se connecte automatiquement au service Livephoto et met à jour les photos téléchargées. Validez votre choix par la touche OK. Une fois le service configuré, sélectionnez le bouton Valider avec les touches puis appuyez sur la touche OK. -
Page 26: Verrouiller/Déverrouiller Un Fichier
Verrouiller/Déverrouiller un fichier Il est recommandé de verrouiller les fichiers que vous souhaitez conserver afin d’éviter la suppression automatique de ces derniers lors d’une opération de copie ou de mise à jour des dossiers. Pour verrouiller/déverrouiller un fichier, procédez comme suit : Appuyez sur la touche Menu de la télécommande. -
Page 27: Réglages Du Cadre Photo
Réglages du cadre photo Modifier/Personnaliser l’affichage Le menu Personnalisation vous offre la possibilité de modifier : • la langue de l’interface, • la luminosité de l’écran (10 niveaux), • l’état du mode veille ainsi que sa plage horaire. Pour sortir du mode veille, appuyez sur n’importe quelle Note touche de la télécommande. - Page 28 Si vous alors... souhaitez... définissez l’heure de début et de fin du mode veille. Le champ Plage horaire affiche la plage horaire comme suit: - cases 1 et 2 : heure de début + minutes de début - cases 3 et 4 : heure de fin + minutes de fin Pour modifier la plage horaire, procédez comme suit: 1.
-
Page 29: Régler La Date Et L'heure
Régler la date et l’heure Appuyez sur la touche Menu de la télécommande. Sélectionnez le menu Réglages avec les touches puis validez par la touche OK. Sélectionnez le menu Date/Heure/Réveil avec les touches puis validez par la touche OK. Effectuez les réglages désirés en vous aidant du tableau suivant : Si vous alors... -
Page 30: Activer Le Réveil
Activer le réveil Appuyez sur la touche Menu de la télécommande. Sélectionnez le menu Réglages avec les touches puis validez par la touche OK. Sélectionnez le menu Date/Heure/Réveil avec les touches puis validez par la touche OK. Effectuez les réglages désirés en vous aidant du tableau suivant : Si vous alors... -
Page 31: Entretien
Entretien Remplacement des piles de la télécommande Pour changer la pile de la télécommande, suivez les étapes ci-dessous : Ouvrez le compartiment de la pile tel qu’indiqué par le dessin figurant sur le compartiment. Retirez la pile usagée. Insérez une pile neuve 3V Lithium de même type, en respectant le sens d’insertion. Le signe + doit être orienté... -
Page 32: Incidents
Incidents Symptôme Cause éventuelle et solution possible S’il n’y a pas d’alimentation, vérifiez si le cadre photo est bien Pas d’alimentation raccordé à son bloc d’alimentation secteur, que ce dernier est raccordé au secteur et essayez de nouveau. Vérifiez que vous avez bien inséré une carte mémoire ou une clé... -
Page 33: Caractéristiques Techniques
: 19 x 22,2 x 9,5 cm Poids : env. 990 g Interface de contrôle : Télécommande infrarouge 1 x Pile Lithium 3V CR2025 Toutes ces données vous sont fournies à titre indicatif. AgfaPhoto se réserve le droit d'apporter toutes modifications sans aucun préavis. Livret utilisateur... -
Page 34: Environnement
Environnement La préservation de l'environnement est une préoccupation essentielle d’AgfaPhoto. AgfaPhoto a la volonté d'exploiter des installations respectueuses de l'environnement et a choisi d'intégrer la performance environnementale dans l'ensemble du cycle de vie de ses produits, de la phase de fabrication à la mise en service, l'utilisation et l'élimination. - Page 35 Welcome ............. . 1 Safety instructions and recommendations .
- Page 36 5 Resource configuration / management....... . . 19 Organising files ..............19 Copying files from an external peripheral .
-
Page 37: Welcome
Welcome Congratulations, you have just acquired a digital photo frame and we would like to thank you for your trust in our products. Your digital photo frame will fit into your home environment perfectly. You will be able to spend many happy moments with your family and friends sharing your multimedia files (photos, videos, music) stored either on a USB memory stick or on a compatible memory card, or from a multimedia exchange site. - Page 38 4, rue du Petit Albi - 95800 Cergy Saint-Christophe - FRANCE www.sagem.com AgfaPhoto Holding Gmbh: AGFAPHOTO is used under license of Agfa-Gevaert NV & Co. KG. Agfa-Gevaert NV & Co. KG does not manufacture these products or provide any product warranty or support.
-
Page 39: Preface
Preface For your comfort and safety, before using this product please read carefully the section Safety instructions and recommendations, page 1. Symbols This manual uses symbols to help the reader identify the type of information given. The reader will find the following symbols: Symbol Definition •... - Page 40 Your new digital photo frame Contents The box contains the following elements: • the digital photo frame • a mains transformer • a remote control • a USB adapter (mini USB to USB) • a removable frame • a quick-start guide •...
-
Page 41: Description Of The Remote Control
Description of the remote control Description Menu Displays the main menu. Deletes the selected file. Copies a file to the photo frame's internal memory. Switches the screen On / Off (standby mode). Note: to switch the photo frame on / off, use the On/Off button on the back Menu of the device. -
Page 42: Starting Your Digital Photo Frame
Starting your digital photo frame Connection Before connecting up your photo frame, see Safety instructions recommendations, page 1. Connect the mains transformer cable provided to the photo frame, then slot the cable into the cable guide. Plug the transformer into the mains socket. Place the removable frame provided on the digital photo frame if you wish to customise it, as shown in the following illustration: Remove the protective film from the screen by pulling on the tab. -
Page 43: Switching On The Photo Frame For The First Time
Switching on the photo frame for the first time Press the On/Off button. On/Off button A welcome screen is displayed during the start up phase. Wait a few seconds for the installation screen to be displayed. Select the language using the keys on the remote control then validate your choice by pressing the OK button. -
Page 44: Connecting Your Photo Frame To The Wi-Fi Network
Connecting your photo frame to the Wi-Fi network The Wi-Fi connection can be configured using the Livebox easy Wi-Fi function (automatic detection) or manually. Automatic Wi-Fi connection (Livebox only) Set your Livebox to association mode by pressing the REG, 1 or Wi-Fi button for at least 5 seconds. -
Page 45: Manual Wi-Fi Connection
Manual Wi-Fi connection Manual configuration must be used in the following situations : • Livebox easy Wi-Fi installation has failed; • the Livebox easy Wi-Fi function is not available; • you wish to connect your photo frame to another modem or Box. Before starting, you must: •... - Page 46 It may be necessary to enter a WEP or WPA key, depending on the configuration of your modem or Box If your modem or then… box has a... 1. In the WEP key field which opens, select your WEP key in the list displayed using the keys, press the OK key to display the virtual keyboard, enter...
-
Page 47: The User Interface
The user interface Browsing the user interface The remote control is used to switch from one menu to another. Use the keys to select a menu and the OK button to validate your choice. When you need to enter data, the photo frame displays a virtual keyboard which allows you to enter text, numbers and punctuation marks, etc. -
Page 48: Description Of The User Interface
Description of the user interface The photo frame has two main menus, the Media menu and the Settings menu. To access this screen, press the Menu button on the remote control. All you need to do then is select the menu required using the keys on the remote control, then press the OK button to validate. -
Page 49: Presentation Of The Settings Menu
Use the table below to help you identify resources at a glance. A resource will only be displayed if it is available (for example if the USB memory stick is connected, the memory card is inserted, etc.) Folder Description Open photos you have downloaded from the Livephoto account. Note: multimedia exchange site requiring an Internet connection Livephoto and a user account. -
Page 50: Getting To Grips With Your Digital Photo Frame
Getting to grips with your Digital Photo Frame Launching a slide show Launching a slide show from a USB memory stick or a memory card Insert the memory card in the slot provided. If you wish to connect a USB memory stick, remove the cover to reveal the mini-USB port on the photo frame, plug in the USB adapter provided and then connect your USB memory stick to the other end of the USB adapter. -
Page 51: Actions You Can Perform While The Slide Show Is Running
Actions you can perform while the slide show is running You can intervene during the slide show whenever you like, using the remote control browser and control keys. You can move between the photographs displayed, enlarge a photograph, pause or stop the slide show. To move manually between the photos in the slide show, use the keys on the remote control. - Page 52 To configure the settings, proceed as follows: While the slide show is running press the OK button. Adjust the settings using the table below: If you want to… then… 1. Select the Timer field using the keys, then validate using the OK key. modify the photo 2.
-
Page 53: Playing Background Music
Playing background music The photo frame can play background music while a slide show is running. The background music can be an audio file or a playlist. Press the Menu key on the remote control to enter the main menu. Select the Settings menu using the keys, then validate using the OK button. - Page 54 The screen displays the folders identified by the photo frame. Do not forget to insert the USB memory stick or the memory Note card if this support contains the file to be read. Select the folder containing the multimedia files to be read, then validate using the OK button.
-
Page 55: Resource Configuration / Management
Resource configuration / management In this section you will find all the information you require to manage the resources of your photo frame and in particular procedures for: • supplying the internal memory with files; • defining the resources used (downloading from the Internet service, copying); •... -
Page 56: Downloading Files From The Multimedia Exchange Site
To copy files into the photo frame's internal memory, proceed as follows: Press the Menu key on the remote control. Select the Media menu using the keys, then validate using the OK button. The screen displays the folders identified by the photo frame. Select the source folder containing the file(s) to be copied from the folders displayed. -
Page 57: Downloading Files
In the Frequency field which opens, select how often you would like the photo frame to connect automatically to the Livephoto service to update the downloaded photos using keys. Press the OK button to validate your choice. When configuring the service is complete, select the Validate button using the keys then press the OK button. -
Page 58: Locking/Unlocking A File
Locking/Unlocking a file You are advised to lock files which you wish to keep to avoid them being automatically deleted when folders are copied or updated. To lock/unlock a file, proceed as follows: Press the Menu key on the remote control. Select the Media menu using the keys, then validate using the OK button. -
Page 59: Adjusting The Settings On Your Photo Frame
Adjusting the settings on your photo frame Modifying/Customising the display The Customise menu allows you to modify : • the interface language, • screen brightness (10 levels), • standby mode and its time slot. To interrupt standby mode, press any button on the remote Note control. - Page 60 If you want then… to… set the time for start and end of standby mode. The Time slot field displays the time slot as follows: - boxes 1 and 2: start hour + start minutes - boxes 3 and 4: end hour + end minutes To modify the time slot, proceed as follows: 1.
-
Page 61: Adjusting The Date And Time
Adjusting the date and time Press the Menu key on the remote control. Select the Settings menu using the keys, then validate using the OK button. Select the Date/Time/Alarm menu using the keys, then validate using the OK key. Adjust the settings using the table below: If you want then…... -
Page 62: Activating The Alarm
Activating the alarm Press the Menu key on the remote control. Select the Settings menu using the keys, then validate using the OK button. Select the Date/Time/Alarm menu using the keys, then validate using the OK key. Adjust the settings using the table below: If you want then…... -
Page 63: Maintenance
Maintenance Replacing the batteries in the remote control To change the battery in the remote control, follow the steps below: Open the battery compartment as shown on the picture on the compartment. Remove the used battery. Insert a new 3V Lithium battery of the same type, making sure it is the right way round. The + sign must be turned towards you. -
Page 64: Incidents
Incidents Symptom Possible cause and solution If there is no power, check that the photo frame has been No power connected to the transformer, and that this is connected to the mains, then try again. Check that you have correctly inserted a memory card or a USB memory stick into the appropriate reader and that these No display contain files that can be read by the device (see Technical... -
Page 65: Technical Characteristics
: 19 x 22.2 x 9.5 cm Weight : approx. 990 g Control interface : Infrared remote control 1 x 3V CR2025 Lithium battery All data is provided for information only. AgfaPhoto reserves the right to make any modifications without any prior warning. User Guide... -
Page 66: Environment
Environment Preservation of the environment is an essential concern for AgfaPhoto. The desire of AgfaPhoto is to operate installations that respect the environment and hence it has decided to integrate environmental performance in the complete life cycle of its products, from the manufacturing phase to the commissioning, use and elimination. - Page 68 Document non contractuel Document subject to change without notice *253031533A*...