Airzone AZAI6WSCDKA Mode D'emploi
Masquer les pouces Voir aussi pour AZAI6WSCDKA:
Table des Matières

Publicité

Les langues disponibles

Les langues disponibles

Liens rapides

DKN Cloud Wi-Fi Adaptor
English
Español
AZAI6WSCDKA
AZAI6WSCDKB
AZAI6WSPDKC
1

Publicité

Table des Matières
loading

Sommaire des Matières pour Airzone AZAI6WSCDKA

  • Page 1 English Español DKN Cloud Wi-Fi Adaptor AZAI6WSCDKA AZAI6WSCDKB AZAI6WSPDKC...
  • Page 2: Table Des Matières

    Unlinking a third party device from your DKN Plus ........................................14 SETTINGS ..........................................................15 Changing language ....................................................15 Information 3PTI .......................................................15 INSTALLATION - DKN CLOUD WI-FI ADAPTOR FOR VRV/SKYAIR (AZAI6WSCDKA) ..............................16 Package content .......................................................16 LED Operation ......................................................16 Connection (AZAI6WSCDKA) ................................................17 INSTALLATION - DKN RESIDENTIAL CLOUD WI-FI ADAPTOR FOR DUCTLESS (AZAI6WSCDKB) ........................18 Package content .......................................................18...
  • Page 3: Unit Control

    UNIT CONTROL Depending on the installation, the reference temperature will be measured from: The Indoor Unit From the screen tap on the Menu icon and select Home The Thermostat the Daikin unit to control. Both Setting the unit on/off Setting the set-point temperature Tap on the On and Off buttons individually or by groups Adjust the set-point temperature by sliding your finger from the...
  • Page 4: Setting The Operating Mode

    Setting the operating mode Getting information from unit The available modes, depending on the installation type, Open the drop-down menu, tap on icon and Home are: select the Daikin unit to control. Auto. Allows automatic switching between cooling and Tap on unit information which shows the device MAC heating.
  • Page 5: Schedules

    SCHEDULES Seeing a schedule From the screen tap on the Menu icon and go to Home Schedules. Tap the day of the week to see the schedule associated to that day. Select a unit to see all the schedules associated to it. Schedules can also be seen at the Unit control menu.
  • Page 6: Creating A New Schedule

    Creating a new schedule Editing a schedule From the screen tap on the Menu icon and go to From the screen tap on the Menu icon and go to Home Home Schedules. Schedules. Each system group can set up to 24 schedules. Follow the steps described below: Follow the steps below to set the schedule: Tap the schedule to be edited.
  • Page 7: Units Management

    UNITS MANAGEMENT Adding a unit Releasing unit From the screen tap on the Menu icon and tap From the screen tap on the Menu icon and tap Home Home Configure Unit. Configure Unit. To add a new Daikin unit, tap Search units and follow the To find a Daikin unit, tap Search units.
  • Page 8: Editing Unit Data

    Editing unit data From the screen tap on the Menu icon and tap Home Manage Units. Select the unit to be edited. Edit the parameters: Name and Unit icon. Tap Delete to remove the unit. If there is no unit, tap Configure Unit and enter the following parameters: Removing the unit from the app Editing group data...
  • Page 9: Configuring The Communication Protocol

    Configuring the Communication Protocol 3) You can adjust the following settings parameters for each communication protocol. The communication protocol settings menu is only Modbus available on DKN Plus devices and can only be configured in the initial association process. - Modbus address: Configurable value between 1 and 256. 1) Press Communication Protocol to access the settings - Speed bps: Value selectable from among the available menu.
  • Page 10: Configuring The Fallback Algorithm

    Configuring the Fallback Algorithm The DKN+ Fallback logic enables the control of indoor unit by a thermostat using G, Y and W contacts. The DKN+ Fallback logic is available as a default until the adaptor is connected to the cloud. Once the adaptor is connected to the cloud the Fallback logic is disabled automatically.
  • Page 11: Led Settings

    LED Settings Select whether you want to keep the status LEDs on your DKN device working or prefer that they always remain off. 1) Press Communication Protocol to access the settings menu. *Note: The power LED will always remain on.* You can change this setting later in the Edit Unit section.
  • Page 12: Inviting A User

    Inviting a user Editing user permission From the screen tap on the Menu icon From the screen tap on the Menu icon Home Home Manage Users. Manage Users. Tap the + icon and set the following parameters: Email. Tap the user to edit and change the parameters: User type.
  • Page 13: Third Party Devices (3Pti)

    THIRD PARTY DEVICES (3PTI) This option is only available on DKN Plus devices. Linking the account of third party device From the screen tap on the Menu icon , tap Third 3) You will be redirected to the manufacturer’s website Home Party Devices.
  • Page 14: Unlink Your Dkn Plus Third-Party Account

    6) Finally, you must choose from the following options how the indoor unit will behave if the thermostat loses its Internet connection: 1. The indoor unit will follow the commands of the DKN Plus device. 2. The indoor unit will follow the commands of the associated smart thermostat.
  • Page 15: Changing The Zone

    Changing the zone From the screen tap on the Menu icon , tap Third 3) You will be redirected to the manufacturer’s website Home Party Devices. to authorize the link through your user credentials. Important: It is only possible to select a zone from those 1) Select the device whose zone you wish to change.
  • Page 16: Settings

    Information 3PTI 2) Press the lower button Unlink device and confirm to unlink the thermostat. Important: When a device is unlinked it does not disappear From the screen tap on the Menu icon , tap Third Home from the list of available devices, it is unlinked from any Party Devices.
  • Page 17: Installation - Dkn Cloud Wi-Fi Adaptor For Vrv/Skyair (Azai6Wscdka)

    INSTALLATION - DKN CLOUD WI-FI ADAPTOR FOR VRV/SKYAIR (AZAI6WSCDKA) Package content Meaning Wiring cable for power supply and P1P2 communication Modbus port Indoor unit port for wiring cable Wi-Fi connection reset Account association reset https://dkncloudna.com/modbus/MI_AZAI6_MODBUS_A4_MUL.pdf LED Operation The DKN Cloud Wi-Fi Adaptor have integrated LEDs that detects the operation of the device.
  • Page 18: Connection (Azai6Wscdka)

    Connection (AZAI6WSCDKA) The DKN Cloud Wi-Fi Adaptor for VRV/SkyAir units has 4 connecting wires: 2 for communication with the indoor unit (red and black) and 2 for the power supply. Follow these steps to connect them: Disconnect the indoor unit power.
  • Page 19: Installation - Dkn Residential Cloud Wi-Fi Adaptor For Ductless (Azai6Wscdkb)

    INSTALLATION - DKN RESIDENTIAL CLOUD WI-FI ADAPTOR FOR DUCTLESS (AZAI6WSCDKB) Package content Meaning Wiring cable for power supply and S21 connection Modbus port Indoor unit port for wiring cable Wi-Fi connection reset Account association reset https://dkncloudna.com/modbus/MI_AZAI6_MODBUS_A4_MUL.pdf LED Operation The DKN Cloud Wi-Fi Adaptor have integrated LEDs that detects the operation of the device. Depending on the LED operation, it indicates: 1.
  • Page 20: Connection (Azai6Wscdkb)

    Connection (AZAI6WSCDKB) The DKN Residential Cloud Wi-Fi Adaptor for Ductless units has one wiring cable. Follow these steps to connect it: Disconnect the indoor unit power. Connect the supplied cable to S21 connector on the indoor unit or an accessory adapter (ordered separately). Power the indoor unit.
  • Page 21: Installation - Dkn Plus Adaptor For Vrv/Skyair/Ductless (Azai6Wspdkc)

    INSTALLATION - DKN PLUS ADAPTOR FOR VRV/SKYAIR/DUCTLESS (AZAI6WSPDKC) Package content Meaning Common wiring cable Association process reset Wiring cable for P1P2 communication Digital input Wiring cable for S21 communication On-Off output Modbus port Smart thermostat connection Indoor unit port External power input Device reboot https://dkncloudna.com/modbus/MI_AZAI6_MODBUS_A4_MUL.pdf LED Operation...
  • Page 22: P1P2 Connection (Azai6Wspdkc)

    P1P2 Connection (AZAI6WSPDKC) The DKN Plus Adaptor for VRV/SkyAir units has 4 connecting wires: 2 for communication with the indoor unit (red and black) and 2 for the power supply. Follow these steps to connect them: Disconnect the indoor unit power. Connect the DKN to the terminals of the indoor unit using the A+B supplied cable, X35A/X18A/X9A (depending on the indoor unit) and P1 P2.
  • Page 23: Smart Thermostat Connection

    Smart thermostat connection The DKN Plus adaptor can also be paired to a third party device. For the connection follow the wiring diagram shown below: Smart thermostat To finish the installation it is necessary to link the account of your third party thermostat following the instruccions of the Third Party Device epigraph.
  • Page 24: Regulations

    - Consult the dealer or an experienced radio/TV technician for help. Declaration of conformity To access the declaration of conformity, please follow the link below: http://doc.airzone.es/Certificates/Product/SDoC_AZAI6WSCDKA_FCC_A4_EN.pdf Modification statement Corporación Empresarial Altra S.L. has not approved any changes or modifications to this device by the user. Any changes or...
  • Page 25 Dissocier un dispositif de tiers de votre DKN Plus ........................................37 CONFIGURATION .........................................................38 Changer de langue ....................................................38 Informations sur les dispositifs associés 3PTI ..........................................38 INSTALLATION - ADAPTATEUR DKN CLOUD WI-FI POUR UNITÉS VRV/SKYAIR (AZAI6WSCDKA) ........................39 Contenu de l’emballage ..................................................39 Fonctionnement LED....................................................39 Connexion (AZAI6WSCDKA) ................................................40 INSTALLATION - ADAPTATEUR DKN RESIDENTIAL CLOUD WI-FI POUR UNITÉS NON GAINABLES (AZAI6WSCDKB) ................41...
  • Page 26: Contrôle De L'unité

    CONTRÔLE DE L’UNITÉ Selon l’installation, la température de référence sera mesurée à partir : de l’unité intérieure Sur l’écran , appuyez sur l’icône de menu et Accueil du thermostat sélectionnez l’unité Daikin à contrôler. des deux Activer ou désactiver l’unité Établir la température de consigne Appuyez sur les boutons On et Off individuellement ou de manière groupée à...
  • Page 27: Régler L'ailette

    Établir le mode de fonctionnement Obtenir des informations de l’unité Les modes disponibles, en fonction du type d’installation, Ouvrez le menu déroulant, appuyez sur l’icône Accueil sont : puis sélectionnez l’unité Daikin à contrôler. Auto. Permet d’alterner automatiquement entre Appuyez sur les informations de l’unité, qui affichent refroidissement et chauffage.
  • Page 28: Programmations

    PROGRAMMATIONS Voir une programmation Sur l’écran , appuyez sur l’icône de menu , puis Accueil rendez-vous sur Programmations. Appuyez sur le jour de la semaine pour voir la programmation qui y est associée. Sélectionnez unité pour voir toutes programmations sont associées.
  • Page 29: Créer Une Nouvelle Programmation

    Créer une nouvelle programmation Modifier une programmation Sur l’écran , appuyez sur l’icône de menu , p u i s Sur l’écran , appuyez sur l’icône de menu , puis Accueil Accueil rendez-vous sur Programmations. rendez-vous sur Programmations. Chaque groupe système peut définir...
  • Page 30: Gestion Des Unités

    GESTION DES UNITÉS Ajouter une unité Libérer une unité Sur l’écran , appuyez sur l’icône de menu , puis Sur l’écran , appuyez sur l’icône de menu , puis Accueil Accueil sur Configurer unité. sur Configurer unité. Pour ajouter une nouvelle unité Daikin, appuyez sur Pour trouver une unité...
  • Page 31: Modifier Les Données D'une Unité

    Modifier les données d’une unité Sur l’écran , appuyez sur l’icône de menu , puis Accueil sur Gérer les unités. Sélectionnez l’unité à modifier. Modifier les paramètres : Nom et Icône de l’unité. Appuyez sur Supprimer pour supprimer l’unité. Si aucune unité ne s’affiche, appuyez sur Configurer unité et saisissez les paramètres suivants : Supprimer une unité...
  • Page 32: Configurez Le Protocole De Communication

    Configurez le protocole de communication 3. Vous pouvez régler les paramètres de configuration Le menu de configuration du protocole de communication suivants pour chaque protocole de communication. n’est disponible que sur les dispositifs DKN Plus et ne peut Modbus être configuré qu’au cours du processus d’association initial.
  • Page 33: Configuration De L'algorithme Fallback

    Configuration de l’algorithme Fallback The DKN+ Fallback logic enables the control of indoor unit by a thermostat using G, Y and W contacts. The DKN+ Fallback logic is available as a default until the adaptor is connected to the cloud. Once the adaptor is connected to the cloud the Fallback logic is disabled automatically.
  • Page 34: Configuration Des Led

    Configuration des LED Sélectionnez si vous souhaitez que les LED d’état de votre dispositif DKN continuent de fonctionner ou si vous préférez qu’elles restent toujours éteintes. *Note : La LED d’alimentation restera toujours allumée.* Vous pourrez modifier cette configuration ultérieurement dans la section **Éditer unité** GESTION DES UTILISATEURS Modifier mon compte...
  • Page 35: Inviter Un Utilisateur

    Inviter un utilisateur Modifier l’autorisation d’un utilisateur Sur l’écran , appuyez sur l’icône de menu , puis Sur l’écran , appuyez sur l’icône de menu puis Accueil Accueil sur Gérer les utilisateurs. sur Gérer les utilisateurs. Appuyez sur l’icône + et définissez les paramètres suivants : Appuyez sur Caractéristiques avancées et basiques pour E-mail.
  • Page 36: Dispositifs De Tiers (3Pti)

    DISPOSITIFS DE TIERS (3PTI) Cette option n’est disponible que sur les dispositifs DKN Plus. Associer DKN Plus avec le compte de fabricants tiers 3) Sélectionnez le fabricant dont vous souhaitez associer le compte parmi les fabricants compatibles. Sur l’écran , appuyez sur l’icône de menu , puis 4) Vous serez redirigé...
  • Page 37: Dissocier Le Compte De Fabricants Tiers De Votre Dkn Plus

    7) Enfin, vous devez choisir, parmi les options suivantes, le comportement de l’unité intérieure si le thermostat perd la connexion Internet : 1. L’unité intérieure suivra les ordres du DKN Plus. 2. L’unité intérieure suivra les ordres du thermostat intelligent associé. **Attention** : Si vous choisissez de faire suivre à...
  • Page 38: Modifier Une Zone Associée À Un Dispositif

    Modifier une zone associée à un dispositif 2) Appuyez sur ** Zone** pour accéder à la liste des Sur l’écran , appuyez sur l’icône de menu , puis zones disponibles. Accueil sur Dispositifs de tiers . 3) Sélectionnez la zone à laquelle vous souhaitez associer votre dispositif.
  • Page 39: Configuration

    Informations sur les dispositifs associés 3PTI 2) Appuyez sur le bouton inférieur **Dissocier dispositif** puis confirmez afin de dissocier le thermostat. **Attention :** Lorsque vous dissociez un dispositif, Sur l’écran , appuyez sur l’icône de menu , puis Accueil ce dernier ne disparaît pas de la liste des dispositifs sur Dispositifs de tiers .
  • Page 40: Installation - Adaptateur Dkn Cloud Wi-Fi Pour Unités Vrv/Skyair (Azai6Wscdka)

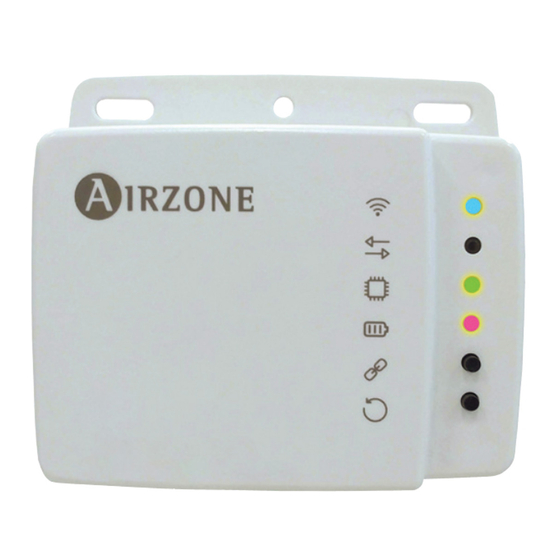
    INSTALLATION - ADAPTATEUR DKN CLOUD WI-FI POUR UNITÉS VRV/SKYAIR (AZAI6WSCDKA) Contenu de l’emballage Signification Câblage pour l’alimentation et la communication P1P2 Port Modbus Port d’unité intérieure pour le câblage Réinitialisation de connexion Wi-Fi Réinitialisation de l’association de compte https://dkncloudna.com/modbus/MI_AZAI6_MODBUS_A4_MUL.pdf Fonctionnement LED L’adaptateur DKN Cloud Wi-Fi dispose de LED intégrées qui détectent le fonctionnement du dispositif.
  • Page 41: Connexion (Azai6Wscdka)

    Connexion (AZAI6WSCDKA) Le DKN Cloud Wi-Fi Adaptor for VRV/SkyAir units dispose de quatre fils de connexion : deux pour les communications avec l’équipement Daikin (rouge et noir) et deux pour l’alimentation. Pour réaliser la connexion : Coupez l’alimentation de l’unité intérieure Daikin.
  • Page 42: Installation - Adaptateur Dkn Residential Cloud Wi-Fi Pour Unités Non Gainables (Azai6Wscdkb)

    INSTALLATION - ADAPTATEUR DKN RESIDENTIAL CLOUD WI-FI POUR UNITÉS NON GAINABLES (AZAI6WSCDKB) Contenu de l’emballage Signification Câblage pour l’alimentation et la communication S21 Port Modbus Port d’unité intérieure pour le câblage Réinitialisation de connexion Wi-Fi Réinitialisation de l’association de compte https://dkncloudna.com/modbus/MI_AZAI6_MODBUS_A4_MUL.pdf Fonctionnement LED L’adaptateur DKN Cloud Wi-Fi dispose de LED intégrées qui détectent le fonctionnement du dispositif.
  • Page 43: Connexion (Azai6Wscdkb)

    Connexion (AZAI6WSCDKB) L’adaptateur DKN Residential Cloud Wi-Fi pour unités non gainables units dispose de quatre fils de connexion : deux pour les communications avec l’équipement Daikin (rouge et noir) et deux pour l’alimentation. Pour réaliser la connexion : Coupez l’alimentation de l’unité intérieure Daikin. Connectez le câble fourni au connecteur S21 de l’unité...
  • Page 44: Installation - Adaptateur Dkn Plus Pour Unités Vrv/Skyair/Non Gainables (Azai6Wspdkc)

    INSTALLATION - ADAPTATEUR DKN PLUS POUR UNITÉS VRV/SKYAIR/NON GAINABLES (AZAI6WSPDKC) Contenu de l’emballage Câblage commun Réinitialisation du processus d’association Câblage pour la communication P1P2 Entrée numérique Câblage pour la communication S21 Sortie marche-arrêt Port Modbus Connexion thermostat intelligent Connexion à l'unité intérieure Entrée d'alimentation externe Réinitialisation du dispositif https://dkncloudna.com/modbus/MI_AZAI6_MODBUS_A4_MUL.pdf...
  • Page 45: P1P2 Connexion (Azai6Wspdkc)

    P1P2 Connexion (AZAI6WSPDKC) Le DKN Cloud Wi-Fi Adaptor for VRV/SkyAir units dispose de quatre fils de connexion : deux pour les communications avec l’équipement Daikin (rouge et noir) et deux pour l’alimentation. Pour réaliser la connexion : Coupez l’alimentation de l’unité intérieure Daikin. Connectez le DKN aux bornes de l’unité...
  • Page 46: Connexion Thermostat Intelligent

    Connexion thermostat intelligent Le DKN PLUS peut être associé à un thermostat tiers. Suivez le schéma ci-dessous pour la connexion : Smart thermostat Pour terminer l’installation, il faut associer le compte de ce thermostat en suivant les instructions figurant dans la section des Dispositifs tiers.
  • Page 47: Règlements

    - Consulter le revendeur ou un technicien radio/télévision expérimenté. Déclaration de conformité Pour accéder à la déclaration de conformité, suivez le lien ci-dessous : http://doc.airzone.es/Certificates/Product/SDoC_AZAI6WSCDKA_FCC_A4_EN.pdf Déclaration de modification Corporación Empresarial Altra S.L. n’approuve aucune modification ni changement apporté à ce dispositif par l’utilisateur.
  • Page 48 Desvincular un dispositivo de terceros de su DKN Plus ......................................60 AJUSTES ..........................................................61 Cambiar idioma ......................................................61 Información de los dispositivos vinculados ...........................................61 INSTALACIÓN - DKN CLOUD WI-FI ADAPTOR FOR VRV/SKYAIR (AZAI6WSCDKA) ..............................62 Contenido de la caja ....................................................62 Operación de los LEDs ...................................................62 Conexión (AZAI6WSCDKA) ...................................................63 INSTALACIÓN - DKN RESIDENTIAL CLOUD WI-FI ADAPTOR FOR DUCTLESS (AZAI6WSCDKB)..........................64...
  • Page 49: Control De La Unidad

    CONTROL DE LA UNIDAD Dependiendo de la instalación, la temperatura de referencia será medida desde : En el menú desplegable , pulse inicio y selecciona la la unidad interior unidad Daikin a controlar. el termostato ambas Encender o apagar una unidad Establecer la temperatura de consigna Ajuste la temperatura de consigna deslizando su dedo Pulse los botones On y Off en la pantalla de inicio o...
  • Page 50: Establecer Un Modo De Funcionamiento

    Establecer un modo de funcionamiento Obtener información de la unidad Los modos disponibles, dependiendo del tipo de En el menú desplegable , pulse inicio y selecciona la instalación son: unidad Daikin a controlar. Automático. Permite el cambio automático entre frío y Pulse en el icono de información que mostrará...
  • Page 51: Programaciones

    PROGRAMACIONES Ver programaciones En el menú desplegable , pulse inicio y selecciona programaciones. Selecciona el día de la semana y la unidad para ver la programación asociada. Las programaciones también se pueden ver en el menú de control de la unidad. Activar/Desactivar una programación Selecciona el día de la semana y la unidad para ver la programación asociada.
  • Page 52: Crear Una Nueva Progamación

    Crear una nueva progamación Editar una programación En el menú desplegable , pulse inicio y selecciona En el menú desplegable , pulse inicio y selecciona programaciones. programaciones. Se pueden configurar hasta 24 progamas por cada sistema. Siga los siguientes pasos: Siga los siguientes pasos para la nueva progamación: Pulse la programación a ser editada.
  • Page 53: Gestión De Unidades

    GESTIÓN DE UNIDADES Añadir una unidad Liberar una unidad En el menú desplegable , pulse inicio y selecciona En el menú desplegable , pulse inicio y selecciona gestión de unidades. gestión de unidades. Para añadir una unidad nueva Daikin, seleccione buscar Para encontrar una unidad Daikin, seleccione buscar unidad y siga los siguientes pasos: unidad.
  • Page 54: Editar Datos De Un Grupo

    Editar datos de un grupo En el menú desplegable , pulse inicio y selecciona gestión de unidades. Pulse el grupo que desea editar. Edite los parámetros: nombre e icono de la unidad. Seleccione eliminar para borrar la unidad. Eliminar una unidad de la app Editar datos de un grupo En el menú...
  • Page 55: Configurar El Protocolo De Comunicaciones

    Configurar el protocolo de comunicaciones 3) Puede ajustar los siguientes parámetros de menú configuración protocolo configuración para cada protocolo de comunicaciones. comunicaciones únicamente está disponible en los Modbus dispositivos DKN Plusy únicamente puede ser configurado en el proceso de asociación inicial. - Dirección Modbus: Valor configurable entre 1 y 256.
  • Page 56: Configurar El Algoritmo Fallback

    Configurar el Algoritmo Fallback La lógica DKN + Fallback permite el control de la unidad interior mediante un termostato, utilizando contactos G, Y y W. La lógica DKN + Fallback está disponible de forma predeterminada hasta que el adaptador se conecta a Cloud.
  • Page 57: Configuración De Los Led

    Configuración de los LED Seleccione si desea mantener funcionando los LED de estado de su dispositivo DKN o prefiere que permanezcan siempre apagados. *Nota: El LED de alimentación siempre permanecerá encendido.* Podrá modificar posteriormente esta configuración en el apartado de Editar unidad. GESTIÓN DE USUARIOS Editar mi cuenta Borrar mi cuenta...
  • Page 58: Invitar A Un Usuario

    Invitar a un usuario Editar permisos de un usuario En el menú desplegable , pulse inicio y selecciona En el menú desplegable , pulse inicio y selecciona Usuarios. Usuarios. Pulse el icono + en el grupo a controlar y establezca los Puede consultar las diferencias entre un usuario avanzado siguientes parámetros: y un usuario básico pulsando en “diferencias entre...
  • Page 59: Dispositivos De Terceros (3Pti)

    DISPOSITIVOS DE TERCEROS (3PTI) Esta opción solo está disponible en los dispositivos DKN Plus. 3) Seleccione el fabricante cuya cuenta quiere asociar de entre los fabricantes compatibles. Vincular DKN Plus con la cuenta de terceros fabri- 4) Será redirigido a la web del fabricante para autorizar la vinculación mediante sus credenciales de usuario.
  • Page 60: Desvincular La Cuenta De Terceros Fabricantes De Su Dkn Plus

    7) Finalmente, se debe elegir el comportamiento de la instalación en caso de que el termostato pierda la conexión a internet de entre las siguientes opciones: 1. La unidad interior seguirá las ordenes del DKN Plus. 2. La unidad interior seguirá las ordenes del termostato asociado.
  • Page 61: Cambiar Zona Asociada

    Cambiar zona asociada En el menú desplegable pulse Dispositivos 3) YPulse en la zona a la que desee asociar su dispositivo. terceros. Importante: Solo es posible seleccionar una zona de entre 1) Pulse en el dispositivo cuya zona desea modificar. las que cuenten con un dispositivo DKN Plus y no tengan otro termostato asociado previamente.
  • Page 62: Ajustes

    Información de los dispositivos vinculados 2) Pulse en el botón inferior Desvincular dispositivo y confirme para desasociar el termostato. En el menú desplegable pulse Dispositivos Importante: Al desvincular un dispositivo este no terceros. desaparece del listado de dispositivos disponibles, se desasocia de cualquier zona a la que estuviera asociado.
  • Page 63: Instalación - Dkn Cloud Wi-Fi Adaptor For Vrv/Skyair (Azai6Wscdka)

    INSTALACIÓN - DKN CLOUD WI-FI ADAPTOR FOR VRV/SKYAIR (AZAI6WSCDKA) Contenido de la caja Significado Cable de alimentación y puerto de comunicación P1P2 Modbus puerto Puerto para cable hacia la unidad interior Reset de la Conexión Wi-Fi Reset de la asociación de la cuenta https://dkncloudna.com/modbus/MI_AZAI6_MODBUS_A4_MUL.pdf...
  • Page 64: Conexión (Azai6Wscdka)

    Conexión (AZAI6WSCDKA) El DKN Cloud Wi-Fi Adaptor para unidades VRV/SkyAir tiene 4 cables de conexión: 2 para comunicación con la unidad interior (rojo y negro) y 2 para la alimentación. Siga estos pasos para conectarlos: Desconecte la unidad interior de la alimentación.
  • Page 65: Instalación - Dkn Residential Cloud Wi-Fi Adaptor For Ductless (Azai6Wscdkb)

    INSTALACIÓN - DKN RESIDENTIAL CLOUD WI-FI ADAPTOR FOR DUCTLESS (AZAI6WSCDKB) Contenido de la caja Meaning Cable de alimentación y puerto de conexión S21 Modbus puerto Puerto para cable hacia la unidad interior Reset de la Conexión Wi-Fi Reset de la asociación de la cuenta https://dkncloudna.com/modbus/MI_AZAI6_MODBUS_A4_MUL.pdf Operación de los LEDs El DKN Cloud Wi-Fi Adaptor consta de los siguientes LEDs que permiten identificar el funcionamiento del dispositivo.
  • Page 66: Conexión (Azai6Wscdkb)

    Conexión (AZAI6WSCDKB) El DKN Residential Cloud Wi-Fi Adaptor para unidades Ductless tiene un único cable. Siga estos pasos para conectarlo: Desconecte la unidad interior de la alimentación. Conecte el cable suministrado al S21 conector on the indoor unit or an accessory adapter (ordered separately). Alimente la unidad interior.
  • Page 67: Instalación - Dkn Plus Adaptor For Vrv/Skyair/Ductless (Azai6Wspdkc)

    INSTALACIÓN - DKN PLUS ADAPTOR FOR VRV/SKYAIR/DUCTLESS (AZAI6WSPDKC) Contenido de la caja Significado Cable común Reinicio proceso de asociación Cable para P1P2 comunicación Entrada digital Cable para S21 comunicación Salida paro-marcha Puerto Modbus Conexión termostato inteligente Puerto unidad interior Entrada de fuente de alimentación externa Reinicio del dispositvo https://dkncloudna.com/modbus/MI_AZAI6_MODBUS_A4_MUL.pdf Operación de los LEDs...
  • Page 68: Conexión P1P2 (Azai6Wspdkc)

    Conexión P1P2 (AZAI6WSPDKC) Siga estos pasos para conectarlos: Desconecte la unidad interior de la alimentación. Conecte el DKN a los teminales de la unidad interior usando el cable A+B suministrado, X35A/X18A/X9A (Dependiendo de la unidad interior) y P1 P2. Alimente la unidad interior. Compruebe los LEDs (Ver sección Operación de los LEDs). El LED del Cloud Wi-Fi Adaptor para unidades VRV/SkyAir permanece parpadeando en verde cuando la conexión esté...
  • Page 69: Conexión Termostato Inteligente

    Conexión termostato inteligente El DKN PLUS puede ser emparejado con un termostato de terceros. Para la conexión siga el esquema siguiente: Smart thermostat Para terminar la instalación es necesario asociar la cuenta de este termostato siguiendo las instrucciones del apartado de Dispositivos de terceros.
  • Page 70: Regulaciones

    - Consult the dealer or an experienced radio/TV technician for help. Declaration of conformity To access the declaration of conformity, please follow the link below: http://doc.airzone.es/Certificates/Product/SDoC_AZAI6WSCDKA_FCC_A4_EN.pdf Modification statement Corporación Empresarial Altra S.L has not approved any changes or modifications to this device by the user. Any changes or...

Ce manuel est également adapté pour:

Azai6wscdkbAzai6wspdkc

Table des Matières