Publicité
Liens rapides
CONTENTS
• CONTENU • CONTENIDO
RoadShower (1X)
quick connector (hose) (1X)
connecteur rapide (tuyau)
adaptador de desconexión rápida (manguera)
quick connector (spigot) (1X)
connecteur rapide (robinet)
adaptador de desconexión rápida (espita)
hose (1X)
tuyau
manguera
Pour le français, aller à la page 7.
Instruction #1036081B - page 1 of 12
(x 1)
(x 1)
(1X)
on/off elbow (1X)
robinet coudé
(x 1)
válvula de apertura/cierre
(1X)
long carriage bolt (4X)
boulon à tête bombée long
tornillo de cabeza redonda largo
AVAILABLE ACCESSORIES
On/Off Elbow
On/Off Elbow
On/Off Elbow
#8004103
®
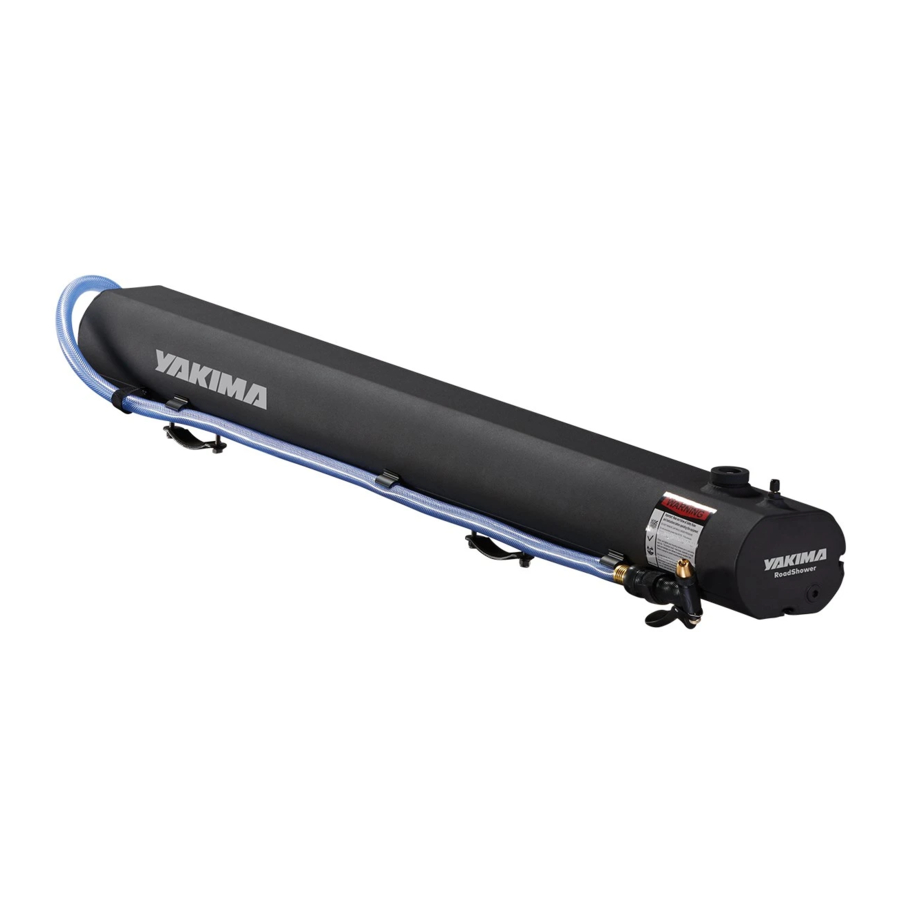
RoadShower™ 4G, 7G, 10G
nut (4X)
écrou
(x 4)
tuerca
(4X)
(1X)
61
64 68 72 75 79 82 88 90 93 97 100 104 108 111 115 118
F
C
16 18 20 22 24 28 30 32 34 36 38 40 42 44 46 48 50 52
thermometer (1X)
thermomètre
(x 1)
termómetro
(1X)
(x 1)
(1X)
(x 4)
(4X)
30" shower head (large)
#8004106
19" shower head (medium)
#8004104
NOTE: RoadShower
7G shown throughout
accessory lock (2X)
serrure d'accessoire
cerradura accesoria
nozzle (1X)
pistolet
(x 1)
pistola rociadora
(4X)
clamp (2X)
étrier
(x 2)
pinza
(2X)
short carriage bolt (4X)
boulon à tête bombée court
tornillo de cabeza redonda corto
CROSSBAR SPREAD
RoadShower 4G/7G: 24"-50"
RoadShower 10G: 32"-80"
ROOF RACK LOAD LIMITS
RoadShower 4G: Racks with
100lb limit and higher
RoadShower 7G/10G: Racks
with limit of 165lbs and up.
Para español ir a la página 7.
this instruction.
(x 2)
(2X)
gasket (2X)
joint
(x 2)
junta
(2X)
key (2X)
clé
(x 2)
llave
(2X)
washer (4X)
rondelle
(x 4)
arandela
(4X)
(x 4)
(4X)
Publicité

Manuels Connexes pour Yakima RoadShower 4G


Sommaire des Matières pour Yakima RoadShower 4G
- Page 1 ROOF RACK LOAD LIMITS On/Off Elbow #8004106 On/Off Elbow 19” shower head (medium) #8004103 RoadShower 4G: Racks with #8004104 100lb limit and higher RoadShower 7G/10G: Racks with limit of 165lbs and up. Pour le français, aller à la page 7.
- Page 2 READ AND ADHERE TO THE WARNINGS: Safety warnings are affixed to the tank below the fill cap and air valve as an important remider that you must adhere to those safetly protocols when operating RoadShower™. WARNING: Do not drink from the RoadShower. WARNING: Do not leave water in the RoadShower™...
- Page 3 ASSEMBLY INSTALL THE ON/OFF ELBOW. Install the on/off elbow to the tank and firmly tighten it using a wrench. Do not overtighten. Check for leaks once the tank is filled and retighten if necessary. INSTALL THE NOZZLE. ATTACH THE HOSE TO SPIGOT. Install the nozzle to the other end of the hose and firmly...
- Page 4 INSTALLATION BOTTOM SLOT INSTALLATION ON CROSSBARS. Determine which carriage bolt you will need based on the thickness of your crossbars. For thinner crossbars use the shorter bolt. For thicker crossbars use the longer bolts. NOTE: If you intend to use the included accessory locks (recommended) use the longer bolts.
- Page 5 FILLING AND PRESSURIZING THE TANK FILLING AND PRESSURIZING ROADSHOWER WITH A GARDEN HOSE. ™ NOTE: Clean the tank before using RoadShower™ for the first time. See page 2 for instructions to sanitize and clean the tank. A. Detach the sprayer hose from the tank by releasing the quick release connector. B.
- Page 6 FILLING THE TANK AND PRESSURIZING WITH A PUMP. A. Remove the fill cap from the tank. B. Fill the tank with clean water. C. Replace the fill cap. D. Remove the air valve cap and connect a pump to the air valve. You may use a 12 volt tire compressor, or other suitable pump.
-
Page 7: Custom Installations
LÍMITES DE CARGA DE LOS RACKS PARA TECHO RoadShower 4G : porte-bagage pouvant RoadShower 4G: Para racks con un límite de 100 libras, y superior. supporter au moins 45 kg (100 lb). RoadShower 7G/10G: Para racks con un límite de 165 libras, y más. - Page 8 FRANÇAIS ESPAÑOL AVERTISSEMENT : ne pas passer dans un lave-auto ADVERTENCIA: No entre a ningún lavadero automático automatique si le RoadShower est en place. Il est de vehículos con el tanque RoadShower™ instalado. Debe obligatoire de retirer le RoadShower du véhicule avant desinstalarlo antes de entrar en uno de esos lugares para de pénétrer dans un lave-auto automatique sous peine evitar dañar el vehículo y el tanque RoadShower.
- Page 9 FRANÇAIS ESPAÑOL INSTALACIÓN INSTALLATION INTRODUZCA LOS TORNILLOS EN LA RANURA INSTALLATION SUR BARRES TRANSVERSALES INFERIOR DEL TANQUE. PAR LA RAINURE INFÉRIEURE. Determine qué tornillo de cabeza redonda necesitará, en base al Déterminer quels boulons à tête bombée il faudra employer selon espesor de sus barras transversales.
- Page 10 Tenga en cuenta que el agua del rempli d’eau. Si l’on utilise la rainure latérale pour le montage, Yakima tanque puede estar más caliente que la de la manguera. Además, recommande d’employer plus de deux étriers pour garantir la sécurité...
-
Page 11: Important Warnings
à www. In order to replace any lost or defective keys, note the lock and key yakima.com. numbers below and register them at www.yakima.com. Anote el número de su llave: Record Your Key Number:... -
Page 12: Advertencias Importantes
Para reemplazar una llave perdida o defectuosa, anote más abajo los números de la cerradura y de la llave y regístrelos en www.yakima.com. Anote el número de su llave: (grabado en las llaves de bloqueo)