Publicité

Les langues disponibles
  • FR

Les langues disponibles

WARRANTY CONDITION
This product is guaranteed for a period of 2 years from the date of purchase* against
any failure resulting from a manufacturing or material defect. This warranty does not
EN
cover defects or damage resulting from incorrect installation, improper use or abnormal
wear of the product.
*as shown on the sales receipt.
CONDITION DE GARANTIE
Ce produit est garanti pour une période de 2 ans à partir de la date d'achat*, contre
toute défaillance résultant d'un vice de fabrication ou de matériau. Cette garantie ne
FR
couvre pas les vices ou les dommages résultant d'une mauvaise installation, d'une
utilisation incorrecte ou de l'usure anormale du produit.
*sur présentation du ticket de caisse.
GARANTIEVOORWAARDEN
Dit product wordt gegarandeerd voor een periode van 2 jaar vanaf de aankoopdatum*,
voor elke storing die het gevolg is van een fabricagefout of het materiaal. Gebreken of
NL
schade door slechte installatie, onjuist gebruik of abnormale slijtage van het product
worden niet gedekt door deze garantie.
*op vertoon van kassabon.
CONDICIONES DE GARANTÍA
El certificado de garantía de este producto tiene una duración de 2 años a partir de la
fecha de compra* que se limita a los defectos de fabricación y averías del material.
ES
Se excluyen de la garantía deficiencias o daños originados por una mala instalación,
errores en la manipulación o por un uso inadecuado.
*previa presentación del comprobante de compra.
CONDIZIONI DI GARANZIA
Questo prodotto è garantito per un periodo di 2 anni a partire dalla data di acquisto*
contro qualsiasi guasto derivante da difetti di fabbricazione o del materiale. Questa
IT
garanzia non copre i difetti o i danni derivanti da un'errata installazione, da un utilizzo
improprio o dall'usura anomala del prodotto.
*dietro presentazione dello scontrino.
ELECTRO DEPOT
1 route de Vendeville
59155 FACHES-THUMESNIL - FRANCE
08/2021 – V1
1/2
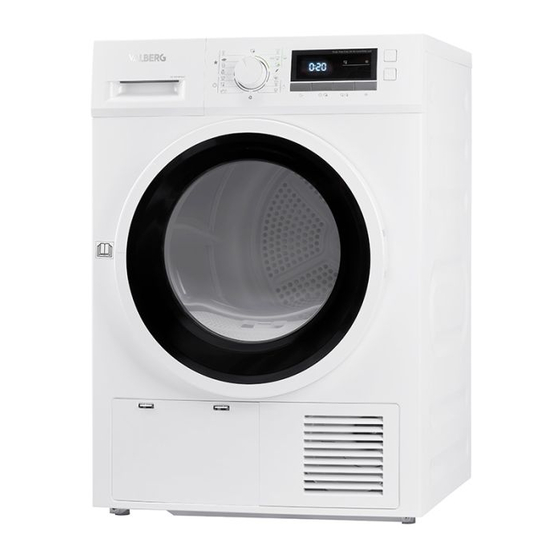
Tumble Dryer
Sèche-linge
Droogkast
Secadora
Asciugabiancheria
971324
DC 8 B W566C
INSTRUCTIONS FOR USE
....................02
CONSIGNES D'UTILISATION
....................24
GEBRUIKSAANWIJZINGEN
....................44
INSTRUCCIONES DE USO
....................68
ISTRUZIONI PER L'USO
....................90

Publicité

Chapitres

Table des Matières
loading

Sommaire des Matières pour VALBERG DC 8 B W566C

  • Page 1 971324 CONDICIONES DE GARANTÍA DC 8 B W566C El certificado de garantía de este producto tiene una duración de 2 años a partir de la fecha de compra* que se limita a los defectos de fabricación y averías del material.
  • Page 3: Table Des Matières

    Table of contents Using the appliance Description of the appliance Preview of the Thanks! appliance T h a n k y o u f o r c h o o s i n g t h i s VA L B E R G p ro d u c t . Installation Using the appliance Chosen, tested and recommended by ELECTRO DEPOT,...
  • Page 4: Using The Appliance

    Preview of the appliance Using the appliance Description of the appliance Installation Packaging for the dryer Tray Tank Cord Drum Lint filter Control panel Door Unpacking the dryer Air inlet Handle Maintenance cover Control panel On/Off Switches the appliance on or off. Start/Pause Press this button to start or pause the drying cycle.
  • Page 5: Using The Appliance

    Using the appliance Using the appliance Installation For your convenience, it is possible to connect your condensing dryer to the water drain. Please note! As the drain hose is not included in the delivery, we recommend that you buy one Levelling separately.
  • Page 6: Operation

    Using the appliance Using the appliance Operation Quick operation CAUTION : Before the very first cycle, there may still be some of the grease or dust generated during manufacturing or transportation inside the dryer. To avoid contaminating NOTE : your laundry, follow these instructions: Before use, ensure that the appliance is correctly installed.
  • Page 7 Using the appliance Using the appliance Please note that some textiles are not suitable for tumble drying. Always refer to the following symbols: Clothing composed of a blend of different fabrics (about 800 g) Drying Jacket (about 800 g, in cotton) Tumble drying possible Jeans (about 800 g) Do not tumble dry...
  • Page 8: Control Panel

    Using the appliance Using the appliance Control panel 2. If the dryer stops unexpectedly during drying and when the dryer displays indications, refer to the "Troubleshooting" section to resolve the problem. Delay Start Other functions • Instructions relating to the [Delayed start] function Time This function is used to delay the drying of the laundry for up to 24 hours.
  • Page 9: Drying Program Table

    Using the appliance Using the appliance Drying program table 3. Except for the [Cotton iron], [], [Wool], [Hot air], [Cold air] and [Refresh] programs, all the other programs can be used with the [Drying level] function. • Instructions relating to the [Anti-crease] function At the end of the drying cycle, the anti-crease process lasts 30 minutes (default) or 120 minutes (if selected).
  • Page 10 Using the appliance Using the appliance NOTE : • This symbol is associated with the energy efficiency of the standard cotton program. The latter complies with the current EN 61121 standard and is more suited to drying standard cotton textiles loaded according to the set capacity. •...
  • Page 11: Useful Information

    Useful information Useful information Care and maintenance NOTE: Cleaning the lint filter • The residues that build up on the lint filter prevent air Let the dryer cool down. from circulating, which increases the drying time and energy consumption; this is why the lint filter should be cleaned after each use.
  • Page 12 Useful information Useful information 5. Thoroughly clean the condenser and leave it to drain completely. 6. Clean the seals. 7. Reinsert the condenser using the button. 8. Unscrew both blocking levers. 9. Close the maintenance cover until it clicks into place. If you use the dryer regularly, clean the condenser every three months.
  • Page 13: Troubleshooting

    Useful information Useful information CAUTION : Repairs may only be conducted by authorised technicians. • Before contacting the customer service, make sure you assess the problem yourself beforehand and properly adhere to the instructions. • Even if the problem is covered by the warranty, you will be charged for the technician's advice.
  • Page 14 Aperçu de l’appareil Table de matières Description de l’appareil Aperçu de l’appareil Merci ! M e rc i d ’ a v o i r c h o i s i c e p ro d u i t VA L B E R G . Installation Utilisation de Choisis, testés et recommandés par ELECTRO DEPOT,...
  • Page 15: Aperçu De L'appareil

    Aperçu de l’appareil Utilisation de l’appareil Description de l’appareil Installation Emballage du sèche-linge Plateau Réservoir Cordon Tambour Filtre à peluches Panneau de commande Hublot Déballage du sèche-linge Entrée d’air Poignée Trappe d’entretien Panneau de commande Marche/Arrêt Permet de mettre en marche ou d’éteindre l’appareil. Démarrage/Pause Appuyez sur ce bouton pour démarrer ou interrompre le cycle de séchage.
  • Page 16 Utilisation de l’appareil Utilisation de l’appareil Installation une accumulation de chaleur pouvant entraver le bon fonctionnement de l’appareil. Par souci de commodité, il est envisageable de brancher votre sèche-linge à condensation sur l’évacuation d’eau. Attention! Le tuyau d’évacuation n’étant pas fourni, nous vous conseillons d’en acheter un Mise à...
  • Page 17: Fonctionnement

    Utilisation de l’appareil Utilisation de l’appareil Fonctionnement Prise en main rapide ATTENTION : Avant le tout premier cycle, des traces de graisse ou de la poussière générées durant la fabrication ou le transport de l’appareil peuvent subsister à l’intérieur REMARQUE : du sèche-linge.
  • Page 18 Utilisation de l’appareil Utilisation de l’appareil Attention, certains textiles ne sont pas adaptés au séchage au sèche-linge. Reportez-vous systématiquement aux pictogrammes qui suivent : Vêtements composés de mélanges de tissus (environ 800 g) Séchage Veste (environ 800 g, en coton) Séchage en machine normal Séchage en machine interdit Jeans (environ 800 g)
  • Page 19: Panneau De Commande

    Utilisation de l’appareil Utilisation de l’appareil Panneau de commande Autres fonctions • Instructions relatives à la fonction [Départ différé] Départ différé Cette fonction permet de différer le séchage du linge jusqu’à 24 heures. La durée de départ différé signifie que le programme démarrera x heures plus tard. Lorsque le programme en départ différé Durée est lancé, le temps indiqué...
  • Page 20 Utilisation de l’appareil Utilisation de l’appareil Tableau des programmes de séchage 2. Appuyez à plusieurs reprises sur le bouton [Intensité] afin de sélectionner la durée du séchage. 3. Exceptés les programmes [Repassage coton], [ ], [Laine], [Air chaud], [Air froid] et [Rafraîchissement], tous les autres programmes peuvent être utilisés avec la fonction [Intensité].
  • Page 21 Utilisation de l’appareil Utilisation de l’appareil REMARQUE : • Ce symbole est associé à l’efficacité énergétique du programme coton standard. Ce dernier est conforme à la norme applicable EN 61121 et le mieux adapté au séchage des textiles en coton standard chargés selon la capacité prévue.
  • Page 22: Informations Pratiques

    Informations pratiques Informations pratiques Entretien et nettoyage Nettoyage du filtre à peluches REMARQUE : • Les résidus accumulés sur le filtre à peluches empêchent Laissez le sèche-linge refroidir. l’air de circuler, ce qui augmente le temps de séchage et la consommation d’énergie; c’est pourquoi le filtre à peluches doit être nettoyé...
  • Page 23 Informations pratiques Informations pratiques Nettoyage du condenseur 4. Retirez le condenseur. Laissez le sèche-linge refroidir. Il est possible que de l’eau résiduelle s’écoule. Placez un 5. Nettoyez soigneusement le condenseur et laissez-le chiffon absorbant sous la trappe d’entretien. égoutter complètement. 6.
  • Page 24: Dépannage

    Informations pratiques Informations pratiques 3. Réinsérez le réservoir d’eau. ATTENTION : Seuls les techniciens agréés sont autorisés à procéder aux réparations. • Avant de contacter le service clients, assurez-vous d’avoir au préalable examiné le problème par vos soins et d’avoir bien respecté...
  • Page 25 Installatie Gebruik van het De selectie en de testen van de toestellen van VALBERG Werking g e b e u re n v o l le d i g o n d e r c o n t ro le e n s u p e r v i s i e v a n...
  • Page 26: Overzicht Van Het Toestel

    Overzicht van het toestel Gebruik van het toestel Beschrijving van het toestel Installatie Verpakking droogkast Plateau Reservoir Snoer Trommel Pluisfilter Bedieningspaneel Deur Uitpakken van de droogkast Luchttoevoer Handvat Onderhoudsluik Bedieningspaneel START/STOP Kan het toestel inschakelen of uitschakelen. Start/Pauze Druk op deze toets om de droogcyclus te starten of te onderbreken. OPGELET: •...
  • Page 27 Gebruik van het toestel Gebruik van het toestel Installatie Voor het gemak is het mogelijk uw condensdroger aan te sluiten op de waterafvoer. Let op! Aangezien de afvoerslang niet bij de levering is inbegrepen, raden wij u aan deze afzonderlijk Waterpas zetten aan te schaffen.
  • Page 28 Gebruik van het toestel Gebruik van het toestel Werking Snelle ingebruikname OPGELET: Vóór de eerste cyclus is het mogelijk dat er nog sporen van vet of stof (ontstaan tijdens de productie of OPMERKING: het transport) achtergebleven zijn in de droogkast. Om te Controleer of het toestel correct geïnstalleerd is vóór elk vermijden dat uw wasgoed vuil wordt, dient u de volgende gebruik.
  • Page 29 Gebruik van het toestel Gebruik van het toestel Referentiegewicht van de droge kleding (per stuk) OPMERKING: • De trommel nooit te vol laden. Kleding samengesteld uit stofmengelingen (ongeveer 800 g) • Geen doorweekt wasgoed laden. De droogkast zou beschadigd kunnen raken of vuur kunnen vatten. •...
  • Page 30 Gebruik van het toestel Gebruik van het toestel Bedieningspaneel 2. Bij een onverwachte stop tijdens het drogen en wanneer de droogkast indicaties weergeeft, raadpleegt u de paragraaf ‘Probleemoplossing’ om het probleem te verhelpen. Uitgesteld starten Andere functies Duur • Instructies voor de werking [Uitgesteld starten] Met deze functie kunt u het drogen tot 24 uur uitstellen.
  • Page 31 Gebruik van het toestel Gebruik van het toestel Tabel met de droogprogramma’s 1. De functie Intensiteit kan exclusief geactiveerd worden voor de start van het programma. 2. Druk verschillende keren op de knop [Intensiteit] om de duur van het drogen te selecteren. 3.
  • Page 32 Gebruik van het toestel Gebruik van het toestel OPMERKING: • Dit symbool hoort bij de energetische doeltreffendheid standaard katoenprogramma. overeenstemming met de geldende norm EN 61121 en is het beste aangepast aan het drogen van standaard katoenen textiel, geladen volgens de voorziene capaciteit. •...
  • Page 33: Praktische Informatie

    Praktische informatie Praktische informatie Onderhoud en reiniging OPMERKING: Reiniging van de pluisfilter • De resten die zich opgestapeld hebben in de filter Laat de droogkast afkoelen. verhinderen dat de lucht gaat circuleren, waardoor de droogtijd en het energieverbruik daalt; daarom dient u na elk gebruik de pluisfilter te reinigen.
  • Page 34 Praktische informatie Praktische informatie Reiniging van de condensor 4. Verwijder de condensor. Laat de droogkast afkoelen. 5. Reinig de condensor en laat deze volledig uitdruipen. Het is mogelijk dat restwater wegvloeit. Leg een absorberende doek onder het onderhoudsluik. 6. Maak de pakkingen schoon. 7.
  • Page 35 Praktische informatie Praktische informatie OPGELET: Herstellingen mogen uitsluitend door erkende technici worden uitgevoerd. • Alvorens de klantendienst te contacteren, gaat u na of u het probleem eerst onderzocht heeft en de gebruiksinstructies heeft nageleefd. • Zelfs in het kader van de garantie worden de adviezen van technici aangerekend.
  • Page 36 Descripción del aparato Índice Descripción del aparato Descripción del ¡Muchas gracias! aparato M u c h a s g r a c i a s p o r h a b e r e le g i d o n u e s t ro p ro d u c t o Instalación Utilización del VA L B E R G .
  • Page 37: Descripción Del Aparato

    Descripción del aparato Utilización del aparato Descripción del aparato Instalación Embalaje de la secadora Bandeja Depósito Cable Tambor Filtro de pelusas Panel de control Puerta Desembalaje de la secadora Entrada de aire Trampilla de mantenimiento Panel de control Marcha/Parada Permite poner en funcionamiento o apagar el aparato. Inicio/Pausa Pulse este botón para comenzar o interrumpir el ciclo de secado.
  • Page 38 Utilización del aparato Utilización del aparato Instalación y podría perjudicar el funcionamiento del aparato. Para mayor comodidad, es posible conectar su secadora de condensación al desagüe de agua. Tenga en cuenta. Como la manguera de desagüe no está incluida en la entrega, le recomendamos que compre una por separado.
  • Page 39 Utilización del aparato Utilización del aparato Funcionamiento Utilización rápida ATENCIÓN: Antes de poner el primer ciclo, puede haber restos de grasa o polvo en el interior debido a la fabricación OBSERVACIÓN: o el transporte del aparato. Para evitar contaminar su ropa, Antes de utilizar el aparato, asegúrese de que esté...
  • Page 40 Utilización del aparato Utilización del aparato Peso de referencia de las prendas secas (por unidad) OBSERVACIÓN: • No cargue en exceso el tambor. Tejidos compuestos de mezclas de tejidos (800 g aproximadamente) • No introduzca ropa empapada. La secadora podría dañarse o salir ardiendo.
  • Page 41: Panel De Control

    Utilización del aparato Utilización del aparato Panel de control 2. Si la secadora se para inesperadamente o si muestra indicaciones, consulte la sección «Solución de averías» dedicada a los fallos y las soluciones. Inicio diferido Otras funciones Duración • Instrucciones relativas a la función [Inicio diferido] Esta función permite diferir el secado de la ropa hasta 24 horas.
  • Page 42 Utilización del aparato Utilización del aparato Tabla de programas de secado 1. La función Intensidad puede activarse exclusivamente antes del inicio del programa. 2. Pulse varias veces el botón Intensidad para seleccionar la duración de secado. 3. Excepto los programas Planchado algodón, Aire caliente, Aire frío y Refrigerar, Delicado,Lana, el resto de programas pueden utilizarse con la función Intensidad.
  • Page 43 Utilización del aparato Utilización del aparato OBSERVACIÓN: • Este símbolo está asociado a la eficiencia energética del programa algodón estándar. Este se ajusta a la norma aplicable EN 61121 y es el que mejor se adapta al secado de ropa de algodón estándar según la capacidad prevista. •...
  • Page 44: Información Práctica

    Información práctica Información práctica Mantenimiento y limpieza OBSERVACIÓN: Limpieza del filtro de pelusas • Los restos acumulados en el filtro de pelusas impiden Deje que la secadora se enfríe. que el aire circule, lo que aumenta el tiempo de secado y el consumo de energía;...
  • Page 45 Información práctica Información práctica Limpieza del condensador 4. Retire el condensador. Deje que la secadora se enfríe. Puede que salga agua 5. L i m p i e b i e n e l co n d e n s a d o r y d é j e lo e s c u r r i r residual.
  • Page 46: Solución De Problemas

    Información práctica Información práctica ATENCIÓN: Sólo los técnicos acreditados están autorizados para realizar reparaciones. • Antes de ponerse en contacto con el servicio de atención al cliente, asegúrese de haber comprobado usted mismo el problema y de haber seguido correctamente las instrucciones de uso.
  • Page 47 Aperçu de l’appareil Sommario Descrizione dell’apparecchio Panoramica Grazie! dell’apparecchio G r a z i e d i a v e r s c e l t o q u e s t o p ro d o t t o VA L B E R G . Installazione Utilizzo S c e l t i , t e s t a t i e r a c c o m a n d a t i d a E L E C T R O D E P O T ,...
  • Page 48: Panoramica Dell'apparecchio

    Panoramica dell’apparecchio Utilizzo dell’apparecchio Descrizione dell’apparecchio Installazione Imballaggio dell’asciugabiancheria Piano Serbatoio Cavo Tamburo Filtro anti-lanugine Pannello di controllo Oblò Disimballaggio dell’asciugabiancheria Presa d’aria Maniglia Portello di manutenzione Pannello di controllo ON/OFF Permette di accendere o di spegnere l’apparecchio. Avvio/Pausa Premere questo pulsante per avviare o interrompere il ciclo di asciugatura. ATTENZIONE : Funzioni specifiche •...
  • Page 49: Installazione

    Utilizzo dell’apparecchio Utilizzo dell’apparecchio Installazione Per comodità, è possibile collegare l’asciugatrice a condensazione allo scarico dell’acqua. Si prega di notare! Poiché il tubo di scarico non è incluso nella consegna, si consiglia di acquistarne Livellamento uno separatamente. La tua asciugatrice ha un tubo, ma è troppo corto. Una volta collocato l’apparecchio nella sua posizione di funzionamento permanente, verificare che sia perfettamente a livello con l’aiuto di una livella a bolla.
  • Page 50: Funzionamento

    Utilizzo dell’apparecchio Utilizzo dell’apparecchio Funzionamento ATTENZIONE : Prima di avviare un ciclo per la prima volta, Guida introduttiva rapida è possibile che ci siano tracce di grasso o della polvere all’interno dell’asciugatrice derivanti dal processo di NOTA : fabbricazione o dal traporto dell’apparecchio. Per evitare di Prima dell’utilizzo, assicurarsi che l’apparecchio sia stato sporcare la biancheria, seguire queste istruzioni: installato correttamente.
  • Page 51 Utilizzo dell’apparecchio Utilizzo dell’apparecchio Peso di riferimento dei capi asciutti (per unità) NOTA : • Non sovraccaricare mai il tamburo. • Non caricare biancheria fradicia. L’asciugabiancheria Capi composti da tessuti misti (circa 800 g) potrebbe danneggiarsi o prendere fuoco. • Non adatto per l’asciugatura di materiali in lana o seta. Giacca (circa 800 g, in cotone) Attenzione, certi tessuti non sono adatti per l’asciugatura in asciugabiancheria.
  • Page 52: Pannello Di Controllo

    Utilizzo dell’apparecchio Utilizzo dell’apparecchio Pannello di controllo Altre funzioni • Istruzioni relative alla funzione [Avvio ritardato] Avvio ritardato Questa funzione permette di ritardare l’asciugatura della biancheria fino a 24 ore. La durata di avvio ritardato indica che il programma si avvierà x ore più tardi. Quando viene fatto partire il programma Durata con avvio ritardato, il tempo visualizzato diminuisce e l’icona di avvio ritardato lampeggia.
  • Page 53: Tabella Dei Programmi Di Asciugatura

    Utilizzo dell’apparecchio Utilizzo dell’apparecchio Tabella dei programmi di asciugatura 3. Eccettuati i programmi [Stiratura cotone], [ ], [Lana], [Aria calda], [Aria fredda] e [Rinfrescamento], tutti gli altri programmi possono essere utilizzati con la funzione [Intensità]. • Istruzioni relative alla funzione [Anti-piega] Al termine del ciclo di asciugatura, il procedimento anti-piega dura 30 minuti (durata predefinita) o 120 minuti (se selezionato).
  • Page 54 Utilizzo dell’apparecchio Utilizzo dell’apparecchio NOTA : • Questo simbolo è associato all’efficienza energetica del programma cotone standard. Questo programma è conforme alla norma applicabile EN 61121 ed è il più adatto per asciugare tessuti in cotone standard caricati rispettando la capacità prevista. •...
  • Page 55: Informazioni Pratiche

    Informazioni pratiche Informazioni pratiche Manutenzione e pulizia NOTA: Pulizia del filtro anti-lanugine • I residui accumulati sul filtro anti-lanugine impediscono Lasciar raffreddare l’asciugabiancheria. all’aria di circolare, facendo aumentare il tempo di asciugatura e il consumo di energia; è per questo che il filtro anti-lanugine deve essere pulito dopo ogni utilizzo.
  • Page 56 Informazioni pratiche Informazioni pratiche 8. Svitare le due leve di bloccaggio. 9. Chiudere il portello di manutenzione in modo che scatti correttamente. Se l’asciugabiancheria viene utilizzata regolarmente, pulire il condensatore ogni tre mesi. Fare attenzione a non danneggiare il condensatore! ATTENZIONE: •...
  • Page 57: Risoluzione Dei Problemi

    Informazioni pratiche Informazioni pratiche Problema Soluzione ATTENZIONE: • Verificare che l’alimentazione elettrica sia presente. • Verificare che la spina di alimentazione sia collegata • Svuotare il serbatoio dopo ogni utilizzo. Se questo Il display non si accende. correttamente. • Verificare il programma selezionato. raggiunge la capacità...

Ce manuel est également adapté pour:

971324

Table des Matières