Table des Matières
Publicité
Liens rapides
Publicité
Table des Matières

Manuels Connexes pour Krups NESPRESSO Vertuo My Machine XN900E10


Sommaire des Matières pour Krups NESPRESSO Vertuo My Machine XN900E10
- Page 1 Machine 9465_UM_ARES_C_KRUPS.indd 1 04.07.16 18:53...
-
Page 2: Table Des Matières
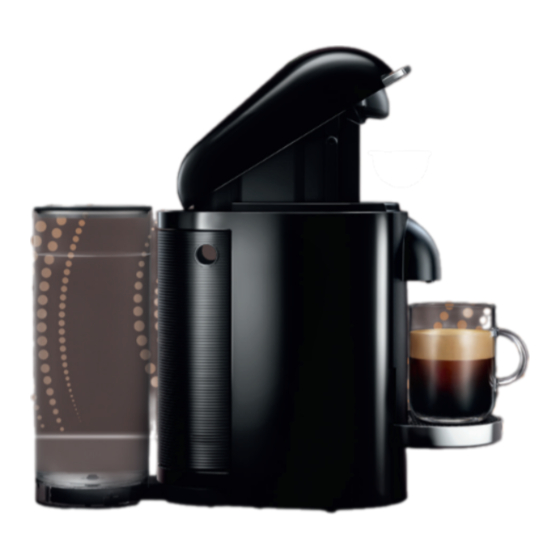
Nespresso Vertuo is an exclusive system creating a perfect coffee, from the Espresso to the large Mug, time after time. Nespresso Vertuo machines are equipped with the unique Centrifusion technology to gently extract a Mug, Gran Lungo or Espresso at the touch of a button. Each extracting parameter has ®... -
Page 3: Safety Precautions
CAUTION: Use of controls, adjustments or performance of SAFETY PRECAUTIONS procedures other than those specified here in may result in hazardous radiation exposure. • The appliance is and breakfast type whose experience CAUTION: when you see this sign, please intended to prepare environments. - Page 4 SAFETY PRECAUTIONS NOTE: This appliance contains a class-1 laser product. over sharp edges, appliance cool down. Avoid risk of fatal damage, never place electric shock and fire clamp it or allow it to the appliance on or • To disconnect the •...
- Page 5 never open it during • When unpacking Avoid possible harm used for an extended when operating the operation. time (holidays, etc.). the machine, remove appliance • Do not put fingers • Replace water in the plastic film and under coffee outlet, risk water tank when dispose.
-
Page 6: Safety Precautions/Consignes De Sécurité
SAFETY PRECAUTIONS CONSIGNES DE SÉCURITÉ • Nespresso reserves SAVE THESE AVERTISSEMENT: pourrez les retrouver the right to change INSTRUCTIONS Lorsque ce symbole et vous y référer instructions without Pass them on to any apparaît, veuillez ultérieurement� prior notice. subsequent user. consulter les •... - Page 7 ATTENTION: Les réglages, ajustements ou des procédures autres que ceux spécifiés ci-dessous peuvent entraîner une exposition dangereuse aux radiations. être utilisé dans: les aient plus de 8 ans et enfants ne jouent pas pincement de doigt. espaces cuisines des qu’ils soient sous la avec la machine.
- Page 8 CONSIGNES DE SÉCURITÉ NOTE: Cette machine contient un appareil laser de classe-1. cordon d’alimentation et peut provoquer des d’humidité. équivalente. • Si le cordon • Pour éviter tout danger, afin de ne pas décharges électriques d’alimentation est ne placez jamais la l’endommager.
- Page 9 pas parfaitement. • N’insérez pas vos Nespresso ou un votre machine avec un Débranchez-la doigts dans le revendeur Nespresso produit d’entretien ou un solvant puissant. immédiatement de compartiment à agréé. la prise électrique. capsules ni dans le • Remplissez toujours le Utilisez un chiffon Contactez le Club bac de récupération...
- Page 10 CONSIGNES DE SÉCURITÉ Détartrage en conditions réelles d’utilisation sont • Lorsqu’il est utilisé effectués de façon correctement, le détartrant Nespresso aléatoire sur des unités sélectionnées. permet d’assurer le Certaines machines bon fonctionnement peuvent donc montrer de votre machine tout des traces d’une au long de sa durée de utilisation antérieure.
-
Page 11: Overview/Présentation
OVERVIEW/PRÉSENTATION SPECIFICATIONS/ SPÉCIFICATIONS OFF/Open and Close Lever ON/Coffee Button XN900 Levier d'ouverture et fermeture / Arrêt Bouton café / Marche Couvercle 220 - 240 V, 50Hz, 1260 W ~ 4�6 kg Capsule Container Collecteur de 1�7 l capsules usagées Water Tank Réservoir d’eau If water tank on the If water tank at the back /... -
Page 12: Machine Handling/Manipulation De L'appareil
MACHINE HANDLING/ MANIPULATION DE L'APPAREIL WATER TANK/RÉSERVOIR D’EAU 1 The water tank arm can be rotated and positioned 2 Remove the water tank by tilting it slightly backwards, at the back, to the left or to the right hand side of the then gently pulling it up. - Page 13 SUPPORT/SUPPORT DE TASSE 1 The cup support has 4 positions 2 To place the cup support, slide cup support straight into and can be temporarily removed the holes and gently push down until the hooks are well to accommodate various cup in place.To remove it, gently lift straight up and then pull sizes.
-
Page 14: First Use Or After A Long Period Of Non-Use/ Première Utilisation Ou Après Une Longue Période D'inutilisation
FIRST USE OR AFTER A LONG PERIOD OF NON-USE/ PREMIÈRE UTILISATION OU APRÈS UNE LONGUE PÉRIODE D’INUTILISATION CAUTION: First read the important safeguards to avoid risks of fatal electrical shock and fire. AVERTISSEMENT: Avant toute chose, lire les consignes de sécurité pour éviter tout risque de décharge électrique mortelle ou d’incendie. 1 Rinse and clean the water 2 Ensure the capsule container and the cup support tank and lid before filling it... - Page 15 5 Steady GREEN lights will indicate the machine 6 Place a container of at least 0.4 l under the coffee outlet. is ready. Placer un récipient d’au moins 0.4 l sous l’orifice de La lumière VERTE et fixe indique que la machine sortie du café.
-
Page 16: Coffee Preparation/Préparation Du Café
COFFEE PREPARATION/ PRÉPARATION DU CAFÉ CAUTION: Be careful not to injure yourself on sharp points or trap your fingers when reaching inside the machine. AVERTISSEMENT: Soyez prudent de ne pas vous blesser sur les pointes coupantes ou de coincer vos doigts dans la machine. 1 Fill the water tank with 2 Turn the machine “ON”... - Page 17 7 Insert a capsule with the dome shape facing downward. 8 Push the lever down to close the Insérer une capsule en plaçant le côté arrondi vers le bas. machine head. Appuyer sur le levier vers le bas pour NOTE: fermer la tête de la machine.
-
Page 18: Energy Saving Concept/ Concept D'économie D'énergie
COFFEE PREPARATION/ PRÉPARATION DU CAFÉ 12 To manually top off your 13 To eject the capsule, open the coffee, push the button machine head by pushing the and push again to stop lever upwards. The machine when desired volume is head will open automatically reached. -
Page 19: Programming The Water Volume/ Programmation Du Volume D'eau
PROGRAMMING THE WATER VOLUME/ PROGRAMMATION DU VOLUME D’EAU 1 The programming is specific to each capsule size, 2 Open the machine head by pressing the lever upwards; Insert the capsule blend you Mug, Gran Lungo or Espresso. Cup sizes can be want to program;... -
Page 20: Special Functions/Fonctions Spéciales - Cleaning/Nettoyage
SPECIAL FUNCTIONS / FONCTIONS SPÉCIALES CLEANING / NETTOYAGE NOTE: The machine has a predefined cleaning procedure that can be launched at user discretion. NOTE: La machine comporte une procédure de nettoyage prédéfinie que l’utilisateur peut lancer en tout temps. CAUTION: Do not use any strong or abrasive cleaning agent or solvent cleaner. -
Page 21: Reset To Factory Settings/ Réinitialiser Les Paramètres De Réglage D'usine
RESET TO FACTORY SETTINGS/ RÉINITIALISER LES PARAMÈTRES DE RÉGLAGE D’USINE NOTE: Choose special function by pressing the lever down: 1 time for "Descaling". 2 times for "Emptying the system". 3 times for "Reset to factory settings" NOTE: Pour choisir les fonctions spéciales, appuyer sur le levier vers le bas: 1 fois pour le 'Détartrage'. 2 fois pour le mode 'vidange'. 3 fois pour 'Paramètres d'usine'. 1 Turn the machine "OFF"... -
Page 22: Emptying The System
EMPTYING THE SYSTEM BEFORE A PERIOD OF NON-USE, FOR FROST PROTECTION OR BEFORE A REPAIR VIDER LA MACHINE AVANT UNE PÉRIODE D’INUTILISATION, POUR LA PROTÉGER DU GEL OU AVANT UNE RÉPARATION 1 Empty the water 2 Open the machine head and let 3 Turn the machine "OFF"... -
Page 23: Descaling/Détartrage
DESCALING/DÉTARTRAGE ASSISTANCE VIDEOS ARE AVAILABLE ON WWW.NESPRESSO.COM - VISIT “MACHINES” SECTION/ ASSISTANCE VIDÉO DISPONIBLE SUR LE SITE WWW.NESPRESSO.COM - VOIR LA PAGE DES MACHINES NOTE: Duration: Approximately 20 minutes. NOTE: Durée approximative: 20 minutes. CAUTION: Read the important safeguards on the descaling package. The descaling solution can be harmful. Avoid contact with eyes, skin and surfaces. Never use any product other than the Nespresso descaling kit available through the Nespresso Club to avoid damage to your machine. - Page 24 DESCALING/DÉTARTRAGE ASSISTANCE VIDEOS ARE AVAILABLE ON WWW.NESPRESSO.COM - VISIT THE “MACHINES” SECTION/ ASSISTANCE VIDÉO DISPONIBLE SUR LE SITE WWW.NESPRESSO.COM - VOIR LA PAGE DES MACHINES NOTE: 7 Choose function by pressing the lever 8 Place a recipient Choose function within 2 down: (minimum volume: minutes or else the machine will go back to...
- Page 25 12 When ready, push the button to rinse the machine. Machine will stop automatically when complete. ORANGE light blinking once every 2 seconds confirms the descaling process is completed. The procedure can be stopped at any time by pushing the button. Quand vous êtes prêt, appuyez sur le bouton pour débuter le rinçage.
-
Page 26: Button Indicators/Blinking Summary/ Résumé Des Lumières Et Clignotements
BUTTON INDICATORS/BLINKING SUMMARY/ RÉSUMÉ DES LUMIÈRES ET CLIGNOTEMENTS O˝ 1˝ 2˝ NO LIGHT / PAS DE LUMIÈRE: No light on the button/ Machine OFF see point 1* ➔ La Lumière est éteinte Machine éteinte voir point 1* ➔ GREEN LIGHT - NORMAL USE / LUMIÈRE VERTE - UTILISATION NORMALE: Steady light/ Ready mode/... - Page 27 O˝ 1˝ 2˝ RED LIGHT - WARNING OR ERROR/ LUMIÈRE ROUGE - AVERTISSEMENT OU ERREUR: Blink two times and then back to ORANGE blinking/ Error while special function running see point 19* ➔ Deux clignotements puis clignotement ORANGE Erreur pendant une Fonction Spéciale Voir le point 19* ➔...
- Page 28 TROUBLESHOOTING ASSISTANCE VIDEOS ARE AVAILABLE ON WWW.NESPRESSO.COM - VISIT THE “MACHINES” SECTION ➔ The machine has turned “OFF” automatically; push the button to turn the machine “ON”. 1� No light on the button. ➔ Check the plug, voltage, and fuse. ➔...
- Page 29 RED LIGHT ➔ Descaling needed: Machine can be operated when alert appears only a few times after this alert before descaling becomes necessary. 13� Half GREEN and Half RED steady light. ➔ See paragraph on “Descaling”. 14� RED light blinking continuously and the machine head ➔...
-
Page 30: Troubleshooting/Guide De Dépannage
GUIDE DE DÉPANNAGE ASSISTANCE VIDÉO DISPONIBLE SUR LE SITE WWW.NESPRESSO.COM - VOIR LA PAGE DES MACHINES ➔ La machine s'est éteinte automatiquement. Appuyer sur le bouton pour la mettre sous tension. 1� Bouton éteint. ➔ Vérifier le connecteur, le voltage et les fusibles. ➔... - Page 31 LUMIÈRE ROUGE ➔ Doit être détartrée: La machine ne fonctionnera que quelques fois après l'apparition de l'alerte avant que le détartrage soit obligatoire. 13� Lumière fixe à moité VERTE et moité ROUGE. ➔ Voir la section détartrage. 14� La lumière ROUGE clignote en continu pendant que la tête ➔...
-
Page 32: Contact The Nespresso Club/Contacter Le Club Nespresso
CONTACT THE NESPRESSO CLUB/ CONTACTER LE CLUB NESPRESSO Should you need any additional information, in case of problems or simply to seek advice, call the Nespresso Club. Contact details for your nearest Nespresso Club can be found in the welcome material in your machine box or at nespresso.com Pour obtenir des renseignements supplémentaires, en cas de problème ou pour obtenir des conseils, appeler le Club Nespresso. -
Page 33: Limited Guarantee
GARANTIE NESPRESSO Krups guarantees this product against defects in materials and workmanship for a period of two years from the date of purchase. During this period, Krups will either repair or replace, at its discretion, any defective product at no charge to the owner. Replacement products or repaired parts will be guaranteed for only the unexpired portion of the original guarantee or six months, whichever is greater. - Page 34 9465_UM_ARES_C_KRUPS.indd 34 04.07.16 18:53...
- Page 35 9465_UM_ARES_C_KRUPS.indd 35 04.07.16 18:53...
- Page 36 www.nespresso.com 9465_UM_ARES_C_KRUPS.indd 36 04.07.16 18:53...