Table des Matières
Publicité
Les langues disponibles
Les langues disponibles
Liens rapides
Publicité
Table des Matières

Manuels Connexes pour Diamond G60/4BFEV6


Sommaire des Matières pour Diamond G60/4BFEV6
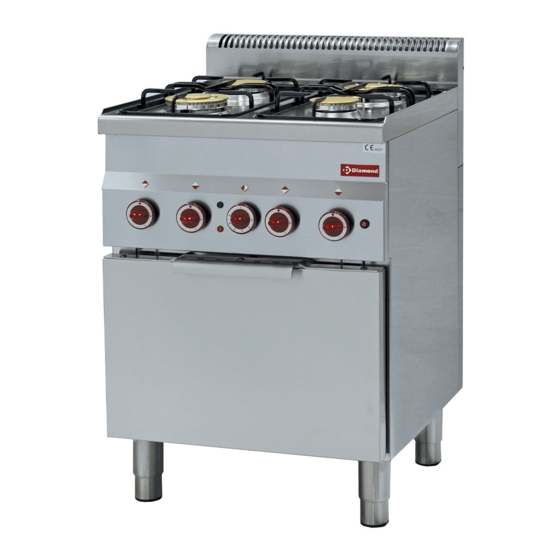
- Page 1 07/2012 Mod: G60/4BFEV6 Production code: 60/60 CFGE...
-
Page 2: Table Des Matières
COMPLIANCE WITH “EEC” DIRECTIVES FOR GAS ITALIANO INDICE APPLIANCES ..............5 3. TECHNICAL DATA TABLE FOR HOBS – COOKERS 1. AVVERTENZE ..............5 2. RISPONDENZA ALLE DIRETTIVE “CEE” ......5 (WITH GAS OVEN) .............. 13 RISPONDENZA ALLE DIRETTIVE "CEE" PER FORNI GAS CHARACTERISTICS .......... -
Page 3: Indice
KONTROLLE AUF GASLECKS ........20 REMPLACEMENT DU CÂBLE D'ALIMENTATION 5. VORBEREITUNG DER INSTALLATION – KOMBIHERDE (FOUR Â GAZ) ..............27 6. MAINTENANCE ............... 27 ..................... 20 TRANSFORMATION POUR FONCTIONNEMENT AVEC GESETZLICHE, TECHNISCHE UND ALLGEMEINE ..20 ..................27 INSTALLATION DER ELEKTROGERÄTE ....20 REMPLACEMENT DES PIECES DE RECHANGE –... - Page 4 TRASFORMACIÓN PARA FUNCIONAMIENTO CON OTROS GASES: HORNO DE COCINAS A GAS ..34 6.2.1 SUSTITUCIÓN DE LA TOBERA DEL QUEMADOR DEL HORNO DE GAS ..........34 6.2.2 REGULACIÓN DEL MÍNIMO DEL QUEMADOR DEL HORNO ..............35 7. INSTRUCCIONES PARA EL USUARIO ......35 CARACTERÍSTICAS TÉCNICAS ........
-
Page 5: Avvertenze
"Essential requirements Annex I° EEC Directive 90/396 MD 26/06/1990" MANUALE D’USO ITALIANO DEUTSCH MONTAGEANLEITUNG QUESTO APPARECCHIO È DESTINATO ALLA COTTURA DI ALIMENTI E DEVE ESSERE USATO ESCLUSIVAMENTE DA PERSONALE PROFESSIONALMENTE QUALIFICATO, NEL MODO DIESES GERÄT IST FÜR DIE GARUNG VON LEBENSMITTELN INDICATO DA QUESTO MANUALE DI ISTRUZIONI. -
Page 6: Conformité Aux Directives "Ue" Pour Appareils À Gaz
CONFORMITÉ DIRECTIVES "UE" POUR APPAREILS À GAZ Cet appareil a obtenu le certificat d'homologation "CE", ayant répondu aux paramètres des bancs d'essais effectués selon la norme : "Exigences essentielles Annexe I° Directive CEE 90/396 du 26/06/1990". ESPAÑOL INSTRUCCIONES DE USO ESTE APARATO ESTÁ... -
Page 7: Tabella Dati Tecnici Piani Di Cottura - Cucine
MANUALE D’USO ITALIANO 3. TABELLA DATI TECNICI PIANI DI COTTURA – CUCINE (CON FORNO GAS) DIAMETRO UGELLI IN CONSUMO GAS TOTALE CENTESIMI DI BRUCIATORI POTENZA POTENZA MILLIMETRO X POTENZA FORNO TOTALE MODELLO METANO METANO G30 – G31 G30 – G31 N°... -
Page 8: Istruzioni Per L'installatore Qualificato
4. ISTRUZIONI PER L'INSTALLATORE QUALIFICATO leggere attentamente le avvertenze contenute nel presente libretto in quanto forniscono importanti indicazioni riguardanti la sicurezza d’installazione, uso e manutenzione; INSTALLAZIONE DELL'APPARECCHIATURA conservare questo libretto per ogni ulteriore consultazione dei vari operatori Togliere l'apparecchiatura dall'imballo e posizionarla sempre sotto una cappa di aspirazione. -
Page 9: Sostituzione Del Cavo Di Alimentazione (Forno A Gas)
SOSTITUZIONE CAVO ALIMENTAZIONE (FORNO A GAS) Il cavo di alimentazione, che deve essere in H05 RR-F, di sezione 3x1 mm², può essere sostituito nel seguente modo: Aprire la morsettiera fig. sottostante; Inserire i conduttori nei rispettivi morsetti: N – L – Fissare il cavo nell'apposito fermacavo;... -
Page 10: Sostituzione Parti Di Ricambio - Bruciatori Top
deve essere quella prescritta sulla targhetta caratteristiche Candela di accensione (17): dell'apparecchio e sul libretto istruzioni (vedi tabella DATI TECNICI). Controllare la pressione di alimentazione inserendo un tubo di gomma con un manometro ad acqua o similare nella presa di pressione (10) saldata sulla rampa togliendo la vite (11). -
Page 11: Regolazione Del Minimo Bruciatore Forno
FORNO ELETTRICO VENTILATO SIMBOLOGIA Dopo aver tolto la suola copri-bruciatore svitare la vite di fissaggio del MANOPOLA bruciatore (22) ed estrarlo dal supporto insieme all’elemento termico e alla candela di accensione. Con una chiave a “tubo” da 7 svitare l’ugello (23), montare il nuovo ugello assicurandosi che sia ben avvitato fino in Rimane sempre accesa durante il fondo. -
Page 12: Manutenzione, Pulizia E Cura
forno. ATTENZIONE: il grill non funziona quando è inserita la funzione gas del forno. 8. MANUTENZIONE, PULIZIA E CURA ATTENZIONE: L’apparecchio non può essere spruzzato né con un getto d’acqua diretto, né con idropulitrice! Prima di iniziare le operazioni di pulizia l’apparecchiatura deve essere staccata dalla tensione elettrica tramite l’interruttore principale. -
Page 13: English
USER’S MANUAL ENGLISH 3. TECHNICAL DATA TABLE FOR HOBS – COOKERS (WITH GAS OVEN) DIAMETER OF NOZZLES TOTAL GAS IN HUNDREDTHS OF A BURNERS POWER TOTAL CONSUMPTION MILLIMETRE X POWER OVEN POWER MODEL METHANE METHANE G30 – G31 G30 – G31 No. -
Page 14: Instructions For The Qualified Installer
4. INSTRUCTIONS FOR THE QUALIFIED INSTALLER Installation must be carried out in compliance with the laws in force in the country where the appliance is installed. APPLIANCE INSTALLATION manufacturer declines responsibility appliance malfunctions due to incorrect installation, tampering, improper use, bad ... -
Page 15: Maintenance
Adjusting the minimum: remove the knobs (8) of the cocks and, using a screwdriver, act on the minimum adjustment screw (9) of the cock until you obtain the Power cord adjustment you desire. Feed pressure: 6. MAINTENANCE Maintenance is reduced to a minimum due to the correct construction of the appliances. -
Page 16: Transformation For Operating With Other
pull the spark plug connection cable off (18), remove the retaining spring (20), pull the spark plug off Piezoelectric igniter (19) see previous photos: remove the panel, pull the spark plug connection cable off (18), remove the fixing nut (21) of the piezoelectric igniter and replace it. TRANSFORMATION FOR OPERATING WITH OTHER GASES –... -
Page 17: Instructions For The User
From natural gas to liquid gas: after having removed the control panel, can be used to defrost food more use a screwdriver to turn the adjustment screw all the way clockwise quickly) (24) From liquid gas to natural gas: after having removed the control panel, 7.2.1 INDICATOR LIGHTS (ELECTRIC OVEN) turn the oven on at 250°C for at least 10-15 minutes. - Page 18 What to do if the appliance is going to be out of use for long periods of time. First of all disconnect it from the electricity. Clean it thoroughly, following the instructions, and dry it. What to do in the case of malfunctions. In the case of failures, turn the appliance off and notify the assistance service.
-
Page 19: Deutsch
DEUTSCH MONTAGEANLEITUNG 3. TABELLE TECHNISCHE DATEN KOCHFELDER – HERDE (MIT GAS OFEN) DURCHMESSER DÜSEN IN GESAMT-GASVERBRAUCH HUNDERSTEL MILLIMETER BRENNER LEISTUNG GESAMT- MODELL X LEISTUNG OFEN LEISTUNG FLÜSSIG- ERDGAS ERDGAS FLÜSSIG- ERDGAS ERDGAS Anzahl x kW kg/h m³/h m³/h 50 mbar 20 mbar 20 mbar 1 x 2,8... -
Page 20: Anweisungen Für Den Installateur
4. ANWEISUNGEN FÜR DEN INSTALLATEUR Vorschriften der Unfallverhütung INSTALLATION DES GERÄTES Gültige Vorschriften des Landes der Geräteaufstellung; Aufmerksam die Hinweise dieses Heftes lesen, da sie wichtige Anweisungen zur Sicherheit der Installation, der Benutzung und Das Gerät aus der Verpackung nehmen und und immer unter Wartung enthalten;... -
Page 21: Austausch Des Versorgungskabels
ANMERKUNG: Der Hersteller übernimmt keine Verantwortung im Falle einer Nichtbeachtung der gesetzlichen Vorschriften zur Unfallverhütung, wie oben beschrieben! AUSTAUSCH VERSORGUNGSKABELS (GASBACKOFEN) Das VersorgungsKabel, das aus H05 rr-F mit Querschnitt 3x1 mmq sein muss, kann wie folgt ausgestauscht werden: Die Klemmleiste wie unten in der Abbildung gezeigt, öffnen; Die Leitungen in die entsprechenden Klemmen einsetzen: N-L- Das Kabel in der Kabelhalterung befestigen;... -
Page 22: Austausch Ersatzteile - Brenner Top
Tabelle TECHNISCHE DATEN). Kontrollieren drehen Befestigungsmuttern Winkelhalterung Versorgungsdruck, indem sie einen Gummischlauch mit einem Thermoelement es ab (16), Wassermanometer oder ähnlichen Rampe ersetzen Sie das Thermoelement. festgeschweißte Druckdose (10) einführen und die Schraube (11) entfernen. Nach erfolgter Kontrolle drehen sie die Schraube der Zündkerze (17): Druckdose wieder fest. -
Page 23: Einstellung Des Minimumswerts
nachdem sie den Sockel der Brennerabdeckungen entfernt haben, Wenn dieser Vorgang abgeschlossen ist, lassen Sie ihn erkalten und drehen sie die Befestigungsschraube des Brenners (22) ab und ziehen reinigen Innere warmem Wasser mildem Sie ihn mit dem Thermoelement und der Zündkerze aus der Halterung. Reinigungsmittel. -
Page 24: Elektrischer Rost
Zündloch 7.3.2 ELEKTRISCHER ROST Infrarotrost: Der Backofen ist mit einem Energieregulator ausgestattet. Die Intensität der Strahlung des Widerstandes kann mit dem spezifischen Griff von MIN. bis MAX. eingestellt werden. Wenn die Funktion Rost eingestellt ist, leuchtet die orangene Leuchtanzeige auf und gleichzeitig hierzu die interne Lampe des Ofens. -
Page 25: Français
MODE D’EMPLOI FRANÇAIS 3. TABLEAU DES CARACTÉRISTIQUES TECHNIQUES – PLANS DE CUISSON – CUSINIÈRES (AVEC FOUR A GAZ) DIAMÈTRE INJECTEURS CONSOMMATION GAZ EN CENTIÈMES DE BRÛLEURS PUISSANCE PUISSANCE TOTALE MILLIMÈTRE X PUISSANCE FOUR TOTALE MODÈLE MÉTHANE MÉTHANE G30 – G31 G30 –... -
Page 26: Instructions Pour L'installateur Agréé
4. INSTRUCTIONS POUR L'INSTALLATEUR AGRÉÉ lire attentivement les recommandations de ce livret car elles fournissent des indications importantes sur la sûreté de INSTALLATION DE L'APPAREIL l'installation, l'utilisation et l'entretien de l'appareil ; conserver ce livret d'instructions afin qu'il puisse être consulté à ... -
Page 27: Remplacement Du Câble D'alimentation (Fourâ Gaz)
REMPLACEMENT DU CÂBLE D'ALIMENTATION (FOUR Â GAZ) Le câble d'alimentation, qui doit être H05 RR-F, de 3 x 1 mm section, peut être remplacé de la façon suivante : Ouvrir le boîtier de connexion fig. ci-dessous ; Enfiler les conducteurs dans les bornes correspondantes : N – L – Fixer le câble dans le serre-câble prévu à... -
Page 28: Remplacement Des Pieces De Rechange - Bruleurs Top
TECHNIQUES). Contrôler la pression d'alimentation en insérant un tuyau en caoutchouc avec un manomètre à eau ou similaire dans la prise de pression (10) soudée sur la rampe en enlevant la vis (11). Dès que le contrôle est effectué, resserrer la vis de la prise de pression. Si la pression d'alimentation était différente de celle prescrite, rechercher la cause et faire en sorte de la remettre correctement. -
Page 29: Reglage Du Minimum Bruleur Four
6.2.2 REGLAGE DU MINIMUM BRULEUR FOUR Réglage du thermostat de MIN. à MAX (En sélectionnant cette fonction et en Résistance positionnant le thermostat à 0°C, on supérieure et aura seulement le fonctionnement du inférieure ventilateur, cette fonction peut être utilisée pour décongeler plus... -
Page 30: Nettoyage De L'interieur Du Four
Les parties en acier doivent être nettoyées avec un chiffon doux, de l'eau et un produit détergent ne contenant ni chlore ni substances abrasives qui risqueraient d'endommager les surfaces en acier. Une fois le nettoyage terminé, rincer à l'eau claire et essuyer avec un chiffon sec. -
Page 31: Español
ESPAÑOL INSTRUCCIONES DE USO 3. TABLA DATOS TÉCNICOS – PLACAS COCCIÓN – COCINAS (CON HORNO GAS) DIÁMETRO BOQUILLAS CONSUMO TOTAL GAS EN CENTÉSIMAS DE QUEMADORES POTENCIA POTENCIA MILÍMETRO X POTENCIA HORNO TOTAL MODELO METANO METANO G30 – G31 G30 – G31 N°... -
Page 32: Cualificado
4. INSTRUCCIONES PARA EL INSTALADOR CUALIFICADO leer detenidamente las advertencias presentadas en este folleto, ya que proporcionan indicaciones importantes acerca de la INSTALACIÓN DEL EQUIPO seguridad de instalación, uso y mantenimiento; guardar este folleto para cualquier futura consulta por parte de ... -
Page 33: Sustitución Del Cable De Alimentación
SUSTITUCIÓN DEL CABLE DE ALIMENTACIÓN (HORNO A GAS) El cable de alimentación, que debe ser en H05 RR-F y de 3x1 mm² de sección, puede sustituirse de la siguiente manera: Abrir la bornera fig. de abajo; Introducir los conectores en los respectivos bornes: N – L – Fijar el cable en el sujetacable correspondiente;... -
Page 34: Sustitución De Los Repuestos: Quemadores Superiores
Controle la presión de alimentación: introduzca un tubo de goma con un manómetro de agua o similar en la toma de presión (10) soldada en la pendiente al quitar el tornillo (11). Luego de realizar el control, atornille nuevamente la toma de presión. Si la presión de alimentación es diferente de la que se indica, busque la causa y restitúyala según lo indicado. -
Page 35: Regulación Del Mínimo Del Quemador Del Horno
operación inversa a lo descripto anteriormente, para finalizar introduzca nuevamente la placa cubrequemadores. Permanece siempre encendida Luz del horno durante el funcionamiento del horno 6.2.2 REGULACIÓN DEL MÍNIMO DEL QUEMADOR DEL HORNO Regulación del termostato de MÍN. a MÁX. seleccionar esta función Resistencia... -
Page 36: Mantenimiento, Limpieza Y Cuidado
8. MANTENIMIENTO, LIMPIEZA Y CUIDADO ATENCIÓN: ¡No se puede rociar el aparato ni con chorros directos de agua ni con hidrolimpiadoras! Antes de empezar las operaciones de limpieza se debe desenchufar el aparato de la red mediante el interruptor principal. Las partes en acero se deben limpiar con un paño suave, con agua y detergente, los detergentes no deben contener cloro ni abrasivos ya que podrían estropear las superficies de acero. -
Page 37: Esquemas De Instalación
9. SCHEMI DI INSTALLAZIONE - INSTALLATION DIAGRAMS – INSTALLATIONSSCHEMEN - SCHEMAS D'INSTALLATION - ESQUEMAS DE INSTALACIÓN... -
Page 40: Esquema Eléctrico
10. SCHEMI ELETTRICI - ELECTRICAL DIAGRAM - ELEKTRISCHES SCHEMA - SCHÉMA ÉLECTRIQUE - ESQUEMA ELÉCTRICO... -
Page 41: Datos Técnicos
11. DATI DI TARGA - TECHNICAL DATA – TECHNISCHE DATEN – DONNÉES TECHNIQUES - DATOS TÉCNICOS...