Télécharger Imprimer la page
JAROLIFT TDRRT01W Mode D'emploi Original

JAROLIFT TDRRT01W Mode D'emploi Original

Masquer les pouces Voir aussi pour TDRRT01W:

Publicité

Les langues disponibles
  • FR

Les langues disponibles

  • FRANÇAIS, page 20

Liens rapides

Sie erreichen uns
Service-Hotline
unter der
+49 8178 - 932 932
Eine aktuelle Version dieser Anleitung finden Sie auf
https://www.jalousiescout.de/anleitungen
A detailed, current instructions can be found at
https://www.jalousiescout.de/anleitungen
FUNKempfänger
Sevenlogic Comfort Funk
Funkempfänger - Timer
FÜR ROHRMOTOREN OHNE FUNK
original montage- und bedienungsanleitung
Original Montageanleitung
DE
Original instructions
EN
Mode d'emploi original
FR
Instrucciones originales
ES
Manuale d'uso originale
IT
Originele gebruiksaanwijzing
NL
Oryginalna instrukcja obsługi
PL
TDRrT01W
Montage UNTERputz
in standard schalterdose
Für alle Rohrmotoren
ohne integriertem Funk
V3.01-12.21

Publicité

loading

Sommaire des Matières pour JAROLIFT TDRRT01W

  • Page 1 Montage UNTERputz in standard schalterdose A detailed, current instructions can be found at Für alle Rohrmotoren https://www.jalousiescout.de/anleitungen ohne integriertem Funk FUNKempfänger TDRrT01W Sevenlogic Comfort Funk Funkempfänger - Timer FÜR ROHRMOTOREN OHNE FUNK original montage- und bedienungsanleitung Original Montageanleitung Original instructions Mode d‘emploi original...
  • Page 2: Table Des Matières

    Anschluss ������������������������������������������������������������������ 6 Montage / Funktionsübersicht ��������������������������������������������������� 7 Programmierung ��������������������������������������������������������������������������� 8 Einstellungen ��������������������������������������������������������������������������� 9-10 Notizen ������������������������������������������������������������������������������������ 65-67 Kontaktinformationen ����������������������������������������������������������������68 Der Funkempfänger Jarolift TDRRT01W erfüllt die Anforderungen der geltenden europäischen und nationalen Richtlinien. 2014/30/EU - EMV-Richtlinie 2014/35/EU - Niederspannungsrichtlinie 2014/53/EU - RED-Richtlinie 2011/65/EU und 2015/863/EU - RoHS-Richtlinie Draft EN 301 489-1 V2.2.0:2017...
  • Page 3: Allgemeine Sicherheitshinweise

    ALLGEMEINE SICHERHEITSHINWEISE • Führen Sie alle Montage- und Anschluss- WARNUNG! arbeiten im spannungsfreien Zustand Wichtige Sicherheitsanweisungen! aus. • Für die Sicherheit von Personen ist es wichtig, diese Anweisungen zu befolgen! WARNUNG! • Bitte bewahren Sie die Anleitung auf und Bei Nichtbeachtung besteht Lebensge- übergeben Sie diese bei einem Besitzer- fahr! wechsel an den neuen Besitzer!
  • Page 4 ALLGEMEINE SICHERHEITSHINWEISE panzer oder anderen beweglichen Teilen • Deaktivieren Sie die Funktion Automati- der Anlage kommt. sches Öffnen und Schließen der Sende- einrichtung bei Schneefall, Vereisung • Für den elektrischen Anschluss muss am oder Frostgefahr, um Schäden am Motor Einbauort ständig ein Stromanschluss mit oder der angetriebenen Anlage zu ver- 230 V/50 Hz und bauseitiger Freischalt- meiden.
  • Page 5 ALLGEMEINE SICHERHEITSHINWEISE Funksteuerung identisch ist, können den WICHTIG! Empfang stören. Nach der DIN EN 13659 muss dafür WICHTIG! Sorge getragen werden, dass die für die Behänge festgelegten Verschiebebe- Entsorgen Sie das Ge- dingungen nach EN 12045 eingehalten rät und ggf. zum Betrieb werden, Behänge also seitlich arretiert des Gerätes notwendige sind.
  • Page 6: Technische Daten & Lieferumfang

    0°C b is + 50 °C Einschaltdauer Relaiausgang ca. 240 Sek. Funkkanäle 1 Kanal Kompatibilität Jarolift TDRC Hand- und Wandsender Lieferumfang Vergleichen Sie nach dem Auspacken den Packungsinhalt mit den Angaben zum Lieferumfang in dieser Anleitung: 1. Funkempfänger TDRR02W (Netzteil / Empfängermodul) 2.
  • Page 7: Montage / Funktionsübersicht

    MONTAGE montage des funkempfängers Beachten Sie den Anschlussplan auf Seite 6. • Der Netzanschluss des Funkempfängers und alle Arbeiten an elektrischen Anlagen dürfen nur durch eine zugelassene Elektrofachkraft nach den Anschlussplänen in dieser Anleitung erfolgen. • Führen Sie alle Montage- und Anschlussarbeiten im spannungsfreien Zustand aus. Drücken Sie das Netzteil aus dem inneren Tragrahmen und dem Außenrahmen.
  • Page 8: Programmierung

    Schließen Sie den Funkempfänger entsprechend der Montageanleitung (siehe Seite 6) an. Drücken Sie für ca. 3 Sekunden die Stopp-Taste des TDRRT01W um den Lernmodus zu aktivieren. Der angeschlossene Motor wird kurz vibrieren und die LED-Kontrollleuchte erlischt um zu signalisieren, dass sich der Empfänger für ca.
  • Page 9: Einstellungen

    EINSTELLUNGEN ändern der drehrichtung des motors WICHTIG! Die Drehrichtung des Motors (AUF / AB) muss nach dem Einlernen des ersten Senders geprüft und ggf. geändert werden! Die Taste AUF muss Rollläden und Jalousien ÖFFNEN und Markisen SCHLIESSEN! Die Taste AB muss Rollläden und Jalousien SCHLIESSEN und Markisen ÖFFNEN! Dies ist insbesondere in Verbindung mit zeitgesteuerten oder anderen Automatikgeräten gesteuerten Anlagen zu be- achten.
  • Page 10 einstellungen - uhrzeit - auf- und abfahrzeiten Einstellen der aktuellen Uhrzeit und des Datums Drücken Sie im Hauptmenü die K1-Taste (Beschreibung s. Seite 7). In der linken oberen Ecke erscheint ein Uhrensymbol und die Stundenanzeige blinkt. Stellen Sie die Uhrzeit über die AUF- / AB- Taste ein und bestätigen Sie die Eingabe über die K1-Taste.
  • Page 11 Assembly / Function overview ��������������������������������������������������16 Programming �������������������������������������������������������������������������������17 Settings ����������������������������������������������������������������������������������� 18-19 Notes ���������������������������������������������������������������������������������������� 65-67 Contact information��������������������������������������������������������������������68 The Jarolift TDRRT01W radio receiver fulfils the requirements of the applicable European and national directives. 2014/30/EU - EMC Directive 2014/35/EU - Low Voltage Directive 2014/53/EU - RED Directive 2011/65/EU and 2015/863/EU - RoHS Directive Draft EN 301 489-1 V2.2.0:2017...
  • Page 12: General Safety Instructions

    GENERAL SAFETY INSTRUCTIONS WARNING! WARNING! Important safety instructions! Failure to comply may result in danger to • For the safety of persons it is important to life! follow these instructions! • When using in damp rooms, observe • Please keep the instructions and hand the regulations for installation in damp them over to the new owner when chan- rooms, especially the...
  • Page 13 ALLGEMEINE SICHERHEITSHINWEISE site. radio receiver. • Attach permanently mounted control de- • Watch the moving installation (roller vices in a visible position. shutter, awning, blind) and keep peop- le away from it until the movement has • Both rated torque and rated operating stopped.
  • Page 14: Important

    GENERAL SAFETY INSTRUCTIONS stations) whose transmission frequency is IMPORTANT! identical to that of the radio control unit can interfere with reception. According to DIN EN 13659, it must be ensured that the displacement condi- IMPORTANT! tions specified for the hangings accor- ding to EN 12045 are complied with, Do not dispose of the i.e.
  • Page 15: Technical Data / Scope Of Delivery

    Duty cycle Relay output ca. 240 Sek. Radio channels 1 Kanal Compatibility Jarolift TDRC hand and wall transmitter Scope of delivery After unpacking, compare the con- tents of the package with the informa- tion on the scope of delivery in these instructions: 1.
  • Page 16: Assembly / Function Overview

    ASSEMBLY mounting the radio receiver Observe the connection diagram on page 6. • The mains connection of the radio receiver and all work on electrical installations may only be carried out by an authorised electrician in accordance with the connection diagrams in this manual. by an authorised electrician in accordance with the connection diagrams in this manual.
  • Page 17: Programming

    Connect the radio receiver according to the installation instructions (see page 6). Press the stop button of the TDRRT01W for approx. 3 seconds to activate the learning mode. The connected motor will vibrate briefly and the LED indicator light will go out to signal that the receiver is in learning mode for approx.
  • Page 18: Settings

    SETTINGS changing the direction of rotation of the motor IMPORTANT! The direction of rotation of the motor (UP / DOWN) must be checked and, if necessary, changed after teaching in the first transmitter. changed! The OPEN button must OPEN roller shutters and blinds and CLOSE awnings! The DOWN button must CLOSE roller shutters and blinds and OPEN awnings! This must be observed in particular in connection with time-controlled or other automatic devices controlled installa- tions.
  • Page 19 settings - time - up and down times Setting the current time and date Press the K1 key in the main menu (description see page 7). A clock symbol appe- ars in the upper left corner and the hour display flashes. Set the time using the UP / DOWN key and confirm the entry using the K1 key.
  • Page 20 EN 60669-2-1 :2004/A 12:2010 EN 62479:2010 Le texte complet de la déclaration de conformité UE est disponible à l'adresse Internet suivante : https://www.jarolift.de/konformitaetserklaerungen.html N° d'enregistrement WEEE DE 41060608 for : JAROLIFT®™ Schoenberger Allemagne Entreprises GmbH & Co. KG Rue Zech 1-7 Michael Mayer 82069 Hohenschäftlarn...
  • Page 21: Consignes Générales De Sécurité

    CONSIGNES GÉNÉRALES DE SÉCURITÉ par électrocution! AVERTISSEMENT! • Effectuez tous les travaux de montage et Instructions de sécurité importantes! de raccordement hors tension. • Pour la sécurité des personnes, il est im- portant de suivre ces instructions! AVERTISSEMENT! • Veuillez conserver ce mode d'emploi et le En cas de non-respect, il y a danger de remettre au nouveau propriétaire en cas mort!
  • Page 22 CONSIGNES GÉNÉRALES DE SÉCURITÉ n'entre pas en contact avec le tablier du pour le raccordement aux moteurs de volet roulant ou d'autres parties mobiles volets roulants, de stores et de stores de l'installation. vénitiens. • Pour le raccordement électrique, une •...
  • Page 23 CONSIGNES GÉNÉRALES DE SÉCURITÉ D'autres installations d'émission (par ex. IMPORTANT! casques radio, babyphones, stations mé- téo radio) dont la fréquence d'émission Selon la norme DIN EN 13659, il faut est identique à celle de la radiocommande veiller à ce que les conditions de dépla- peuvent perturber la réception.
  • Page 24: Données Techniques / Contenu De La Livraison

    Durée d'enclenchement sortie relais ca. 240 Sek. Canaux radio 1 Kanal Compatibilité Jarolift TDRC Émetteur manuel et mural Contenu de la livraison Après avoir déballé l'appareil, com- parez le contenu de l'emballage avec les informations relatives à la livraison figurant dans ce manuel : 1.
  • Page 25: Montage Du Récepteur Radio

    MONTAGE montage du récepteur radio Respectez le schéma de connexion de la page 6. • Le raccordement au réseau du récepteur radio et tous les travaux sur les installations électriques ne doivent être effectués que par un électricien agréé, conformément aux schémas de raccordement figurant dans les présentes instructions. •...
  • Page 26: Programmation

    Raccordez le récepteur radio conformément aux instructions de montage (voir page 6). Appuyez sur le bouton d'arrêt du TDRRT01W pendant environ 3 secondes pour activer le mode d'apprentissage. Le moteur connecté vibrera brièvement et le témoin lumineux LED s'éteindra pour signaler que le récepteur est en mode de programmation pendant environ 5 secondes.
  • Page 27: Réglages

    RÉGLAGES changer le sens de rotation du moteur IMPORTANT! Le sens de rotation du moteur (MONTEE / DESCENTE) doit être vérifié et éventuellement modifié après la programmation du premier émetteur! La touche MONTÉE doit permettre d'OUVRIR les volets roulants et les stores et de FERMER les stores! La touche BAS doit FERMER les volets roulants et les stores et OUVRIR les stores! Il convient d'en tenir compte, notamment en liaison avec des installations commandées par minuterie ou par d'autres appareils automatiques.
  • Page 28: Réglage De L'heure Et De La Date Actuelles

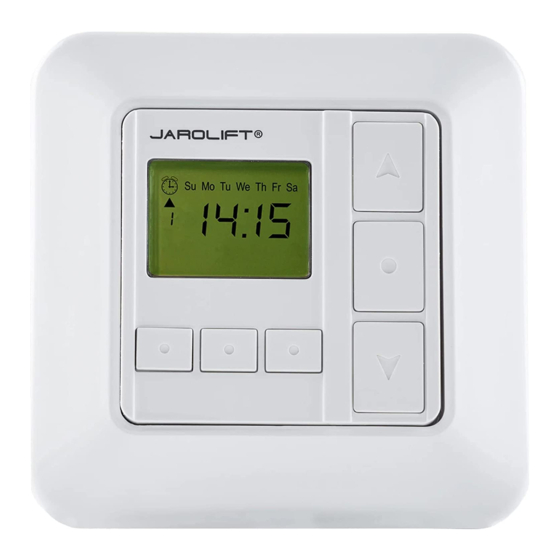
    réglages - heure - heures de montée et de descente Réglage de l'heure et de la date actuelles Dans le menu principal, appuyez sur la touche K1 (description voir page 7). Un symbole d'horloge apparaît dans le coin supérieur gauche et l'affichage des heures clignote.
  • Page 29 EN 62479:2010 El texto completo de la declaración de conformidad de la está disponible en la siguiente dirección de Internet: https://www.jarolift.de/konformitaetserklaerungen.html Nº de registro WEEE DE 41060608 para: JAROLIFT®™ Schoenberger Alemania Empresas GmbH & Co. KG Zechstrasse 1-7 Michael Mayer 82069 Hohenschäftlarn...
  • Page 30: Instrucciones Generales De Seguridad

    INSTRUCCIONES GENERALES DE SEGURIDAD ¡ADVERTENCIA! ¡ADVERTENCIA! Instrucciones de seguridad importantes. El incumplimiento puede poner en pelig- • Para la seguridad de las personas es im- ro la vida! portante seguir estas instrucciones! • Si se utiliza en locales húmedos, hay que •...
  • Page 31: Allgemeine Sicherheitshinweise

    ALLGEMEINE SICHERHEITSHINWEISE instalación de una conexión de corriente de nevadas, heladas o peligro de heladas con 230 V/50 Hz y de un dispositivo de para evitar daños en el motor o en la uni- desconexión in situ (fusible). dad accionada. •...
  • Page 32 INSTRUCCIONES GENERALES DE SEGURIDAD No instale el radiomando en la proximidad ¡IMPORTANTE! directa de grandes superficies metálicas. Según la norma DIN EN 13659, debe Otros dispositivos de transmisión (por garantizarse que se cumplan las condi- ejemplo, auriculares de radio, monitores de ciones de desplazamiento especificadas bebés, estaciones meteorológicas de radio) para las suspensiones según la norma...
  • Page 33: Datos Técnicos / Volumen De Suministro

    Ciclo de trabajo Salida de relé ca. 240 Sek. Canales de radio 1 Kanal Compatibilidad Transmisor manual y de pared Jarolift TDRC Alcance de la entrega Después de desembalar, compare el contenido del paquete con la informa- ción sobre el alcance de la entrega en estas instrucciones: 1.
  • Page 34: Montaje / Resumen De Funciones

    MONTAJE montaje del receptor de radio Observe el esquema de conexión de la página 6. • La conexión a la red eléctrica del receptor de radio y todos los trabajos en las instalaciones eléctricas sólo pueden ser reali- zados por un electricista autorizado de acuerdo con los esquemas de conexión de este manual. por un electricista autoriza- do de acuerdo con los esquemas de conexión de este manual.
  • Page 35: Programación

    Conecte el receptor de radio según las instrucciones de instalación (véase la página 6). Pulse el botón de parada del TDRRT01W durante unos 3 segundos para activar el modo de aprendizaje. El motor conectado vibrará brevemente y la luz indicadora LED se apagará para señalar que el receptor está en modo de aprendizaje durante unos 5 segundos.
  • Page 36: Ajustes

    AJUSTES cambiar el sentido de giro del motor ¡IMPORTANTE! El sentido de giro del motor (ARRIBA/ABAJO) debe comprobarse y, en su caso, modificarse tras el aprendizaje en el primer transmisor. ¡cambiado! El botón OPEN debe abrir las persianas y los toldos y cerrarlos! El botón DOWN debe CERRAR las persianas y los toldos y ABRIRlos! Esto debe observarse especialmente en relación con los sistemas controlados por tiempo u otros dispositivos automá- ticos.
  • Page 37 ajustes - tiempo - tiempos de subida y bajada Ajuste de la hora y la fecha actuales Pulse la tecla K1 en el menú principal (descripción en la página 7). Aparece un sím- bolo de reloj en la esquina superior izquierda y la indicación de la hora parpadea. Ajuste la hora con la tecla UP / DOWN y confirme la entrada con la tecla K1.
  • Page 38 EN 60669-2-1 :2004/A 12:2010 EN 62479:2010 Il testo completo della dichiarazione di conformità UE è disponibile al seguente indirizzo internet: https://www.jarolift.de/konformitaetserklaerungen.html WEEE Reg. No. DE 41060608 per: JAROLIFT®™ Imprese Schoenberger Germania GmbH & Co. KG Zechstrasse 1-7 Michael Mayer 82069 Hohenschäftlarn CEO / Geschäftsführer...
  • Page 39: Istruzioni Generali Di Sicurezza

    ISTRUZIONI GENERALI DI SICUREZZA ATTENZIONE! ATTENZIONE! Importanti istruzioni di sicurezza! L'inosservanza può comportare un peri- • Per la sicurezza delle persone è importan- colo di vita! te seguire queste istruzioni! • In caso di utilizzo in ambienti umidi, • Conservate le istruzioni e consegnatele al osservare le norme per l'installazione in nuovo proprietario al momento del cam- ambienti umidi, in particolare la...
  • Page 40 ALLGEMEINE SICHERHEITSHINWEISE namento in loco (fusibile). • Utilizzare solo componenti e accessori originali del produttore. • Fissare i dispositivi di controllo montati in modo permanente in una posizione • Istruire tutte le persone sull'uso sicuro del visibile. radioricevitore. • Sia la coppia nominale che il tempo di •...
  • Page 41 ISTRUZIONI GENERALI DI SICUREZZA Altri dispositivi di trasmissione (ad esempio, IMPORTANTE! cuffie radio, baby monitor, stazioni meteo radio) la cui frequenza di trasmissione è Secondo la norma DIN EN 13659, si identica a quella della centralina radio può deve garantire che le condizioni di interferire con la ricezione.
  • Page 42: Collegamento Elettrico

    Ciclo di lavoro Uscita a relè ca. 240 Sek. Canali radio 1 Kanal Compatibilità Trasmettitore a mano e a parete Jarolift TDRC Ambito di consegna Dopo il disimballaggio, confrontate il contenuto del pacco con le informa- zioni relative alla fornitura contenute in queste istruzioni: 1.
  • Page 43: Montaggio / Panoramica Delle Funzioni

    MONTAGGIO montaggio del ricevitore radio Osservare lo schema di collegamento a pagina 6. • Il collegamento alla rete del radioricevitore e tutti i lavori sulle installazioni elettriche devono essere eseguiti solo da un elettricista autorizzato in conformità con gli schemi di collegamento contenuti in questo manuale. •...
  • Page 44: Programmazione

    Collegare il ricevitore radio secondo le istruzioni di installazione (vedi pagina 6). Premere il pulsante di arresto del TDRRT01W per circa 3 secondi per attivare la modalità di apprendimento. Il motore collegato vibrerà brevemente e la spia LED si spegnerà per segnalare che il ricevitore è in modalità di apprendi- mento per circa 5 secondi.
  • Page 45: Impostazioni

    IMPOSTAZIONI cambiare il senso di rotazione del motore IMPORTANTE! Il senso di rotazione del motore (UP / DOWN) deve essere controllato e, se necessario, cambiato dopo l'insegnamento nel primo trasmettitore. cambiato! Il pulsante OPEN deve aprire le tapparelle e le tende e chiudere le tende da sole! Il pulsante GIÙ...
  • Page 46 impostazioni - tempo - tempi di salita e discesa Impostazione dell'ora e della data attuali Premere il tasto K1 nel menu principale (descrizione vedi pagina 7). Nell'angolo in alto a sinistra appare il simbolo di un orologio e l'indicazione delle ore lampeggia. Impostare l'ora con il tasto UP / DOWN e confermare l'inserimento con il tasto K1.
  • Page 47 EN 60669-1: 1999/A2:2008 EN 60669-2-1 :2004/A 12:2010 EN 62479:2010 De volledige tekst van de EU-conformiteitsverklaring is beschikbaar op het volgende internetadres: https://www.jarolift.de/konformitaetserklaerungen.html WEEE Reg. Nr. DE 41060608 voor: JAROLIFT®™ Schoenberger Duitsland Ondernemingen GmbH & Co. KG Zechstrasse 1-7 Michael Mayer 82069 Hohenschäftlarn CEO / Geschäftsführer...
  • Page 48: Algemene Veiligheidsinstructies

    ALGEMENE VEILIGHEIDSINSTRUCTIES zaamheden in spanningsloze toestand WAARSCHUWING! uit. Belangrijke veiligheidsinstructies! • Voor de veiligheid van personen is het WAARSCHUWING! belangrijk deze instructies op te volgen! Niet-naleving kan levensgevaarlijk zijn! • Bewaar de gebruiksaanwijzing en over- handig deze aan de nieuwe eigenaar •...
  • Page 49 ALLGEMEINE SICHERHEITSHINWEISE de plaats van installatie permanent een • Deactiveer het automatisch openen en stroomaansluiting van 230 V/50 Hz en sluiten van de gever bij sneeuwval, ijsvor- een uitschakelinrichting (zekering) ter ming of gevaar voor vorst om schade aan plaatse beschikbaar zijn. de motor of de aangedreven eenheid te voorkomen.
  • Page 50 ALGEMENE VEILIGHEIDSINSTRUCTIES pervlakken. Andere zendapparatuur (b.v. BELANGRIJK! radiohoofdtelefoons, babyfoons, radio- weerstations) waarvan de zendfrequentie Volgens DIN EN 13659 moet ervoor identiek is aan die van de HOME-CONTROL- worden gezorgd dat de verplaatsings- LER kan de ontvangst verstoren. voorwaarden die voor de ophangingen volgens EN 12045 zijn gespecificeerd, worden nageleefd, d.w.z.
  • Page 51: Elektrische Aansluiting

    Activiteitscyclus Relaisuitgang ca. 240 Sek. Radio kanalen 1 Kanal Verenigbaarheid Jarolift TDRC hand- en wandzender Omvang van de levering Vergelijk na het uitpakken de inhoud van de verpakking met de informatie over de omvang van de levering in deze gebruiksaanwijzing: 1.
  • Page 52: Overzicht Van De Functies

    MONTAGE Montage van de radio-ontvanger Neem het aansluitschema op pagina 6 in acht. • De netaansluiting van de radiografische ontvanger en alle werkzaamheden aan de elektrische installatie mogen uitsluitend worden uitgevoerd door een erkende elektrotechnische installateur overeenkomstig de aansluitschema's in deze handlei- ding.
  • Page 53: Programmering

    Sluit de radio-ontvanger aan volgens de installatie-instructies (zie pagina 6). Druk ongeveer 3 seconden op de stoptoets van de TDRRT01W om de leermodus te activeren. De aangesloten motor gaat kort trillen en het LED-lampje gaat uit om aan te geven dat de ontvanger in de leermodus is.ontvanger staat gedurende ca.
  • Page 54: Instellingen

    INSTELLINGEN wijziging van de draairichting van de motor BELANGRIJK! De draairichting van de motor (OMHOOG / OMLAAG) moet worden gecontroleerd en, indien nodig, ge- wijzigd na het inleren van de eerste zender. veranderd! De OPEN toets moet rolluiken en zonneschermen OPEN en zonneschermen DICHT maken! De DOWN knop moet rolluiken en jaloezieën DICHT en zonneschermen OPENEN! Dit moet in het bijzonder in acht worden genomen in verband met tijdgestuurde of andere automatische apparaten gestuurde systemen.
  • Page 55 instellingen - tijd - op en neer tijden Instellen van de huidige tijd en datum Druk op de toets K1 in het hoofdmenu (beschrijving zie blz. 7). Een kloksymbool verschijnt in de linkerbovenhoek en de uurweergave knippert. Stel de tijd in met de UP / DOWN toets en bevestig de invoer met de K1 toets. De minutenweergave knippert dan.
  • Page 56 EN 60669-1: 1999/A2:2008 EN 60669-2-1 :2004/A 12:2010 EN 62479:2010 Pełny tekst deklaracji zgodności UE jest dostępny pod następującym adresem internetowym: https://www.jarolift.de/konformitaetserklaerungen.html Nr rej. WEEE DE 41060608 dla: JAROLIFT®™ Schoenberger Germany Enterprises GmbH & Co. KG Zechstraße 1-7 Michael Mayer 82069 Hohenschäftlarn CEO / Geschäftsführer...
  • Page 57: Ogólne Wskazówki Bezpieczeństwa

    OGÓLNE INSTRUKCJE BEZPIECZEŃSTWA przyłączeniowe wykonywać w stanie bez OSTRZEŻENIE! napięcia. Ważne wskazówki bezpieczeństwa! • Dla bezpieczeństwa osób należy OSTRZEŻENIE! bezwzględnie przestrzegać niniejszej instrukcji! Nieprzestrzeganie tego zalecenia może spowodować zagrożenie życia! • Proszę zachować instrukcję i przekazać ją nowemu właścicielowi przy zmianie •...
  • Page 58: Ogólne Instrukcje Bezpieczeństwa

    OGÓLNE INSTRUKCJE BEZPIECZEŃSTWA styka się z kurtyną żaluzji lub innymi ru- • Odbiornik radiowy należy stosować chomymi częściami urządzenia. wyłącznie do podłączania silników rolet, markiz i żaluzji. • Do podłączenia elektrycznego w miej- scu instalacji musi być stale dostępne • Dezaktywować funkcję automatyc- przyłącze sieciowe 230 V/50 Hz oraz znego otwierania i zamykania jednost- odłącznik (bezpiecznik).
  • Page 59 OGÓLNE INSTRUKCJE BEZPIECZEŃSTWA radiowe, nianie, radiostacje pogodowe), WAŻNE! których częstotliwość nadawania jest identyczna z częstotliwością radiowego Zgodnie z normą DIN EN 13659 należy urządzenia sterującego, mogą zakłócać upewnić się, że spełnione są warunki odbiór. przemieszczenia określone dla wies- zaków zgodnie z normą EN 12045, tzn. że wieszaki są...
  • Page 60: Przyłącze Elektryczne

    0°C b is + 50 °C Cykl pracy Wyjście przekaźnikowe ca. 240 Sek. Kanały radiowe 1 Kanal Zgodność Jarolift TDRC nadajnik ręczny i ścienny Zakres dostawy Po rozpakowaniu należy porównać zawartość opakowania z informacjami dotyczącymi zakresu dostawy zawar- tymi w niniejszej instrukcji: 1.
  • Page 61: Montaż / Przegląd Funkcji

    MONTAŻ montaż odbiornika radiowego Przestrzegać schematu połączeń na stronie 6. • Podłączenie odbiornika radiowego do sieci oraz wszystkie prace przy instalacjach elektrycznych mogą być wykonywane tylko przez uprawnionego elektryka zgodnie ze schematami podłączeń w niniejszej instrukcji. przez uprawnionego elektry- ka zgodnie ze schematami połączeń zawartymi w niniejszej instrukcji. •...
  • Page 62: Programowanie

    Podłącz odbiornik radiowy zgodnie z instrukcją montażu (patrz strona 6). Aby włączyć tryb nauki, należy nacisnąć przycisk STOP na urządzeniu TDRRT01W na ok. 3 sekundy. Podłączony silnik będzie krótko wibrować, a dioda LED zgaśnie, aby zasygnalizować, że odbiornik jest w trybie uczenia się...
  • Page 63: Ustawienia

    USTAWIENIA zmiana kierunku obrotów silnika WAŻNE! Kierunek obrotów silnika (GÓRA / DÓŁ) musi być sprawdzony i w razie potrzeby zmieniony po przyuczeniu pierwszego nadajnika. zmienione! Przycisk OPEN musi otwierać rolety i żaluzje oraz zamykać markizy! Przycisk DÓŁ musi zamykać rolety i żaluzje oraz otwierać markizy! Należy tego przestrzegać...
  • Page 64 ustawienia - czas - czasy w górę i w dół Ustawianie bieżącej godziny i daty W menu głównym nacisnąć przycisk K1 (opis patrz strona 7). W lewym górnym rogu pojawia się symbol zegara, a wskaźnik godzin miga. Ustawić godzinę za pomocą klawiszy GÓRA / DÓŁ i potwierdzić klawiszem K1. Następnie miga wskazanie minut.
  • Page 65: Notes

    NOTIZEN...
  • Page 66 NOTIZEN...
  • Page 67 NOTIZEN...
  • Page 68: Contact Information

    Es gelten unsere allgemeinen Geschäftsbedingungen. Eine aktuelle Version dieser Anleitung finden Sie auf http://www.jarolift.de/bedienungsanleitungen.html / Reprinting, even in extracts, only with permission of the author. Product changes that serve to improve quality from our point of view can be made at any time, even without prior notice or notification.