Milwaukee 2125-20 Mode D'emploi
Liens rapides
IMPORTANT SAFETY
INSTRUCTIONS
READ AND UNDERSTAND ALL INSTRUCTIONS. When using electric appli-
WARNING
ances, basic precautions should always be followed, including the following:
• Before using, read this operator's manual, your battery pack and charger operator's manual, and all labels on
the battery pack, charger and light. Learn your light's applications and limitations as well as potential hazards as-
sociated with this type of tool.
• Read and understand all the instructions before using the appliance.
• To reduce the risk of injury, close supervision is necessary when an appliance is used near children.
• Store idle light out of reach of children. Warm lights can become hazardous in the hands of children.
• Store indoors. Do not expose to rain.
• B atteries must be recharged only with the charger specified by the manufacturer. A charger that may be suitable
for one type of battery may create a risk of fire when used with another battery.
• U se light only with specifically designated battery pack. Use of any other batteries may create a risk of fire.
• When battery pack is not in use, keep it away from metal objects like: paper clips, coins, keys, nails, screws, or
other small metal objects that can make a connection from one terminal to another. Shorting the battery terminals
together may cause sparks, burns, or a fire.
• Maintain labels and nameplates. These carry important information. If unreadable or missing, contact a MILWAUKEE
service facility for a free replacement.
SAVE THESE INSTRUCTIONS
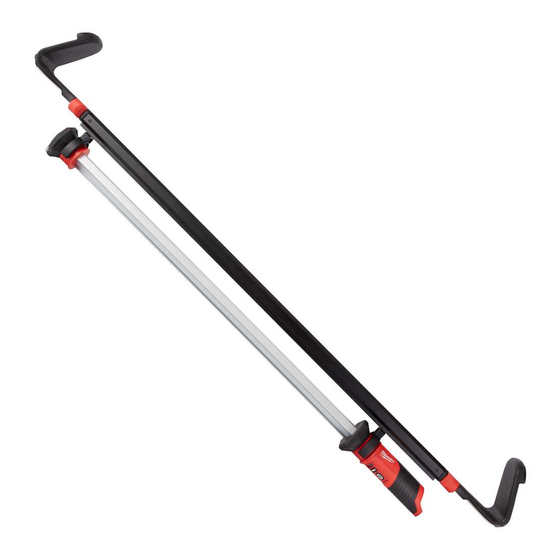
FUNCTIONAL DESCRIPTION
3
2
8
6
1. Mounting carrier
2. Pinch zone
3. Carrier hooks
4. Battery bay
Volts
C
Direct Current
Read Operator's Manual
Cat. No. ................................................................................................................................................. 2125-20
Ingress Protection........................................................................................................................................IP54
Light Output
High .................................................................................................................................................. 1350Lm
Low ..................................................................................................................................................... 600Lm
Mounting Carrier Extension ...................................................................................................................48" - 78"
Battery Type .............................................................................................................................................M12™
Charger Type ............................................................................................................................................M12™
DC Input Volts................................................................................................................................................. 12
Max DC Input Amps....................................................................................................................................... 0.9
Recommended Ambient Operating Temperature ...............................................................................0°F to 125°F
Recharge only with the charger specified for the battery. For specific charging instructions,
WARNING
read the operator's manual supplied with your charger and battery.
Inserting/Removing the Battery
To remove the battery, push in the release buttons and pull the battery pack away from the tool.
Always remove battery pack before changing or removing accessories.
WARNING
To insert the battery, slide the pack into the body of the tool. Make sure it latches securely into place.
To reduce the risk of injury, do not look directly into the light when the light is on.
WARNING
To turn on the light, press the Power button
To turn off the light, press the Power button
The light bar can be used on its own, using the light bar hook to hang by a surface, or with the carrier to mount
inside the hood of a car.
To mount the light to the hood of a car:
1. Place the mounting carrier on the hood of the car using the carrier hooks. Extend the hooks if necessary to
ensure fit. Make sure the carrier is fully seated on the hood. WARNING! Pinch hazard - Keep hands out of
pinch zone.
2. Adjust the light bar as necessary by rotating it to the desired position and sliding it left or right along the
mounting carrier.
To reduce the risk of injury, always unplug the charger and remove the battery pack from
WARNING
the charger or tool before performing any maintenance. Never disassemble the tool, bat-
tery pack or charger. Contact a MILWAUKEE service facility for ALL repairs.
Keep your light, battery pack and charger in good repair by adopting a regular maintenance program. If the light
does not work properly, return the light to a MILWAUKEE service facility for repairs.
To reduce the risk of personal injury and damage, never immerse your tool, battery pack
WARNING
or charger in liquid or allow a liquid to flow inside them.
Keep tool handles clean, dry and free of oil or grease. Use only mild soap and a damp cloth to clean the tool, bat-
tery pack and charger since certain cleaning agents and solvents are harmful to plastics and other insulated parts.
Some of these include gasoline, turpentine, lacquer thinner, paint thinner, chlorinated cleaning solvents, ammonia
and household detergents containing ammonia. Never use flammable or combustible solvents around tools.
Use only recommended accessories. Others may be hazardous.
WARNING
For a complete listing of accessories, go online to www.milwaukeetool.com or contact a distributor.
LIMITED WARRANTY - USA & CANADA
Every MILWAUKEE power tool* (see exceptions below) is warranted to the original purchaser only to be free from defects in material and workman-
ship. Subject to certain exceptions, MILWAUKEE will repair or replace any part on an electric power tool which, after examination, is determined by
MILWAUKEE to be defective in material or workmanship for a period of five (5) years** after the date of purchase unless otherwise noted. Return of
the power tool to a MILWAUKEE factory Service Center location or MILWAUKEE Authorized Service Station, freight prepaid and insured, is required.
A copy of the proof of purchase should be included with the return product. This warranty does not apply to damage that MILWAUKEE determines
to be from repairs made or attempted by anyone other than MILWAUKEE authorized personnel, misuse, alterations, abuse, normal wear and tear,
lack of maintenance, or accidents.
Normal Wear: Many power tools need periodic parts replacement and service to achieve best performance. This warranty does not cover repair when
normal use has exhausted the life of a part including, but not limited to, chucks, brushes, cords, saw shoes, blade clamps, o-rings, seals, bumpers,
driver blades, pistons, strikers, lifters, and bumper cover washers.
*This warranty does not cover Air Nailers & Staplers; Airless Paint Sprayer; Cordless Battery Packs; Gasoline Driven Portable Power Generators;
Hand Tools; Hoist – Electric, Lever & Hand Chain; M12™ Heated Gear; Reconditioned Product; and Test & Measurement Products. There are
separate and distinct warranties available for these products.
**The warranty period for Job Site Radios, M12™ Power Port, M18™ Power Source, Jobsite Fan and Trade Titan™ Industrial Work Carts is one (1)
year from the date of purchase. The warranty period for the Drain Cleaning Cables is two (2) years from the date of purchase. The warranty period
for the LED in the LED Work Light and the LED Upgrade Bulb for the Work Light is the lifetime of the product subject to the limitations above. If
during normal use the LED or LED Bulb fails, the part will be replaced free of charge.
Warranty Registration is not necessary to obtain the applicable warranty on a MILWAUKEE power tool product. The manufacturing date of the product
will be used to determine the warranty period if no proof of purchase is provided at the time warranty service is requested.
ACCEPTANCE OF THE EXCLUSIVE REPAIR AND REPLACEMENT REMEDIES DESCRIBED HEREIN IS A CONDITION OF THE CONTRACT
FOR THE PURCHASE OF EVERY MILWAUKEE PRODUCT. IF YOU DO NOT AGREE TO THIS CONDITION, YOU SHOULD NOT PURCHASE
THE PRODUCT. IN NO EVENT SHALL MILWAUKEE BE LIABLE FOR ANY INCIDENTAL, SPECIAL, CONSEQUENTIAL OR PUNITIVE DAMAGES,
OR FOR ANY COSTS, ATTORNEY FEES, EXPENSES, LOSSES OR DELAYS ALLEGED TO BE AS A CONSEQUENCE OF ANY DAMAGE TO,
FAILURE OF, OR DEFECT IN ANY PRODUCT INCLUDING, BUT NOT LIMITED TO, ANY CLAIMS FOR LOSS OF PROFITS. SOME STATES DO
NOT ALLOW THE EXCLUSION OR LIMITATION OF INCIDENTAL OR CONSEQUENTIAL DAMAGES, SO THE ABOVE LIMITATION OR EXCLU-
SION MAY NOT APPLY TO YOU. THIS WARRANTY IS EXCLUSIVE AND IN LIEU OF ALL OTHER EXPRESS WARRANTIES, WRITTEN OR
ORAL. TO THE EXTENT PERMITTED BY LAW, MILWAUKEE DISCLAIMS ANY IMPLIED WARRANTIES, INCLUDING WITHOUT LIMITATION ANY
IMPLIED WARRANTY OF MERCHANTABILITY OR FITNESS FOR A PARTICULAR USE OR PURPOSE; TO THE EXTENT SUCH DISCLAIMER
IS NOT PERMITTED BY LAW, SUCH IMPLIED WARRANTIES ARE LIMITED TO THE DURATION OF THE APPLICABLE EXPRESS WARRANTY
AS DESCRIBED ABOVE. SOME STATES DO NOT ALLOW LIMITATIONS ON HOW LONG AN IMPLIED WARRANTY LASTS, SO THE ABOVE
LIMITATION MAY NOT APPLY TO YOU, THIS WARRANTY GIVES YOU SPECIFIC LEGAL RIGHTS, AND YOU MAY ALSO HAVE OTHER RIGHTS
WHICH VARY FROM STATE TO STATE.
M12™ LED UNDERHOOD LIGHT
LAMPE DE TRAVAIL SOUS CAPOT À DEL M12™
LÁMPARA LED M12™ PARA COFRE
1
7
6
5
5. Power and Mode buttons
6. Carrier clips
7. Light bar
8. Light bar hook
SYMBOLOGY
UL Listing for Canada and U.S.
US
Pinch Hazard - Keep hands out
of pinch zone
SPECIFICATIONS
ASSEMBLY
OPERATION
. Press the MODE button to cycle through High and Low settings.
again.
Hanging the Light
MAINTENANCE
Maintain Light
Cleaning
ACCESSORIES
This warranty applies to product sold in the U.S.A. and Canada only.
Please consult the 'Service Center Search' in the Parts & Service section of MILWAUKEE's website www.milwaukeetool.com or call 1.800.SAWDUST
(1.800.729.3878) to locate your nearest service facility for warranty and non-warranty service on a Milwaukee electric power tool.
LIMITED WARRANTY - MEXICO, CENTRAL AMERICA & CARIBBEAN
TECHTRONIC INDUSTRIES' warranty is for 5 years since the original purchase date.
This warranty card covers any defect in material and workmanship on this Product.
To make this warranty valid, present this warranty card, sealed/stamped by the distributor or store where you purchased the product, to the Authorized
Service Center (ASC). Or, if this card has not been sealed/stamped, present the original proof of purchase to the ASC.
Call toll-free1 01 (800) 030-7777 to find the nearest ASC, for service, parts, accessories or components.
Procedure to make this warranty valid
Take the product to the ASC, along with the warranty card sealed/stamped by the distributor or store where you purchased the product, and any faulty
piece or component will be replaced without cost for you. We will cover all freight costs relative with this warranty process.
Exceptions
This warranty is not valid in the following situations
a) When the product is used in a different manner from the end-user guide or instruction manual.
b) When the conditions of use are not normal.
c) When the product was modified or repaired by people not authorized by TECHTRONIC INDUSTRIES.
Note: If cord set is damaged, it should be replaced by an Authorized Service Center to avoid electric risks.
SERVICE AND ATTENTION CENTER
Call to 01 (800) 030-7777
IMPORTED AND COMMERCIALIZED BY
TECHTRONIC INDUSTRIES MEXICO, SA DE CV
Av President Masarik #29 piso 7, Col. Polanco V Sección
CP 11560, Deleg. Miguel Hidalgo, CDMX
Model:
Date of Purchase:
Distributor or Store Stamp:
2
3
AVERTISSEMENT
4
• Avant d'utiliser, lire le présent manuel d'utilisation, le manuel d'utilisation du bloc-piles et du chargeur, ainsi
que toutes les étiquettes se trouvant sur le bloc-piles, le chargeur et la lampe. Lire le manuel de la lampe pour
apprendre les applications et les limites, ainsi que les risques spécifiques relatifs à l'utilisation de cet outil.
• Lire et comprendre toutes les instructions avant d'utiliser l'appareil.
• Pour réduire les risques de blessure, porter une attention particulière lorsque le produit est utilisé en présence
d'enfants.
• Entreposer la lampe non utilisée hors de la portée des enfants. Les lampes chaudes peuvent être dangereuses
dans les mains des enfants.
• Entreposer à l'intérieur. Ne pas exposer à la pluie.
• L es piles doivent être chargées uniquement avec le chargeur spécifié par le fabricant. Un chargeur approprié
pour un type de piles peut créer un risque d'incendie s'il est utilisé avec un autre type de piles.
• N'utiliser la lampe qu'avec un bloc-piles recommandé. L'usage de tout autre bloc-piles peut créer un risque d'incendie.
• Lorsque le bloc-piles n'est pas en usage, le tenir à l'écart des articles métalliques tels que : les attaches trom-
bones, pièces de monnaie, clés, clous, vis et autres petits objets métalliques risquant d'établir le contact entre
les deux bornes. La mise en court-circuit des bornes des piles peut causer des étincelles, des brûlures ou un incendie.
• Maintenir en état les étiquettes et les plaques signalétiques. Des informations importantes y figurent. Si elles sont
illisibles ou manquantes, contacter un centre de service et d'entretien MILWAUKEE pour un remplacement gratuit.
CONSERVEZ CES INSTRUCTIONS
3
8
Volts
Courant direct
Lire le manuel d'utilisation
No de Cat ............................................................................................................................................... 2125-20
Protection contre l'infiltration ........................................................................................................................ IP54
Type de batterie ......................................................................................................................................... M12™
Type de chargeur....................................................................................................................................... M12™
Alimentation en V CD .......................................................................................................................................12
Alimentation en A CD max ...............................................................................................................................0,9
Température ambiante de fonctionnement recommandée .......................................... -18°C à 50°C (0°F à 125°F)
AVERTISSEMENT
teries.
Pour retirer la batterie, enfoncer les boutons de déverrouillage et la tirer hors de l'outil.
AVERTISSEMENT
Pour insérer la batterie, la glisser dans le corps de l'outil. S'assurer qu'elle est fixée solidement.
AVERTISSEMENT
Pour allumer la lampe, appuyer sur le bouton de mise en marche
entre les réglages d'éclairage Élevé et Faible. Pour éteindre la lampe, appuyer encore une fois sur le bouton
de mise en marche
La barre lumineuse peut être utilisée seule en la suspendant à l'aide du crochet de la barre, ou encore avec le
support pour l'installer à l'intérieur du capot d'une voiture.
Pour installer la lampe au capot d'une voiture :
1. Placer le support d'installation sur le capot de la voiture à l'aide des crochets du support. Étirer les crochets
au besoin pour s'assurer d'un bon ajustement. Vérifier que le support d'installation est complètement appuyé
sur le capot. AVERTISSEMENT! Risque de pincement — Tenir les mains à l'écart de la zone de pincement.
2. Ajuster la barre lumineuse au besoin en la tournant dans la position désirée et en la glissant à gauche ou à
droite le long du support d'installation.
AVERTISSEMENT
d'entretien. Ne démontez jamais une lampe torche, la batterie ou le chargeur. Pour toute réparation,
consultez un centre de service MILWAUKEE accrédité.
Gardez la lampe torche, la batterie et le chargeur en bonne condition en adoptant un programme de mainte-
nance ponctuel.
Si la lampe n'éclaire toujours pas correctement, faites-la réparer à un centre de service MILWAUKEE accrédité.
To reduce the risk of injury, user must read and understand
operator's manual.
Afin de réduire le risque de blessures, l'utilisateur doit lire et
bien comprendre le manuel de l'utilisateur.
Para reducir el riesgo de lesiones, el usuario debe leer y
entender el manual del operador.
RÈGLES IMPORTANTES DE
SÉCURITÉ
Lire et veiller à bien comprendre toutes les instructions. Lors de
l'utilisation d'outils électriques, toujours suivre les consignes de base,
notamment :
DESCRIPTION FONCTIONNELLE
2
1
6
7
1. Support d'installation
5. Boutons de mise en marche et de mode
2. Zone de pincement
6. Pinces du support
3. Crochets du support
7. Barre lumineuse
4. Compartiment des piles
8. Crochet de la barre lumineuse
PICTOGRAPHIE
UL Listing Mark pour
C
US
Canada et Etats-unis
Risque de pincement — Tenir les mains à
l'écart de la zone de pincement
SPECIFICATIONS
MONTAGE DE L'OUTIL
Ne recharger la batterie qu'avec le chargeur spécifié. Pour les instructions de
charge spécifiques, lire le manuel d'utilisation fourni avec le chargeur et les bat-
Insertion/Retrait de la batterie
Il faut toujours retirer la batterie et verrouiller la détente de l'outil avant de
changer ou d'enlever les accessoires.
MANIEMENT
Afin d'éviter les risques d'éblouissement, ne regardez pas directement le réflecteur
de la lampe lorsqu'elle est allumee.
.
Suspension de la lampe
ENTRETIEN
Pour minimiser les risques de blessures corporelles, débranchez le chargeur et
retirez la batterie du chargeur ou une lampe torche avant d'y effectuer des travaux
Entretien de la lampe torche
2
3
6
5
4
. Appuyer sur le bouton MODE pour basculer

Manuels Connexes pour Milwaukee 2125-20


Sommaire des Matières pour Milwaukee 2125-20
- Page 1 Subject to certain exceptions, MILWAUKEE will repair or replace any part on an electric power tool which, after examination, is determined by MILWAUKEE to be defective in material or workmanship for a period of five (5) years** after the date of purchase unless otherwise noted. Return of Pour installer la lampe au capot d'une voiture : the power tool to a MILWAUKEE factory Service Center location or MILWAUKEE Authorized Service Station, freight prepaid and insured, is required.
- Page 2 Sous réserve de certaines exceptions, MILWAUKEE réparera ou remplacera toute pièce d’un outil électrique qui, après examen Recargue la batería sólo con el cargador especificado para ella. Para instrucciones par MILWAUKEE, s’est avérée être affectée d’un vice de matériau ou de fabrication et ce pendant une période de cinq (5) ans** à compter de la date ADVERTENCIA d’achat, sauf indication contraire.