Publicité

Les langues disponibles

Les langues disponibles

Liens rapides

FOOD DEHYDRATORS
PRO-1200 28-0301-W (80 L)
PRO-2400 28-0501-W (160 L)
DUE TO CONSTANT FACTORY IMPROVEMENTS, THE PRODUCT PICTURED MIGHT DIFFER
SLIGHTLY FROM THE PRODUCT IN THIS BOX. 020416

Publicité

Table des Matières
loading

Sommaire des Matières pour Weston PRO-1200

  • Page 1 FOOD DEHYDRATORS PRO-1200 28-0301-W (80 L) PRO-2400 28-0501-W (160 L) DUE TO CONSTANT FACTORY IMPROVEMENTS, THE PRODUCT PICTURED MIGHT DIFFER SLIGHTLY FROM THE PRODUCT IN THIS BOX. 020416...
  • Page 2: Table Des Matières

    SUMMARY SOMMAIRE DRYING FLOWERS SÉCHER LES FLEURS FOOD SAFETY SÉCURITÉ ALIMENTAIRE TWO-YEAR LIMITED WESTON WARRANTY DEUX ANS DE GARANTIE WESTON LIMITÉE ¡IMPORTANTE ! REGLAS IMPORTANTES DE SEGURIDAD INSTRUCCIONES PARA HACER TIERRA LISTA DE COMPONENTES 28-29 INSTRUCCIONES DE ENSAMBLADO INSTRUCCIONES DE PREFUNCIONAMIENTO INSTALACIÓN...
  • Page 3: Important

    IMPORTANT! This appliance is a Dehydrator, not an oven. Its purpose is to dry, not cook. Dehydrator operation is not the same as that of an oven. . BEFORE dehydrating, heat meat to an internal temperature of 160 C) and poultry to 165 F (74 C) in an oven to kill any bacteria that may be present.
  • Page 4: General Safety Rules

    GENERAL SAFETY RULES READ AND FULLY UNDERSTAND ALL INSTRUCTIONS AND WARNINGS PRIOR TO USING THIS UNIT. YOUR SAFETY IS MOST IMPORTANT! FAILURE TO COMPLY WITH PROCEDURES AND SAFE GUARDS MAY RESULT IN SERIOUS INJURY OR PROPERTY DAMAGE. REMEMBER: YOUR PERSONAL SAFETY IS YOUR RESPONSIBILITY! 1.
  • Page 5: Grounding Instructions

    GROUNDING INSTRUCTIONS FIGURE A GROUNDING This appliance must be grounded while in use to protect the operator from electrical shock. The appliance is equipped with a 3-conductor cord and a 3-prong grounding type plug to fit the proper grounding-type receptacle. The appliance has a plug that looks like Figure A.
  • Page 6 WARNING! Before cleaning, assembling or disassembling the Dehydrator, make sure the PLUG IS REMOVED FROM THE OUTLET/ POWER SOURCE! ALWAYS unplug the Dehydrator when not in use. BACK VIEW...
  • Page 7: Component List

    If any components of this unit are broken, the unit does not operate properly or you need a replacement instruction manual, visit us on the web at WestonProducts.com 1-800-814-4895 Or call Weston Brands LLC Toll Free at Monday thru Friday 8:00am-5:00pm ET. Outside the U.S. call 001-216-901-6801...
  • Page 8: 80 L Assembly Instructions

    80 L ASSEMBLY INSTRUCTIONS 1. Make sure the Dehydrator is turned off and unplugged. 2. Remove the Racks and any other loose items from the interior and close the Door. 3. Gently lay the Dehydrator onto its left side (when facing the Door) on a rug or other similar article to prevent scratching.
  • Page 9: Pre-Operating Instructions

    PRE-OPERATING INSTRUCTIONS • DO NOT operate the Dehydrator without the Feet / Casters installed. • Locate the Dehydrator on a clean, level, dry, non-flammable, surface at least 6” (15 cm) away from any wall. Avoid carpeted surfaces. • Set the brakes on the two front-mounted Swivel Casters (160-L model) . SET UP 1.
  • Page 10: Programming

    PROGRAMMING Digital Display 7. TO SET THE TIME: Press the “TIME” Button on the Control Panel one time. Use the “UP” & “DOWN” Buttons on the right side of the Control Panel to set the countdown timer hours (23 hour maximum). Press the “TIME” Button again to switch to minutes.
  • Page 11: Post Operation

    POST OPERATION 13. Set the Power Switch to “OFF” when you are done. 14. Unplug the Dehydrator when not in use. 15. Clean the Dehydrator after each use, especially the Diffuser. See the “CLEANING INSTRUCTIONS” section of this booklet. OPERATING INSTRUCTIONS •...
  • Page 12: Cleaning Instructions

    CLEANING INSTRUCTIONS WARNING! Before cleaning, assembling or disassembling the Dehydrator, make sure the Dehydrator is OFF and the PLUG IS REMOVED FROM THE OUTLET/POWER SOURCE! • IMPORTANT! Clean the Dehydrator after EACH use. Do not use abrasive cleansers. The Racks are NOT dishwasher safe. •...
  • Page 13: Troubleshooting

    CABINET DOOR Wipe the Door and Seal clean with a moderately damp cloth and soap if necessary. Wipe off any residue if soap is used. Wipe the glass clean with a rag or paper towels and glass cleaner. DRIP TRAY Empty then wash the Drip Tray in warm soapy water.
  • Page 14: Light Bulb Replacement

    LIGHT BULB REPLACEMENT WARNING! Before cleaning, assembling or disassembling the Dehydrator, make sure the Dehydrator is OFF and the PLUG IS REMOVED FROM THE OUTLET/POWER SOURCE! 1. Turn off the Dehydrator Lights. Turn off and disconnect the Dehydrator from the power outlet. 2.
  • Page 15: Drying Tips

    DRYING TIPS SAUSAGE OR SNACK STICKS: Use the Snack Stick Hangers to hang and dry sausage links and snack sticks. After removing all the Racks from your Dehydrator, simply drape the links over the Snack Stick Hangers and slide them into the top Snack Stick Rack Supports Rack Supports.
  • Page 16 DRYING TIPS As with most methods of cooking, good preparation is essential to success. Following a few basic guidelines will greatly increase the quality of the dehydrated product and decrease the time needed to make it. NOTE: Before dehydrating, heat meat to an internal temperature of 160 C) and poultry to 165 F (74 C) to kill any bacteria that may be present.
  • Page 17: Making Jerky

    MAKING JERKY Meat should be as lean as possible. Using lean meat will help the meat dry faster and aid in cleanup by decreasing fat drippings. Ground meat should be 80% to 90% lean. Ground turkey, venison, buffalo and elk are other excellent choices for Jerky.
  • Page 18: Storing Jerky

    MAKING JERKY If you are using a marinade, shake off excess liquid from the meat before spacing it evenly in single layers, approximately 1/4”-1/2” (0.6-1.5 cm) apart, on the Dehydrator Racks. IMPORTANT NOTE: DO NOT place jerky over the center hole of the Racks.
  • Page 19: Summary

    SUMMARY Remember drying food is as much an art as any other form of cooking. Once familiar with the basics, experiment to create unique dried foods. Just remember the basics: • The leaner the meat, the better the jerky • Do not overlap food products on the drying racks •...
  • Page 20: Food Safety

    FOOD SAFETY There are basic rules to follow when handling food. They are COOK, SEPARATE, CLEAN, and CHILL. COOK It’s crucial to cook food to a safe internal temperature to destroy bacteria that is present. The safety of hamburgers and other foods made with ground meat has been receiving a lot of attention lately, and with good reason.
  • Page 22: Two-Year Limited Weston Warranty

    TWO-YEAR LIMITED WESTON WARRANTY This warranty applies to products purchased and used in the U.S. and Canada, which have been properly registered within 30 days of the date of original purchase. This is the only express warranty for this product and is in lieu of any other warranty or condition.
  • Page 23 DESHIDRATADORES DESHIDRATADOR DE ALIMENTOS DE ALIMENTOS PRO-1200 28-0301-W (80 L) PRO-2400 28-0501-W (160 L) DEBIDO A CONSTANTES MEJORAS EN LA FÁBRICA, EL PRODUCTO QUE SE MUESTRA PUEDE SER LIGERAMENTE DIFERENTE DEL PRODUCTO EN ESTA CAJA. 020416...
  • Page 24: Importante

    ¡IMPORTANTE! Este electrodoméstico es un deshidratador, no un horno. Tiene por fin secar, no cocinar. La operación de un deshidratador no es igual a la de un horno. ANTES de deshidratar, caliente la carne a una temperatura interna • de 160 F (71 C) y las aves de corral a 165 F (74...
  • Page 25: Reglas Importantes De Seguridad

    REGLAS IMPORTANTES DE SEGURIDAD LEA Y ENTIENDA COMPLETAMENTE TODAS LAS INSTRUCCIONES Y ADVERTENCIAS ANTES DE UTILIZAR ESTA UNIDAD. ¡SU SEGURIDAD ES LO MÁS IMPORTANTE! NO SEGUIR LOS PROCEDIMIENTOS Y PRECAUCIONES PUEDE PROVOCAR LESIONES GRAVES Y DAÑOS MATERIALES. RECUERDE: ¡SU SEGURIDAD PERSONAL ES RESPONSABILIDAD DE USTED! de 6"...
  • Page 26: Instrucciones Para Hacer Tierra

    INSTRUCCIONES PARA HACER TIERRA FIGURA A ATERRIZADO Este aparato debe estar aterrizado para proteger al operario de choques eléctricos. El aparato está equipado con un cable de 3 conductores y una clavija de tierra de tres patas que entra en un tomacorriente aterrizado apropiado.
  • Page 28 ADVERTENCIA. ¡Antes de limpiar, armar o desarmar el deshidratador, asegúrese que se haya RETIRADO EL ENCHUFE DEL TOMACORRIENTE O FUENTE DE ALIMENTACIÓN. SIEMPRE desconecte el deshidratador cuando no esté en uso. BACK VIEW...
  • Page 29: Lista De Componentes

    WestonProducts.com 1-800-814-4895 O llame a Weston Brands LLC larga distancia sin costo De lunes a viernes, de 8:00 a.m. a 5:00 p.m. tiempo del ET. Fuera de Estados Unidos llame al 001-216-901-6801...
  • Page 32: Programación

    PROGRAMACIÓN Pantalla digital 7. PARA AJUSTAR EL TIEMPO: Presione el botón “TIME” (tiempo) en el panel de control una vez. Utilice los botones “UP” (subir) y “DOWN” (bajar) que se encuentran en el lado derecho del panel de control para ajustar las horas del temporizador regresivo (máximo 23 horas).
  • Page 33: Operación Posterior

    OPERACIÓN POSTERIOR 13. Ajuste el interruptor de encendido en “OFF” (apagado) cuando haya terminado. 14. Desenchufe el deshidratador cuando no esté en uso. 15. Limpie el deshidratador después de cada uso, especialmente el difusor. Consulte la sección “INSTRUCCIONES DE LIMPIEZA” en este manual. INSTRUCCIONES DE FUNCIONAMIENTO •...
  • Page 34: Instrucciones De Limpieza

    INSTRUCCIONES DE LIMPIEZA ADVERTENCIA. Antes de limpiar, ensamblar o desarmar el deshidratador, asegúrese de que el deshidratador esté APAGADO y de que se haya RETIRADO EL ENCHUFE DEL TOMACORRIENTE O DE LA FUENTE DE ALIMENTACIÓN. • ¡IMPORTANTE! Limpie el deshidratador después de CADA uso. No utilice limpiadores abrasivos.
  • Page 35: Bandeja De Goteo

    PUERTA DEL GABINETE Limpie la puerta y la junta con un paño moderadamente húmedo y jabón si es necesario. Limpie cualquier residuo si se utiliza jabón. Limpie el vidrio con un trapo o toallas de papel y un limpiador de vidrios. BANDEJA DE GOTEO Primero vacíe y luego lave la bandeja de goteo con agua tibia y jabón.
  • Page 36: Reemplazo De La Bombilla

    REEMPLAZO DE LA BOMBILLA ADVERTENCIA. Antes de limpiar, ensamblar o desarmar el deshidratador, asegúrese de que el deshidratador esté APAGADO y de que se haya RETIRADO EL ENCHUFE DEL TOMACORRIENTE O DE LA FUENTE DE ALIMENTACIÓN. 1. Apague las luces del deshidratador. Apague y desconecte el deshidratador del tomacorriente.
  • Page 37: Consejos De Secado

    CONSEJOS DE SECADO SALCHICHA O PALITOS DE BOCADILLO: Utilice el colgador para palitos de bocadillo para colgar y secar las salchichas y los palitos de bocadillo. Después de retirar todas las rejillas de su deshidratador, simplemente cuelgue las salchichas en los colgadores para palitos Colgadores para Soportes...
  • Page 38 CONSEJOS DE SECADO Al igual que con la mayoría de los métodos de cocción, una buena preparación es fundamental para tener éxito. Siguiendo algunas pautas básicas aumentará en gran medida la calidad del producto deshidratado y disminuirá el tiempo requerido para hacerlo.
  • Page 39: Preparación De La Cecina

    PREPARACIÓN DE LA CECINA La carne debe ser lo más delgada posible. El uso de la carne magra le ayudará a que la carne se seque más rápido y ayudará en la limpieza por la disminución de los goteos de grasa. La carne molida debe ser de 80% a 90% magra.
  • Page 40: Almacenamiento De La Cecina

    PREPARACIÓN DE LA CECINA Si está utilizando una marinada, sacuda el exceso de líquido de la carne antes de dividirlo uniformemente en capas individuales, aproximadamente 1/4" a 1/2" (0.6 a 1.5 cm), en las rejillas del deshidratador. NOTA IMPORTANTE: NO coloque la cecina sobre el orificio central de las rejillas.
  • Page 41: Resumen

    RESUMEN Recuerde que secar comida es un arte como cualquier otra forma de cocinar. Una vez que esté familiarizado con los conceptos básicos, experimente para crear alimentos secos únicos. Siempre recuerde los aspectos básicos: • Cuanto más magra la carne, mejor será la cecina •...
  • Page 42: Seguridad De Los Alimentos

    SEGURIDAD DE LOS ALIMENTOS Hay que seguir ciertas reglas básicas al manejar alimentos. Las reglas son COCINAR, SEPARAR, LIMPIAR y ENFRIAR. COCINAR Es muy importante cocinar los alimentos a una temperatura interna que destruya cualquier bacteria que esté presente. Últimamente se ha puesto mucha atención en la higiene de las hamburguesas y otros alimentos elaborados con carne molida y con razón.
  • Page 44: Dos Años De Garantía Weston Limitada

    DOS AÑOS DE GARANTÍA WESTON LIMITADA Esta garantía aplica a los productos que se compran y usan en los EE. UU. y Canadá, y que se registraron adecuadamente dentro de 30 días de la fecha de compra original. Esta es la única garantía expresa para este producto y reemplaza cualquier otra garantía o condición.
  • Page 45: Déshydrateur Modéla A

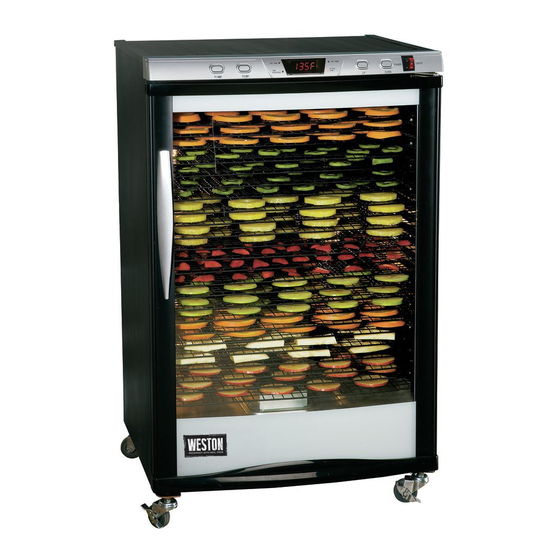
    DÉSHYDRATEUR MODÉLA A PRO-1200 28-0301-W (80 L) PRO-2400 28-0501-W (160 L) PARCE QUE NOS PRODUITS BÉNÉFICIENT DE PERFECTIONNEMENTS CONSTANTS APPORTÉS EN USINE, LES ILLUSTRATIONS PRÉSENTÉES PEUVENT ÊTRE LÉGÈREMENT DIFFÉRENTES DU PRODUIT REÇU. 020416...
  • Page 46: Important

    IMPORTANT! aliments à déshydrater et l’alimentation Cet appareil est un déshydrateur, électrique, la température programmée peut non un four. Son intention est ne pas être atteinte. de déshydrater, non cuire. Le fonctionnement du déshydrateur n’est . Pour un rendement maximal : ne pas pas le même que celui d’un four.
  • Page 47: Importantes Règles De Sécurité

    IMPORTANTES RÈGLES DE SÉCURITÉ LIRE ET COMPRENDRE COMPLÈTEMENT TOUTES LES DIRECTIVES ET LES AVERTISSEMENTS AVANT D’UTILISER CE PRODUIT. LE PLUS IMPORTANT EST VOTRE SÉCURITÉ! LE DÉFAUT D’OBSERVER LES PROCÉDURES ET MISES EN GARDE PEUT ENTRAÎNER DES BLESSURES GRAVES OU DES DOMMAGES MATÉRIELS. N’OUBLIEZ PAS : VOTRE SÉCURITÉ...
  • Page 48 AVERTISSEMENT! Avant de nettoyer, d’assembler ou de démonter le déshydrateur, veiller à LE DÉBRANCHER DE LA PRISE OU DE LA SOURCE D’ALIMENTATION! TOUJOURS débrancher le déshydrateur lorsqu’il n’est pas utilisé. BACK VIEW...
  • Page 49: Description De La Pièce

    WestonProducts.com 1-800-814-4895 Veuillez appeler Weston Brands, LLC au numéro sans frais : Du lundi au vendredi: de 8 h à 17 h ET. En dehors des États-Unis, veuillez appeler le 001-216-901-6801...
  • Page 50: Instructions De Montage

    INSTRUCTIONS DE MONTAGE 80 L 1. S’assurer que le déshydrateur est éteint et débranché. 2. Retirer les grilles et tout autre article libre de l’intérieur et fermer la porte. 3. Déposer délicatement le déshydrateur sur son côté gauche (en regardant la porte) sur un tapis ou autre un article semblable afin de prévenir les rayures.
  • Page 51: Instructions Avant L'utilisation

    INSTRUCTIONS AVANT L’UTILISATION • NE PAS faire fonctionner le déshydrateur sans avoir installé les pieds/ roulettes. • Placer le déshydrateur sur une surface propre, de niveau, sèche et non inflammable à au moins 6 po (15 cm) de tout mur. Éviter les surfaces avec tapis.
  • Page 52: Programmation

    PROGRAMMATION Affichage numérique 7. POUR PROGRAMMER L’HEURE : Appuyer une fois sur le bouton « TIME » (heure) sur le panneau de contrôle. Utiliser les boutons « UP » et « DOWN » (augmenter et diminuer) à droite sur le panneau de contrôle pour programmer les heures de la minuterie à...
  • Page 53: Après L'utilisation

    APRÈS L’UTILISATION 13. Régler l’interrupteur d’alimentation à « OFF » (arrêt) après l’utilisation. 14. Débrancher le déshydrateur lorsqu’il n’est pas utilisé. 15. Nettoyer le déshydrateur après chaque utilisation, surtout le diffuseur. Voir la rubrique « DIRECTIVES DE NETTOYAGE » de ce livret. INSTRUCTIONS D’UTILISATION •...
  • Page 54: Directives De Nettoyage

    DIRECTIVES DE NETTOYAGE AVERTISSEMENT! Avant de nettoyer, d’assembler ou de démonter le déshydrateur, s’assurer qu’il est en position OFF (arrêt) et que LA PRISE EST DÉBRANCHÉE DE LA PRISE DE COURANT/ SOURCE D’ALIMENTATION! • IMPORTANT! Nettoyer le déshydrateur après CHAQUE utilisation. Ne pas utiliser de nettoyants abrasifs.
  • Page 55: Dépannage

    PORTE DE L’ARMOIRE Essuyer la porte et le joint d’étanchéité à l’aide d’un linge modérément humide et du savon, au besoin. Essuyer tout résidu si le savon est utilisé. Bien essuyer la vitre à l’aide d’un chiffon ou de papier essuie-tout et de lave-vitres.
  • Page 56: Remplacement De L'ampoule

    REMPLACEMENT DE L’AMPOULE AVERTISSEMENT! Avant de nettoyer, d’assembler ou de démonter le déshydrateur, s’assurer qu’il est en position OFF (arrêt) et que LA PRISE EST DÉBRANCHÉE DE LA PRISE DE COURANT/SOURCE D’ALIMENTATION! 1. Éteindre les lumières du déshydrateur. Éteindre et débrancher le déshydrateur de la prise de courant.
  • Page 57: Conseils De Déshydratation

    CONSEILS DE DÉSHYDRATATION SAUCISSES C O L L A T I O N S BÂTONNET Utiliser les supports à collations en bâtonnet pour accrocher déshydrater les chaînons saucisses collations en bâtonnet. Support à Supports Après avoir enlevé les collations Supports des grilles en bâtonnet des grilles...
  • Page 58 CONSEILS DE DÉSHYDRATATION Comme la plupart des méthodes de cuisson, une bonne préparation est essentielle à la réussite. Suivre quelques directives de base augmentera de façon importante la qualité du produit déshydraté et réduira le temps nécessaire pour le faire. REMARQUE : Avant de déshydrater, chauffer la viande à...
  • Page 59: Faire De La Charqui

    FAIRE DE LA CHARQUI La viande devrait être aussi maigre que possible. L’utilisation de la viande maigre aidera à la viande à déshydrater plus rapidement et facilitera le nettoyage en réduisant l’égouttement de graisse. La viande hachée devrait être de 80 % à 90 % maigre. La dinde, la venaison, le buffle et l’élan hachés sont d’autres excellents choix pour la charqui.
  • Page 60: Remarque Importante

    FAIRE DE LA CHARQUI Si une marinade est utilisée, éliminer l’excès de liquide en secouant la viande avant de la disposer de façon égale en couches simples, séparée par environ 1/4 à 1/2 po (0,6 à 1,5 cm) sur les grilles du déshydrateur. REMARQUE IMPORTANTE : NE PAS placer la charqui sur les trous au centre des grilles.
  • Page 61: Sommaire

    SOMMAIRE Ne pas oublier que la déshydratation des aliments est autant un art que toute autre forme de cuisson. Lorsque les éléments de base sont connus, l’expérimentation peut créer des aliments déshydratés uniques. Se souvenir de quelques éléments de base : •...
  • Page 62: Sécurité Alimentaire

    SÉCURITÉ ALIMENTAIRE Il y a des règles fondamentales à suivre lors de la manipulation d’aliments. Elles sont CUIRE, SÉPARER, NETTOYER, et REFROIDIR RAPIDEMENT. CUIRE Il est crucial de cuire les aliments à une température interne sûre pour détruire les bactéries qui sont présentes.
  • Page 63: Deux Ans De Garantie Weston Limitée

    DEUX ANS DE GARANTIE WESTON LIMITÉE La présente garantie s’applique aux produits, achetés et utilisés aux États-Unis et au Canada, qui ont été dûment enregistrés dans un délai de 30 jours à compter de la date d’achat initiale. La présente garantie est la seule garantie expresse pour ce produit et remplace toute autre garantie ou condition.
  • Page 64 Numéro de téléphone à l’extérieur des É.-U. : 001-216-901-6801 Weston Brands LLC, Weston Brands LLC, Cleveland, Ohio 44149 WestonProducts.com Veuillez communiquer avec le service clientèle des produits Weston AVANT de retourner cet appareil au détaillant. CONSERVER CES DIRECTIVES! Veuillez les consulter fréquemment et les utiliser pour la formation.

Ce manuel est également adapté pour:

Pro-240028-0301-w28-0501-w

Table des Matières