
Manuels Connexes pour Yamaha YAS-207


Sommaire des Matières pour Yamaha YAS-207
- Page 1 English Français Front Surround System Système Surround Frontal YAS-CU207 NS-WSW42 Owner’s Manual Mode d’emploi...
-
Page 2: Explanation Of Graphical Symbols
Explanation of Graphical Symbols The lightning flash with arrowhead symbol within C A UT I ON an equilateral triangle is intended to alert the user to the presence of uninsulated “dangerous RISK OF ELECTRIC SHOCK voltage” within the product’s enclosure that may be DO NOT OPEN of sufficient magnitude to constitute a risk of electric shock to persons. - Page 3 FCC requirements. Modifications not expressly approved by be installed and operated with at least 20 cm and more between the radiator and Yamaha may void your authority, granted by the FCC, to use the product. person’s body. 2. IMPORTANT: •...
-
Page 4: Precautions
• When setting up the unit, make sure that the AC outlet you are using is easily • Yamaha cannot be held responsible for injury to you or accessible. If some trouble or malfunction occurs, immediately turn off the power damage of the products caused by improper use or switch and disconnect the plug from the AC outlet. - Page 5 AC outlet. Then, request an inspection from the • Do not disassemble a battery. If the contents of the battery get on your hands or in dealer where you purchased the unit or from qualified Yamaha service personnel. your eyes, it can cause blindness or chemical burns.
- Page 6 Immediately request an inspection from the dealer not plugged in sufficiently can cause dust to accumulate on the plug, causing a fire where you purchased the unit or from qualified Yamaha service personnel. or burns.
-
Page 7: Battery Use
AC outlet and request an inspection from the dealer where you purchased the unit or from qualified Yamaha service personnel. • Keep small parts out of the reach of infants. Your children may accidentally swallow... - Page 8 Notice Handling • Do not place vinyl, plastic, or rubber products on this unit. Failure to observe this Indicates points that you must observe in order to may cause discoloration or deformation in the panel of this unit. • If the ambient temperature changes drastically (such as during unit transportation prevent product failure, damage or malfunction and or under rapid heating or cooling) and there is a chance condensation may have data loss, as well as to protect the environment.
- Page 9 Information Indicates information of note regarding this product. Functions included in the unit • Air may be blown out from the bass reflex port. This is not a malfunction. This occurs particularly often when outputting music with heavy bass. About the name plate of the unit The model number, serial number, power requirements, etc., may be found on or near the name plate, which is at the bottom of the unit.
- Page 10 ® The Bluetooth word mark and logos are registered trademarks owned by Bluetooth SIG, Inc. and any use of such marks by Yamaha Corporation is under license. • This manual uses the following signal words for the important information: WARNING Manufactured under license from Dolby Laboratories.
-
Page 11: Table Des Matières
Contents IMPORTANT SAFETY INSTRUCTIONS ... 2 Listening to the sound from a Bluetooth device .......... 31 PRECAUTIONS ..........4 Settings ............34 Supplied items ..........12 Configuring the HDMI control function....34 Features ............15 Configuring HDMI audio output ....... 34 Frequently asked questions...... -
Page 12: Supplied Items
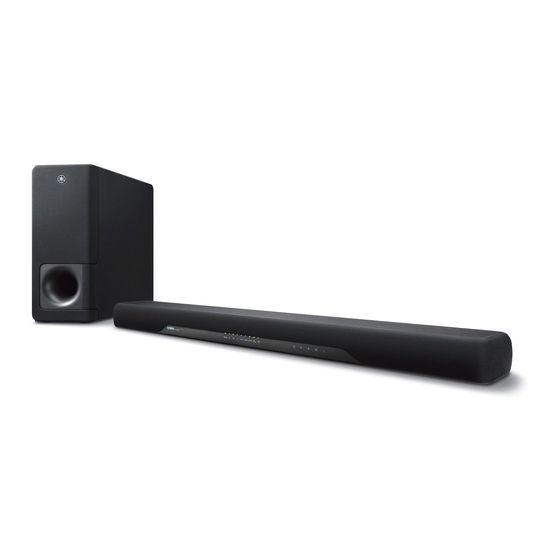
Supplied items Make sure you have received all of the following items. Center unit (YAS-CU207) Wireless subwoofer (NS-WSW42) In this manual, the wireless subwoofer is referred to as “subwoofer”. Remote control Power cable × 2 Optical digital audio cable A CR2025 Lithium battery has already been inserted into the remote control. -
Page 13: Preparing The Remote Control
Preparing the remote control Operating range of the remote control Remove the battery’s insulating strip before attempting to use the Operate the remote control within the range as shown below. remote control. Within 6 m (20 ft) Remote control sensor Battery’s insulating strip... -
Page 14: Replacing The Battery In The Remote Control
Replacing the battery in the remote control Press and hold the release tab in the direction indicated by and slide the battery holder out in the direction indicated by Battery holder Release tab CR2025 Lithium battery... -
Page 15: Features
Features This front surround system, comprised of the center unit and wireless subwoofer, allows you to enjoy dynamic sound with video played on your home TV. • 3D surround playback Surround sound can be heard not only from horizontal directions, but also from varying heights when DTS Virtual:X is used (p. 27). •... -
Page 16: Frequently Asked Questions
Frequently asked questions The following section covers popular functions and frequently asked questions about the unit. Can I use the TV’s remote control to operate the unit? Can the brightness of the indicators be adjusted? Yes. When the unit is connected to a TV via HDMI cable, the Yes. -
Page 17: Part Names And Functions
Part names and functions Center unit (front panel) (input) Select an input source to be played back (p. 26). (mute) Mute the audio output. Touch again to unmute (p. 28). (volume +/-) Adjust the volume (p. 28). (power) Turn on or off the unit (p. 25). 1 Speakers NOTE •... -
Page 18: Center Unit (Rear Panel)
Center unit (rear panel) Illustrations of the rear panel of the center unit used in this manual show the respective positions of jacks with the labels used on the bottom of the center unit itself so that jacks may be easily recognized. AC IN 8 AC IN jack a ANALOG input jack... -
Page 19: Subwoofer
Subwoofer Front panel Rear panel 2 3 4 PAIRING STANDBY PAIRING STANDBY 1 Bass reflex port indicator Glows when the center unit and subwoofer are connected 2 PAIRING button wirelessly. Used to pair the center unit with the subwoofer manually (p. 42). 5 AC IN jack 3 STANDBY indicator Connect the power cord of the subwoofer (p. -
Page 20: Installation
Installation The center unit can be installed on a TV stand or mounted on a wall. Position the subwoofer to the left or right of the center unit. Angle the subwoofer slightly toward the center of the room to prevent sound from reflecting off of walls. - Page 21 Doing so may cause the unit to fall. HDMI • Check that the unit is fixed securely after the installation. Yamaha will bear no responsibility for any accidents caused by improper installations. Mounting holes on bottom of the unit...
-
Page 22: Connections
Connections Connecting a TV and set-top box For the cable connection, follow the procedure below. : Video signals HDMI cable (optional) : Audio signals HDMI INPUT OPTICAL The digital audio/video signals from the set- OUTPUT top box or BD/DVD player are input to this unit. - Page 23 Connecting a game console via the analog jack Connect an external device, such as a game console or TV that does NOTE not have an optical digital audio output, to the ANALOG input jack of Audio Return Channel (ARC) supported TV the center unit.
-
Page 24: Connecting The Power Cable
Connecting the power cable Turning on the unit After all connections are complete, connect the supplied power Press the (power) key on the remote control or touch on the cables to the AC IN jack on the center unit and subwoofer center unit. -
Page 25: Operations
Operations (power) key Remote control signal transmitter Turns on or off the unit. Transmits infrared signals. Center unit Turned on The indicator for the last input source selected glows. Turned off (Bluetooth standby function enabled, p. 33) Subwoofer Turned on Glows STANDBY Turned off... - Page 26 Input keys Select an input source to be played back. HDMI ....Sound from a device connected to the HDMI IN jack TV ......TV audio or sound from a device connected to the unit’s TV input jack ANALOG ...Sound from a device connected to the ANALOG input jack BLUETOOTH ..Sound from a Bluetooth connected device (p.
- Page 27 SURROUND and STEREO keys CLEAR VOICE key Enable/disable the clear voice function. Switch between surround and stereo (2-channel) playback. When this function is enabled, human voices such as lines in movies and TV shows, or news and sport commentary, are SURROUND key played clearly.
- Page 28 SUBWOOFER (+/–) keys Adjust the volume of the subwoofer. Volume down (–) Volume up (+) NOTE • The SUBWOOFER (–) key is also used when pairing the center unit and subwoofer manually. MUTE key Mute the audio output. Press the key again to unmute. Flash (on mute) VOLUME (+/–) keys Adjust the volume of the unit.
- Page 29 Decoder indicator The unit supports the following audio signals. The color of the DIMMER key indicator identifies the type of audio input signal. Green (Dolby Digital), Red (DTS) Change the brightness of the indicators. Each time the key is pressed, the brightness of the indicators changes as follows. Dim (default setting) →...
-
Page 30: Operating The Unit By Tv's Remote Control (Hdmi Control)
Operating the unit by TV’s remote control (HDMI control) The HDMI control function (link function) coordinates operation of a TV and the unit so that the unit can be operated using the TV’s remote control. When a TV is connected to the center unit with an HDMI cable (p. 22), the TV’s remote control can be used to perform the following operations. Coordinated functions via the TV remote control NOTE •... -
Page 31: Listening To The Sound From A Bluetooth Device
Listening to the sound Press the BLUETOOTH key on the unit’s remote control to select Bluetooth as the input source. from a Bluetooth The BLUETOOTH indicator on the unit flashes. device BLUETOOTH Flashes Audio from a Bluetooth device, such as a smartphone or a digital music player, can be played over a wireless connection. - Page 32 Select “YAS-207 Yamaha” in the Bluetooth device list Terminating Bluetooth connection on the device. Bluetooth connection is terminated in the following cases. If a passkey (PIN) is required, enter the number “0000”. • The Bluetooth function is turned off on the compatible device.
- Page 33 Using the Bluetooth standby function Using the HOME THEATER CONTROLLER The Bluetooth standby function allows you to turn on or off the unit automatically, linked with the operation of the Bluetooth device. When the free HOME THEATER CONTROLLER app is installed on a Bluetooth-compatible smartphone or other device, various operations With the unit turned on, hold down the BLUETOOTH (basic operation of the unit, selection of a surround mode, adjustment...
-
Page 34: Settings
Settings Configuring the HDMI control function Configuring HDMI audio output Follow the procedure below to enable or disable the unit’s HDMI Specify whether HDMI audio input signal will be played from the unit control function. This function is enabled by default. or the TV. -
Page 35: Enabling/Disabling The Auto Power Standby Function
Enabling/disabling the auto power Initializing the unit standby function Follow the procedure below to initialize the unit. Enabling the auto power standby function prevents the unit from Turn off the unit. remaining on when not in use. When the auto power standby function is enabled, the unit automatically turns off in any of the following Touch and hold on the center unit until all... -
Page 36: Troubleshooting
Refer to the table below when the unit does not function properly. If the problem you are experiencing is not listed below or if the instructions below do not help, turn off the unit, disconnect the power cables of the center unit and subwoofer, and contact the nearest authorized Yamaha dealer or service center. - Page 37 Problem Cause Remedy All indicators go out although The unit is configured so that indicators do not glow or Use the DIMMER key to select the desired brightness (p. 29). flash unless the unit is being operated. the unit is turned on (it may seem that the unit is turned off).
- Page 38 The protection circuitry in the subwoofer has been To protect the product, the power of the subwoofer cannot be activated. turned on. Unplug the power cable from the AC wall outlet and contact the nearest authorized Yamaha dealer or service center.
- Page 39 Pair the center unit and subwoofer manually (p. 42). If a wireless connection is not established, the unit may be malfunctioning. Unplug the power cables from the AC wall outlets and contact the nearest authorized Yamaha dealer or service center. Though the indicator on The volume is too low.
-
Page 40: Remote Control
Problem Cause Remedy No surround effect. Stereo playback is selected. Select surround playback or 3D surround playback (p. 27). The volume is too low. Turn up the volume (p. 28). The TV or playback device is set to output 2 channel Change the digital audio output setting on the TV or playback audio (such as PCM) only. -
Page 41: Bluetooth
Bluetooth Problem Cause Remedy The unit cannot be connected Bluetooth is not selected as the input source. Select Bluetooth as the input source (p. 31). to a Bluetooth device. The unit is connected to a different Bluetooth device. Unpair the Bluetooth device that is currently connected, and pair with the desired Bluetooth device. - Page 42 Pairing the center unit and subwoofer manually Within 30 seconds, press and hold the PAIRING button on the rear panel of the subwoofer for more than 3 seconds. Turn off the unit. Once the center unit and subwoofer have been paired and a Press and hold the SUBWOOFER (–) key on the wireless connection established, the indicator will glow, and...
-
Page 43: Specifications
Specifications Item Center unit (YAS-CU207) Subwoofer (NS-WSW42) Amplifier Section Maximum Rated Output Power Front L/R 50 W x 2 ch 100 W Type Front L/R: Acoustic suspension type Bass reflex type Front L/R: 46 mm (1-3/4") cone magnetic shielding type x 4 Driver 16 cm (6-1/4") cone non-magnetic shielding type x 1 Tweeter: 25 mm (1") dome magnetic shielding type... - Page 44 Item Center unit (YAS-CU207) Subwoofer (NS-WSW42) Bluetooth version Ver. 4.1 — Supported profiles A2DP, SPP — Supported codecs SBC, MPEG4 ACC — Radio frequency (Operational 2402 MHz to 2480 MHz — frequency) Bluetooth Maximum output power (EIRP) 20 dBm (100 mW) —...
- Page 45 • To decode audio bitstream signals on this unit, set the input source device date. appropriately so that the device outputs the bitstream audio signals directly (does To obtain the latest manual, access the Yamaha website then download the manual not decode the bitstream signals on the device). Refer to documentation supplied file.
-
Page 46: Explication Des Symboles Graphiques
Explication des symboles graphiques L'éclair avec une flèche à l'intérieur d'un triangle équilatéral est destiné à attirer l'attention de l'utilisateur sur la présence d'une « tension dangereuse » non isolée à l'intérieur de l'appareil, ATTENTION: POUR RÉDUIRE LES RISQUES D’INCENDIE ET DE pouvant être suffisamment élevée pour constituer DÉCHARGE ELECTRIQUE, NE PAS RETIRER LE COUVERCLE (OU un risque d'électrocution. -
Page 47: Informations De La Fcc (Pour Les Clients Résidents Aux États-Unis)
• Le présent appareil est conforme à la partie 15 des règles de la FCC et aux normes par Yamaha peut invalider l’autorisation, accordée par la FCC, d’utiliser ce des CNR d'Industrie Canada applicables aux appareils radio exempts de licence. -
Page 48: Précautions D'usage
électriques. • Lors de l'installation de l'appareil, assurez-vous que la prise secteur que vous • Yamaha ne peut être tenu responsable des dommages utilisez est facilement accessible. En cas de problème ou de dysfonctionnement, corporels et matériels causés par une mauvaise... - Page 49 Faites ensuite inspecter l'appareil par le yeux peut entraîner la cécité ou provoquer des brûlures chimiques. revendeur auprès duquel vous l'avez acheté ou par un technicien Yamaha qualifié. • Ne jetez pas les piles au feu. Cela pourrait causer l'explosion des piles et provoquer •...
-
Page 50: En Cas D'anomalie
électriques ou des brûlures. l'avez acheté ou par un technicien Yamaha qualifié. • Veillez à toujours saisir la fiche elle-même, et non le câble, pour la retirer de l'appareil ou de la prise secteur. -
Page 51: Perte De Capacités Auditives
Yamaha qualifié. de l'utilisateur, s'il s'agit de vous-même ou d'autres personnes. -
Page 52: Utilisation Des Piles
Avis Utilisation des piles • Risque d'explosion en cas de remplacement de la pile par une autre de type incorrect. Remplacer la pile par une pile du même type ou de type équivalent. Indique les points que vous devez respecter afin •... -
Page 53: Connexions
Informations Connexions • En cas de connexion d'unités externes, assurez-vous de lire attentivement le mode d'emploi de l'appareil concerné et reliez-le conformément aux instructions fournies. Indique des informations importantes concernant La non conformité aux instructions de manipulation peut provoquer le ce produit. -
Page 54: Marques Commerciales
Le mot et logo Bluetooth est une marque déposée et enregistrée propriété de Bluetooth SIG, Inc. et toute utilisation de ces marques par Yamaha Corporation est • Ce manuel utilise les mots de signalisation suivants pour les informations soumise à licence. - Page 55 Table des matières CONSIGNES DE SÉCURITÉ À LIRE Écoute du son depuis un périphérique ATTENTIVEMENT..........2 Bluetooth ............31 PRÉCAUTIONS D'USAGE ........ 4 Réglages............34 Configuration de la fonction de contrôle Éléments fournis .......... 12 HDMI ..................34 Description ........... 15 Configuration de la sortie audio HDMI Foire aux questions ........
-
Page 56: Éléments Fournis
Éléments fournis Vérifiez que vous disposez de tous les éléments suivants. Appareil central (YAS-CU207) Caisson de basse sans fil (NS-WSW42) Dans ce manuel, l’utilisation du terme « caisson de basse » fait référence au caisson de basse sans fil. Télécommande 2 câbles d’alimentation Câble audio numérique optique Une pile au lithium CR2025 a déjà... -
Page 57: Préparation De La Télécommande
Préparation de la télécommande Rayon d’action de la télécommande Retirez la languette isolante de la pile avant d’essayer d’utiliser la Utilisez la télécommande dans le rayon indiqué ci-dessous. télécommande. Dans un rayon de 6 m Capteur de télécommande Languette isolante de la pile... -
Page 58: Remplacement De La Pile Dans La Télécommande
Remplacement de la pile dans la télécommande Maintenez enfoncée la patte de dégagement dans le sens indiqué et sortez le porte-pile en le faisant glisser dans le sens indiqué par Porte-pile Patte de dégagement Pile au lithium CR2025... -
Page 59: Description
Description Ce système surround frontal, composé de l’appareil central et du caisson de basse, vous permet de profiter d'un son dynamique lors du visionnage de vidéos sur votre téléviseur. • Lecture Surround 3D Le son surround peut être écouté non seulement dans le sens horizontal, mais également dans le sens vertical lorsque DTS Virtual:X est utilisé... -
Page 60: Foire Aux Questions
Foire aux questions La section suivante présente les fonctions populaires et les questions fréquemment posées sur l’appareil. Puis-je utiliser la télécommande du téléviseur pour La luminosité des témoins peut-elle être ajustée ? commander l’appareil ? Oui. Utilisez la touche DIMMER de la télécommande (p. 29). Oui. -
Page 61: Noms De Pièces Et Fonctions
Noms de pièces et fonctions Appareil central (face avant) (entrée) Pour sélectionner une source d’entrée à lire (p. 26). (sourdine) Pour mettre la sortie audio en sourdine. Touchez de nouveau pour rétablir le son (p. 28). (volume +/-) Pour régler le volume (p. 28). (alimentation) Pour allumer ou éteindre l’appareil 1 Enceintes... -
Page 62: Appareil Central (Face Arrière)
Appareil central (face arrière) Les illustrations de la face arrière de l'appareil central utilisées dans ce manuel montrent les positions respectives des prises avec les étiquettes utilisées sur le bas de l'appareil central, afin que les prises puissent être facilement reconnues. AC IN 8 Prise AC IN a Prise d’entrée ANALOG... -
Page 63: Caisson De Basse
Caisson de basse Face avant Face arrière 2 3 4 PAIRING STANDBY PAIRING STANDBY 1 Port bass-reflex 4 Témoin S'allume lorsque l'appareil central et le caisson de basse sont 2 Bouton PAIRING connectés sans fil. Cette touche sert à apparier manuellement l’appareil central avec 5 Prise AC IN le caisson de basse (p. -
Page 64: Installation
Installation L’appareil central peut être installé sur un meuble de télévision ou fixé à un mur. Placez le caisson de basse à gauche ou à droite de l'appareil central. Orientez légèrement le caisson de basse vers le centre de la pièce pour éviter que le son ne se réfléchisse sur les murs. - Page 65 • Vérifiez que l’appareil est solidement fixé après l’installation. Yamaha n’assumera aucune responsabilité pour tout accident découlant d’une installation incorrecte. Écran tactile...
-
Page 66: Raccordements
Raccordements Raccordement d’un téléviseur et d’un décodeur Raccordez les câbles en procédant comme suit. : Signaux vidéo Câble HDMI (en option) : Signaux audio HDMI INPUT Les signaux audio/vidéo numériques du OPTICAL OUTPUT décodeur ou du lecteur BD/DVD sont reçus sur cet appareil. -
Page 67: Raccordement D'une Console De Jeux Via La Prise Analogique
Raccordement d’une console de jeux via la prise analogique Raccordez un appareil externe comme une console de jeux ou un NOTE téléviseur non pourvu d’une sortie audio numérique optique à la prise Téléviseur compatible ARC (Audio Return Channel: canal de retour audio) d’entrée ANALOG de l’appareil central. -
Page 68: Branchement Du Câble D'alimentation
Branchement du câble d’alimentation Mise sous tension de l’appareil Une fois que tous les raccordements sont terminés, branchez les Appuyez sur la touche (alimentation) de la télécommande ou câbles d’alimentation fournis sur la prise AC IN de l’appareil central, touchez sur l'appareil central. -
Page 69: Utilisation
Utilisation Touche (alimentation) Émetteur de signal de télécommande Allume ou éteint l’appareil. Émet des signaux infrarouges. Appareil central Allumé Le témoin de la dernière source d’entrée sélectionnée s’allume. Éteint (fonction de veille Bluetooth activée, p. 33) Caisson de basse Allumé Éteint Allumé... -
Page 70: Touches D'entrée
Touches d’entrée Pour sélectionner une source d’entrée à lire. HDMI ....Son d’un dispositif raccordé à la prise d’entrée HDMI IN TV ......Audio du téléviseur ou son d’un dispositif raccordé à la prise d’entrée TV de l’appareil ANALOG ...Son d’un dispositif raccordé à la prise d’entrée ANALOG BLUETOOTH ..Son d’un périphérique connecté... - Page 71 Touches SURROUND et STEREO Touche CLEAR VOICE Pour activer/désactiver la fonction de voix claires. Pour basculer entre la lecture surround et stéréo (2 canaux). Lorsque cette fonction est activée, les voix humaines, comme les dialogues des films et des émissions télévisées, ou les Touche SURROUND actualités et les commentaires sportifs, sont lues clairement.
-
Page 72: Touche Mute
Touches SUBWOOFER (+/–) Pour régler le volume du caisson de basse. Volume bas (–) Volume élevé (+) NOTE • La touche SUBWOOFER (–) est également utilisée lorsque vous appariez manuellement l'appareil central et le caisson de basse. Touche MUTE Pour mettre la sortie audio en sourdine. Appuyez à nouveau sur la touche pour rétablir le son. -
Page 73: Témoin Du Décodeur
Témoin du décodeur L’appareil prend en charge les signaux audio suivants. La couleur du Touche DIMMER témoin identifie le type de signal d’entrée audio. Vert (Dolby Digital), rouge (DTS) Change la luminosité des témoins. Chaque fois que la touche est enfoncée, la luminosité des témoins change comme suit. Faible (réglage par défaut) →... -
Page 74: Commande De L'appareil Avec La Télécommande Du Téléviseur (Contrôle Hdmi)
Commande de l’appareil avec la télécommande du téléviseur (contrôle HDMI) La fonction de contrôle HDMI (fonction de liaison) coordonne le fonctionnement d’un téléviseur et de l’appareil pour que l’appareil puisse être commandé au moyen de la télécommande du téléviseur. Lorsqu’un téléviseur est raccordé à l’appareil central avec un câble HDMI (p. 22), la télécommande du téléviseur peut être utilisée pour exécuter les opérations suivantes. -
Page 75: Écoute Du Son Depuis Un Périphérique Bluetooth
Écoute du son depuis Appuyez sur la touche BLUETOOTH de la télécommande de l’appareil pour sélectionner Bluetooth comme source d’entrée. un périphérique Le témoin BLUETOOTH sur l’appareil clignote. Bluetooth BLUETOOTH Le son depuis un périphérique Bluetooth, comme un smartphone ou Clignotant un baladeur numérique, peut être lu via une connexion sans fil. -
Page 76: Mettre Fin À La Connexion Bluetooth
Sélectionnez « YAS-207 Yamaha » dans la liste des Mettre fin à la connexion Bluetooth périphériques Bluetooth sur le périphérique . La connexion Bluetooth prend fin dans les cas suivants. Si un code (PIN) est nécessaire, tapez le numéro « 0000 ». -
Page 77: Utilisation Du Mode De Veille Bluetooth
Utilisation du mode de veille Bluetooth Utilisation de l’application HOME THEATER CONTROLLER La fonction de veille Bluetooth vous permet d’allumer ou d’éteindre automatiquement l’appareil, lié au fonctionnement du périphérique Lorsque l’application HOME THEATER CONTROLLER gratuite est Bluetooth. installée sur un smartphone compatible Bluetooth ou un autre dispositif, plusieurs opérations (fonctionnement de base de l’appareil, Alors que l’appareil est sous tension, maintenez sélection d’un mode surround, ajustement des réglages sonores,... -
Page 78: Réglages
Réglages Configuration de la fonction de contrôle HDMI Configuration de la sortie audio HDMI audio Procédez comme indiqué ci-dessous pour activer ou désactiver la Spécifiez si le signal d’entrée audio HDMI sera lu depuis l’appareil ou fonction de contrôle HDMI de l’appareil. Cette fonction est activée par le téléviseur. -
Page 79: Activation/Désactivation De La Fonction De Veille Automatique
Activation/désactivation de la fonction Réinitialisation de l’appareil de veille automatique Procédez comme indiqué ci-dessous pour réinitialiser l’appareil. En activant la fonction de veille automatique, vous empêchez Éteignez l’appareil. l’appareil de rester allumé lorsqu’il n’est pas utilisé. Lorsque la fonction de veille automatique est activée, l’appareil se met Touchez et maintenez enfoncées automatiquement hors tension dans l’un des cas suivants. -
Page 80: Guide De Dépannage
Yamaha le plus proche. Vérifiez tout d’abord les points suivants : 1 Les câbles d’alimentation de l’appareil central, du caisson de basse, du téléviseur et des appareils de lecture (comme des lecteurs... - Page 81 Anomalie Cause possible Action corrective Tous les témoins s’éteignent L’appareil est configuré pour que les témoins ne Utilisez la touche DIMMER pour sélectionner la luminosité s’allument ou ne clignotent que s’il est utilisé. souhaitée (p. 29). alors que l’appareil est sous tension (on pourrait penser que l’appareil est éteint).
- Page 82 Le circuit de protection du caisson de basse a été activé. Le caisson de basse ne peut pas être mis sous tension par mesure de protection. Débranchez le câble d’alimentation de la prise secteur et contactez le revendeur ou le service après-vente agréé Yamaha le plus proche.
- Page 83 Si une connexion sans fil n'est pas établie, cela peut indiquer un dysfonctionnement de l’appareil. Débranchez les câbles d’alimentation des prises secteur et contactez le revendeur ou le service après-vente agréé Yamaha le plus proche. Bien que le témoin sur le Le niveau sonore est trop bas.
-
Page 84: Télécommande
Anomalie Cause possible Action corrective Pas d’effet surround. La lecture stéréo est sélectionnée. Sélectionnez la lecture surround ou la lecture surround 3D (p. 27). Le niveau sonore est trop bas. Augmentez le niveau de volume (p. 28). Le téléviseur ou l’appareil de lecture est réglé pour Changez le réglage de sortie audio numérique sur le téléviseur émettre uniquement l’audio 2 canaux (PCM par exemple). - Page 85 Bluetooth Anomalie Cause possible Action corrective L’appareil ne peut pas être Bluetooth n’est pas sélectionné comme source d’entrée. Sélectionnez Bluetooth comme source d’entrée (p. 31). connecté à un périphérique L’appareil est connecté à un périphérique Bluetooth Découplez le périphérique Bluetooth actuellement connecté, et Bluetooth.
-
Page 86: Appariement Manuel De L'appareil Central Et Du Caisson De Basse
Appariement manuel de l’appareil central et du Dans les 30 secondes qui suivent, maintenez enfoncée la touche PAIRING sur la face arrière du caisson de basse caisson de basse pendant plus de 3 secondes. Une fois que l'appareil central et le caisson de basse ont été Éteignez l’appareil. -
Page 87: Caractéristiques Techniques
Caractéristiques techniques Élément Appareil central (YAS-CU207) Caisson de basse (NS-WSW42) Puissance de sortie nominale Section Amplificateur Avant G/D 50 W x 2 canaux 100 W maximale Type Avant G/D: Type de suspension acoustique Type bass-reflex Avant G/D: 46 mm type conique à blindage magnétique x 4 Excitateur 16 cm type conique à... - Page 88 Élément Appareil central (YAS-CU207) Caisson de basse (NS-WSW42) Version Bluetooth Ver. 4.1 — Profils pris en charge A2DP, SPP — Codecs pris en charge SBC, MPEG4 ACC — Fréquence radio (fréquence 2402 MHz à 2480 MHz — opérationnelle) Bluetooth Puissance de sortie maximale 20 dBm (100 mW) —...
-
Page 89: Signal Audionumérique
à la date de publication du manuel. bitstream directement (ne décode pas les signaux bitstream sur le périphérique). Pour obtenir la version la plus récente du manuel, accédez au site Web de Yamaha puis téléchargez le fichier du manuel concerné. - Page 90 Yamaha Global Site http://www.yamaha.com/ Yamaha Downloads http://download.yamaha.com/ Manual Development Group © 2017 Yamaha Corporation Published 10/2017 KS-B0 Printed in China AV16-0011 10-1 Nakazawa-cho, Naka-ku, Hamamatsu, 430-8650 Japan...