Table des Matières
Publicité
Liens rapides
Publicité
Table des Matières

Manuels Connexes pour Horizon Hobby OUTCAST EXB


Sommaire des Matières pour Horizon Hobby OUTCAST EXB
-
Page 2: Safety Precautions And Warnings
This product is not intended for use by children without direct adult supervision. Do not use with incompatible components or alter this product in any way outside of the instructions provided by Horizon Hobby, LLC. This manual contains instructions for safety, operation and maintenance. -
Page 3: Sicherheitshinweise Und Warnungen
Wird dieses Produkt nicht auf eine sichere und verantwortungsvolle Weise betrieben, kann dies zu Verletzungen oder Schäden am Produkt oder anderen Sachwerten führen. Versuchen Sie nicht ohne Genehmigung durch Horizon Hobby, LLC, das Produkt zu zerlegen, es mit inkompatiblen Komponenten zu verwenden oder auf jegliche Weise zu erweitern. -
Page 4: Précautions Et Avertissements Liés À La Sécurité
être utilisé par des enfants sans la surveillance directe d´un adulte. N´essayez pas de démonter le produit, de l´utiliser avec des composants incompatibles ou d´en améliorer les performances sans l´accord d´Horizon Hobby, LLC. Ce manuel comporte des instructions relatives à la sécurité, au fonctionnement et à l´entretien. Il est capital de lire et de respecter la totalité... -
Page 5: Table Des Matières
Contents Page Page Maintenance Schedule Warnings Wheel and Tire Maintenance Kit Overview Pivot Ball Maintenance Required Shock Maintenance Recommended Tools How To...Install Servo in Receiver box How To...Install Receiver in Receiver box Driveshaft Maintenance How To...Install ESC on Receiver box lid How To...Change the Pinion/Motor How To...Install the servo saver How To...Adjust Ride Height... -
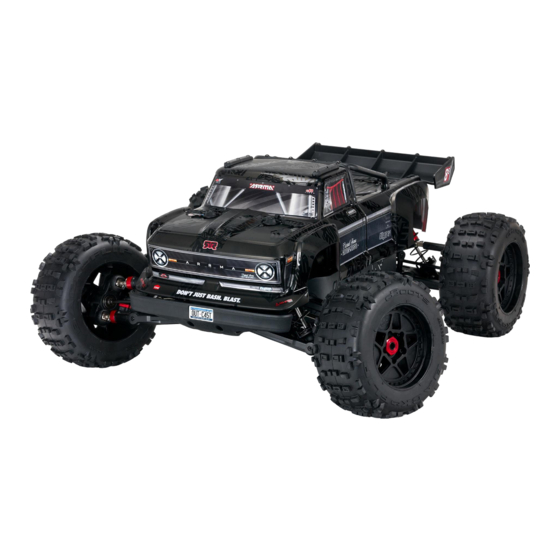
Page 6: Kit Overview
Kit Overview Überblick Aperçu du Kit Supplied Mitgeliefert Fournis • OUTCAST 1/5 4WD EXtreme Bash Roller (Black) (ARA5210) Wheel wrench Radschlüssel Clé de roue 39T Spur Gear 39T Stirnrad Pignon droit 39T Motor Mounts Supports de moteur SPECIFICATIONS SPEZIFIKATIONEN Motorhalterungen CARACTÉRISTIQUES ARRMA OUTCAST 8S (ARA5210) -
Page 7: Required
Required Benötigt Requis 8S Electronic Speed Control Contrôle de vitesse électronique 8S 8S Elektronische Geschwindigkeitsregelung 2Ch Transmitter and Receiver Émetteur et récepteur 2Ch 2Ch Sender und Empfänger 8S Capable Motor (see page 16) Moteur compatible 8S (voir page 16) 8S-fähiger Motor (siehe Seite 16) 2x4S LiPo Battery 2x4S LiPo LiPo Akku 2x4S LiPo LiPo Batteries... -
Page 8: Recommended Tools
Recommended Tools Empfohlene Werkzeuge Outils recommandés Nut Drivers Mutternschlüssel Wheel wrench Clés à douille Radschlüssel emmanchée Clé de roue Hex Drivers Long Nose Pliers Inbusschlüssel Tournevis à tête hexagonale Spitzzange Grease Pinces à bec long Fett Turnbuckle Wrench Graisse Spurstangenwerkzeug Clef pour biellettes à... -
Page 9: Comment
How To... Wie... Comment... Install Servo in Receiver box Installieren Sie das Servo in der Empfängerbox Installer le servo dans la boîte du récepteur The below steps will help you to choose and select the correct servo for the vehicle and install it in the correct mount. Die folgenden Schritte helfen Ihnen bei der Auswahl und Auswahl des richtigen Servos für das Fahrzeug und beim Einbau in die richtige Halterung. -
Page 10: Comment
How To... Wie... Comment... Install Receiver in Receiver box Installieren Sie das Empfänger in der Empfängerbox Installer le récepteur dans la boîte du récepteur The below steps will help you to install your chosen receiver into the receiver box that you have have chosen for your servo. Die folgenden Schritte helfen Ihnen bei der Installation des von Ihnen ausgewählten Empfängers in der Empfängerbox, die Sie für Ihr Servo ausgewählt haben. -
Page 11: Comment
How To... Wie... Comment... Install ESC on Receiver box lid Installieren Sie den Regler am Deckel der Installer l'ESC sur le couvercle du Empfängerbox boîtier récepteur The below steps will help you to install your chosen 8S Electronic Speed Control to the Receiver Box lid. Die folgenden Schritte helfen Ihnen bei der Installation der von Ihnen gewählten elektronischen 8S-Geschwindigkeitsregelung am Deckel der Empfängerbox. -
Page 12: Comment
How To... Wie... Comment... Install the servo saver Installieren Sie den Servo Saver Installer l'économiseur d'asservissement The below steps will help you to install the servo saver and radio box module into the car. Die folgenden Schritte helfen Ihnen beim Einbau des Servo-Sparers und des Radio-Box-Moduls in das Auto. - Page 13 ! Anti clockwise thread ! Gegen den 2.5mm Uhrzeigersinn Faden ! Filetage anti-horaire M3x20mm Button Head Screw (AR721320) x1 M4x12mm Flat Head 2.5mm Screw (AR722412) x4 WWW.ARRMA-RC.COM...
-
Page 14: Comment
How To... Wie... Comment... Change the Spur Gear Spurrad wechseln Changer l'engrenage droit The below steps will help you select the correct spur gear for the vehicle and install it. Follow gearing advice from your chosen motor manufacturer. Die folgenden Schritte helfen Ihnen bei der Auswahl und Auswahl des richtigen Stirnradgetriebes für das Fahrzeug und beim Einbau. - Page 15 M5x16mm Flat Head Screw (ARA722516) x4 M3x8mm Button Head Screw (AR721308) x2 Spur Gear 47T (ARA310920) x1 M4x16mm Flat Head Screw (ARA722416) x4 2.5mm Flange Lock Nut M4 (AR708001) x1 M3x8mm Button Head Screw (AR721308) x2 M4x16mm Flat Head Screw (ARA722416) x4 2.5mm Flange Lock Nut...
-
Page 16: Comment
How To... Wie... Comment... Install the motor Den Motor einbauen Installer le moteur The below steps will help you to install the motor into the vehicle. Choose your motor plate based on your motor dimensions. Die folgenden Schritte helfen Ihnen beim Einbau des Motors in das Fahrzeug. Wählen Sie Ihre Motorplatte basierend auf Ihren Motorabmessungen. - Page 17 M4x20mm Flanged Button Head Screw (ARA727420) x3 2.5mm WWW.ARRMA-RC.COM...
-
Page 18: Neutre De Direction
Remove Body Entfernen Sie die Karosserie Supprimer la carrosserie Install AA Batteries In Controller Legen Sie die AA Batterien in das Steuergerät ein Installer les piles AA dans la radiocommande AA batteries x4 (NOT INCLUDED) Wichtig: beacht- en Sie die Polung Note: Polarité... - Page 19 How to Drive Wie man fährt Neutre de direction ACCELERATE Beschleunigung Accélérer LEFT RIGHT Links Rechts RIGHT LEFT Gauche Droite Rechts Links Droite Gauche How to hold BRAKE/REVERSE ACCELERATE Bremsen/Rückwärts Wie man hält Beschleunigung Freiner/Sens inverse Comment tenir Accélérer BRAKE/REVERSE Bremsen/Rückwärts Freiner/Sens inverse ACCELERATE...
- Page 20 Install Car Body Entfernen Sie die Karosserie Supprimer la carrosserie NOW GET SHREDDING! Storage Lagern Stockage WWW.ARRMA-RC.COM...
-
Page 21: Maintenance Schedule
Maintenance Schedule Wartungsplan Calendrier de maintenance We recommend a Service Schedule to keep your vehicle in the best working condition possible. Our recommended schedule appears as the below icon: Wir empfehlen Ihnen einen Wartungsplan auszuführen, um Ihr Fahrzeug im bestmöglichen Zustand zu erhalten. Unsere Empfehlungen für Nous vous recommandons un Carnet d’entretien pour maintenir votre véhicule dans les meilleures conditions de fonctionnement possible. - Page 22 Maintenance Wartung Entretien Wheel and Tire Maintenance Wartung der Felgen und Reifen Entretien des Roues et pneus Check the areas highlighted in the image to the left after the duration of usage above. Replace parts where necessary to ensure maximum durability and enjoyment from your vehicle.
- Page 23 Maintenance Wartung Entretien Pivot Ball Maintenance Aufhängungs-Wartung Entretien des porte-fusèes Check the areas highlighted in the image to the left after the duration of usage above. Replace parts where necessary to ensure maximum durability and enjoyment from your vehicle. Überprüfen Sie die hervorgehobenen Bereiche im linken Bild nach den oben angegebenen Zeiträumen.
-
Page 24: Shock Maintenance
Maintenance Wartung Entretien Shock Maintenance Stoßdämpfer-Wartung Entretien des amortisseurs Check the areas highlighted in the image to the left after the duration of usage above. Replace parts where necessary to ensure maximum durability and enjoyment from your vehicle. Überprüfen Sie die hervorgehobenen Bereiche im linken Bild nach den oben angegebenen Zeiträumen. - Page 25 WWW.ARRMA-RC.COM...
- Page 26 Maintenance Wartung Entretien Check the areas highlighted in the image to the left after the duration of usage above. Replace parts where necessary to ensure maximum durability and enjoyment from your vehicle. Überprüfen Sie die hervorgehobenen Bereiche im linken Bild nach den oben angegebenen Zeiträumen.
- Page 27 Maintenance Wartung Entretien Check the areas highlighted in the image to the left after the duration of usage above. Replace parts where necessary to ensure maximum durability and enjoyment from your vehicle. Überprüfen Sie die hervorgehobenen Bereiche im linken Bild nach den oben angegebenen Zeiträumen.
- Page 28 Maintenance Wartung Entretien Driveshaft Maintenance Wartung des Antriebsstranges Entretien des cardans Check the areas highlighted in the image to the left after the duration of usage above. Replace parts where necessary to ensure maximum durability and enjoyment from your vehicle. Überprüfen Sie die hervorgehobenen Bereiche im linken Bild nach den oben angegebenen Zeiträumen.
-
Page 29: Comment
How To... Wie... Comment... Change the Pinion/Motor Wechselt man das Motorritzel/den Motor Changez le Pignon / Moteur The below steps will help you to change the pinion which will alter the speed of the vehicle. Removing the motor can also be done at the same time. Die unten gezeigten Schritte helfen Ihnen das Motorritzel zu wechseln. -
Page 30: Comment
How To... Wie... Comment... Adjust Ride Height Stellt man die Bodenfreiheit ein Réglage de la hauteur du châssis The below steps will help you to adjust the vehicle's ground clearance to suit the terrain you choose to drive on. Die unten gezeigten Schritte helfen Ihnen die Bodenfreiheit optimal auf das von Ihnen befahrene Gelände einzustellen. -
Page 31: Comment
How To... Wie... Comment... Vent your tires Reifen entlüften Ventilez vos pneus The below steps will show you how to vent your tires when driving in wet or sandy conditions. Die folgenden Schritte zeigen Ihnen, wie Sie Ihre Reifen beim Fahren auf nasser oder sandiger Fahrbahn entlüften. -
Page 32: Limitation Of Liability
LIMITED WARRANTY What this Warranty Covers Horizon Hobby, LLC, (Horizon) warrants to the original purchaser that the product purchased (the “Product”) will be free from defects in materials and workmanship for a period of 2 years from the date of purchase. -
Page 33: Sicherheitshinweise
Bedienungsanleitung des Modells wie auch der Fernsteuerung. Garantiezeitraum Exklusive Garantie Horizon Hobby LLC (Horizon) garantiert, dass dasgekaufte Produkt frei von Material- und Montagefehlern ist. Der Garantiezeitraum entspricht den gesetzlichen Bestimmung des Landes, in dem das Produkt erworben wurde. In Deutschland beträgt der Garantiezeitraum 6 Monate und der Gewährleistungszeitraum 18 Monate nach dem Garantiezeitraum. -
Page 34: Limitations De La Garantie
Garantie exclusive - Horizon Hobby, LLC (Horizon) garantit que le Produit acheté (le « Produit ») sera exempt de défauts matériels et de fabrication à sa date d’achat par l’Acheteur. La durée de garantie correspond aux dispositions légales du pays dans lequel le produit a été... -
Page 35: Warranty And Service Contact Information
(Repairs and Repair Requests) United States of Horizon Product Support 2904 Research Road America (Product Technical Assistance) 877-504-0233 Champaign, Illinois 61822 USA Sales 800-338-4639 Horizon Technischer Service Hanskampring 9 +49 (0) 4121 2655 100 D 22885 Barsbüttel, Germany Sales: Horizon Hobby GmbH WWW.ARRMA-RC.COM...