Publicité

Les langues disponibles
  • FR

Les langues disponibles

  • FRANÇAIS, page 5

Liens rapides

Your safety, and the safety of others, is very important. To help you make informed decisions about safety,
we have provided installation and operating instructions and other information on labels and in this guide. This
information alerts you to potential hazards that could hurt you or others. It is not possible to warn you about all
potential hazards associated with this product, you must use your own good judgment.
CARELESS INSTALLATION AND OPERATION CAN RESULT IN SERIOUS INJURY OR EQUIPMENT DAM-
AGE. READ AND UNDERSTAND ALL SAFETY PRECAUTIONS AND OPERATING INSTRUCTIONS BE-
FORE INSTALLING AND OPERATING THIS PRODUCT.
This guide identifies potential hazards and has important safety messages that help you and others avoid personal
injury or death. WARNING and CAUTION are signal words that identify the level of hazard. These signal words
mean:
WARNING signals a hazard that could cause serious injury or death, if you do not follow
recommendations.
follow recommendations.
This guide uses NOTICE to call attention to important mechanical information, and Note: to emphasize general
information worthy of special attention.
Failure to observe these instructions could lead to severe injury or death.
Always Read the Plow Operator's Manual, the Winch Operator's Manual and all warning labels before operating.
Always remove jewelry and wear eye protection.
Always use appropriate and adequate care in lifting components into place.
Always insure components will remain secure during installation and operation.
Always tighten all nuts and bolts securely, per the installation instructions.
Always operate the vehicle at a walking speed with the blade installed. Never exceed 5 mph (8 km/h), even with blade up.
Always plow cautiously, impact with hidden or stationary object may cause the vehicle to stop suddenly or go out of control.
Never operate the vehicle on slopes greater than 10 degrees with the plow installed.
Never stand or ride on the plow.
Always stay clear of moving parts and joints. Always keep others away when operating or adjusting plow.
Always perform regular inspections and maintenance on the plow mechanism, fasteners, cable and related hardware.
Always replace all worn or damaged parts before operating.
Never operate this WARN product with damaged or missing parts.
Always drive slowly over bumpy and rough terrain. Driving at speeds that cause the plow to bounce while in the up position can cause the
winch to back-drive, causing the plow to work its way down. This may result in the plow impacting a stationary object and cause damage to
the vehicle and operator injury or death.
Always drive at speeds such that the plow does not bounce and be aware of the plow position while driving at all times.
Never raise the top of the plow above the headlights of the ATV, as it may damage the vehicle and plow.
WARN® INDUSTRIES
INSTALLATION INSTRUCTIONS
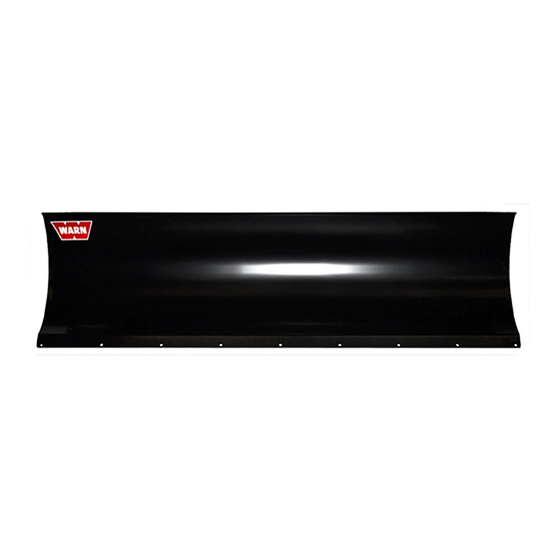
ProVantage 72" Plow Blade Kit
CAUTION signals a hazard that may cause minor to moderate injury, if you do not
Part Number: 79958
Application: SxS Vehicles
WARNING
INJURY HAZARD
PAGE 1
79959 Rev A1

Publicité

Table des Matières
loading

Sommaire des Matières pour Warn ProVantage 72

  • Page 1 This information alerts you to potential hazards that could hurt you or others. It is not possible to warn you about all potential hazards associated with this product, you must use your own good judgment.
  • Page 2: Before You Begin

    Before You Begin This kit also requires a ProVantage Plow Base Kit, a vehicle specific Plow Mounting kit, and a WARN winch to raise and lower the plow. Please contact your nearest dealer for part numbers. Please note that much of the hardware used for this installation can be found in the Plow Base kit.
  • Page 3: Parts List

    Be sure to lock the retaining pin when completed to prevent losing the pin and skid dur- ing plowing. NOTE: Refer to Warn Plowing Operators guide to FIGURE 1 WEAR BAR INSTALLATION determine where to set the skid height during plowing.
  • Page 4: Maintenance/Care

    Heavy Duty Skid and Pin 2x 77907, 2x 79938 Contact your nearest WARN dealer for ordering. To find a dealer nearest you, contact the WARN dealer locator line at 1-800-910-1122. If you are having problems with your plow, please follow the steps below: Reference the installation instructions for tips or notes.
  • Page 5  Toujours remplacer toutes les pièces usées ou endommagées avant l’utilisation.  Ne jamais faire fonctionner ce produit WARN avec des pièces endommagées ou manquantes.  Toujours conduire lentement sur les terrains cahoteux ou accidentés. Le fait de conduire à des vitesses qui secouent la lame alors qu’elle est en position relevée peut provoquer le déroulement du treuil, ayant pour effet de baisser la lame.
  • Page 6: Avant De Commencer

    Ce kit nécessite également un kit de base de lame ProVantage, un kit de montage de lame spécifique à chaque véhicule et un treuil Warn pour lever et abaisser la lame. Prière de contacter le concessionnaire le plus proche pour obtenir les numéros de référence des pièces. Noter que la plupart du matériel utilisé dans cette installation est compris dans le kit de base de lame.
  • Page 7: Liste De Pièces Détachées

    éviter de perdre la cheville et le patin durant le déblaiement. REMARQUE : Se reporter au guide de l’utilisateur de lame Warn pour déterminer à quel niveau ré- gler la hauteur du patin durant le déblaiement FIGURE 1 INSTALLATION DE LA BARRE D’USURE...
  • Page 8: Maintenance, Entretien

    Communiquer avec le concessionnaire chez qui l’on a fait l’acquisition du kit. Appeler un des centres de service autorisés WARN indiqués sur la garantie qui accompagne le kit. Avant d’appeler, s’assurer d’avoir les informations suivantes à portée de main : numéro de pièce (indiqué sur le recto des instructions), date d’achat, marque, modèle et année du quad.
  • Page 9  Reemplace siempre toda pieza gastada o dañada antes de proceder a la operación.  No opere nunca este producto de WARN con piezas dañadas o que falten.  Conduzca siempre lentamente sobre terreno accidentado. Si se conduce a velocidades que hagan que la pala de empuje rebote mientras se encuentra en la posición elevada, se podría producir el retroceso del cabrestante y el descenso de la pala.
  • Page 10: Antes De Comenzar

    Este juego también requiere uno de base de pala de empuje ProVantage, que es un juego de montaje de pala específico para vehículos, y un cabrestante WARN para subir y bajar la pala. Comuníquese con su distribuidor más cercano si necesita los números de referencia de las piezas. Tenga presente que muchas de las piezas necesarias para esta instalación pueden encontrarse en el juego de la base de la pala.
  • Page 11: Lista De Piezas

    NOTA: Consulte la guía de operador de la pala de empuje de Warn para determinar dónde fijar la altura de la arrastradera durante la operación FIGURA 1 de la máquina.
  • Page 12: Mantenimiento Y Cuidado

    Comuníquese con el distribuidor donde compró el juego. Llame al centro de asistencia técnica autorizado de WARN que se indique en la garantía que viene con el juego. Cuando llame, tenga la siguiente información a mano: número de pieza (indicado en la parte anterior de las instrucciones), fecha de la compra y marca, modelo y año del modelo del ATV.
  • Page 13 Verschlissene oder beschädigte Teile sind vor Inbetriebnahme auszuwechseln.  WARN-Produkte dürfen nicht mit beschädigten oder fehlenden Teilen in Betrieb genommen werden.  Auf unebenem oder rauem Untergrund ist die Geschwindigkeit zu senken. Hohe Geschwindigkeiten, bei denen der angehobene Pflug schwankt, ...
  • Page 14: Table Des Matières

    Vor Beginn Für dieses Kit sind ein ProVantage Pflugträger-Kit, ein fahrzeugspezifisches Pflugbefestigungs-Kit und eine WARN-Winde zum Anheben/Absenken des Pfluges er- forderlich. Die Bestellnummern erfahren Sie bei Ihrem Händler vor Ort. Die meisten für diese Installation not- wendigen Metallteile befinden sich im Pflugträger-Kit.
  • Page 15: Einzelteile

    Muffe und die gewünschte Gleitschuhöffnung geschoben wird. Haltestift zum Schluss sichern, damit sich Befestiger und Gleitschuh bei der Arbeit nicht lösen. HINWEIS: Siehe Bedienungsanleitung für den WARN- Pflug in Bezug auf Angaben zur Gleitschuh- höhe beim Räumen. Die Befestigung der Pflugschar an der Schubstange...
  • Page 16: Wartung/Pflege

    80475 Gleitschuh und Stift 2x 77907, 2x 79938 Eine Bestellung nimmt Ihr WARN-Händler vor Ort entgegen. Angaben zu Ihrem WARN-Händler vor Ort erhalten Sie telefonisch unter 1-800-910-1122. Bei Problemen mit dem Pflug gehen Sie wie folgt vor: Lesen Sie die Tipps und Hinweise in der Installationsanleitung.
  • Page 17 Byt alltid ut alla slitna eller skadade delar innan plogen används.  Använd aldrig denna WARN-produkt med skadade delar eller utan alla delar på plats.  Kör alltid sakta i ojämn och svår terräng. Hastigheter som orsakar att plogen hoppar då den är i uppfällt läge kan medföra att vinschen backar, ...
  • Page 18: Innan Du Börjar

    Innan du börjar Denna sats kräver även ploganslutningskit ProVantage, en fordonsspecifik plogmonteringssats och en Warn- vinsch för att höja och sänka plogen. Kontakta närmaste återförsäljare för artikelnummer. Observera att en stor del av de beslag med mera som behövs för denna installation ingår i ploganslutningskiten. En lista över re- servdelar återfinns på...
  • Page 19: Komponentförteckning

    OBS! Se bruksanvisningen för Warns plogar för att bestämma släpskons höjd för plogningen. FIGUR 1 SLITSTÅNGSINSTALLATION Installationen av plogbladet i plogskjutröret fortsätter i instruktionsboken för plogskjutröret. WARN® INDUSTRIES PAGE 19 79959 Rev A1...
  • Page 20: Underhåll/Skötsel

    (se framsidan av instruktionerna), inköpsdatum, märke, mod- ell samt modellår för ATV. Kontakta WARN:s kundtjänst på telefon +1 800 543 9276 eller via www.warn.com. Uppge följande informa- tion vid kontakt: artikelnummer (se framsidan av instruktionerna), inköpsdatum, märke, modell samt modellår för ATV.
  • Page 21: Istruzioni Di Installazione

    Sostituire sempre eventuali elementi logori o danneggiati prima dell’uso.  Non usare mai questo prodotto WARN se ci sono parti danneggiate o mancanti.  Guidare sempre lentamente su terreno irregolare e accidentato. Guidare a velocità che fa rimbalzare la spalatrice quando è sollevata può mettere in ...
  • Page 22: Prima Di Iniziare

    Questo kit richiede anche il kit della base della spalatrice ProVantage, che è il kit di montaggio della spalatrice particolare per il veicolo, e un verricello WARN per alzare e abbassare la spalatrice. Per i numeri di pezzo con- tattare il rivenditore locale. Notare che molti degli attrezzamenti metallici specifici usati nel montaggio fanno parte del kit della base della spalatrice.
  • Page 23 NOTA: per stabilire l’impostazione dell’altezza dei pat- tini in fase di spalatura, vedere il manuale per l’operatore delle spalatrici Warn. FIGURA 1 INSTALLAZIONE DELLA BARRA DI CONSUMO Le istruzioni di montaggio della lama di spalatura sul gruppo del tubo di spinta sono riportate nel manuale di istruzioni per il tubo di spinta.
  • Page 24: Manutenzione/Cura

    Mettersi in contatto con il rivenditore presso cui si è acquistato il kit. Chiamare un centro di servizio autorizzato di WARN scegliendolo tra quelli elencati sul foglio di garanzia ac- cluso al kit. Avere le seguenti informazioni a portata di mano prima di chiamare: numero del pezzo (indicato sulla parte frontale delle istruzioni), data di acquisto, e marca, modello e anno del modello dell’ATV.
  • Page 25 Vaihda aina kaikki kuluneet tai vioittuneet osat ennen käyttöä.  Älä koskaan käytä tätä WARN-tuotetta, jos siinä on viallisia osia tai siitä puuttuu osia.  Aja aina hitaasti, jos maa on epätasainen. Ajaminen nopeuksilla, jotka saavat auran pomppimaan sen ollessa yläasennossa, saattaa vaikuttaa ...
  • Page 26: Ennen Kuin Aloitat

    Ennen kuin aloitat Tämän sarjan käyttöön tarvitaan myös ProVantage-auranrunkosarja, ajoneuvokohtainen auran kiinnityssarja ja WARN-vintturi auran nostamista ja laskemista varten. Saat osien numerot ottamalla yhteyden lähimpään jälleen- myyjään. Huomaa, että useimmat tässä asennuksessa tarvittavat osat löytyvät auranrunkosarjasta. Vaihto-osien luettelo on tämän asiakirjan viimeisellä sivulla.
  • Page 27 Muista lukita kiinnitystappi, jotta tappi ja jalas eivät irtoa aurauksen aikana. HUOMAUTUS: Katso Warnin auran käyttöoppaasta, mille korkeudelle jalas tulisi asettaa aurauksen ajaksi. KUVA 1 KULUMISLEVYN ASENNUS Auran terän asentaminen työntöputkikokonaisuuteen jatkuu työntöputken asennusoppaassa. WARN® INDUSTRIES PAGE 27 79959 Rev A1...
  • Page 28: Huolto Ja Kunnossapito

    Kun soitat, valmistaudu antamaan seuraavat tiedot: osanumero (annettu ohjeiden etupuolella) ja ostopäivä sekä maastoajoneuvon merkki, malli ja vuosi. Ota yhteys WARNin asiakaspalveluun 1 800 543 9276 tai www.warn.com. Kun soitat, valmistaudu antamaan seuraavat tiedot: osanumero (annettu ohjeiden etupuolella) ja ostopäivä sekä maastoajoneuvon merkki, malli ja vuosi.

Ce manuel est également adapté pour:

79958

Table des Matières