Table des Matières
Publicité
Les langues disponibles
Les langues disponibles
Liens rapides
All about the
Use
of your
Important Safeguards ............................................. 2
Toaster Oven Safety Instructions ............................3
Parts and Features ................................................ 4
Prior To Using Your Toaster Oven........................... 7
Setting Cooking Rack Positions .............................. 7
&
Toaster Oven
TA B L E O F C O N T E N T S
USA and Canada 1-888-845-7330
Care
Cooking with the Toaster Oven.............................. 8
Cleaning Your Toaster Oven.................................12
Troubleshooting ..................................................13
Warranty Information ..........................................14
Publicité
Chapitres
Table des Matières
Dépannage

Manuels Connexes pour Frigidaire FPTO06D7MS


Sommaire des Matières pour Frigidaire FPTO06D7MS
-
Page 1: Table Des Matières
All about the & Care Toaster Oven of your TA B L E O F C O N T E N T S Important Safeguards ..........2 Cooking with the Toaster Oven......8 Cleaning Your Toaster Oven.........12 Toaster Oven Safety Instructions ......3 Troubleshooting ..........13 Parts and Features .......... -
Page 2: Important Safeguards
IMPortant SaFeGuarDS When using electrical appliances, basic covered or touching flammable material, including curtains, draperies, walls, and the like. Do not safety precautions should always be store, or lay any item on the oven during operation. followed, including the following: 20 Extreme caution should be exercised when using 1 Read all instructions. - Page 3 FrIGIDaIre toaSter oven SaFetY electrical Power If the electric circuit is overloaded with other appliances, your appliance may not operate properly. It should be operated on a separate electric circuit from other appliances. Product Specifications Model Number FPTO06D7MS Rated Wattage 1500W ...
-
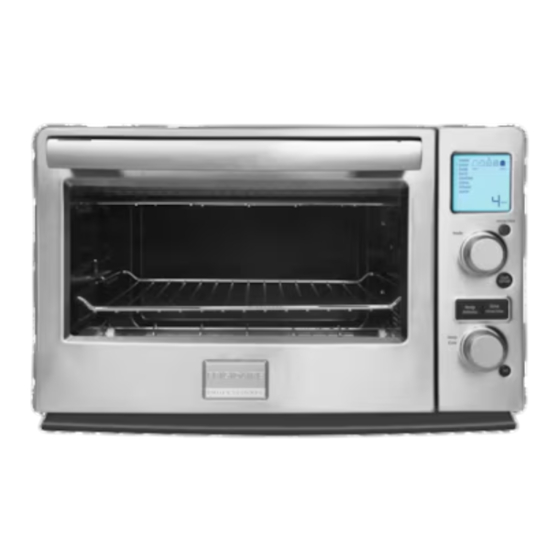
Page 4: Parts And Features
PartS anD FeatureS function function timer function function time timer timer 1 Door Handle 7 Pizza Pan 12 Start/Cancel 18 Number of Slices 2 Flat Glass Door 8 Bake Pan 13 Temp/Darkness 19 Temperature 3 Door Frame 9 LCD Screen 14 Time/Slices/Size 20 Convection Icon 4 Control Panel... -
Page 5: Features And Accessories
FeatureS anD acceSSorIeS cooking rack Function/Mode control Selects the cooking function. PowerPlus ™ convection System Turns convection fan on/off. Start/cancel May be positioned in the upper, lower, or middle Rack Support Guides. This option is useful for toasting, baking, Starts and turns off the Toaster Oven cooking functions. and general cooking with casseroles and other cookware. -
Page 6: Time Control
toaSter oven FeatureS toaster oven cooking racks Always check the food 10 minutes before the suggested cooking time is reached to avoid overcooking. For optimum results, maximize airflow by placing items in the center of the rack, leaving the food uncovered, and using bakeware with lower sides when possible. -
Page 7: Prior To Using Your Toaster Oven
PrIor to uSInG Your toaSter oven how to Set the cooking rack Positions top Slot-rack uP top Slot-rack DoWn Prior to using Your toaster oven 1 Carefully unpack the contents from the box and check to make sure all accessories are accounted for, and that the toaster oven and accessories Mid Slot-rack uP Mid Slot-rack DoWn... -
Page 8: Cooking With The Toaster Oven
cooKInG WIth the toaSter oven Bake Function Broil Function Food Position: Food Position: Center food on the cooking rack and adjust the rack Broiling is typically used to cook food from the top down height so the food is centered in the Toaster Oven. and promotes browning on top by only activating the top The lower slots with the rack in the up position is a heating elements. -
Page 9: Toast Function
cooKInG WIth the toaSter oven toast Function Bagel Function Food Position: Food Position: Regardless of the number of slices, bread should always Bagels (and English muffins) should be sliced in half be positioned directly on the cooking rack and as and placed cut side up. -
Page 10: Pizza Function
cooKInG WIth the toaSter oven Pizza Function convection Fan: Turned on by default for faster, more even cooking. This Food Position: may be turned off by pressing the Convection button. Pizza should be cooked in the supplied pizza pan and 1 Place the bakeware with the cookie dough on the placed in the Toaster Oven so that it does not contact cooking rack. -
Page 11: Warm Function
cooKInG WIth the toaSter oven button to begin reheating. 5 When the time has elapsed, the tone will sound and the oven will automatically shut off. 6 If food is to be removed before the cycle ends, simply press the Start/Cancel button to shut the Toaster Oven off. -
Page 12: Cleaning Your Toaster Oven
• For daily cleaning, wipe the outside surface with a clean, damp cloth. To further enhance the finish of the Stainless Steel exterior, Frigidaire recommends Ecosential Stainless Steel Cleaner, by Smart ChoiceTM. You can order on line at: http:// frigidaire.stores.yahoo.net, or by calling... -
Page 13: Troubleshooting
trouBLeShootInG Issue Possible Solutions The oven does not turn on. • Check that the power plug is securely inserted into the outlet. • Insert the power plug into a different outlet. • Reset the circuit breaker if necessary. The LCD display is not backlit. •... -
Page 14: Warranty Information
SMaLL DoMeStIc aPPLIance WarrantY InForMatIon Your appliance is covered by a one year limited OR PART REPAIR OR REPLACEMENT AS PROVIDED warranty. For one year from your original date HEREIN. CLAIMS BASED ON IMPLIED WARRANTIES, of purchase, Electrolux will repair or replace the INCLUDING WARRANTIES OF MERCHANTABILITY OR appliance or parts, at Electrolux’s option, that prove FITNESS FOR A PARTICULAR PURPOSE, ARE LIMITED... - Page 15 Todo acerca del Cuidado Horno Tostador de su ÍNDICE Medidas De Protección Importantes ......16 Cocción Con El Horno Tostador......22 Limpieza Del Horno Tostador........26 Instrucciones De Seguridad Del Horno Tostador ..17 Piezas Y Funciones ..........18 Localización Y Solución De Problemas.....27 Antes De Utilizar Su Horno Tostador.......
-
Page 16: Medidas De Protección Importantes
MeDIDaS De ProteccIÓn IMPortanteS cuando se utilizan aparatos eléctricos, líquidos calientes. siempre se deben respetar las precau- 16 No cubra la BANDEJA RECEPTORA DE MIGAJAS u ciones de seguridad, incluidas las otra pieza del Horno con papel metálico. Esto puede ocasionar que el Horno se sobrecaliente. -
Page 17: Información De Seguridad Para El Consumidor
SeGurIDaD DeL horno toStaDor FrIGIDaIre Información de Seguridad Para el aDvertencIa consumidor Peligro de Descarga eléctrica eSta unIDaD eS SoLo Para uSo DoMÉStIco. enchufe Polarizado enchufe la unidad a una toma de corriente eléctrica con conexión a tierra. Este aparato tiene un enchufe polarizado (una hoja es más ancha que la otra). -
Page 18: Piezas Y Funciones
PIeZaS Y FuncIoneS function function timer function function time timer timer 1 Asa De La Puerta 7 Refractario Para Pizza 13 Temperatura/Grado De 18 Número De Tostado Rebanadas 2 Puerta De Vidrio 8 Refractario Para Plano Horneado 14 Tiempo/Rebanadas/ 19 Temperatura Tamaño 3 Bastidor De La Puerta 9 Pantalla LCD... - Page 19 caracterÍStIcaS Y acceSorIoS rejilla De cocción Perilla Función/Mode Selecciona la función de cocción. Sistema De cocción rápida PowerPlus ™ Enciende/apaga el ventilador de cocción rápida. Inicio/cancelar Se debe colocar en los carriles de apoyo superior, intermedio e inferior para la rejilla. Esta opción es útil Inicia y apaga las funciones de cocción del Horno para tostar, hornear y cocción en general con cacerolas y Tostador.
- Page 20 FuncIoneS DeL horno toStaDor rejillas De cocción Del horno tostador derecho de la pantalla de temperatura indica si el ventilador de cocción rápida se ha activado. Para la mayoría de las recetas se recomienda una temperatura de 25 °F si se cocina con cocción rápida. Siempre revise el alimento 10 minutos antes de alcanzar el tiempo de cocción sugerido a fin de evitar la recocción.
-
Page 21: Antes De Utilizar Su Horno Tostador
anteS De utILIZar Su horno toStaDor cómo ajustar Las Posiciones De La rejilla De cocción ranura superior- ranura superior- rejilla hacia arrIBa rejilla hacia aBaJo antes De utilizar Su horno tostador 1 Desembale cuidadosamente el contenido de la caja y compruebe que todos los accesorios esten incluidos, y que el Horno Tostador y los accesorios no muestren ningún daño físico. -
Page 22: Cocción Con El Horno Tostador
coccIÓn con eL horno toStaDor Función hornear (Bake) un tono y el horno se apagará automáticamente. 6 Si se debe retirar la comida antes de que suene Posición De Los alimentos: el tono, solo presione el botón Start/Stop (iniciar/ Coloque los alimentos en la rejilla y ajuste la altura de parar) para apagar el Horno Tostador. - Page 23 un sonido, el horno se apagará automáticamente, 7 Una vez transcurrido el y usted podrá dar vuelta los alimentos y ajustar tiempo, el horno emitirá el horno para la cocción del otro lado de los un sonido y se apagará alimentos.
-
Page 24: Important
5 Pulse el botón de Time/ 3 Gire la perilla Function/Mode (Función/Modo) a la Slices/Size (Tiempo/ posición PIZZA. Rebanadas/Tamaño), y 4 La temperatura está pre- luego gire la perilla de programada a 450°F. Para Temp/Timer (Temperatura/ cambiar la temperatura Temporizador) para pre-programada,, pulse seleccionar el número de el botón Temp/Darkness... - Page 25 Para cambiar la temperatura 4 Pulse el botón Start/Cancel (Inicio/Cancelar) para pre-programada, pulse el comenzar a recalentar. botón de Temp/Darkness 5 Una vez transcurrido el tiempo, el horno emitirá un (Temperatura/Grado de sonido y se apagará automáticamente. Tostado), y luego gire la 6 Si necesita retirar los alimentos antes de que perilla de Temp/Timer termine el ciclo, sólo tiene que pulsar el botón...
-
Page 26: Limpieza Del Horno Tostador
Frigidaire recomienda utilizar el limpiador para acero inoxidable Ecosential, de Smart ChoiceTM. Usted puede pedirlo en línea en: http://frigidaire. stores.yahoo.net, o llamando al 1-800-599-7579. • La rejilla, el molde para pizza, el molde para... -
Page 27: Solución De Problemas
SoLucIÓn De ProBLeMaS Problema Posibles Soluciones El horno no se enciende. • Verifique que el enchufe esté bien insertado en el tomacorriente. • Conecte el cable de alimentación a una toma diferente. • Restablezca el interruptor general si es necesario. La pantalla LCD no se ilumina. -
Page 28: Información Sobre La Garantía
InForMacIÓn SoBre La GarantÍa De eLectroDoMÉStIcoS PequeñoS DeScarGo De GarantÍaS IMPLÍcItaS; Su aparato tiene cobertura de garantía limitada de un año. Durante un año, a partir de la fecha original de LÍMIte De GarantÍa: compra, Electrolux reparará o reemplazará el aparato o EL ÚNICO Y EXCLUSIVO RECURSO DEL CLIENTE las partes, a criterio de Electrolux, que tengan defectos CONFORME A ESTA GARANTÍA SERÁ, A CRITERIO... -
Page 29: Fonctionnement
Tout sur le Fonctionnement L'entretien Grille-Pain de votre TABLE DES MATIÈRES Importantes Mesures De Protection ......30 Réglage De La Position Des Grilles De Cuisson..35 Importantes Consignes De Sécurité Cuisiner Avec Le Grille-pain Four ......36 Pour Votre Grille-pain Four........31 Nettoyage De Votre Grille-pain Four......40 Pièces Et Caractéristiques........ -
Page 30: Importantes Mesures De Protection
IMPortanteS MeSureS De ProtectIon Lors de l’utilisation d’appareils 15 Soyez extrêmement prudents lorsque vous déplacez un appareil contenant de l’huile chaude ou tout électriques, des mesures de sécurité autre liquide chaud. de base doivent toujours être suivies, 16 Ne recouvrez pas le ramasse-miettes ou toute autre incluant les suivantes: pièce du four avec un papier d’aluminium. - Page 31 Celui-ci devrait être connecté sur un circuit électrique séparé des autres appareils. Spécifications du Produit Numéro De Modèle FPTO06D7MS Puissance Nominale 1500W Puissance Nominale Ou Éléments Chauffants Supé...
-
Page 32: Pièces Et Caractéristiques
PIÈceS et caractÉrIStIqueS function function timer function function time timer timer 1 Poignée De La Porte 7 Plaque À Pizza 13 Temp/Degré De Cuisson 19 Température 2 Porte En Verre Plat 8 Moule Á Cuisson 14 Minuterie/Tranches/ 20 Icône De Convection Dimension 3 Cadre De Porte 9 Écran ACL... -
Page 33: Fonctions Et Accessoires
FonctIonS et acceSSoIreS Grille De cuisson contrôle Fonctions/Mode Sélectionne la fonction de cuisson. Système De convection PowerPlus ™ Allume ou éteint le ventilateur. Marche/annuler Peut être positionnée dans la partie supérieure, inférieure ou central des guides de support pour plateau. Cette Met en marche et annule les fonctions de cuisson du option est particulièrement pratique pour le rôtissage, la grille-pain four. - Page 34 caractÉrIStIqueS Du GrILLe-PaIn Four Grilles De cuisson Du Grille-Pain Four cycle de chauffage. Une icône de ventilateur apparaîtra à la droite de l’affichage de température, indiquant que la ventilation à convection fonctionne. Lorsque vous cuisinez avec la convection, la majorité des recettes recommandent de réduire la température de 25 °F.
-
Page 35: Avant D'utiliser Votre Grille-Pain Four
avant D’utILISer votre GrILLe-PaIn Four comment régler Les Positions Du Plateau De cuisson Fente Supérieure - Fente Supérieure - Plateau vers Le haut Plateau vers Le BaS avant D’utiliser votre Grille-Pain Four 1 Retirez soigneusement tout emballage de la boîte et assurez-vous que tous les accessoires sont bien présents, et que le grille-pain four et les accessoires Fente centrale -... -
Page 36: Cuisiner Avec Le Grille-Pain Four
cuISIner avec Le GrILLe-PaIn Four Fonction cuire Démarrer/Annuler pour éteindre le four. Retirez ensuite les aliments du four. Position De La nourriture: MISe en GarDe Centrez la nourriture sur le plateau de cuisson et ajustez la hauteur du plateau afin que la nourriture soit centrée dans le grille-pain four. -
Page 37: Fonction Rôtie
du cycle, appuyez simplement sur le bouton avIS Démarrer/Annuler pour éteindre le grille-pain four. Retirez ensuite les aliments du four. Les aliments à faire brunir doivent se situer à au moins 2,5 cm (1 po) des éléments chauffants, dans la partie avIS supérieure du four. -
Page 38: Fonction Pizza Position De La Nourriture
démarrer le four. pour sélectionner la taille de la pizza que vous faites cuire. Ce chiffre apparaîtra sur l’écran ACL. 7 Lorsque le temps s’est écoulé, un signal 6 Les temps de cuisson par défaut sont préréglés à sonore se fera entendre et le four s’éteindra 16 minutes pour une pizza de 6 po, à... -
Page 39: Fonction Préchauffer
7 Lorsque le temps s’est écoulé, un signal généralement un bon point de départ. Il sera peut-être sonore se fera entendre et le four s’éteindra nécessaire de monter ou descendre le plateau pour un automatiquement. chauffage uniforme. 8 Si la nourriture doit être retirée avant la fin du ventilation De convection: cycle, appuyez simplement sur le bouton Démarrer/ Éteint par défaut. -
Page 40: Nettoyage De Votre Grille-Pain Four
• Pour un nettoyage quotidien, essuyez la surface extérieure avec un linge doux et humide. Pour faire briller la partie extérieure en acier inoxydable, Frigidaire recommande l’utilisation de Ecosential Stainless Steel Cleaner par Smart Choice™. Vous pouvez commander ce produit en ligne au http:// frigidaire.stores.yahoo.net ou en appelant au... -
Page 41: Dépannage
DÉPannaGe Problème Solutions possibles Le four ne s’allume pas. • Assurez-vous que la fiche est bien insérée dans la prise murale. • Insérez la fiche dans une autre prise murale. • Remettre le disjoncteur à zéro, si nécessaire. L’affichage ACL ne s’allume pas. •... -
Page 42: Information Sur La Garantie Des Petits
InForMatIon Sur La GarantIe DeS PetItS aPPareILS MÉnaGerS avIS De non-reSPonSaBILItÉ Sur LeS Votre appareil est couvert par une garantie limitée de un (1) an. Pendant un (1) an, à compter de la date GarantIeS IMPLIcIteS; LIMItatIon d’achat originale, Electrolux réparera ou remplacera DeS recourS : l’appareil ou les pièces, à...