Chapitres
Table des Matières

Manuels Connexes pour AEG HK854400IB


Sommaire des Matières pour AEG HK854400IB
- Page 1 HK854400IB Brugsanvisning Induktionskogesektion User manual Induction Hob Notice d'utilisation Table de cuisson à induction Istruzioni per l’uso Piano cottura a induzione...
-
Page 2: Table Des Matières
Indhold Tak for, at du har valgt et af vores højkvalitetsprodukter. Du bedes læse denne brugsanvisning omhyggeligt for at sikre optimal og regelmæssig ydelse fra dit nye produkt Den vil guide dig sikkert igennem alle produktets funktioner. Vi anbefaler, at du opbevarer brugsanvisningen på et sikkert sted, så... -
Page 3: Korrekt Brug
Hvis pladen får en revne, skal du tage stikket ud af kontakten for at forebygge elek- trisk stød. INSTALLATIONSVEJLEDNING Før installationskal du notere serienummeret (Ser. Nr.) fra typeskiltet.Typeskiltet sidder i bunden af apparatets kabinet. HK854400IB 949 593 266 01 58 GBD C3 AU 220-240 V 50-60-Hz Induction 7,4 kW 7,4 kW... -
Page 4: Sikkerhedsanvisninger
Installationsvejledning Sikkerhedsanvisninger ADVARSEL Læs dette! Kontroller, at apparatet ikke har fået skader under transporten. Tilslut ikke et beskadiget ap- parat. Kontakt om nødvendigt forhandleren. Apparatet må kun installeres, tilsluttes eller repareres af en autoriseret servicetekniker. Brug kun originale reservedele. Brug først indbygningsapparater, når de er monteret i passende indbygningsenheder og bordplader, der opfylder kravene. - Page 5 Installationsvejledning • I enderne skal de fire stykker pakning skæres i smig, svarende til falsens hjørner. Paknin- gens ender må ikke klæbes oven på hinanden. • Når pakningen klæbes på, skal de skrå snit flugte med falsens hjørner, så der ikke kan komme silikonefugemasse ind under glaskeramikken, når der fuges.
-
Page 6: Produktbeskrivelse
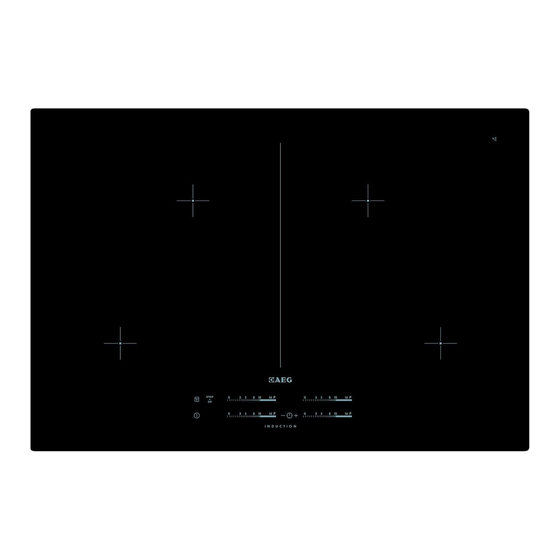
Produktbeskrivelse Hvis du bruger en beskyttelseskasse (ekstraudstyr), er der ikke brug for den forreste ventilationsspalte på 5 mm og beskyttende plade lige under appara- tet. PRODUKTBESKRIVELSE Oversigt over kogesektionen Induktionskogezone, 2300 W, med boo- sterfunktion, 3200 W Induktionskogezone, 2300 W, med boo- sterfunktion, 3200 W Induktionskogezone, 2300 W, med boo- sterfunktion, 3200 W... -
Page 7: Betjeningsvejledning
Betjeningsvejledning Sensorfelt Funktion Indikator for varmetrin Viser det aktuelle varmetrin Skala på betjeningspanel Betjeningsknapper til brændere Øger eller mindsker tiden Vælger kogezone Tænder og slukker STOP+GO Display for varmetrin Visning Forløb Kogezonen er slukket Kogezonen er tændt -funktionen er tændt. Opkogningsautomatik er slået til Boosterfunktionen er slået til Der er en funktionsfejl... -
Page 8: Varmetrin
Betjeningsvejledning • du dækker et sensorfelt med en genstand (f.eks. en gryde eller en klud) i over 10 sekun- der. Advarslen lyder, til du har fjernet genstanden. • kogezonen bliver for varm (f.eks. hvis en gryde koger tør). Du kan først bruge kogesektio- nen, når kogezonen er kølet af. -
Page 9: Slå Boosterfunktionen Til Og Fra
Betjeningsvejledning Slå boosterfunktionen til og fra Boosterfunktionen tilfører ekstra effekt til kogezonerne i højst 10 minutter. Derefter slår in- duktionszonen automatisk over på . Start funktionen ved at røre ved tændes. Stop funktionen ved at vælge et varmetrin mellem Effektstyring Effektstyringen fordeler effekten parvis mel- lem to kogezoner (se tegningen). -
Page 10: Stop+Go
Betjeningsvejledning • Stop af CountUp Timer: Vælg kogezone med , og tryk på eller for at afbryde timeren. Lampen for kogezonen slukkes. Minutur Timeren kan bruges som et minutur, når kogezonerne ikke anvendes. Tryk på . Tryk på eller på timeren for at vælge tiden. Når tiden er gået, lyder signalet og blinker. -
Page 11: Nyttige Oplysninger Og Råd
Nyttige oplysninger og råd • Minuturet tælles ned • Timeren tælles ned • Du anbringer noget på betjeningspanelet. Aktivering af lydene Deaktivering af apparatet. Rør ved i 3 sekunder. Displayet tændes og slukkes. Rør ved i 3 sekunder. tændes, da lyden er slået fra. Rør ved tændes. - Page 12 Nyttige oplysninger og råd Öko Timer (Øko-timer) For at spare strøm slukker kogezonens varmelegeme automatisk tidligere end nedtællingsti- meren giver signal. Den reducerede opvarmningstid afhænger af varmetrin og tilbered- ningstid. Eksempler på anvendelser Oplysningerne i tabellen er kun vejledende. Tem- Bruges til: Gode råd peratur-...
-
Page 13: Vedligeholdelse Og Rengøring
Vedligeholdelse og rengøring VEDLIGEHOLDELSE OG RENGØRING Rengør altid apparatet efter brug. Brug altid kogegrej med ren bund. ADVARSEL Skarpe og skurende rengøringsmidler skader apparatet. Af hensyn til din egen sikkerhed må du ikke rengøre apparatet med damp- eller højtryk- srenser. Ridser eller mørke pletter i glaskeramikken betyder ikke noget for apparatets funktion. -
Page 14: Miljøhensyn
Miljøhensyn Fejl Mulig årsag og løsning • Automatisk slukning er blevet udløst. Sluk for apparatet, og tændes tænd igen. • Overophedningssikringen for kogezonerne er blevet udløst. Sluk for kogezonen. Tænd for kogezonen igen. • Der står ikke kogegrej på kogezonen. Sæt kogegrej på kogezo- tændes nen. -
Page 15: Safety Information
Contents Thank you for choosing one of our high-quality products. To ensure optimal and regular performance of your appliance please read this instruction manual carefully. It will enable you to navigate all processes perfectly and most efficiently. To refer to this manual any time you need to, we recommend you to keep it in a safe place. -
Page 16: Safety During Operation
INSTALLATION INSTRUCTIONS Before the installation, note down the serial number (Ser. Nr.) from the rating plate.The rating plate of the appliance is on its lower casing. HK854400IB 949 593 266 01 58 GBD C3 AU 220-240 V 50-60-Hz Induction 7,4 kW... -
Page 17: Safety Instructions
Installation instructions Safety instructions WARNING! You must read these! Make sure that the appliance is not damaged because of transportation. Do not connect a damaged appliance. If it is necessary, speak to the supplier. Only an authorised service technician can install, connect or repair this appliance. Use only original spare parts. - Page 18 Installation instructions • For the four corners of the rabbet the ends of the sealing tapes must be cut into mitres. Do not bond the ends over one another. • Bond the sealing tape flush into the corner of the rabbet, so that no silicon compound can get under the glass ceramic when grouting.
-
Page 19: Product Description
Product description If you use a protection box (additional accessory), the front ventilation space of 5 mm and protec- tive floor directly below the appliance are not necessary. PRODUCT DESCRIPTION Cooking surface layout Induction cooking zone 2300W, with Power function 3200W Induction cooking zone 2300W, with Power function 3200W Induction cooking zone 2300W, with... -
Page 20: Operating Instructions
Operating instructions sensor field function a heat setting display shows the heat setting a control bar to set the heat setting increases or decreases the time selects the cooking zone starts and stops STOP+GO Heat setting displays Display Description The cooking zone is off The cooking zone operates function operates. -
Page 21: The Heat Setting
Operating instructions • you cover a sensor field with an object (a pan, a cloth, etc.) for longer than 10 seconds. The sound operates until you remove the object. • the hob gets too hot (e.g. when a saucepan boils dry). Before you use the hob again, the cooking zone must be cool. -
Page 22: Switching On And Off The Power Function
Operating instructions Switching on and off the power function The power function gives more power to an induction cooking zone for no longer than 10 minutes. After that time, the induction cooking zone automatically sets back to . To start it , touch comes on. -
Page 23: Stop+Go
Operating instructions • Checking the elapsed time: select the cooking zone with . The indicator of the cooking zone flashes faster. Display shows the elapsed time. • Stopping the CountUp Timer: select the cooking zone with and touch switch off the timer. The indicator of the cooking zone goes out. Minute Minder You can use the timer as a Minute Minder while cooking zones do not operate. -
Page 24: Helpful Hints And Tips
Helpful hints and tips Touch for 3 seconds. The displays come on and go out. Touch for 3 seconds. comes on, the sound is on. Touch comes on, the sound is off. When this function operates, you can hear the sounds only when: •... -
Page 25: Energy Saving
Helpful hints and tips Energy saving • If possible, always put the lids on the cookware. • Put cookware on a cooking zone before you start it. Öko Timer (Eco Timer) To save the energy, the heater of the cooking zone switches itself off earlier than count down timer signal. -
Page 26: Care And Cleaning
Care and cleaning CARE AND CLEANING Clean the appliance after each use. Always use cookware with clean bottom. WARNING! Sharp objects and abrasive cleaning agents will damage the appliance. For your safety, do not clean the appliance with steam blasters or high-pressure cleaners. Scratches or dark stains on the glass ceramic have no effect on how the appliance operates. -
Page 27: Environment Concerns
Environment concerns Problem Possible cause and remedy • The automatic switch-off operates. Stop the appliance and comes on start it again. • Overheating protection for the cooking zone operates. Switch off the cooking zone. Switch on the cooking zone again. •... -
Page 28: Packaging Material
Environment concerns Packaging material The packaging materials are friendly to the environment and can be recycled. The plastic components are identified by marking: >PE<,>PS<, etc. Discard the packaging materials as household waste at the waste disposal facilities in your municipality. -
Page 29: Consignes De Sécurité
Sommaire Nous vous remercions d’avoir choisi l’un de nos produits de qualité. Afin de garantir une performance optimale et constante de votre appareil, veuillez lire attentivement cette notice d'utilisation. Il vous permettra d’utiliser correctement et efficacement toutes les fonctions de l’appareil. Nous vous recommandons de conserver cette notice à... -
Page 30: Sécurité Des Enfants
Consignes de sécurité Sécurité des enfants • Cet appareil a été conçu pour être utilisé par des adultes. Veillez à ce que les enfants n'y touchent pas et ne l'utilisent pas comme un jouet. • Ne laissez pas les emballages à portée de main des enfants. Ils pourraient s'asphyxier ! •... -
Page 31: Instructions D'installation
INSTRUCTIONS D'INSTALLATION Avant d'installer l'appareil, notez le numéro de série qui figure sur la plaque signaléti- que.La plaque signalétique se trouve sur la partie inférieure de l'appareil. HK854400IB 949 593 266 01 58 GBD C3 AU 220-240 V 50-60-Hz Induction 7,4 kW... -
Page 32: Mise En Place Du Joint Dans La Feuillure
Instructions d'installation • Assurez-vous que l'appareil est correctement installé de manière à éviter tout contact. • Des connexions desserrées ou incorrectes peuvent être à l'origine d'une surchauffe des bornes. • Le raccordement électrique ne doit être effectué que par un électricien qualifié. •... - Page 33 Instructions d'installation min. 25mm min. 5mm min. 20mm min. 600 +1 mm +1 mm +1 mm +1 mm min. 38mm min. 5mm Si vous utilisez un boîtier de protection (accessoi- re supplémentaire), l'espace ouvert de ventilation de 5 mm et le fond de protection installé directe- ment sous l'appareil ne sont plus nécessaires.
-
Page 34: Description De L'appareil
Description de l'appareil DESCRIPTION DE L'APPAREIL Description de la table de cuisson Zone de cuisson à induction 2300 W, avec fonction Booster 3200 W Zone de cuisson à induction 2300 W, avec fonction Booster 3200 W Zone de cuisson à induction 2300 W, avec fonction Booster 3200 W Bandeau de commande Zone de cuisson à... -
Page 35: Indicateurs Du Niveau De Cuisson
Notice d'utilisation Touche sensitive Fonction Activation et désactivation de la fonction STOP Indicateurs du niveau de cuisson Indicateur Description La zone de cuisson est à l'arrêt. La zone de cuisson fonctionne. La fonction est activée. La fonction de démarrage automatique de la cuisson est activée. La fonction Booster est activée. -
Page 36: Le Niveau De Cuisson
Notice d'utilisation • vous utilisez des récipients qui ne sont pas adaptés. s'allume et, 2 minutes après, la zone de cuisson est automatiquement mise à l'arrêt. • vous n'avez pas mis à l'arrêt une zone de cuisson ou modifié le niveau de cuisson. Après un certain temps s'allume et la table de cuisson se met à... -
Page 37: Utilisation Du Minuteur
Notice d'utilisation niveau de cuisson Pour l'activer , appuyez sur s'active. Pour le désactiver, ré- gler un niveau de cuisson entre Gestion du niveau de puissance Le dispositif de gestion de la puissance ré- partit la puissance disponible entre deux zo- nes de cuisson formant une paire (voir la fi- gure). -
Page 38: Stop+Go
Notice d'utilisation • Contrôle du temps écoulé : sélectionnez la zone de cuisson avec . Le voyant de la zone de cuisson clignote plus rapidement. L'affichage indique le temps écoulé. • Désactivation du CountUp Timer: sélectionnez la zone de cuisson avec et appuyez pour désactiver le minuteur. -
Page 39: Offsound Control (Désactivation Et Activation Des Signaux Sonores)
Conseils utiles OffSound Control (Désactivation et activation des signaux sonores) Désactivation des signaux sonores Mettez l'appareil à l'arrêt. Appuyez sur pendant 3 secondes. Tous les indicateurs s'allument et s'éteignent. Appuyez pendant 3 secondes. s'allume, le signal sonore est activé. Appuyez sur s'allume, le signal sonore est désactivé. -
Page 40: Bruits De Fonctionnement
Conseils utiles Bruits de fonctionnement Si vous entendez • un craquement : l'ustensile est composé de différents matériaux (conception "sand- wich"). • un sifflement : vous utilisez une ou plusieurs zones de cuisson avec la fonction Booster et l'ustensile est composé de différents matériaux (conception "sandwich"). •... -
Page 41: Entretien Et Nettoyage
Entretien et nettoyage Niveau Adapté à : Durée Conseils cuisson 9-12 Cuisson à feu doux : escalopes, cordons selon Retourner à mi-cuisson. bleus de veau, côtelettes, rissolettes, besoin. saucisses, foie, roux, œufs, crêpes, bei- gnets 12-13 Cuisson à température élevée des pom- 5-15 Retourner à... -
Page 42: En Cas D'anomalie De Fonctionnement
En cas d'anomalie de fonctionnement EN CAS D'ANOMALIE DE FONCTIONNEMENT Symptôme Cause possible et solution Impossible de mettre en fonc- • Vous avez effleuré 2 ou plusieurs touches sensitives en même tionnement l'appareil ou de le temps. N'effleurez qu'une seule touche sensitive à la fois. faire fonctionner. -
Page 43: En Matière De Protection De L'environnement
En matière de protection de l'environnement Symptôme Cause possible et solution Erreur du système électronique car un récipient brûle ou vous s'allume n'utilisez pas un plat de cuisson adapté. La protection anti-sur- chauffe de la zone de cuisson est activée. L'arrêt automatique est activé. -
Page 44: Informazioni Per La Sicurezza
Indice Grazie per aver scelto uno dei nostri prodotti di qualità. Per garantire il funzionamento ottimale e regolare dell'apparecchio, la preghiamo di leggere attentamente questo manuale d'istruzioni. In tal modo potrà eseguire ogni operazione alla perfezione e con la massima efficienza. Le consigliamo inoltre di conservare il manuale in un luogo sicuro, affinché... - Page 45 Informazioni per la sicurezza Sicurezza bambini • Solo gli adulti possono utilizzare questo apparecchio. Sorvegliare i bambini per assicurar- si che non giochino con l'apparecchio. • Tenere tutto l'imballaggio fuori dalla portata dei bambini. Sussiste il rischio di soffoca- mento. •...
-
Page 46: Istruzioni Di Installazione
ISTRUZIONI DI INSTALLAZIONE Prima dell'installazione, annotare il numero di serie (N. serie) riportato sulla targhetta identificativa.La targhetta identificativa dell'apparecchiatura è applicata sul lato in- feriore. HK854400IB 949 593 266 01 58 GBD C3 AU 220-240 V 50-60-Hz Induction 7,4 kW... - Page 47 Istruzioni di installazione • Per il collegamento a 1 o 2 fasi, utilizzare un cavo di allacciamento alla rete tipo H05BB- F Tmax 90 °C (o superiore). • Sostituire il cavo di allacciamento alla rete danneggiato con un cavo speciale (tipo H05BB-F Tmax 90°C;...
-
Page 48: Descrizione Del Prodotto
Descrizione del prodotto min. 38mm min. 5mm Nel caso in cui si stia utilizzando un protettore da sovratensioni (accessorio aggiuntivo), lo spazio di ventilazione anteriore di 5 mm e il pavimento protettivo appena sotto al dispositivo non sono necessari. DESCRIZIONE DEL PRODOTTO Superficie di cottura Zona di cottura a induzione 2300 W con funzione Power 3200 W... -
Page 49: Pannello Comandi
Descrizione del prodotto Pannello comandi Usare i tasti sensore per mettere in funzione l'apparecchiatura. Gli indicatori, i display e i segnali acustici segnalano quali funzioni sono attive. tasto sensore funzione accende e spegne il piano di cottura attiva e disattiva il blocco dei tasti o la sicurezza bambini indicatore timer relativo alla zona di indica la zona per la quale è... -
Page 50: Istruzioni D'uso
Istruzioni d'uso Display Descrizione Pentola non adeguata o troppo piccola; oppure manca la pentola sulla zona di cottura Lo spegnimento automatico è attivo. OptiHeat Control (indicatore 3 livelli di calore residuo) AVVERTENZA Pericolo di ustioni a causa del calore residuo! OptiHeat Control indica il livello di calore residuo. -
Page 51: Preriscaldamento Automatico
Istruzioni d'uso Preriscaldamento automatico 2 3 4 5 6 7 8 9 10 11 12 13 14 È possibile ottenere il livello di potenza necessario in meno tempo attivando la funzione di Preriscaldamento automatico. Questa funzione imposta il livello di potenza più elevato per un determinato periodo di tempo (vedere figura), quindi riduce la temperatura fino a rag- giungere il livello di potenza necessario. -
Page 52: Stop+Go
Istruzioni d'uso Impostare il timer del conto alla rovescia dopo aver selezionato la zona di cottura. Il livello di potenza può essere impostato prima o dopo l'impostazione del timer. • Selezione della zona di cottura:sfiorare finché si accende la spia della zona di cot- tura desiderata. -
Page 53: La Sicurezza Bambini
Consigli e suggerimenti utili Come prima cosa impostare il livello di potenza. Per avviare questa funzione sfiorare . Il simbolo si accende per 4 secondi. Il Timer rimane acceso. Per interrompere questa funzione sfiorare . Si accende il livello di potenza precedente- mente impostato. -
Page 54: Rumori Durante Il Funzionamento
Consigli e suggerimenti utili Appoggiare la pentola sulla croce sulla superficie di cottura. Coprire completamente la cro- ce. La parte magnetica del fondo della pentola deve essere di almeno 120 mm. Le zone di cottura a induzione si adattano automaticamente alle dimensioni del fondo delle pentole. È possibile appoggiare una pentola di grandi dimensioni su due zone di cottura contempora- neamente. -
Page 55: Pulizia E Cura
Pulizia e cura Livello Usare per: Tempo Suggerimenti di po- tenza Tenere in caldo pietanze cucinate Secondo Coprire con il coperchio necessi- tà Salse, per fondere: burro, cioccolata, ge- 5-25 Mescolare di tanto in tanto latina Rassodare: omelette, uova strapazzate 10-40 Coprire con il coperchio Cuocere il riso e pietanze a base di latte,... -
Page 56: Cosa Fare Se
Cosa fare se… I graffi o le macchie scure sulla vetroceramica non compromettono il funzionamento del- l'apparecchio. Per eliminare lo sporco: 1. – rimuovere immediatamente:plastica fusa, pellicola di plastica e alimenti contenenti zucchero. Se non vengono eliminati, potrebbero danneggiare l'apparecchiatura. Il ve- tro richiede l'uso di un raschietto speciale. -
Page 57: Considerazioni Ambientali
Considerazioni ambientali Problema Possibile causa e rimedio • Non vi sono pentole sulla zona di cottura. Appoggiare una si accende pentola sulla zona di cottura. • Il tipo di pentola non è corretto. Utilizzare un tipo di pentola corretto. • Il diametro del fondo della pentola è troppo piccolo rispetto alla zona di cottura. -
Page 58: Materiale Di Imballaggio
Materiale di imballaggio I materiali di imballaggio sono ecologici e possono essere riciclati. I componenti in plastica sono identificati dal contrassegno: >PE<,>PS<, ecc. Smaltire i materiali di imballaggio come rifiuti domestici conferendoli presso gli appositi centri di smaltimento comunali. - Page 60 www.aeg-electrolux.com/shop...