Télécharger Imprimer la page

Neato Robotics botvac D7 connected Guide D'utilisateur

Masquer les pouces Voir aussi pour botvac D7 connected:

Publicité

Les langues disponibles
  • FR

Les langues disponibles

  • FRANÇAIS, page 5

Liens rapides

QUICK
START
Start Here | Commencez ici | Comience aquí | Comincia qui | Jetzt loslegen
Begin hier | Start her | Start her | Börja här | Aloita tästä

Publicité

loading

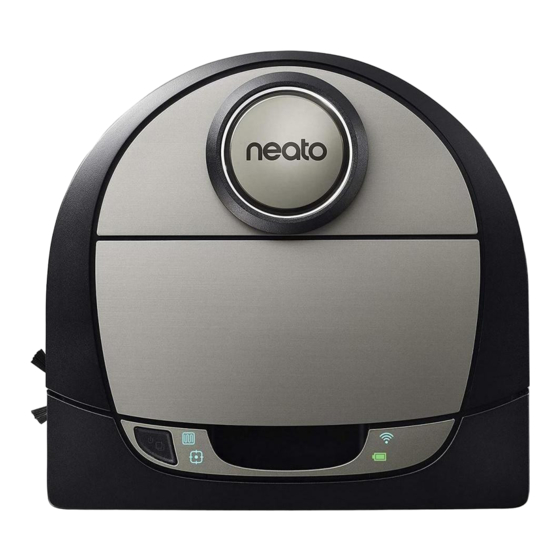
Sommaire des Matières pour Neato Robotics botvac D7 connected

  • Page 1 QUICK START Start Here | Commencez ici | Comience aquí | Comincia qui | Jetzt loslegen Begin hier | Start her | Start her | Börja här | Aloita tästä...
  • Page 3 Connecting Your Robot REMOVE FILMS AND STICKERS INITIAL ROBOT CHARGING IMPORTANT: Remove all protective films and shipping material from Place the rounded side the robot and charge base. If they are not removed, your Neato robot of your Neato robot will not operate correctly.
  • Page 4 Pairing Issues - Try Again Start Using Your Robot During pairing the WI-FI LED will change based on connection status: Use the Neato app to start using your robot, or press the Start Button on the robot. WI-FI LED LED COLOR WHAT IT MEANS Robot is in Pairing Mode Soft Glowing Blue...
  • Page 5: Connexion Du Robot

    Connexion du robot RETIRER LES FILMS PROTECTEURS ET AUTOCOLLANTS PREMIER CHARGEMENT DU ROBOT IMPORTANT : retirez tous les films et autres éléments de protection du Placez le côté arrondi robot et de la base de charge. Si vous ne le faites pas, votre robot Neato de votre robot Neato ne fonctionnera pas correctement.
  • Page 6 Problèmes d’association ? Renouvelez l’opération Première utilisation de votre robot Durant l’association, le voyant du Wi-Fi change en fonction de l’état de la Utilisez l’application Neato pour commencer à utiliser connexion : votre robot ou appuyez sur le bouton de démarrage du robot. VOYANT DU WI-FI COULEUR DU VOYANT SIGNIFICATION...
  • Page 7 Conexión de su robot QUITE LAS PELÍCULAS Y PEGATINAS CARGA INICIAL DEL ROBOT IMPORTANTE: Quite todas las películas protectoras y materiales de Coloque el lado redondo transporte del robot y de la base de carga. De lo contrario, el robot Neato del robot Neato en los no funcionará...
  • Page 8 Problemas de emparejamiento - Intentar nuevamente Empiece a usar su robot Durante el emparejamiento, el LED Wi-Fi cambiará en función del estado Use la app Neato para poner en marcha el robot de conexión: o pulse el botón Inicio del aparato. LED WI-FI COLOR DEL LED SIGNIFICADO...
  • Page 9 Collegamento del robot RIMUOVERE PELLICOLE E ADESIVI CARICA INIZIALE DEL ROBOT IMPORTANTE: Rimuovere tutte le pellicole protettive e il materiale da Posizionare la parte curva imballaggio dal robot e dalla base di ricarica. Se non verranno rimossi, del robot Neato contro i il robot Neato non funzionerà...
  • Page 10: Pulizia Spot

    Problemi di associazione – Riprovare Primo utilizzo del robot Durante l'associazione, il LED WI-FI cambierà in funzione dello stato Usate l'app Neato per cominciare a usare il robot, della connessione: oppure premete il pulsante di accensione sul robot stesso. LED WI-FI COLORE DEL LED SIGNIFICATO Il robot è...
  • Page 11 Ihren Roboter verbinden FOLIEN UND AUFKLEBER ENTFERNEN ROBOTER ERSTMALS AUFLADEN WICHTIG: Entfernen Sie alle Schutzfolien und Verpackungsmaterialien Drücken Sie die abgerundete des Roboters und der Ladestation. Solange diese nicht entfernt sind, Seite Ihres Neato-Roboters funktioniert Ihr Neato-Roboter nicht einwandfrei. gegen die Metallkontakte der Ladestation bis die Kontakte vollständig hineingedrückt sind.
  • Page 12 Kopplungsprobleme – Versuchen Sie es erneut Inbetriebnahme Ihres Roboters Während der Kopplung verändert sich die WLAN-LED entsprechend Verwenden Sie die Neato-App, um den Roboter des Verbindungsstatus: zu starten oder drücken Sie die Start-Taste an Ihrem Roboter. WLAN-LED LED-FARBE BEDEUTUNG Roboter befindet sich im Kopplungsmodus Sanft leuchtendes Blau START-TASTE, HAUSREINIGUNG und...
  • Page 13 Anslut din robot TA BORT FILMER OCH DEKALER ROBOTENS FÖRSTA LADDNING VIKTIGT: Avlägsna all skyddsfilm och packningsmaterial från roboten Placera den rundade sidan och laddningsstationen. Om de inte tas bort kommer din Neato- av Neato-roboten mot robot inte att fungera korrekt. laddningsstationens metalliska laddningskontakter...
  • Page 14 Problem med sammankoppling - Försök igen Börja använda din robot Under anslutning kommer WIFI-LED-lampan att ändras beroende Använd neato-appen för att börja använda din på anslutningsstatus: robot, och tryck på Start-knappen på roboten. WIFI-LED-LAMPA LED-FÄRG VAD DET BETYDER LED-LAMPOR FÖR START-KNAPP, HUSRENGÖRING och Mjukt glödande blå...
  • Page 15 Uw Robot Aansluiten FOLIE EN STICKERS VERWIJDEREN ROBOT INITIEEL LADEN BELANGRIJK: Verwijder alle beschermfolie en verpakkingsmateriaal Plaats de afgeronde zijde van de robot and het laadstation. Als deze niet worden verwijderd, van uw Neato-robot werkt de Neato-robot niet goed. tegen de metalen laadcontactpunten op het laadstation totdat de contactpunten helemaal...
  • Page 16 Koppelingsproblemen – opniew proberen Uw Robot in gebruik nemen Tijdens de koppeling verandert het WI-FI lampje op basis van de Gebruik de Neato app om uw robot te starten, verbindingsstatus: of druk op de startknop op de robot. WI-FI Lampje KLEUR LAMPJE BETEKENIS Robot is in koppelingsmodus Zacht gloeiend blauw...
  • Page 17 Forbindelse af din robot FJERN FILM OG MÆRKATER INDLEDENDE ROBOT OPLADNING VIGTIGT: Fjern al beskyttelsesfilm og forsendelsesmateriale Placer den afrundede fra robotten og OPladestationen. Hvis de ikke fjernes, vil din side af din Neato- Neato-robot ikke fungere korrekt. robot mod metal opladningskontakterne på opladestationen, indtil kontakterne er skubbet...
  • Page 18 Parrings problemer - Prøv igen Begynd at bruge din robot Brug Neato appen for at begynde at bruge din Under parring ændres WI-FI LED'en i overensstemmelse med robot, eller tryk på Startknappen på robotten. forbindelsesstatussen: WI-FI LED LED FARVE HVAD DETTE BETYDER Robot er nu i parringstilstanden Blød lysende blå...
  • Page 19 Tilkobling av Robot FJERN BESKYTTELSESFILM OG KLISTREMERKER FØRSTE LADING AV ROBOT VIKTIG: Fjern all beskyttelsesfilm og emballasje fra roboten og Plasser den runde siden ladebasen. Hvis det ikke er fjernet vil ikke roboten fungere korrekt. av Neato-roboten mot ladekontaktene i metall på ladebasen inntil kontaktene er skjøvet helt inn.
  • Page 20 Tilkoblingsproblemer - Prøv på nytt Begynn å bruke roboten din Under tilkobling vil WI-FI LED-lys endre seg etter tilkoblingsstatus: Bruk Neato-appen for å begynne å bruke roboten, eller trykk Start-knappen på roboten. WI-FI LED-lys LYSMØNSTER HVA DET BETYR Robot er i koblingsmodus Dus glødende blå...
  • Page 21 Robotin yhdistäminen POISTA KALVOT JA TARRAT ROBOTIN ENSIMMÄINEN LATAUSKERTA TÄRKEÄÄ: Poista kaikki suojakalvot ja pakkausmateriaalit robotista ja Työnnä robotin pyöreää puolta latausasemasta. Neato-robottisi ei toimi kunnolla, mikäli niitä ei poisteta. latausaseman metallisia latausliittimiä vasten, kunnes liittimet ovat työntyneet kokonaan sisään. Latausliittimet VALMISTELE LATAUSASEMA Lataa robotti täyteen ennen ensimmäistä...
  • Page 22 Yhdistämisongelmat - Yritä uudelleen Robotin käytön aloitus Yhdistämisen aikana WI-FI-MERKKIVALO vaihtuu yhteystilan mukaisesti. Aloita robotin käyttö Neato-sovelluksen avulla, tai paina robotin käynnistyspainiketta. WI-FI-MERKKIVALO MERKKIVALON VÄRI MERKITYS Robotti on yhdistämistilassa Pehmeästi hehkuva sininen KÄYNNISTYSPAINIKKEEN, KODIN IMUROINTITILAN ja ALUEEN Yhdistetään Neato-sovellukseen tai -tiliin IMUROINTITILAN MERKKIVALOT Nopeasti vilkkuva sininen* KODIN IMUROINNIN...
  • Page 24 Neato Robotics, Inc. 8100 Jarvis Avenue, Newark, CA 94560 USA NeatoRobotics.com 515-0057 Rev 1...