Table des Matières
Publicité
Les langues disponibles
Les langues disponibles
Liens rapides
INSTALLATION INSTRUCTIONS
PASSAGE
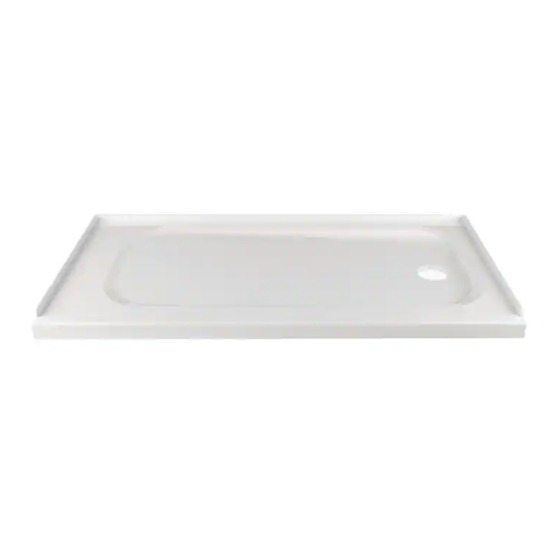
SHOWER BASES
™
MODELS: A8010T-RHO, A8010T-LHO, A8011T-RHO,
A8011T-LHO, A8012T-CO
Visit http://www.americanstandard-us.com/passage-collection for coordinating products.
Thank you for selecting American Standard – the benchmark of fine quality for over 100 years. To ensure this product is installed
properly, please read these instructions carefully before you begin. (Certain installations may require professional help.)
Local building codes vary by location. Observe all local plumbing and building codes.
TOOLS & MATERIALS REQUIRED....
TOOLS:
• Level
• Pencil
• Square
• Tape Measure
• Pipe Wrench
NOTE: Read instructions completely before proceeding with installation.
The opening dimensions should be at least 1/8" (3mm) larger than dimensions shown.
For the best fit, the opening measurements should be verified against the actual shower base received.
8"
(203mm)
14-1/4"
(362mm)
30"
(762mm)
1"
(25mm)
2-1/4"
(57mm)
8"
(203mm)
15-1/4"
(387mm)
32"
(813mm)
1"
(25mm)
2-1/4"
(57mm)
All product names listed herein are trademarks of AS America, Inc. unless otherwise noted.
© AS America, Inc. 2018
• Slip Joint Pliers
• Screw Driver
• Standard Woodworking Tools
• Personal Safety Equipment
• Caulking Gun
A8010T-LHO
60"
(1524mm)
2-3/4"
(71mm)
A8011T-LHO
60"
(1524mm)
2-3/4"
(71mm)
MATERIALS:
• Silicone Sealant
• Drop Cloth
• Mortar Mix or Grout
A8010T-RHO
60"
(1524mm)
2-3/4"
(71mm)
1"
(25mm)
2-1/4"
(57mm)
A8011T-RHO
60"
(1524mm)
2-3/4"
(71mm)
1"
(25mm)
2-1/4"
(57mm)
8"
(203mm)
14-1/4"
(362mm)
30"
(762mm)
8"
(203mm)
15-1/4"
(387mm)
32"
(813mm)
755467-100 Rev. A 7/18
Publicité
Table des Matières

Manuels Connexes pour American Standard PASSAGE A8010T-RHO


Sommaire des Matières pour American Standard PASSAGE A8010T-RHO
- Page 9 Pour trouver des produits associés, visitez http://www.americanstandard-us.com/passage-collection Merci d'avoir choisi American Standard, la référence en matière de qualité depuis plus de 100 ans. Afin de garantir une installation adéquate, veuillez lire ces instructions attentivement avant de commencer. (L'installation peut nécessiter l'aide d'un professionnel dans certains cas.) De plus, assurez-vous d'installer le produit conformément aux codes locaux.
-
Page 10: Tracer Un Repère Sur Les Montants Àau-Dessus Du Niveau Du Sous-Plancher
A8012T-CO 48 po (1219mm) 24 po (610mm) 16 po (413mm) 34 po (864mm) 2-3/4 po 1 po (70mm) (25mm) 2-1/4 po (57mm) TRACER UN REPÈRE SUR LES MONTANTS À Assurez-vous que le plancher et les montants sont d'aplomb et AU-DESSUS DU NIVEAU DU SOUS-PLANCHER d'équerre, selon ce qui est illustré... -
Page 11: Aucun Matériau D'assise Sous La Bride De La Base
Mélangez un matériau d'assise à faible affaissement, par exemple du mortier, et appliquez une bonne couche de ce matériau pour supporter l'ensemble du fond de la base de douche. Le béton N'est PAS recommandé. La base de douche NE doit PAS être supportée par la bride de la base. AUCUN MATÉRIAU COUPE TRANSVERSALE DRAIN À... -
Page 12: Installation Après Nettoyage
Afin de mettre cette garantie en vigueur, vous devez faire parvenir la carte d’enregistrement de garantie remplie à l’attention d’ A merican Standard, prouvant l’achat. En aucun cas, American Standard ne pourra être tenue responsable des frais de réparation ou de remplacement de matériel d’installation, y compris mais non limité à, carrelage, marbre, etc. -
Page 13: Entretien
Please inspect the product immediately upon receipt for transit damage, missing packs/parts or manufacturing produit ou toute pièce du produit qui, selon American Standard et à son entière discrétion, a un défaut de matériau ou de fabrication, dans un fault. Damage reported later cannot be accepted. Please handle the product with care avoiding knocks and contexte d'utilisation et d'entretien normal, pendant toute la durée de vie du produit. - Page 14 MODEL: AM801703400 SERIES Thank you for selecting American Standard – the benchmark of fine quality for over 100 years. To ensure this product is installed 1b. Replacer le montant [20] sur le montant mural coulissant [21] et utiliser trois vis M4x8 fournies en plaçant des coupes de plastique properly, please read these instructions carefully before you begin.
-
Page 15: Assembly Drawing
ASSEMBLY DRAWING AJUSTER LE PANNEAU DE PORTE COULISSANT [12] [15] [33] 1a. Une fois l’assemblage terminé, il peut être nécessaire d’ajuster le panneau de porte coulissant [32] pour qu’il fonctionne correctement. Vous pouvez le faire en ajustant les cylindres [8] fixés au panneau de porte coulissant en desserrant l’écrou métallique des cylindres. 1b. -
Page 16: Installation Notes
INSTALLATION NOTES: FIXER LE PANNEAU DE PORTE COULISSANT AU RAIL HORIZONTAL This unit is best installed by two people. 1a. Placer minutieusement le panneau de porte coulissant [32] sur le rail horizontal [1] depuis l’intérieur de la douche et sur les cylindres [8]. Cover drain with tape prior to installation to prevent the loss of small parts. - Page 17 INSTALLING FLOOR U CHANNEL AND BOTTOM GUIDE ASSEMBLER LES CYLINDRES ET LA PORTE DE PANNEAU COULISSANT 1a. Place U Channel [28] and Bottom Guide [6] on Fixed Wall Post [21] side of threshold edge of shower pan. 1a. Installer la poignée de porte [2] sur le panneau de porte coulissant [32] en laisant les rondelles en plastique transparent entre le panneau de NOTE: One side of Bottom Guide is meant to hold the Fixed Panel [31] (with the rubber Shim [7] ), while the other side is verre et la poignée.
- Page 18 ASSEMBLING FIXED PANEL AND SLIDING WALL POST ASSEMBLER LE RAIL HORIZONTAL ET LES CONNECTEURS MURAUX. NOTE: TWO PEOPLE REQUIRED 1a. Ensure Shim [7] is in groove on Bottom Guide [6] for Fixed Panel side. 1a. Fixer les blocs de limite [33] au connecteur mural [11a]. REMARQUE : Le connecteur mural [11a] compte un trou fileté sur un côté prévu pour le bloc de limite.
-
Page 19: Remarque : 2 Personnes Nécessaires
ASSEMBLER LE PANNEAU FIXE ET LE MONTANT MURAL COULISSANT ASSEMBLING THE HORIZONTAL RAIL AND WALL CONNECTORS REMARQUE : 2 PERSONNES NÉCESSAIRES 1a. Placer une cale [7] dans la rainure du guidage inférieur [6] pour le côté du panneau fixe. 1a. Attach Limit Block [33] to Wall Connector [11a]. NOTE: Wall Connector [11a] has a threaded hole on one side to accommodate the Limit Block. - Page 20 INSTALLER LE PROFILÉ EN U AU SOL ET LE GUIDAGE INFÉRIEUR ASSEMBLING ROLLERS AND SLIDING PANEL DOOR 1a. Placer le profilé en U [28] et le guidage inférieur [6] sur le côté du montant mural fixe [21] du seuil du bac de douche. 1a.
-
Page 21: Remarques D'installation
REMARQUES D’INSTALLATION : ATTACHING SLIDING DOOR PANEL TO HORIZONTAL RAIL L'installation de la porte se fait plus facilement à deux. 1a. Carefully place Sliding Door Panel [32] onto Horizontal Rail [1] from inside of shower area and onto the Rollers [8]. Couvrir le renvoi avec du ruban avant l'installation pour éviter de perdre les petites pièces. -
Page 22: Image D'assemblage
IMAGE D'ASSEMBLAGE ADJUSTING SLIDING DOOR PANEL [12] [15] [33] 1a. Once all assembly is completed, it may be necessary to adjust the Sliding Door Panel [32] for proper operation. This can be achieved by adjusting Rollers [8] attached to the Sliding Door Panel by loosening the metal nut on Roller. 1b. -
Page 23: Contenu De La Boîte
MODÈLE : SÉRIE AM801703400 Merci d'avoir choisi American Standard, la référence en matière de qualité depuis plus de 100 ans. Afin de garantir une installation 1b. Place Post [20] back onto Sliding Wall Post [21] and use 3 supplied M4x8 screws placing white plastic cups through each adéquate, veuillez lire ces instructions attentivement avant de commencer. -
Page 24: Outils Et Équipement Nécessaires
AS AMERICA, INC. LIMITED LIFETIME WARRANTY FOR SHOWER DOORS INFORMATION GÉNÉRALE AS America, Inc. (“American Standard”) warrants to the original consumer purchaser that it will, at its sole option, repair or replace Vérifier le produit immédiatement après sa réception pour contrôler la présence d'éventuels dommages de transport, de this product or any part of this product, if it confirms that the product is defective in materials or workmanship under normal use and défauts de fabrication ou l'absence de pièces ou de paquets.