Table des Matières

Publicité

Les langues disponibles

Les langues disponibles

Liens rapides

Vor dem Gebrauch des
Gerätes die Betriebs-
anleitung aufmerksam
lesen.
Before using the tool,
read the operating
instructions carefully.
Avant l'utilisation de
l'appareil, consultez
soigneusement le
mode d'emploi.
Prima d'utilizzare
l'apparecchio, leggere
attentamante le istruzi-
oni per l'uso.
STR 64
Pneumatisches Handgerät zum Umreifen mit Stahlband
Pneumatic hand tool for steel strapping
Appareil pneumatique pour le cerclage par feuillard d'acier
Apparecchio pneumatica per reggiare con reggetta
BETRIEBSANLEITUNG
OPERATING INSTRUCTIONS
MODE D'EMPLOI
ISTRUZIONI PER L'USO
12.11
Originalbetriebsanleitung
Translation of original manual
Traduction du mode d'emploi original
Traduzione dall'originale
Ab Serie-Nr. 2500
From serie no 2500
A partir du no de série 2500
A partire dal no. di serie 2500
DEUTSCH
ENGLISH
FRANÇAIS
ITALIANO
3
12
21
30

Publicité

Table des Matières
loading

Sommaire des Matières pour strapex STR 64

  • Page 1 Prima d’utilizzare l’apparecchio, leggere attentamante le istruzi- oni per l’uso. STR 64 Pneumatisches Handgerät zum Umreifen mit Stahlband Ab Serie-Nr. 2500 Pneumatic hand tool for steel strapping From serie no 2500 Appareil pneumatique pour le cerclage par feuillard d‘acier A partir du no de série 2500...
  • Page 2: Konformitätserklärung

    +1 800 779 380 Telefon +31 30 248 03 11 Wir erklären in alleiniger Verantwortung, dass das sales@iwdstrapping.com.au sales@strapex.nl Gerät STR 64, auf welches sich diese Erklärung Belgien Norwegen bezieht, mit den geltenden Bestimmungen der Richt- Strapex Sprl Strapex / Josef Kihlberg AS linie des Rates vom 17.
  • Page 3: Table Des Matières

    Strapex STR 64 INHALTSVERZEICHNIS TECHNISCHE DATEN Seite 1 Technische Daten Gewicht 3,2 kg 2 Allgemeines Abmessung Länge 302 mm 2.1 Hinweis zum Umweltschutz Breite 130 mm 3 Sicherheitsvorschriften Höhe 180 mm 4 Beschreibung Spannkraft Bis ca. 3000 N 4.1 Aufbau 4.2 Funktionsprinzip...
  • Page 4: Allgemeines

    Strapex STR 64 ALLGEMEINES Diese Betriebsanleitung soll das Kennenlernen des Gerätes und den bestimmungsgemässen Einsatz VORSICHT! erleichtern. Die Betriebsanleitung enthält wichtige Hinweise, wie das Gerät sicher, sachgerecht und wirt- Wird verwendet bei Ge- schaftlich einzusetzen ist. Das Einhalten der Hinweise fahren für Leben...
  • Page 5: Sicherheitsvorschriften

    Strapex STR 64 SICHERHEITSVORSCHRIFTEN Informieren Sie sich! Keine Gas- oder Druck- luftflaschen verwenden! Vor dem Gebrauch des Gerätes die Betriebsan- Das Gerät darf nicht an jklsfjklsdj lksdfjkl jkljsdllkjjkljsd fkljjklkjkljsdafj asdfjklkjjkljklj leitung sorgfältig lesen. eine Gas- oder Druckluft- ksldafkjkljkl jkljklkljsdafjlkj jkljjkljklkljljlk flasche angeschlossen Schützen Sie sich!
  • Page 6: Beschreibung

    Strapex STR 64 BESCHREIBUNG 4.1 AUFBAU 1 Luftanschluss 2 Gelbe Taste (Verschliessen) 3 Grüne Taste (Spannen) 4 Handgriff 5 Druckreduzierventil 6 Druckluftmotor 7 Spannrad und Matrize 8 Grundplatte 9 Verschliesszangen 10 Druckluftzylinder 11 Aufhängebügel Fig. 1 4.2 FUNKTIONSPRINZIP – Band von Hand durch die Plombe (2/1) ziehen.
  • Page 7: Inbetriebnahme

    Wasserabscheider, Druckreduzierventil mit Manometer und Ölnebelgerät besteht. Das Ölnebelgerät soll genügend Öl abgeben. Die Schlauchlänge zwischen dem Gerät STR 64 und der Wartungseinheit soll 5 m nicht überschreiten. Die lich- te Weite der Leitung soll minimum 10 mm betragen.
  • Page 8: Bedienung

    Strapex STR 64 BEDIENUNG 6.1 BEDIENUNG DES GERÄTES – Band von der Rolle durch die Plombe (4/1) schie- ben, danach um das Packgut führen. – Bandanfang nochmals durch die Plombe schieben. Fig. 4 – Den Bandanfang (5/1) unter der Plombe umbie- gen (3–4 cm).
  • Page 9: Verschlusskontrolle

    Strapex STR 64 Spannen – Mit dem Daumen der rechten Hand die grüne Taste (7/1) ganz nach unten drücken. Grüne Taste los- lassen. Das Band wird gespannt, bis der Druckluft- motor stillsteht. Die Spannkraft kann stufenlos eingestellt werden (siehe Kapitel 7.1).
  • Page 10: Wartung Und Instandsetzung

    Strapex STR 64 WARTUNG UND INSTANDSETZUNG 7.1 SPANNKRAFT/SPANNGESCHWINDIGKEIT EINSTELLEN – Luftdruck am Druckreduzierventil der Wartungs- einheit auf 4–6 bar einstellen. – Mit Schraubenzieher Drosselschraube (10/1) des Druckluftmotors so einstellen, dass bei gewünsch- ter Bandspannung der Druckluftmotor zum Still- stand kommt. Dabei ist darauf zu achten, dass die Plombe einwandfrei gekerbt und das Band abge- schnitten wird.
  • Page 11: Abschneidmesser Ersetzen

    Strapex STR 64 7.4 ABSCHNEIDMESSER ERSETZEN Ausbau – Spannrad ausbauen (siehe Kapitel 7.3). – Getriebegehäuse (13/9) inkl. Luftmotor und Achse entfernen. – Mit Schraubenzieher Spezial-Schraube (13/1) lösen. – Achse (13/2) und Feder (13/3) entfernen. – Grundplatte (13/4) herausziehen. – Zylinderschraube (13/6) entfernen.
  • Page 12: Npt)

    Part no. 480.019.022 DECLARATION OF AGREEMENT We take sole responsibility for declaring that the CH-8953 Dietikon, 18.12.2009 tool STR 64, to which this declaration refers, is in full compliance with the current requirements General Manager Manager Products of the guidelines laid down by the council on...
  • Page 13: General Information

    Strapex STR 64 GENERAL INFORMATION These operating instructions are intended to simplify familiarisation with the strapping tool and the pos- CAUTION! sibilities of application for the intended purpose. The operating instructions contain important information Used where there is dan- concerning the safe, proper and efficient use of the ger to life and health.
  • Page 14: Safety Instructions

    Strapex STR 64 SAFETy INSTRUCTIONS Inform yourself! Do not use a bottled air or gas source! Read the operating in- structions carefully. Do not operate tis tool jklsfjklsdj lksdfjkl jkljsdllkjjkljsd fkljjklkjkljsdafj by usining a bottled air asdfjklkjjkljklj ksldafkjkljkl jkljklkljsdafjlkj jkljjkljklkljljlk...
  • Page 15: Description

    Strapex STR 64 DESCRIPTION 4.1 DESIGN 1 Compressed air connection 2 Yellow button (Sealing) 3 Green button (Tensioning) 4 Handle 5 Pressure reduzing valve 6 Compressed air motor 7 Tension wheel and tension plug 8 Base plate 9 Sealing jaws...
  • Page 16: Initial Operation

    The oil mist lubricator should supply sufficient oil. The length of the hose between the STR 64 and the maintenance unit should not exceed 5 m (15 ft). The internal diameter of the pipe should be at least 10 mm “).
  • Page 17: Operating Instructions

    Strapex STR 64 OPERATING INSTUCTIONS 6.1 OPERATING THE TOOL – Draw the strap from the dispenser, slide the strap through the seal (4/1) and wind strap around the package. – Push the strap start a second time through the seal.
  • Page 18: Checking The Seal

    Strapex STR 64 Tensioning – Press the green button completely down with the thumb of the right hand. Release green button. The strap is tensioned until the air motor stops. The tensioning force can be infinitely adjusted (see chapter 7.1).
  • Page 19: Preventive And Corrective Maintenance

    Strapex STR 64 PREVENTIVE AND CORRECTIVE MAINTENANCE 7.1 ADJUSTING TENSIONING FORCE/ TENSIONING SPEED – Set air pressure at pressure reducing valve of maintenance unit to 4–6 bar. – With a screwdriver adjust pressure reducing valve (10/1) of air motor, so that the motor stops when the required tension is reached.
  • Page 20: Replacing Cutting Knife

    Strapex STR 64 7.4 REPLACING CUTTING KNIFE Removal – Remove tension wheel (see chapter 7.3). – Remove gear housing (13/9) including air motor and shaft. – With screwdriver loosen special screw (13/1). – Remove shaft (13/2) and compression spring (13/3).
  • Page 21: Type A (En Iso 11202)

    No d‘article 480.019.022 DéCLARATION DE CONFORMITé Nous déclarons sous notre propre responsabilité CH-8953 Dietikon, 18.12.2009 que l‘appareil STR 64 ci-dessus, au sujet duquel se réfère cette déclaration, est conforme avec les General Manager General Manager Products prescriptions en vigueur de la directive du conseil...
  • Page 22: Instructions Générales

    Strapex STR 64 INSTRUCTIONS GéNéRALES Ces instructions de service doivent faciliter la con- naissance de l‘appareil et les possibilités d‘utilisation PRUDENCE! selon les règles. Les instructions de service contien- nent d‘importants renseignements, à savoir comment Utilisé si risque de mort l‘appareil doit fonctionner en toute sécurité, selon les...
  • Page 23: Instructions De Sécurité

    Strapex STR 64 INSTRUCTIONS DE SéCURITé Renseignez-vous! Bouteilles gaz ou d‘air comprimé interdites! Avant l‘utilisation de Interdiction de branche- l‘appareil, consultez jklsfjklsdj lksdfjkl jkljsdllkjjkljsd soigneusement le mode ment de l‘appareil à une fkljjklkjkljsdafj asdfjklkjjkljklj ksldafkjkljkl jkljklkljsdafjlkj jkljjkljklkljljlk d‘emploi. bouteille de gaz ou d‘air comprimé.
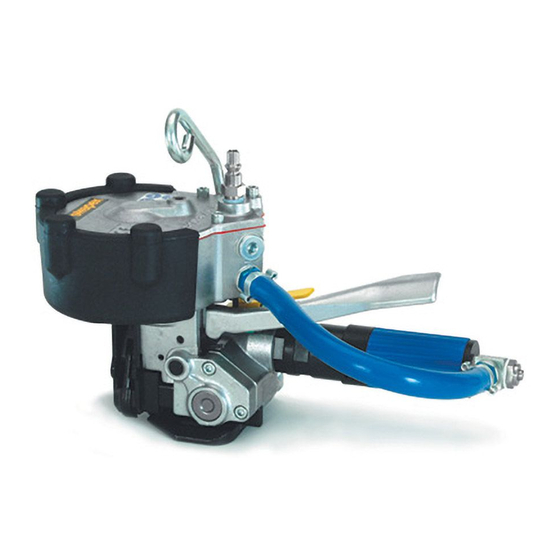
  • Page 24: Description

    Strapex STR 64 DESCRIPTION 4.1 MODULES PRINCIPAUX 1 Raccordement air comprimé 2 Touche jaune (sertissage) 3 Touche verte (serrage) 4 Levier 5 Soupape réductrice 6 Moteur à air comprimé 7 Molette de tension et matrice de tension 8 Plaque de la base 9 Pinces 10 Cylindre air comprimé...
  • Page 25: Mise En Service

    L‘huileur doit fournir suffisamment de brouillard d‘huile. La longeur du tuyau entre l‘unité de traitement de l‘air comprimé et l‘appareil STR 64 ne doit pas ex- céder 5 m. Le trou du tuyau doit être au minimum de 10 mm. If faut veiller à ce que le tuyau ne fasse pas de boucles dans lesquelles de l‘huile pourrait stagner.
  • Page 26: Mode D'emploi

    Strapex STR 64 MODE D‘EMPLOI 6.1 MODE D‘EMPLOI POUR L‘APPAREIL – Dévider le feuillard et introduire l‘agrafe (4/1). – Placer le feuillard autour du colis et glisser l‘extrémité dans l‘agrafe. Fig. 4 – Replier le feuillard (5/1) de 3–4 cm sous l‘agrafe.
  • Page 27: Vérification Du Sertissage

    Strapex STR 64 Tendre – Avec le pouce de la main droite, appuyer à fond sur la touche verte (7/1). Relâcher le levier. Le feuillard sera tendu jusqu‘à ce que le moteur à air comprimé s‘immobilise. La force de tension peut être réglée de façon continue (voir chapitre 7.1).
  • Page 28: Instruction De Service

    Strapex STR 64 INSTRUCTION DE SERVICE 7.1 RÉGLAGE DE LA FORCE ET DE LA VITESSE DE TENSION – Régler la pression à 4–6 bar à la soupape de réduc- tion de pression de l‘unité de traitement de l‘air. – Régler avec un tournevis le moteur à air comprimé...
  • Page 29: Remplacement Du Couteau De Coupe

    Strapex STR 64 7.4 REMPLACEMENT DU COUTEAU DE COUPE Démontage – Démonter la molette de tension (voir chapitre 7.3). – Enlever le bâti d‘engrenage (13/9) y inclus le mo- teur à air comprimé et l‘axe du cylindre. – Desserrer la vis spécial (13/1).
  • Page 30: Dati Tecnici

    Art. nr. 480.019.022 DICHIARAZIONE DI CONFORMITà Dichiariamo sotto la nostra responsabilità che CH-8953 Dietikon, 18.12.2009 l‘apparecchio STR 64, al quale questa dichiarazione si riferisce, corrisponde alle prescrizioni in vigore General Manager General Manager Products delle direttive del Consiglio europeo del 17 maggio...
  • Page 31: Informazioni Generali

    Strapex STR 64 INFORMAZIONI GENERALI Queste istruzioni per l‘uso hanno lo scopo di facilitare la conoscenza dell‘apparecchio e delle sue possibilità PERICOLO! di utilizzo. Esse contengono importanti informazioni su come utilizzare l‘apparecchio in modo sicuro, compe- Viene usato come indica- tente ed economico.
  • Page 32: Prescrizioni Di Sicurezza

    Strapex STR 64 PRESCRIZIONI DI SICUREZZA Si informi! Non bombola di gas o Prima di utilizzare l’appa- aria compressa! recchio, leggere atten- Non collegare l‘appa- jklsfjklsdj lksdfjkl jkljsdllkjjkljsd fkljjklkjkljsdafj tamente le istruzioni per recchio ad una bombola di asdfjklkjjkljklj ksldafkjkljkl...
  • Page 33: Descrizioni

    Strapex STR 64 DESCRIZIONI 4.1 COSTRUZIONE 1 Allacciamento aria 2 Tasto giallo (chiudere) 3 Tasto verde (tendere) 4 Leva 5 Valvola di riduzione 6 Motore ad aria compressa 7 Rotella di tensione e matrice 8 Piastra di base 9 Tenaglie...
  • Page 34: Messa In Esercizio

    L‘apparecchio di nebulizzazione olio deve fornire olio a sufficienza. La lunghezza dei tubi flessibili tra l‘apparecchio STR 64 e l‘unità di manutenzione non deve superare i 5 m. Il diametro interno del tubo deve essere almeno 10 mm. Occorre prestare attenzione che il tubo non formi degli anelli con conseguente accumulo dell‘olio.
  • Page 35: Istruzioni Per L'uso

    Strapex STR 64 ISTRUZIONI PER L‘USO 6.1 ISTRUZIONI PER L‘USO DELL‘APPARECCHIO – Infilare la reggetta dal rotolo attraverso il piombo (4/1) quindi avvolgerla attorno alla merce da im- ballare. – Infilare ancora una volta l’inizio della reggetta attraverso il piombo.
  • Page 36: Controllo Della Chiusura

    Strapex STR 64 Tendere – Con il pollice della mano destra premere il tasto verde (7/1) fino in fondo. Lasciar andare il tasto verde. La reggetta viene tesa fino all‘arresto del motore aria compressa. La forza di tensione può essere regolata liberamente (vedi capitolo 7.1).
  • Page 37: Manutenzione E Riparazione

    Strapex STR 64 MANUTENZIONE E RIPARAZIONE 7.1 REGOLAZIONE DELL‘ACCOPPIAMENTO A FRIZIONE/VELOCITà DI TENSIONE – Regolare la pressione dell‘aria alla valvola di ridu- zione della pressione nell‘unità di manutenzione a 4–6 bar. – Con il cacciavite regolare il motore dell‘aria com- pressa (10/1) in modo da fare arrestare il motore al raggiungimento della tensione desiderata.
  • Page 38: Sostituzione Del Coltello

    Strapex STR 64 7.4 SOSTITUZIONE DEL COLTELLO Smontaggio – Rimuovere la rotella di tensione (vedi capitolo 7.3). – Rimuovere la cassa del cambio completa (13/9). – Con il cacciavite rimuovere vite speciale (13/1). – Rimuovere asse (13/2) e molla (13/3).

Table des Matières