Makita XPH07 Manuel D'instruction
Masquer les pouces
Voir aussi pour XPH07:
- Manuel d'instructions (100 pages) ,
- Manuel d'instruction (88 pages) ,
- Manuel d'instruction (69 pages)
Table des Matières
Publicité
Les langues disponibles
Les langues disponibles
Liens rapides
Publicité
Table des Matières

Manuels Connexes pour Makita XPH07


Sommaire des Matières pour Makita XPH07
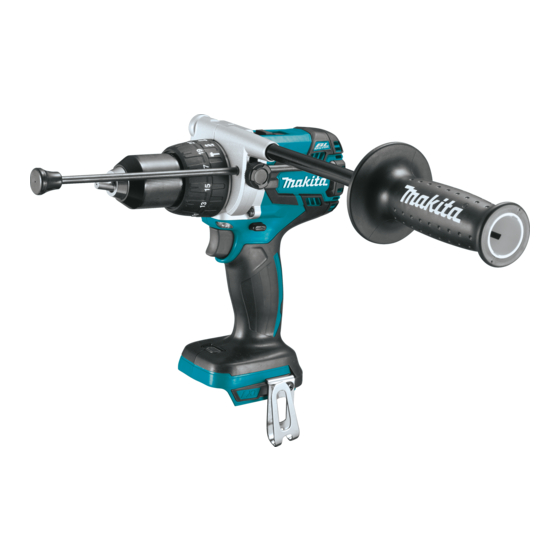
- Page 1 INSTRUCTION MANUAL MANUEL D'INSTRUCTION MANUAL DE INSTRUCCIONES Cordless Hammer Driver Drill Perceuse Percussion-Visseuse sans Fil Rotomartillo Atornillador Inalámbrico XPH07 014695 IMPORTANT: Read Before Using. IMPORTANT: Lire avant usage. IMPORTANTE: Leer antes de usar.
-
Page 2: General Power Tool Safety Warnings
ENGLISH (Original instructions) SPECIFICATIONS Model XPH07 Drilling into concrete 16 mm (5/8") Drilling into steel 13 mm (1/2") Capacities Drilling into wood 76 mm (3") Fastening wood screw 10 mm x 90 mm (3/8" x 3-1/2") Fastening machine screw 6 mm (1/4") - Page 3 12. Prevent unintentional starting. Ensure the and the work to be performed. Use of the switch is in the off-position before connecting power tool for operations different from those to power source and/or battery pack, picking intended could result in a hazardous situation. up or carrying the tool.
- Page 4 Always be sure you have a firm footing. If electrolyte gets into your eyes, rinse them Be sure no one is below when using the tool out with clear water and seek medical in high locations. attention right away. It may result in loss of Hold the tool firmly.
- Page 5 Lithium-ion batteries with a star marking are equipped FUNCTIONAL DESCRIPTION with a protection system. This system automatically cuts off power to the tool to extend battery life. The tool will automatically stop during operation if the CAUTION: tool and/or battery are placed under one of the following Always be sure that the tool is switched off and the •...
-
Page 6: Speed Change
Reversing switch action not work even with a recharged battery cartridge, cool down the tool fully. If the condition does not CAUTION: change, have the tool repaired by a Makita local Always check the direction of rotation before • service center. - Page 7 Selecting the action mode ASSEMBLY CAUTION: CAUTION: Always set the ring correctly to your desired mode • mark. If you operate the tool with the ring Always be sure that the tool is switched off and the • positioned halfway between the mode marks, the battery cartridge is removed before carrying out tool may be damaged.
- Page 8 First, slide the action mode change lever so that it Adjustable depth rod points to the marking. The adjusting ring can be aligned in any torque levels for this operation. 1. Depth rod Be sure to use a tungsten-carbide tipped bit. 2.
-
Page 9: Drilling Operation
Hold the tool If you need any assistance for more details regarding firmly and exert care when the bit begins to break these accessories, ask your local Makita Service Center. through the workpiece. Drill bits A stuck bit can be removed simply by setting the •... - Page 10 COMPLETE tool, freight prepaid, to one of Makita’s Factory or Authorized Service Centers. If inspection shows the trouble is caused by defective workmanship or material, Makita will repair (or at our option, replace) without charge. This Warranty does not apply where:...
-
Page 11: Consignes De Sécurité Générales Pour Outils Électriques
FRANÇAIS (Mode d’emploi original) SPÉCIFICATIONS Modèle XPH07 Perçage du béton 16 mm (5/8") Perçage de l’acier 13 mm (1/2") Capacités Perçage du bois 76 mm (3") Serrage d’une vis à bois 10 mm x 90 mm (3/8" x 3-1/2") Serrage d’une vis de mécanique 6 mm (1/4") - Page 12 Si vous devez utiliser un outil électrique dans été conçu, il effectuera un travail de meilleure un endroit humide, utilisez une source qualité et de façon plus sécuritaire. d'alimentation protégée par un disjoncteur de 18. N'utilisez pas l'outil électrique s'il n'est pas fuite à...
-
Page 13: Consignes De Sécurité Pour La Perceuse-Visseuseà Percussion Sans Fil
clous, vis ou autres petits objets métalliques Tenez l’outil fermement. qui risquent d'établir une connexion entre les Gardez les mains éloignées des pièces en bornes. La mise en court-circuit des bornes de rotation. batterie peut causer des brûlures ou un incendie. N'abandonnez pas l'outil alors qu'il tourne. - Page 14 Cessez immédiatement l'utilisation si le temps DESCRIPTION DU de fonctionnement devient excessivement FONCTIONNEMENT court. Il y a risque de surchauffe, de brûlures, voire d'explosion. Si l'électrolyte pénètre dans vos yeux, rincez- ATTENTION: les à l'eau claire et consultez immédiatement Assurez-vous toujours que l'outil est hors tension •...
-
Page 15: Système De Protection De La Batterie (Batterie Lithium-Ion Marquée D'une Étoile)
Puis appuyez de nouveau sur la centre de service après-vente local Makita. gâchette pour redémarrer. Interrupteur Si l’outil ne démarre pas, la batterie est en surchauffe. -
Page 16: Inverseur
La pression sur la gâchette n'est pas possible lorsque le Allumage de la lampe avant levier inverseur se trouve en position neutre. 1. Lampe Changement de vitesse ATTENTION: Engagez toujours entièrement levier • changement de vitesse dans la position correcte. Si vous utilisez l'outil alors que le levier de changement de vitesse se trouve à... -
Page 17: Réglage Du Couple De Serrage (Mode Tournevis " ")
Pour le mode de rotation avec percussion, tournez Utilisez toujours la poignée latérale pour assurer votre l'anneau de sorte que la flèche pointe vers l'indication sécurité. de l'anneau. Insérez la poignée latérale de façon à ce que la rainure Pour le mode de rotation avec embrayage, tournez sur le bras s'engage dans une des rainures sur l'outil. -
Page 18: Utilisation
L'utilisation de la barre de profondeur ajustable permet de qu'il ne glisse à l'extérieur du trou. percer des trous de même profondeur. Desserrez la vis de N'appliquez pas davantage de pression lorsque le trou serrage, réglez sur la position désirée, puis resserrez la vis. est bouché... -
Page 19: Entretien
Pour maintenir la SÉCURITÉ et la FIABILITÉ du produit, les réparations, tout autre travail d'entretien ou de réglage doivent être effectués dans un centre de service Makita agréé ou un centre de service de l'usine Makita, exclusivement avec des pièces de rechange Makita. - Page 20 GARANTIE LIMITÉE D’UN AN MAKITA Politique de garantie Chaque outil Makita est inspecté rigoureusement et testé avant sa sortie d’usine. Nous garantissons qu’il sera exempt de défaut de fabrication et de vice de matériau pour une période d’UN AN à partir de la date de son achat initial.
-
Page 21: Advertencias De Seguridad Generales Para Herramientas Eléctricas
ESPAÑOL (Instrucciones originales) ESPECIFICACIONES Modelo XPH07 Taladrado en concreto 16 mm (5/8") Taladrado en acero 13 mm (1/2") Capacidades Taladrado en madera 76 mm (3") Fijación de tabique de madera 10 mm x 90 mm (3/8" x 3-1/2") Fijación de tornillo de maquinaria 6 mm (1/4") - Page 22 Cuando utilice una herramienta eléctrica en Mantenimiento y uso de la herramienta eléctrica exteriores, utilice un cable de extensión 17. No fuerce la herramienta eléctrica. Utilice la apropiado para exteriores. herramienta eléctrica correcta para utilización de un cable apropiado para uso en aplicación.
- Page 23 26. Cuando no se esté usando el cartucho de la Mantenga las manos alejadas de las piezas batería, manténgalo alejado de otros objetos giratorias. metálicos, como sujetapapeles (clips), monedas, No deje la herramienta en marcha. Tenga en llaves, clavos, tornillos u otros objetos pequeños marcha la herramienta solamente cuando la de metal los cuales pueden actuar creando una tenga en la mano.
- Page 24 Si el tiempo de operación se ha acortado en DESCRIPCIÓN DEL exceso, deje de operar de inmediato. Podría FUNCIONAMIENTO correrse el riesgo de sobrecalentamiento, posibles quemaduras e incluso explosión. En caso de que ingresen electrolitos en sus PRECAUCIÓN: ojos, enjuáguelos bien con agua limpia y Asegúrese siempre de que la herramienta esté...
- Page 25 Makita en su Luego, vuelva a jalar el gatillo interruptor región. para reanudar el funcionamiento.
- Page 26 Esta herramienta tiene un conmutador de inversión para Iluminación de la lámpara delantera cambiar la dirección de giro. Presione hacia dentro la palanca del conmutador de inversión del lado A para 1. Lámpara giro hacia la derecha o del lado B para giro hacia la izquierda.
- Page 27 Esta herramienta tiene un anillo de cambio del modo de Instalación de la empuñadura lateral accionamiento. Seleccione entre los tres modos uno (mango auxiliar) apropiado para las necesidades de su trabajo utilizando este anillo. 1. Protuberancia Para giro solamente, gire el anillo de forma que la 2.
- Page 28 auxiliar) y sujete la herramienta firmemente por la Tope de profundidad ajustable empuñadura lateral y empuñadura del interruptor durante las operaciones. En caso contrario podrá 1. Varilla de resultar en la pérdida del control de la herramienta y profundidad posiblemente graves heridas. 2.
- Page 29 Se ejerce una tremenda fuerza de torsión en la • Centros de Servicio Autorizados por Makita, empleando broca/herramienta en el momento de traspasar el siempre repuestos Makita. orificio. Sostenga firmemente la herramienta y...
- Page 30 COMPLETA, porte pagado con antelación, a una de las fábricas o centros de servicio autorizados Makita. Si la inspección muestra que el problema ha sido causado por mano de obra o material defectuoso, Makita la reparará (o a nuestra opción, reemplazará) sin cobrar.
- Page 32 Para reducir la exposición a estos productos químicos: trabaje en un área bien ventilada y póngase el equipo de seguridad indicado, tal como las máscaras contra polvo que están especialmente diseñadas para filtrar partículas microscópicas. Makita Corporation 3-11-8, Sumiyoshi-cho, Anjo, Aichi 446-8502 Japan www.makita.com...
- Page 33 INSTRUCTION MANUAL MANUAL DE INSTRUCCIONES Cordless Impact Driver Atornillador de Impacto Inalámbrico XDT14 IMPORTANT: Read Before Using. IMPORTANTE: Lea antes de usar.
- Page 34 ENGLISH (Original instructions) SPECIFICATIONS Model: XDT14 Fastening capacities Machine screw 4 mm - 8 mm (5/32" - 5/16") Standard bolt 5 mm - 16 mm (3/16" - 5/8") High tensile bolt 5 mm - 14 mm (3/16" - 9/16") No load speed (RPM) Hard impact mode 0 - 3,600 /min Medium impact mode...
- Page 35 Use personal protective equipment. Always Use power tools only with specifically desig- wear eye protection. Protective equipment such nated battery packs. Use of any other battery as dust mask, non-skid safety shoes, hard hat, or packs may create a risk of injury and fire. hearing protection used for appropriate conditions When battery pack is not in use, keep it away will reduce personal injuries.
-
Page 36: Functional Description
Insert it all the way until it locks in place causing fires, personal injury and damage. It will with a little click. If you can see the red indicator on the also void the Makita warranty for the Makita tool and upper side of the button, it is not locked completely. charger. -
Page 37: Overload Protection
Overload protection CAUTION: Always install the battery cartridge fully until the red indicator cannot be seen. If not, it may accidentally When the battery is operated in a manner that causes fall out of the tool, causing injury to you or someone around you. it to draw an abnormally high current, the tool automat- ically stops without any indication. In this situation, turn CAUTION: Do not install the battery cartridge the tool off and stop the application that caused the tool... - Page 38 Makita service NOTE: Use a dry cloth to wipe the dirt off the lens of center.
- Page 39 Changing the impact force ► 1 . Changed in four steps 2. Hard 3. Medium 4. Soft 5. T mode 6. Button You can change the impact force in four steps: hard, medium, soft, and T mode. This allows a tightening suitable to the work. Every time the button is pressed, the number of blows changes in four steps.
- Page 40 ASSEMBLY NOTE: If the driver bit is not inserted deep enough into the sleeve, the sleeve will not return to its original position and the driver bit will not be secured. In this case, try re-inserting the bit according to the instruc- CAUTION: Always be sure that the tool is tions above.
- Page 41 To maintain product SAFETY and RELIABILITY, NOTICE: If you use a spare battery to continue repairs, any other maintenance or adjustment should the operation, rest the tool at least 15 min. be performed by Makita Authorized or Factory Service Centers, always using Makita replacement parts. 9 ENGLISH...
-
Page 42: Optional Accessories
Should any trouble develop during this one year period, return the COMPLETE tool, freight prepaid, to one of Makita’s Factory or Authorized Service Centers. If inspection shows the trouble is caused by defective workmanship or material, Makita will repair (or at our option, replace) without charge. This Warranty does not apply where: • repairs have been made or attempted by others: •... -
Page 43: Advertencias Generales De Seguridad Para Herramientas Eléctricas
ESPAÑOL (Instrucciones originales) ESPECIFICACIONES Modelo: XDT14 Capacidades de apriete Tornillo de máquina 4 mm - 8 mm (5/32" - 5/16") Tornillo estándar 5 mm - 16 mm (3/16" - 5/8") Tornillo de alta resistencia 5 mm - 14 mm (3/16" - 9/16") Velocidad sin carga (rpm) Modo de impacto duro 0 r/min - 3 600 r/min... - Page 44 No maltrate el cable. Nunca utilice el cable Mantenimiento y uso de la herramienta eléctrica para transportar, jalar o desconectar la herra- No fuerce la herramienta eléctrica. Utilice la mienta eléctrica. Mantenga el cable alejado del herramienta eléctrica correcta para su aplica- calor, aceite, objetos cortantes o piezas móvi- ción.
- Page 45 Servicio Instrucciones importantes de Haga que una persona calificada repare la seguridad para el cartucho de herramienta eléctrica utilizando sólo piezas de batería repuesto idénticas. Esto asegura que se man- tenga la seguridad de la herramienta eléctrica. Antes de utilizar el cartucho de batería, lea Siga las instrucciones para la lubricación y todas las instrucciones e indicaciones de cambio de accesorios.
-
Page 46: Descripción Del Funcionamiento
Makita, o de baterías alteradas, puede ocasio- nar que las baterías exploten causando un incendio, lesiones personales y daños. Asimismo, esto inva- lidará la garantía de Makita para la herramienta y el cargador Makita. Consejos para alargar al máximo la vida útil de la batería Cargue el cartucho de batería antes de que... -
Page 47: Protección Contra Sobrecarga
La herramienta está equipada con un freno eléctrico. Si encender la herramienta. la herramienta falla constantemente en detenerse tras soltar el gatillo interruptor, lleve la herramienta a mante- Protección en caso de nimiento a un centro de servicio Makita. sobredescarga Iluminación de la luz delantera Cuando la capacidad de la batería no es suficiente, la herramienta se detiene automáticamente. En este caso, PRECAUCIÓN:... - Page 48 Accionamiento del conmutador de inversión de giro ► 1 . Luz ► 1 . Palanca del interruptor de inversión PRECAUCIÓN: Confirme siempre la direc- ción de rotación antes de la operación. PRECAUCIÓN: Utilice el conmutador de inversión solamente después de que la herra- mienta haya parado completamente.
- Page 49 Cambio de la fuerza de impacto ► 1 . Cambio a cuatro niveles 2. Alta 3. Media 4. Baja 5. Modo T 6. Botón La fuerza de impacto puede cambiarse a cuatro niveles: duro, medio, suave y modo T. Esto permite un apriete adecuado para el trabajo. Cada vez que el botón es oprimido, el número de percusiones cambia a cuatro niveles.
- Page 50 Para quitar la punta de destornillador, jale el mandril en MONTAJE dirección de la flecha y jale la punta de destornillador hacia afuera. NOTA: Si la punta de destornillador no se encuentra PRECAUCIÓN: Asegúrese siempre de que la insertada hasta el fondo en el mandril, éste no regre- herramienta esté apagada y el cartucho de batería sará a su posición original y la punta de destornillador haya sido extraído antes de realizar cualquier no quedará asegurada. En este caso, procure inser- trabajo en la misma.
- Page 51 Makita, empleando AVISO: Si está utilizando una batería de repuesto siempre repuestos Makita.
-
Page 52: Accesorios Opcionales
Makita. Si la inspección muestra que el problema ha sido a causa de un defecto de mano de obra o material, Makita hará la reparación (o a su discreción, el reemplazo) sin ningún cargo. Esta garantía no aplica cuando: •... - Page 56 Para reducir la exposición a estos productos químicos: trabaje en un área bien ventilada y póngase el equipo de seguridad indicado, tal como las máscaras contra polvo que están especialmente diseñadas para filtrar partículas microscópicas. Makita Corporation 3-11-8, Sumiyoshi-cho, Anjo, Aichi 446-8502 Japan 885506-944...
-
Page 57: Cordless Circular Saw Scie Circulaire Sans Fil Sierra Circular Inalámbrica
INSTRUCTION MANUAL MANUEL D'INSTRUCTION MANUAL DE INSTRUCCIONES Cordless Circular Saw Scie Circulaire sans Fil Sierra Circular Inalámbrica XSH03 015157 IMPORTANT: Read Before Using. IMPORTANT: Lire avant usage. IMPORTANTE: Leer antes de usar. -
Page 58: General Power Tool Safety Warnings
ENGLISH (Original instructions) SPECIFICATIONS Model XSH03 Blade diameter 165 mm (6-1/2") at 0° 57 mm (2-1/4") Max. cutting depth at 45° 41 mm (1-5/8") at 50° 37 mm (1-7/16") No load speed (RPM) 5,000 /min Overall length 350 mm (13-3/4") Net weight 3.1 kg (6.8 lbs) 3.3 kg (7.3 lbs) - Page 59 13. Remove any adjusting key or wrench before 25. Use power tools only with specifically turning the power tool on. A wrench or a key designated battery packs. Use of any other left attached to a rotating part of the power tool battery packs may create a risk of injury and fire.
- Page 60 Hold the power tool by insulated gripping surfaces only, when performing an operation where the cutting tool may contact hidden wiring. Contact with a "live" wire will also make exposed metal parts of the power tool "live" and could give the operator an electric shock. When ripping, always use a rip fence or straight edge guide.
- Page 61 17. Never force the saw. Push the saw forward at 27. Place the wider portion of the saw base on that a speed so that the blade cuts without part of the workpiece which is solidly supported, slowing. Forcing the saw can cause uneven cuts, not on the section that will fall off when the cut is loss of accuracy, and possible kickback.
- Page 62 30. Some material contains chemicals which may be If electrolyte gets into your eyes, rinse them toxic. Take caution to prevent dust inhalation and out with clear water and seek medical skin contact. Follow material supplier safety data. attention right away. It may result in loss of 31.
-
Page 63: Functional Description
NEVER use the tool if it runs when you CAUTION: simply pull the switch trigger without pressing the Always switch off the tool before installing or lock-off lever. Return tool to a MAKITA service • removing of the battery cartridge. center for proper repairs BEFORE further usage. -
Page 64: Adjusting Depth Of Cut
Releasing protection lock Automatic speed change function When the protection system works repeatedly, the tool is locked and the battery indicator shows the following state. 1. Mode indicator Battery indicator Blinking Protection lock works 015201 In this situation, the tool does not start even if turning 015144 the tool off and on. - Page 65 CAUTION: Be sure the blade is installed with teeth pointing • 1. Lamp up at the front of the tool. Use only the Makita wrench to install or remove • the blade. 1. Hex wrench 2. Shaft lock 3. Tighten 4.
- Page 66 015112 When you wish to perform clean cutting operation, connect a Makita vacuum cleaner to your tool. Replace the lever on the lower guard to the one supplied with the dust nozzle. Install the dust nozzle on the tool using 011231 the screw.
- Page 67 Makita Authorized or Factory Service used. Centers, always using Makita replacement parts. Never use gasoline, benzine, thinner, alcohol or •...
-
Page 68: Optional Accessories
If you need any assistance for more details regarding inspection shows the trouble is caused by defective these accessories, ask your local Makita Service Center. workmanship or material, Makita will repair (or at our Saw blades option, replace) without charge. - Page 69 FRANÇAIS (Mode d’emploi original) SPÉCIFICATIONS Modèle XSH03 Diamètre de la lame 165 mm (6-1/2") à 0° 57 mm (2-1/4") Profondeur de coupe max. à 45° 41 mm (1-5/8") à 50° 37 mm (1-7/16") Vitesse à vide (RPM) 5 000 /min Longueur totale 350 mm (13-3/4") Poids net...
- Page 70 Sécurité personnelle Débranchez la fiche de la source d'alimentation 10. Restez alerte, attentif à vos mouvements et faites et/ou retirez le bloc-piles de l'outil électrique preuve de bon sens lorsque vous utilisez un outil avant d'effectuer tout réglage, de changer un électrique.
-
Page 71: Consignes De Sécurité Pour La Scie Circulaire Sans Fil
Réparation Lors du sciage en long, utilisez toujours un 28. Faites réparer votre outil électrique par un garde parallèle ou un guide de coupe réparateur qualifié qui utilise des pièces de rectiligne. Cela améliore la précision de la coupe rechange identiques aux pièces d'origine. Le et réduit le risque de coincement de la lame. - Page 72 12. Les grands panneaux doivent être soutenus pour minimiser les risques de recul causé par le coincement de la lame. Les grands panneaux ont tendance à s'affaisser sous leur propre poids. Des supports doivent être installés sous le panneau, des deux côtés, près de la ligne de coupe et près du bord du panneau.
- Page 73 22. Pour vérifier le protecteur inférieur, ouvrez-le à la main, puis relâchez-le et observez sa Fig. 2 fermeture. Vérifiez également que la poignée de rappel ne touche pas le boîtier de l’outil. Laisser lame à découvert TRÈS DANGEREUX et comporte un risque de blessure grave.
- Page 74 et les copeaux. N’utilisez jamais d’essence. court-circuit batterie pourrait 35. Portez masque antipoussières provoquer un fort courant, une surchauffe, protections d'oreilles lorsque vous utilisez l'outil. parfois des brûlures et même une panne. Ne rangez pas l'outil ou la batterie dans des CONSERVEZ CE MODE endroits où...
-
Page 75: Description Du Fonctionnement
à un centre Sinon, l'outil et la batterie pourraient vous glisser de service après-vente MAKITA pour le faire des mains, ce qui risque d'endommager l'outil et la réparer. batterie, ou encore de provoquer des blessures. -
Page 76: Fonction De Changement Automatique De Vitesse
Dispositif de protection contre la surcharge Lorsque l’outil reçoit une tension trop élevée au cours de État de l’indicateur de batterie Puissance restante de son utilisation, il s’arrête sans aucune indication. Dans cette la batterie Clignotement MARCHE ARRÊT situation, éteignez l’outil et arrêtez l’application qui a causé la surcharge de l’outil. -
Page 77: Coupe En Biseau
Allumage de la lampe Coupe en biseau ATTENTION: 1. Levier avant Ne regardez pas la lampe et n'observez pas la • source de lumière directement. 1. Lampe 015105 Desserrez le levier avant. Réglez selon l’angle désiré (0 ° à 50 °) en inclinant en conséquence, puis serrez bien le levier avant. -
Page 78: Rangement De La Clé Hexagonale
à l'avant de l'outil. le flasque extérieur et le boulon hexagonal. Utilisez exclusivement une clé Makita pour • ASSUREZ-VOUS D'AVOIR FERMEMENT SERRÉ LE installer ou retirer la lame. -
Page 79: Entretien
Remplacez le levier sur le protecteur de lame inférieur Garde parallèle (règle de guidage) par celui fourni avec le raccord à poussières. Posez le (accessoire en option) raccord à poussières sur l’outil à l’aide de la vis. Raccordez ensuite le flexible de l’aspirateur au raccord 1. -
Page 80: Accessoires En Option
Pour maintenir la SÉCURITÉ et la FIABILITÉ du produit, les réparations, tout autre travail d'entretien ou de réglage doivent être effectués dans un centre de service Makita agréé ou un centre de service de l'usine Makita, exclusivement avec des pièces de rechange Makita. ACCESSOIRES EN OPTION ATTENTION: Ces accessoires ou pièces complémentaires sont... - Page 81 GARANTIE LIMITÉE D’UN AN MAKITA Politique de garantie Chaque outil Makita est inspecté rigoureusement et testé avant sa sortie d’usine. Nous garantissons qu’il sera exempt de défaut de fabrication et de vice de matériau pour une période d’UN AN à partir de la date de son achat initial.
- Page 82 ESPAÑOL (Instrucciones originales) ESPECIFICACIONES Modelo XSH03 Diámetro del disco 165 mm (6-1/2") a 0° 57 mm (2-1/4") Profundidad de corte máxima a 45° 41 mm (1-5/8") a 50° 37 mm (1-7/16") Velocidad sin carga (RPM) 5 000 r/min Longitud total 350 mm (13-3/4") Peso neto 3,1 kg (6,8 lbs)
- Page 83 Si no es posible evitar usar una herramienta 18. No utilice la herramienta eléctrica si el interruptor eléctrica en condiciones húmedas, utilice un no la enciende y apaga. Cualquier herramienta alimentador protegido con interruptor de eléctrica que no pueda ser controlada con el circuito de falla en tierra (ICFT).
- Page 84 27. En condiciones de mal uso, podrá escapar Sujete la herramienta eléctrica por las superficies líquido de la batería; evite tocarlo. Si lo toca de sujeción aisladas solamente al realizar una accidentalmente, enjuague con agua. Si hay operación en la que la pieza cortadora pueda contacto del líquido con los ojos, acuda por entrar en contacto con cables ocultos.
- Page 85 Cuando vuelva a poner en marcha la sierra brusco, la sierra podrá saltar fácilmente hacia atrás sobre la pieza de trabajo, centre la sierra en la sobre su mano, causándole graves heridas personales. entalladura y compruebe que sus dientes no estén en contacto con el material.
- Page 86 22. Para comprobar el protector inferior, ábralo a mano, suéltelo y compruebe si se cierra. Fig. 2 Compruebe también que el mango retráctil no toque el alojamiento de la herramienta. Dejar el disco expuesto es MUY PELIGROSO y puede provocar graves lesiones personales. Advertencias de seguridad adicionales 23.
- Page 87 35. Utilice una mascarilla antipolvo y protección Un corto circuito en la batería puede causar un para los oídos cuando utilice la herramienta. flujo grande de corriente, sobrecalentamiento, posibles quemaduras y aún descomposturas. GUARDE ESTAS No guarde la herramienta ni el cartucho de INSTRUCCIONES.
- Page 88 Regrese la Para colocar el cartucho de batería, alinee la lengüeta herramienta al centro de servicio MAKITA para las sobre el cartucho de batería con la ranura en la carcasa reparaciones apropiadas ANTES de continuar su y deslice en su lugar.
-
Page 89: Ajuste De La Profundidad De Corte
Protección contra sobrecarga Cuando la herramienta es utilizada de tal manera que Estado indicador de la batería Capacidad restante cause un consumo anormalmente alto de corriente, la Encendido de la batería Intermitencia APAGADO herramienta automáticamente se para sin indicación ("ON") alguna. -
Page 90: Encendido De La Lámpara
Para obtener cortes más limpios y seguros, ajuste la Encendido de la lámpara profundidad de corte de forma que no sobresalga más de un diente del disco de sierra por debajo de la pieza PRECAUCIÓN: de trabajo. La utilización de una profundidad de corte No mire la luz ni vea directamente hacia la fuente •... - Page 91 ASEGÚRESE APRETAR FIRMEMENTE Utilice solamente la llave Makita para instalar o • PERNO HEXAGONAL EN SENTIDO CONTRARIO A desmontar el disco. LAS AGUJAS DEL RELOJ. Almacenamiento de la llave de Allen 1.
- Page 92 Reemplace la palanca sobre el protector inferior con la Tope lateral de corte (regla de guía) incluida en la boquilla para polvo. Instale la boquilla (accesorio opcional) para polvo sobre la herramienta usando el tornillo. Luego conecte la manguera de la aspiradora a la 1.
-
Page 93: Accesorios Opcionales
ángulo de 0°. Para mantener la SEGURIDAD y FIABILIDAD del producto, las reparaciones, y cualquier otra tarea de mantenimiento o ajuste deberán ser realizadas en Centros de Servicio Autorizados por Makita, empleando siempre repuestos Makita. ACCESORIOS OPCIONALES PRECAUCIÓN: Estos accesorios o aditamentos (incluidos o no) •... - Page 94 COMPLETA, porte pagado con antelación, a una de las fábricas o centros de servicio autorizados Makita. Si la inspección muestra que el problema ha sido causado por mano de obra o material defectuoso, Makita la reparará (o a nuestra opción, reemplazará) sin cobrar.
- Page 96 Para reducir la exposición a estos productos químicos: trabaje en un área bien ventilada y póngase el equipo de seguridad indicado, tal como las máscaras contra polvo que están especialmente diseñadas para filtrar partículas microscópicas. Makita Corporation 3-11-8, Sumiyoshi-cho, Anjo, Aichi 446-8502 Japan www.makita.com...
- Page 97 L.E.D. Flashlight Instruction manual Lampe Torche à L.E.D. Manuel d’instructions Linterna Luminiscente Manual de instrucciones DML802...
- Page 99 ENGLISH (Original instructions) Explanation of general view Battery cartridge Button Strap hook Red indicator Switch Ring SPECIFICATIONS Model DML802 3.2 W x 1 pc Standard battery cartridge BL1415 BL1430 BL1440 BL1815 BL1815N BL1830 BL1840 Voltage 14.4 V 18 V Operating hours (approx.) 256 mm 272 mm (10-3/4”) 256 mm (10-1/8”)
- Page 100 CAUTION: These accessories or attachments are recommended for • Always switch off the tool before installing or removing use with your Makita tool specified in this manual. The of the battery cartridge. use of any other accessories or attachments might •...
-
Page 101: Caractéristiques Techniques
FRANÇAIS (Mode d’emploi original) Explication de la vue générale Batterie Bouton Crochet de bandoulière Témoin rouge Interrupteur Anneau CARACTÉRISTIQUES TECHNIQUES Modèle DML802 3,2 W x 1 unité Batterie standard BL1415 BL1430 BL1440 BL1815 BL1815N BL1830 BL1840 Tension 14,4 V 18 V Heures de fonctionnement (Environ) 256 mm 272 mm (10-3/4 po) -
Page 102: Description De Fonctionnement
10. Si un problème quelconque survient, informez-vous • Ne regardez pas lampe à LED et n’observez pas la auprès du centre de service Makita le plus près ou de source de lumière directement. votre détaillant. Pour assurer le fonctionnement sûr et Appuyez sur l’interrupteur pour allumer la lampe à... -
Page 103: Instrucciones Importantes De Seguridad
ESPAÑOL (Instrucciones originales) Explicación de vista general Cartucho de batería Botón Gancho de la correa Indicador rojo Interruptor Anillo ESPECIFICACIONES Modelo DML802 INDICADOR LUMINISCENTE 3,2 W x 1 pza. Cartucho de batería estándar BL1415 BL1430 BL1440 BL1815 BL1815N BL1830 BL1840 Tensión 14,4 V 18 V... - Page 104 El gancho de la correa puede instalarse en el anillo superior o inferior en función del uso. Recargado MANTENIMIENTO Recargue el cartucho de la batería con el cargador Makita antes de usar. PRECAUCIÓN: • Nunca use gasolina, bencina, diluyentes (tíner), Instalación o desinstalación del cartucho...
- Page 105 ACCESORIOS OPCIONALES PRECAUCIÓN: Estos accesorios o aditamentos están recomendados para utilizarse con su herramienta Makita especificada en este manual. El empleo de cualquier otro accesorio o aditamento puede conllevar el riesgo de lesiones personales. Los accesorios o aditamentos deben solamente ser utilizados para el propósito con el que fueron hechos.
- Page 108 Makita Corporation 3-11-8, Sumiyoshi-cho, Anjo, Aichi 446-8502 Japan www.makita.com DML802-NA3-1113...
- Page 109 DC18RA DC18RC Fast Charger Chargeur rapide Cargador rápido Symbols The followings show the symbols used for the charger and battery. Be sure that you understand their meaning before use. Symboles Nous donnons ci-dessous les symboles utilisés pour le chargeur et la batterie. Assurez-vous que vous en avez bien compris la signification avant d’utiliser l’outil.
- Page 110 • Do not short batteries. • Ne jamais court-circuiter les bornes d’une batterie. • No provoque un cortocircuito en las baterías. IMPORTANT: Read Before Using. IMPORTANT : Lire ce qui suit avant d’utiliser cet outil. IMPORTANTE: Leer antes de usar.
-
Page 111: Important Safety Instructions
10. Make sure cord is located so that it will not be stepped on, tripped over, or otherwise subjected to damage or stress. 11. Do not operate charger with damaged cord or plug. If the cord or plug is damaged, ask Makita authorized service center to replace it in order to avoid a hazard. - Page 112 6. Preset melody sound remains stored even when the charger is unplugged. NOTE: • The battery charger is for charging Makita-battery cartridge. Never use it for other purposes or for other manufacturer’s batteries. • When you charge a battery cartridge which is new or has not been used for a long period of time, it may not accept a full charge until after discharging it completely and recharging a couple of times.
- Page 113 (1) le chargeur de batterie, sur (2) la batterie et sur (3) le produit utilisant la batterie. ATTENTION — Pour réduire le risque de blessure, ne chargez que les batteries rechargeables MAKITA qui figurent sur l’étiquette du chargeur. Les autres types de batteries peuvent causer des blessures et entraî- ner des dommages en explosant.
- Page 114 6. La mélodie préréglée demeure en mémoire même lorsque vous débranchez le chargeur. NOTE : • Le chargeur de batterie est conçu pour les batteries Makita. Ne jamais l’utiliser à d’autres fins ou avec les batteries d’autres fabricants. • Lorsque vous chargez une cartouche de batterie neuve ou restée inutilisée pendant une période prolongée, il se peut que vous deviez la recharger et la décharger à...
- Page 115 Tension 9,6 V 12 V 14,4 V Capacité (Ah) Temps de charge (en minutes) Nombre de cellules — — — BH9020A — — — BH1220/C BH1420 Cartouche de batterie au Ni-MH — — — BH9033A — — — BH1233/C BH1433 Tension 14,4 V 18 V...
-
Page 116: Instrucciones De Seguridad Importantes
(1) el cargador de baterías, (2) la batería, y (3) el producto con el que se utilice la batería. PRECAUCION — Para reducir el riesgo de sufrir heridas, cargue solamente las baterías recargables MAKITA marcadas en la etiqueta de cargador. Otros tipos de baterías podrán explotar y ocasionar heridas personales y daños. - Page 117 6. El sonido de melodía permanecerá almacenado aunque desenchufe el cargador. NOTAS: • El cargador de baterías es sólo para cargar cartuchos de batería Makita. No lo utilice nunca con otros fines ni para baterías de otros fabricantes. • Cuando cargue un cartucho de batería que sea nuevo o que no haya sido utilizado durante un largo periodo de tiempo, es posible que no acepte una carga completa hasta después de haberlo descargado completamente y...
- Page 118 Tensión 9,6 V cc 12 V cc 14,4 V cc Capacidad (Ah) Tiempo de carga (minutos) Número de celdas — — — 1,7 Ah 20 min BH9020A — — 2,0 Ah 20 min — BH1220/C BH1420 2,0 Ah 15 min Cartucho de batería Ni-MH —...
- Page 120 Makita Corporation 3-11-8, Sumiyoshi-cho, Anjo, Aichi 446-8502 Japan 884676H946 www.makita.com...