Table des Matières
Publicité
Les langues disponibles
Les langues disponibles
Liens rapides
Publicité
Table des Matières

Manuels Connexes pour Avintage AVI60CDZA


Sommaire des Matières pour Avintage AVI60CDZA
- Page 1 Cave de service intégrable en colonne NOTICE D’UTILISATION AVI60CDZA AVI62XDZA FR – MANUEL D’UTILISATION GB – USE INSTRUCTIONS p. 2 p. 29 DE – GEBRAUCHSANWEISUNG p. 56 NL – HANDLEIDING p. 83 SP – MANUAL DE UTILIZACION IT – MANUAL D‘USO p.
-
Page 2: Consignes Générales De Securité
Avant toute utilisation, merci de lire et appliquer les règles de sécurité et d'utilisation du présent manuel. Tout d’abord, nous vous remercions d’avoir fait confiance à la marque AVINTAGE en acquérant cet appareil et espérons qu’il satisfera pleinement vos attentes. -
Page 3: Pour Votre Protection, Cet Appareil Doit Être Correctement
Cet appareil est destiné exclusivement à un usage domestique et est prévu pour le stockage de boissons spéciales à une température de stockage plus élevée que celle d'un compartiment pour produits frais. En aucun cas cet appareil est destiné à maintenir des produits alimentaires frais. - Page 4 directement accessibles. Maintenir les enfants éloignés de l’appareil Ne pas utiliser l’appareil à l’extérieur Dans le cas où du liquide serait accidentellement renversé (bouteille cassée, etc.) sur des composants électriques (moteur, etc.), veuillez débrancher immédiatement la prise secteur. Pour éviter tout risque d'incendie, d'électrocution ou de blessure, ne pas immerger le câble d'alimentation, la prise ou l'appareil lui- même dans l'eau ou tout autre liquide.
- Page 5 Sécurité des enfants et des autres personnes vulnérables Cet appareil peut être utilisé par des enfants ayant 8 ans et plus, et par des personnes ayant des capacités physiques, sensorielles ou mentales réduites ou un manque d’expérience et de connaissances, à condition qu’elles soient supervisées ou qu’elles aient reçu des instructions concernant l’utilisation de l’appareil en toute sécurité...
- Page 6 Laissez également les clayettes qui étaient à l’intérieur de l’appareil de manière à ce que les enfants ne puissent pas grimper à l’intérieur. Sécurité générale ATTENTION — Cet appareil est conçu pour fonctionner dans un foyer domestique ou pour une utilisation similaire comme : ...
- Page 7 ATTENTION — N’endommagez pas le circuit de réfrigération. ATTENTION — N’utilisez pas d’appareils électriques à l’intérieur du compartiment, sauf si ces derniers sont tolérés par le fabricant. ATTENTION — Le gaz réfrigérant et le gaz isolant sont inflammables. Lors de l'élimination de l'appareil, faites appel à un centre de retraitement ou d’élimination des déchets agréé.
-
Page 8: Utilisation Quotidienne
Sécurité électrique Nous ne pouvons pas être tenus pour responsables de tout incident causé par une mauvaise installation électrique. Le cordon d’alimentation ne doit pas être rallongé. N’utilisez ni prolongateur, ni adaptateur, ni prise multiple. Vérifiez bien que la prise murale n’est pas endommagée. Une prise murale en mauvais état pourrait entrainer une surchauffe de l’appareil et son explosion. - Page 9 stockez jamais substances liquides inflammables à l’intérieur de l’appareil, cela provoquerait un risque d’explosion. Ne faites pas fonctionner d’autres appareils électriques à l’intérieur de cet appareil (mixeurs, turbines à glace électrique, etc.). Lorsque vous débranchez l’appareil, tenez toujours la prise dans vos mains et ne tirez pas sur le cordon.
-
Page 10: Branchez Votre Cave À Vin À Une Prise Terre Murale
Ne nettoyez pas l’appareil avec des objets métalliques, un système à vapeur, des huiles volatiles, des solvants organiques ou des composants abrasifs. Ne nettoyez aucune partie de l’appareil avec des produits inflammables. Les vapeurs peuvent provoquer un risque d'incendie ou d'explosion. - Page 11 brancher l’appareil au courant, afin que le compresseur soit bien alimenté en huile. Une bonne circulation de l’air est nécessaire, afin d’éviter les risques de surchauffe. Pour que la ventilation soit suffisante, suivez bien les consignes d’installation fournies. Dès que possible, évitez que l’appareil ne touche les parois murales et/ou ne soit en contact avec des éléments chauds (compresseur, condensateur) afin d’éviter les risques d’incendie.
-
Page 12: Instructions De Sécurité
Cet appareil est réservé à un usage exclusivement domestique. Le fabricant ne saurait être tenu responsable d’une autre utilisation. R600a Instructions de sécurité Attention — N’obstruer aucune grille de ventilation de l’appareil, veillez à ce que les ouvertures d'aération soient toujours libres. Attention —... -
Page 13: Description De L'appareil
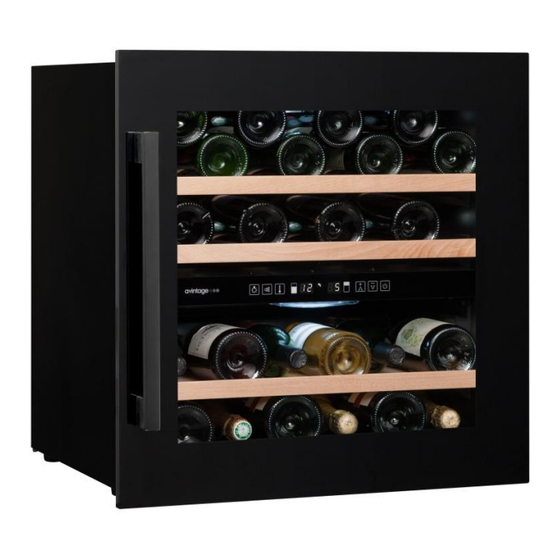
2. DESCRIPTION DE L’APPAREIL Porte Poignée Panneau de contrôle Clayettes Condensateur Cave Pieds réglables 3. PLAQUE SIGNALÉTIQUE Ci-dessous l’exemple d’une plaque signalétique : La plaque signalétique collée à l’intérieur ou à l’arrière de l’appareil (selon modèle) comporte toutes les informations spécifiques à votre appareil. Nous vous conseillons de noter son numéro de série sur ce livret avant son installation, pour vous y référer si nécessaire ultérieurement (intervention technique, demande d’assistance, etc.). - Page 14 4. INSTRUCTIONS D’INSTALLATION Avant d’utiliser votre cave à vin Enlevez l’emballage extérieur et intérieur. Laissez votre appareil en position verticale au repos pendant environ 24h avant sa mise en service. Cela permettra de réduire la possibilité d'un dysfonctionnement du système de refroidissement dû au transport.
- Page 15 Plages de températures ambiantes Cet appareil est indiqué pour un fonctionnement dans des pièces dont la température ambiante est bien spécifique, cette classe climatique est indiquée sur la plaque signalétique. CLASSE SYMBOLE PLAGE DE TEMPÉRATURE AMBIANTE (°C) Tempérée élargie De +10 à +32 Tempérée De +16 à...
- Page 16 Montage de la poignée Pour installer la poignée fournie avec votre cave à vin, nous vous invitons à suivre les instructions ci- dessous : Joint Poignée Cadre de porte 1) Retirez le joint intérieur de la porte du côté où la poignée doit être installée. Vous pouvez voir deux trous destinés à...
- Page 17 Retirez la porte vitrée en dévissant les 8 écrous (repères 3 et 4). Manipulez la porte avec précaution et maintenez-la fermement une fois les écrous retirés pour éviter toute détérioration. Dévissez et repositionnez le support de porte (repère 2) sur le côté opposé. Faites pivoter la porte à...
- Page 18 Bouton ON/OFF ; pour allumer et éteindre l’appareil. Appuyez une fois pour allumer. Appuyez et maintenez 5 secondes pour éteindre. Diminue la température de 1 degré Celsius ou 1 degré Fahrenheit. Augmente la température de 1 degré Celsius ou 1 degré Fahrenheit. Écran d’affichage électronique de la température du compartiment supérieur.
-
Page 19: Mode Sabbath
température homogène. Pour éviter une condensation trop importante lorsque la température ambiante est supérieure à 28°C, ne pas descendre la température en-dessous de 7°C. IMPORTANT : après avoir débranché, éteint l’appareil ou après une coupure de courant, il est impératif d’attendre 5 minutes avant de le rallumer. Alarme de température Une alarme sonore retentira et la température du compartiment concerné... -
Page 20: Équipement
Veillez à ce que le bac contienne toujours de l’eau. Conçu par des spécialistes pour des œnophiles, Avintage a donc pris en compte la sensibilité des bouchons à une humidité ambiante trop basse. C’est pourquoi le bac est à placer sur la clayette du haut afin d’apporter une humidité... - Page 21 Clayettes Pour éviter d’endommager le joint de la porte, assurez-vous que la porte est bien ouverte avant de tirer les clayettes pour mettre ou enlever les bouteilles. Pour un accès plus simple au contenu des clayettes, vous devez faire glisser la clayette vers l’extérieur d’environ 1/3.
- Page 22 A titre d’exemple, si l’on charge exclusivement une cave de bouteilles de Bourgogne, on remarquera être environ 30% sous la quantité initiale cal culée à partir de Bordeaux. Types de croisement Tête bêche col à col : Notez bien la différence de profondeur ! Tête bêche col entre fûts Chargement accru Vérifiez que vous pouvez fermer la porte sans toucher une bouteille avant de la fermer.
-
Page 23: Nettoyage Et Entretien
8. NETTOYAGE ET ENTRETIEN Avant de nettoyer votre appareil (opération à faire régulièrement), débranchez l’appareil en retirant la prise de courant ou en débranchant le fusible dont elle dépend. Nous vous conseillons, avant la première utilisation et de façon régulière, de nettoyer l’intérieur comme l’extérieur (face avant, latérales et dessus) avec un mélange d’eau tiède et de produit de lavage doux. -
Page 24: En Cas De Panne
9. EN CAS DE PANNE Malgré tout le soin que nous apportons à nos fabrications, une panne n’est jamais totalement exclue. Avant de contacter le service après-vente de votre revendeur, vérifiez néanmoins que : La prise de courant est toujours en place ... -
Page 25: Probleme Et Cause Possible
10. PROBLEME ET CAUSE POSSIBLE Vous pouvez résoudre de nombreux problèmes simples de votre cave à vin, en évitant de faire appel à votre service après-vente. Essayez avec les suggestions ci-dessous. PROBLEME CAUSE POSSIBLE La prise n’est pas branchée ... -
Page 26: Environnement
Dans un souci d’amélioration constante de nos produits, nous nous réservons la possibilité de modifier les caractéristiques techniques sans préavis. Les garanties des produits de la marque AVINTAGE sont exclusivement énoncées par les distributeurs que nous avons choisis. Aucun élément des présentes ne peut être interprété comme une garantie supplémentaire. -
Page 27: Fiche Produit Européenne
FICHE PRODUIT EUROPÉENNE selon la réglementation (UE) N°1060/2010 CAVE DE SERVICE MARQUE AVINTAGE RÉFÉRENCE COMMERCIALE AVI60CDZA DONNÉES ÉLECTRIQUES 220-240 V / 50 Hz DIMENSIONS DU PRODUIT (L x P x H) 590 x 562 x 595 mm POIDS NET 33 kg CATÉGORIE DE L’APPAREIL... - Page 28 FICHE PRODUIT EUROPÉENNE selon la réglementation (UE) N°1060/2010 CAVE DE SERVICE MARQUE AVINTAGE RÉFÉRENCE COMMERCIALE AVI62XDZA DONNÉES ÉLECTRIQUES 220-240 V / 50 Hz DIMENSIONS DU PRODUIT (L x P x H) 590 x 562 x 595 mm POIDS NET 33 kg CATÉGORIE DE L’APPAREIL...
-
Page 29: General Safety Instructions
Before use, please read and follow the safety rules and operating instructions in this manual. Firstly, we would like to thank you for purchasing an AVINTAGE product and hope that this appliance fully lives up to your expectations. This appliance enables you to bring your bottles at room temperature or bring them to service temperature (depending on the bottles) thanks to its wide adjustment range. - Page 30 products. Under no circumstances is it intended to keep food products fresh. Make sure that your electrical installation's voltage corresponds to that on the appliance’s nameplate; the appliance must be connected to an approved, earthed system. Incorrect repairs or connections can cause safety hazards. Have your electrical installation checked by a professional, if you are in any doubt.
- Page 31 mains plug immediately. To prevent any risk of fire, electrocution or injury, do not immerse the mains cable, plug or the appliance itself in water or any other liquid. Do not handle the appliance with wet hands. Keep the appliance away from any source of heat and out of direct sunlight.
- Page 32 supervised. Keep all packaging away from children as there is risk of suffocation. Risk of child entrapment. Child entrapment and suffocation are not problems of the past. Junked or abandoned appliances are still dangerous, even if they will “just sit in the garage a few days”.
- Page 33 WARNING — To avoid a hazard due to instability of the appliance, it must be fixed in accordance with the instructions. WARNING — Do not store explosive substances such as aerosol cans with a flammable propellant in this appliance, as they could leak or release fluids.
- Page 34 Refrigerating fluid The refrigerating circuit in the appliance uses refrigerating isobutene (R600a), which is a highly inflammable natural gas and is therefore dangerous for the environment. When transporting or installing the appliance, ensure that no element of the refrigerating circuit is damaged. The refrigerating fluid (R600a) is inflammable.
- Page 35 You must not operate the appliance without the interior lighting lamp cover. Disconnect the appliance before replacing the lighting bulb. The cellar is only applied with power supply of single phase alternating current of 220~240V/50Hz. Do not attempt to replace a damaged power cable, contact your after-sales service.
- Page 36 are only designed to facilitate minor movements. Do not move the appliance over long distances. Never use the base, drawers, doors etc. to stand on or as supports. To avoid items falling and causing injury or damage to the appliance, do not overload the door racks or put food into the appliance.
- Page 37 service center. To ensure proper electrical connection, follow recommendations given in the present manual. Unpack the appliance and visually check that it is not damaged. Do not connect a damaged appliance. Inform your retailer or point of sale of any damage. In such a case, keep the packaging.
-
Page 38: Safety Instructions
closing properly. If this is not the case, contact your after- sales service. Trouble shooting Any electrical work should be carried out by a qualified and skilled technician. The appliance should be repaired by an accredited repair centre, using only manufacturer’s original spare parts. The appliance is designed for home use only. -
Page 39: Description Of The Appliance
manufacturer. This appliance meets the requirements of all applicable European directives and their amendments, and notably complies with the following standards: 2011/65/EU (ROHS) 2014/35/EU on electrical safety 2014/30/EU on electromagnetic compatibility 643/2009/CE relating to energy labels 2. -
Page 40: Technical Data
3. TECHNICAL DATA Below is an example of the nameplate: The nameplate attached to the inside or rear of the appliance (depending on the model) includes the entire information specific to your appliance. We recommend that you make a note of its serial number in this booklet prior to installation, so that you can refer to it later (technical work, request for assistance, etc.). - Page 41 This appliance must be fixed at the top and the bottom using the rail provided for the purpose in order to avoid any risk of tipping when the shelves are slid out. Adequate ventilation is required, do not block the front air outlet. ...
- Page 42 Built-in installation drawings The wine cooler door seals the installed unit almost completely. CAUTION: for all of these models, please take into consideration the clearances required for air intake and exhaust. Hot air must be driven by the ventilation to the rear wall of the cellar and then expelled upwards. The ventilation channels shall be at least 200 square centimeters in cross-section.
- Page 43 Handle installation To install the handle provided with your wine cellar, please follow the below instructions: Gasket Screw Handle Door frame 1) Pull away the door gasket in the area where the handle has to be installed; you can see two designated holes for the handle installation.
- Page 44 Reversing the door The door can be changed from left and right side. No special requirement, all the door is opened from left side. If required to open from right side please refer to the following direction. Note: all parts removed must be saved to do the reinstallation of door. Remove the glass door by unscrewing the eight lock screws 3 and 4.
- Page 45 Temperature setting ON/OFF switch, turn on by pressing once, turn off by pressing and holding 5 seconds. Decrease temperature of 1 degree Celsius or Fahrenheit. Raise temperature of 1 degree Celsius or Fahrenheit. Display shows upper zone temperature at its setting. Temperature display in Celsius.
-
Page 46: Sabbath Mode
Temperature display Display show at its setting. To view the actual temperature in either zone at any time, touch key (B) and key (C) for 3 second, the display will display two zone’s actual temperature with flashing, and it will quit by holding stop. NOTE: when first used or after operating the wine cellar after a long period of inactivity, the inner temperature will not immediately be the temperature setting on the display. -
Page 47: Eco Demo Mode
Designed by specialists in oenology as written above, the wine cellar is allowed for a storage period of 2 months maximum. Avintage has taken care of the cork’s sensibility to the humidity rate. That’s why the plastic reservoir has to be put on the top shelf to ensure a minimum humidity. Be careful to control the water level if you store your wine cellar for a long period. - Page 48 heat produced by the compressor then evaporates the condensates collected in the tray. Shelves To prevent damage to the door seal, ensure that the door is fully open before pulling out the shelves to add or remove bottles. For easier access to the contents of the shelves, slide the shelf out approximately one third of the way.
- Page 49 Types of bottle: We see here 4 kinds of 75 cl wine bottles: Burgundy and Bordeaux wine bottles of different dimensions. There are many others of all shapes and sizes. You will note the storage differences depending on bottle heights, diameters and alternating position method. For example, if a wine cellar is loaded only with Burgundy wine bottles, there will be approximately 30% fewer bottles than the initial quantity calculated for Bordeaux bottles.
-
Page 50: Care And Maintenance
8. CARE AND MAINTENANCE Before cleaning your appliance (something that should be done regularly), disconnect it by removing the plug or by pulling the fuse on the circuit. Before using your appliance for the first time and regularly after that, we recommend that you clean the inside and outside (front, side and top) with warm mixed with a gentle cleaning product. -
Page 51: In The Event Of A Breakdown
9. IN THE EVENT OF A BREAKDOWN Despite the care we take during production, a breakdown can never be totally ruled out. Before contacting your retailer’s after-sales department, please check that: The appliance is properly plugged in There is not a power cut in progress ... - Page 52 10. TROUBLE SHOOTING You can solve many common wine cooler problems easily, saving you the cost of a possible service call. Try the suggestions below to see if you can solve the problem before calling the servicer. PROBLEM POSSIBLE CAUSE ...
- Page 53 As we continuously improve our products for the benefit of our customers, we reserve the right to modify technical characteristics without notice. Warranties for AVINTAGE brand products are offered exclusively by selected retailers. No part of these instructions may be considered as a supplementary guarantee.
- Page 54 EUROPEAN DATA SHEET according to the regulations (UE) N°1060/2010 SERVICE WINE CABINET BRAND AVINTAGE COMMERCIAL REFERENCE AVI60CDZA POWER SUPPLY 220-240 V / 50 Hz PRODUCT DIMENSIONS (W x D x H) 590 x 562 x 595 mm NET WEIGHT 33 kg...
- Page 55 EUROPEAN DATA SHEET according to the regulations (UE) N°1060/2010 SERVICE WINE CABINET BRAND AVINTAGE COMMERCIAL REFERENCE AVI62XDZA POWER SUPPLY 220-240 V / 50 Hz PRODUCT DIMENSIONS (W x D x H) 590 x 562 x 595 mm NET WEIGHT 33 kg...
-
Page 56: Allgemeine Sicherheitshinweise
Lesen Sie vor dem Gebrauch bitte die Bedienungsanleitung durch und befolgen Sie die darin angegebenen Sicherheits- und Gebrauchsanweisungen. Zunächst danken wir Ihnen für das Vertrauen, das Sie der AVINTAGE Gruppe mit dem Erwerb dieses Gerätes entgegen gebracht haben und hoffen, dass es Ihren Erwartungen voll gerecht wird. - Page 57 gemacht werden. Das Gerät ist ausschließlich für den Hausgebrauch und die Lagerung von bestimmten Getränken bei einer Lagertemperatur bestimmt, die höher ist als diejenige eines Lagerfachs für Frischprodukte. Es ist unter keinen Umständen zum Frischhalten von Lebensmitteln bestimmt. Sich vergewissern, dass Spannung elektrischen...
- Page 58 erreichbar ist. Das Gerät nicht verstellen, wenn es gefüllt ist – das Gehäuse könnte sich verziehen und völlig unbrauchbar werden. Die Elektroteile dürfen nicht direkt erreichbar sein. Kinder von dem Gerät fernhalten. Das Gerät nicht im Freien verwenden. Sollte versehentlich Flüssigkeit (zerbrochene Flasche, usw.) auf elektrische Bauteile...
- Page 59 Sicherheit von Kindern und hilfsbedürftigen Personen Das Gerät kann von Kindern im Alter von 8 Jahren und mehr sowie Personen eingeschränkten körperlichen, sensorischen oder geistigen Fähigkeiten oder die Gebrauch des Gerätes nicht erlernt haben, benutzt werden, wenn sie von einer sachkundigen Person, die sich der damit verbundenen Risiken bewusst ist, betreut werden.
- Page 60 Vor der Entsorgung Ihres ausgedienten Weinklimaschranks sollten Gerätetür entfernen. Lassen Zwischenböden im Kühlschrank, damit Kinder nicht einfach hineinklettern können. Allgemeine Sicherheit ACHTUNG — Das Gerät ist für den Hausgebrauch und ähnliche Anwendungen bestimmt, wie z.B Personalküchen Geschäften, Büros sonstigen Arbeitsumgebungen, ...
- Page 61 die nicht vom Hersteller empfohlen wurden. ACHTUNG — Den Kältekreislauf auf keinen Fall beschädigen. ACHTUNG — Im Inneren des Kühlfachs keine Elektrogeräte verwenden, außer diese sind vom Hersteller zugelassen. ACHTUNG — Kältemittel und das Treibmittel der Isolierung sind brennbar. Das Gerät nur in einer amtlich zugelassenen Entsorgungsanlage entsorgen.
- Page 62 Elektrische Sicherheit Wir können nicht für Schäden haftbar gemacht werden, die durch eine fehlerhafte Elektroinstallation verursacht werden. Das Netzkabel darf nicht verlängert werden. Kein Verlängerungskabel, keinen Adapter keine Mehrfachsteckdose verwenden. Prüfen, dass der Netzstecker nicht zerdrückt oder beschädigt ist.
- Page 63 aufbewahren, da Explosionsgefahr besteht. Keine anderen Elektrogeräte (Mixer, Eismaschinen, usw.) im Geräteinneren betreiben. Beim Abtrennen des Gerätes von der Stromversorgung am Netzstecker und nicht am Kabel ziehen. Keine heißen Gegenstände Nähe Kunststoffkomponenten des Gerätes platzieren. Die Empfehlungen des Geräteherstellers zur Lagerung sind genau zu befolgen.
- Page 64 Dampfreinigern, flüchtigen Ölen, organischen Lösemitteln oder Scheuermitteln reinigen. Die einzelnen Geräteteile niemals mit brennbaren Flüssigkeiten reinigen. Durch Dämpfe könnten Brand- Explosionsgefahren entstehen. Zum Entfernen keine scharfen oder spitzen Gegenstände verwenden. Stattdessen einen Kunststoffschaber verwenden. Wichtiger Hinweis zur Installation! ...
- Page 65 Es wird empfohlen, vor dem Anschluss des Gerätes an die Stromversorgung mindestens vierundzwanzig Stunden zu warten, damit der Kompressor ordnungsgemäß mit Öl gefüllt ist. Eine gute Luftzirkulation ist notwendig, um die Gefahr der Überhitzung vermeiden. Gewährleistung einer ausreichenden Belüftung angegebenen Installationshinweise beachten.
- Page 66 Das Gerät muss von einer zugelassenen Reparaturstelle repariert werden. Für Reparatur dürfen Originalersatzteile verwendet werden. Das Gerät ist ausschließlich für den Hausgebrauch bestimmt. Der Hersteller kann nicht für die unsachgemäße Verwendung haftbar gemacht werden. R600a Hinweise Sicherheit Achtung! Die Lüftungsgitter des Gerätes nicht versperren. Achtung! In dem Gerät keine explosionsfähigen Stoffe, wie z.B.
-
Page 67: Gerätebeschreibung
2. GERÄTEBESCHREIBUNG Tür Griff Bedienfeld Roste Kondensator Weinschrank Einstellbare füsse 3. TECHNISCHE DATEN Nachstehend als Beispiel ein Typenschild: Das Typenschild befindet sich im Geräteinneren bzw. an der Geräterückseite (modellabhängig). Es enthält alle gerätespezifischen Angaben. Wir raten Ihnen, die Seriennummer vor der Installation in der Bedienungsanleitung zu notieren, um sie später bei Bedarf griffbereit zu haben (Reparatur, Kundendienstanfrage). - Page 68 4. INSTALLATIONSANWEISUNGEN Vor dem Gebrauch des Gerätes Die Außen- und Innenverpackung entfernen. Das Gerät vor dem Anschließen an das Stromnetz ungefähr 24 Stunden lang aufrecht stehen lassen. Dies verringert die Gefahr von Funktionsstörungen des Kühlsystems durch die Handhabung beim Transport.
- Page 69 Raumtemperaturgrenzen Dieses Gerät ist für den Betrieb unter Raumtemperaturbedingungen bestimmt, die durch die Temperaturklasse bestimmt werden, die am Typenschild angeführt ist. KLASSE SYMBOL UMGEBUNGSTEMPERATURBEREICH (°C) Erweitert temperiert Von +10 bis +32 Temperiert Von +16 bis +32 Subtropisch Von +16 bis +38 Tropisch Von +16 bis +43 Einbauschema...
- Page 70 Montage des Türgriffs Um den mit Ihrem Weinkeller gelieferten Griff zu installieren, folgen Sie bitte den folgenden Anweisungen: Dichtung Schraub Griff Türrahmen 1) Entfernen Sie die Türdichtung in dem Bereich, in dem der Griff installiert werden muss; Sie können zwei vorgesehene Löcher für die Griffinstallation sehen. Die Dichtung kann leicht von Hand verschoben werden, es sind keine Werkzeuge notwendig.
-
Page 71: Betrieb Des Gerätes
Nehmen Sie die Glastür ab, indem Sie die 8 Schrauben (Pos. 3 und 4) abschrauben. Gehen Sie vorsichtig mit der Türe um, und halten Sie sie gut fest, sobald die Schrauben abgenommen sind, um Beschädigungen zu vermeiden. Lösen Sie den Türhalter (Pos. 2) und positionieren Sie ihn auf der anderen Seite. Schwenken Sie die Türe um 180°... - Page 72 ON/OFF-Schalter, schalten Sie ein, indem Sie einmal drücken, schalten Sie aus, indem Sie 5 Sekunden drücken und halten. Verringern Sie die Temperatur um 1 Grad Celsius oder Fahrenheit. Erhöhe die Temperatur um 1 Grad Celsius oder Fahrenheit. Die Anzeige zeigt die obere Zonentemperatur bei ihrer Einstellung an. Temperaturanzeige in Celsius.
- Page 73 HINWEIS: wenn Sie das Gerät vom Netz getrennt oder ausgeschaltet haben oder nach einem Stromausfall: Bitte vor dem erneuten Einschalten unbedingt 5 Minuten warten. Temperaturalarm In den folgenden Fällen wird Alarm ausgelöst und die Displayanzeige beginnt zu blinken: Wenn die Temperatur in einer der Zonen außerhalb des Temperaturbereichs ansteigt oder fällt (5- 12°C oder 12-20°C) Wenn Sie das Gerät einschalten, wenn sich die Temperatur im Inneren des Geräts stark von der Temperatur (+/- 4°C) nach 7 Stunden Arbeit unterscheidet...
- Page 74 Sie den Tank bitte ¾ voll auf. Überprüfen Sie von Zeit zu Zeit den Wasserstand und füllen Sie bei Bedarf Wasser nach. Achten Sie darauf, dass immer Wasser im Behälter ist. Avintage wurde von Fachleuten für Weinliebhaber entwickelt, und berücksichtigt deshalb auch die Empfindlichkeit der Korken hinsichtlich einer zu niedrigen Luftfeuchtigkeit. Deshalb ist der Behälter auf den Rost unterhalb der Lüftung an der Rückseite zu stellen, um ein Mindestmaß...
- Page 75 Roste Um Beschädigungen an der Türdichtung zu vermeiden, muss sichergestellt sein, dass die Türe weit geöffnet ist, bevor man den Rost zum Einlegen oder Herausnehmen von Flaschen herauszieht. Um leichter auf den Inhalt der Roste zugreifen zu können sollten Sie die Roste um etwa 1/3 ihrer Länge herausziehen, wobei selbige beiderseits mit einem Anschlag ausgestattet sind, um ein Herausfallen der Flaschen zu vermeiden.
- Page 76 Flaschentypen: Hier sehen Sie vier Sorten von 75 cl Flaschen, Burgunder und Bordeaux, mit unterschiedlicher Größe. Es gibt zahlreiche weitere Flaschen mit allen möglichen Fassungsvermögen und Formen. Wird ein Weinschrank beispielsweise nur mit Burgunderflaschen gefüllt, liegt man rund 30% unter der ursprünglich für Bordeaux berechneten Menge.
- Page 77 8. PFLEGE Ziehen Sie vor der Reinigung des Gerätes (regelmäßig durchzuführen) den Netzstecker aus der Steckdose oder nehmen Sie die entsprechende Sicherung heraus. Wir raten Ihnen, das Gerät vor der Erstinbetriebnahme und dann regelmäßig innen und außen (Frontseite, Seitenwände und Oberseite) mit lauwarmem Wasser und einem milden Reinigungsmittel zu reinigen.
- Page 78 Öffnen Sie die Tür nicht öfter als unbedingt notwendig. 9. IM PANNENFALL Trotz aller Sorgfalt, die wir für unsere Produkte aufwenden, kann eine Störung niemals völlig ausgeschlossen werden. Bevor Sie sich mit dem Kundendienst Ihres Händlers in Verbindung setzen, prüfen Sie bitte folgende Punkte: ...
- Page 79 10. STÖRUNGSBEHEBUNG Sie können viele einfache Probleme mit dem Temperierschrank selbst lösen, ohne den Kundendienst einzuschalten. Versuchen Sie es mit den nachfolgenden Vorschlägen. PROBLEM MÖGLICHE URSACHE Das Netzkabel wurde nicht angesteckt Der Ein-/Ausschalter steht auf Aus Der Weinschrank schaltet sich nicht ein ...
- Page 80 In dem Bestreben der kontinuierlichen Qualitätsverbesserung unserer Produkte behalten wir uns die Möglichkeit vor, die technischen Merkmale ohne Vorankündigung zu ändern. Die Garantien für die Produkte der Marke AVINTAGE werden ausschließlich durch unsere Vertragshändler gewährt. In dieser Bedienungsanleitung gemachte Angaben können nicht als eine Zusatzgarantie ausgelegt werden.
- Page 81 PRODUKTDATENBLATT gemäß der delegierten Verordnung (EU) Nr. 1060/2010 WEINSCHRANK HERSTELLER AVINTAGE HANDELSBEZEICHNUNG AVI60CDZA STROMVERSORGUNG 220-240 V / 50 Hz ABMESSUNGEN (B x T x H) 590 x 562 x 595 mm NETTOGEWICHT 33 kg GERÄTEKATEGORIE ENERGIEEFFIZIENZKLASSE Energieverbrauch 140 kWh/Jahr, auf der...
- Page 82 PRODUKTDATENBLATT gemäß der delegierten Verordnung (EU) Nr. 1060/2010 WEINSCHRANK HERSTELLER AVINTAGE HANDELSBEZEICHNUNG AVI62XDZA STROMVERSORGUNG 220-240 V / 50 Hz ABMESSUNGEN (B x T x H) 590 x 562 x 595 mm NETTOGEWICHT 33 kg GERÄTEKATEGORIE ENERGIEEFFIZIENZKLASSE Energieverbrauch 140 kWh/Jahr, auf der...
-
Page 83: Algemene Veiligheidsvoorschriften
Gelieve voor het gebruik de veiligheids- en gebruiksregels van deze handleiding te lezen en toe te passen. Allereerst willen wij u bedanken voor uw vertrouwen in de groep AVINTAGE met de aankoop van dit apparaat en wij hopen dat dit aan al uw verwachtingen zal voldoen. - Page 84 Dit apparaat is uitsluitend bedoeld voor huishoudelijk gebruik en bedoeld voor het opslaan van bijzondere drinkwaren op een bewaartemperatuur die hoger is dan die van een opslagruimte voor koel te bewaren producten. Het is geen geval bestemd voor het bewaren van koel te bewaren producten. Zorg ervoor dat het voltage van uw elektrische installatie overeenstemt met de indicaties op het typeplaatje;...
- Page 85 onherstelbaar te beschadigen. De elektrische onderdelen mogen niet rechtstreeks bereikbaar zijn. Houd kinderen uit de buurt van het apparaat. Gebruik dit apparaat niet buiten. Wanneer er per ongeluk vloeistof (gebroken fles, enz.) op de elektrische onderdelen (motor, enz.) wordt gemorst, moet u de voedingsstekker onmiddellijk loskoppelen.
-
Page 86: De Reiniging En Het Onderhoud Mogen Niet Door Kinderen
Veiligheid van kinderen en overige kwetsbare personen Dit apparaat mag gebruikt worden door kinderen van 8 jaar en ouder en door personen met lichamelijke, zintuiglijke of verstandelijke beperkingen, of door personen met gebrek aan kennis en ervaring, op voorwaarde dat ze onder toezicht staan van een persoon die de werking van het apparaat en de hieraan verbonden gevaren kent. - Page 87 de oplegplanken zitten zodat kinderen niet gemakkelijk in het apparaat kunnen klimmen. Algemene veiligheid WAARSCHUWING — Dit apparaat is bestemd voor gebruik voor huishoudelijke en vergelijkbare toepassingen, zoals Keukenruimten voor personeel in winkels, kantoren en andere werkomgevingen, Boerderijen en door klanten in hotels, motels en andere residentiële omgevingen, ...
- Page 88 beschadigen. WAARSCHUWING — Gebruik geen elektrische apparaten in het compartiment, behalve als deze toegestaan zijn door de fabrikant. WAARSCHUWING — Het koelmiddel en het isolatieblaasgas zijn brandbaar. Dankt u het apparaat af, breng het dan alleen naar een erkende afvalverwerkingscentrale. Stel het apparaat niet bloot aan vuur.
- Page 89 Elektrische veiligheid We kunnen niet aansprakelijk gesteld worden voor ongevallen veroorzaakt door een onjuist uitgevoerde of defecte elektrische installatie. Het snoer niet verlengd worden. Gebruik geen verlengsnoeren, adapters of stekkerdozen. Vergewis u ervan dat de netstekker niet is verpletterd of beschadigd.
- Page 90 Berg nooit ontvlambare stoffen of vloeistoffen in het apparaat op; dit kan leiden tot gevaar op ontploffing. Laat nooit overige elektrische apparaten in dit apparaat werken (mixers, elektrische ijsmachines, enz.). Pak, om het apparaat van de stroom af te koppelen, altijd de stekker vast en trek niet aan het snoer.
- Page 91 stoomsysteem, vluchtige oliën, organische oplosmiddelen of schuurmiddelen. Reinig onderdelen van het apparaat nooit met brandbare vloeistoffen. De dampen kunnen brandgevaar of ontploffingen veroorzaken. Gebruik geen scherpe of puntige voorwerpen om het ijs te verwijderen. Gebruik een plastic krabber. Belangrijke informatie voor de installatie ...
- Page 92 alvorens het apparaat op de stroom aan te sluiten opdat de compressor voldoende olie bevat. Om risico op oververhitting te voorkomen is een goede luchtcirculatie vereist. Volg, voor voldoende ventilatie, de verstrekte installatie-instructies na. Vermijd, voor zover mogelijk, dat de achterkant van het apparaat direct tegen de muur staat en/of in contact staat met warme elementen (compressor, condensator) om risico op brand te voorkomen.
-
Page 93: Veiligheidsvoorschriften
erkend Servicecentrum gebruik originele reserveonderdelen. Dit apparaat is uitsluitend bestemd voor huishoudelijk gebruik. De fabrikant kan niet aansprakelijk gesteld worden voor elk ander gebruik. R600a Veiligheidsvoorschriften Waarschuwing: dek de ventilatieroosters van het apparaat niet af. Waarschuwing: berg geen explosieve stoffen zoals spuitbussen met ontvlambaar drijfgas in dit apparaat op. -
Page 94: Beschrijving Van Het Apparaat
2. BESCHRIJVING VAN HET APPARAAT Deur Handvat Controlepaneel Leggers Condensor Kast Instelbare poten 3. TECHNISCHE GEGEVENS Hieronder ziet u een voorbeeld van een typeplaatje: De op de binnen- of achterzijde van het apparaat (afhankelijk van het model) geplakte typeplaat bevat alle informatie betreffende uw apparaat. -
Page 95: Installatievoorschriften
4. INSTALLATIEVOORSCHRIFTEN Voordat u dit apparaat gebruikt Verwijder de verpakking rondom en binnenin. Voordat u het apparaat aansluit op de stroombron, moet u het ongeveer 24 uur rechtop laten staan. Dat zal de kans verkleinen dat het koelsysteem slecht functioneert wegens de behandeling tijdens het transport. - Page 96 Beperkingen op de temperatuur van de omgevingsruimte Dit apparaat is ontworpen om te werken in de omgevingstemperaturen die worden opgegeven door de temperatuurklasse zoals aangegeven op het typeplaatje. BEREIK VAN KLASSE SYMBOOL OMGEVINGSTEMPERATUUR (°C) Uitgebreid gematigd Van +10 tot +32 Gematigd Van +16 tot +32 Subtropisch...
- Page 97 Montage van de handgreep Om de hendel te installeren die bij uw wijnkelder is geleverd, volgt u de onderstaande instructies: Pakking Schroef Handvat Kozijn 1) Trek de deurpakking weg in het gebied waar het handvat moet worden geïnstalleerd; je kunt twee aangegeven gaten zien voor de installatie van het handvat.
- Page 98 Verwijder de glazen deur door de 8 moeren lost te draaien (nummer 3 en 4). Wees voorzichtig met de deur en houd deze stevig vast wanneer de moeren eenmaal verwijderd zijn, om iedere beschadiging te voorkomen. Schroef de deurhouder (nummer 2) los en plaats deze aan de tegenovergestelde zijde. Draai de deur 180°...
- Page 99 ON/OFF-schakelaar, inschakelen door eenmaal te drukken, uitschakelen door 5 seconden ingedrukt te houden. Verlaag de temperatuur van 1 graad Celsius of Fahrenheit. Verhoog de temperatuur van 1 graad Celsius of Fahrenheit. Het display toont de temperatuur van de bovenste zone op zijn instelling. Temperatuurweergave in Celsius.
- Page 100 temperatuuraanpassing van de wijnkelder. Om overmatige condensatie te voorkomen wanneer de omgevingstemperatuur hoger is dan 28 ° C, mag u de temperatuur niet verlagen tot onder 7 ° C. BELANGRIJK: nadat u het apparaat hebt losgekoppeld of uitgeschakeld, of na een stroomonderbreking, is het absoluut noodzakelijk dat u 5 minuten wacht voordat u het opnieuw inschakelt.
- Page 101 Vul het reservoir tot ¾ vol. Controleer het waterpeil incidenteel bij te vullen. Toen de wijn koeler is uitgerust met een koolstoffilter. Ontwikkeld door specialisten voor wijnliefhebbers, heeft Avintage rekening gehouden met de gevoeligheid van kurken voor een te lage luchtvochtigheid. Daarom moet de bak op de bovenste legger geplaatst worden om te zorgen voor de minimale vochtigheid.
- Page 102 Oplegplanken Om schade aan de deurpakking te verwijderen, moet u zorgen dat de deur goed geopend is voordat u aan de oplegplanken trekt om flessen te plaatsen of verwijderen. Voor een eenvoudige toegang tot de inhoud van de oplegplanken, moet u de oplegplank ongeveer 1/3 naar buiten schuiven.
- Page 103 Types flessen: We zien hier 4 soorten flessen van 75 cl, bourgogneflessen en bordelaises, in verschillende groottes. Er bestaan talrijke andere inhouden en vormen. U merkt de rangschikking verschillen naargelang van de hoogte van de flessen, de diameters en de methode om ze kruiselings neer te leggen. Als u bijvoorbeeld een wijnkast uitsluitend met bourgogneflessen vult, zult u merken dat u ongeveer 30 % onder de op basis van bordeauxflessen berekende aanvankelijke hoeveelheid zit.
- Page 104 8. WARTUNG Voordat u uw apparaat schoonmaakt (regelmatig uit te voeren interventie), het apparaat loskoppelen door de stekker uit te trekken of haar zekering los te koppelen. We raden u aan om voor het eerste gebruik en daarna op regelmatige basis de binnen- en buitenkant (voorkant, zijkant en onderkant) schoon te maken met een mengsel van lauw water en een zacht reinigingsproduct.
-
Page 105: In Geval Van Een Defect
9. IN GEVAL VAN EEN DEFECT Ondanks alle zorg die wij aan onze producten besteden, kan een defect nooit volledig uitgesloten worden. Voordat u contact opneemt met de dienst na verkoop van uw handelaar, moet u echter het volgende controleren: ... -
Page 106: Problemen En Oplossingen
10. PROBLEMEN EN OPLOSSINGEN U kunt veel eenvoudige problemen aan uw chambreerkamer oplossen, zonder de naverkoopdienst te hoeven raadplegen. Probeer de onderstaande suggesties. PROBLEEM MOGELIJKE OORZAAK De stekker steekt niet in het contact De Aan/Uit knop staat op de UIT positie De wijnkast start niet ... - Page 107 Met het oog op de voortdurende verbetering van onze producten behouden wij ons het recht voor om de technische kenmerken zonder voorafgaande kennisgeving te wijzigen. De garanties van de AVINTAGE-producten worden uitsluitend door de door ons gekozen dealers gegeven. Geen enkel onderdeel van deze handleiding kan geïnterpreteerd worden als een aanvullende garantie.
- Page 108 EUROPESE GEGEVENSKAART volgens Verordening 1060/2010 (EU) WIJNKAST MERK AVINTAGE HANDELSREFERENTIE AVI60CDZA STROOMVOEDING 220-240 V / 50 Hz AFMETINGEN VAN HET PRODUCT (B x D x H) 590 x 562 x 595 mm NETTOGEWICHT 33 kg CATEGORIE VAN HET APPARAAT ENERGIE-EFFICIËNTIEKLASSE...
- Page 109 EUROPESE GEGEVENSKAART volgens Verordening 1060/2010 (EU) WIJNKAST MERK AVINTAGE HANDELSREFERENTIE AVI62XDZA STROOMVOEDING 220-240 V / 50 Hz AFMETINGEN VAN HET PRODUCT (B x D x H) 590 x 562 x 595 mm NETTOGEWICHT 33 kg CATEGORIE VAN HET APPARAAT ENERGIE-EFFICIËNTIEKLASSE...
-
Page 110: Instrucciones Generales De Seguridad
Antes de utilizar la vinoteca, lea y aplique todas las reglas de seguridad y uso del presente manual. En primer lugar, le agradecemos la confianza que ha depositado en AVINTAGE al adquirir este aparato que, estamos convencidos, cumplirá plenamente sus expectativas. - Page 111 almacenamiento superior compartimento almacenamiento para productos frescos. No está previsto bajo ningún concepto para guardar productos alimenticios frescos. Asegurarse de que la tensión de la instalación eléctrica corresponda con la placa de identificación del electrodoméstico; este último debe estar conectado a un sistema a tierra autorizado.
- Page 112 Mantener a los niños alejados del electrodoméstico. No utilizar este electrodoméstico al aire libre. En caso de que se derrame líquido por accidente (rotura de una botella, etc.) en los componentes eléctricos (motor, etc.), desconectar el enchufe de la red eléctrica inmediatamente. Para impedir todo riesgo de incendio, electrocución o lesiones, no sumergir el cable de la red eléctrica, el enchufe o el propio electrodoméstico en el agua o en cualquier otro líquido.
- Page 113 Seguridad de los niños y demás personas vulnerables Este aparato pueden utilizarlo niños de 8 años o más, personas con capacidad física, sensorial o mental reducida o personas que no hayan aprendido a utilizar el aparato, siempre que estén bajo la supervisión de una persona informada y consciente de los riesgos que ello implica.
- Page 114 en el interior. Seguridad general ATENCIÓN — Este electrodoméstico está previsto para utilizarse en una vivienda o para tener aplicaciones parecidas en Áreas de cocina de oficina, en tiendas, oficinas u otros lugares de trabajo, Fincas y entre clientes en hoteles, moteles y cualquier otro lugar de tipo residencial, ...
- Page 115 ATENCIÓN — No utilice aparatos eléctricos dentro del compartimento, excepto si estos últimos son aceptados por el fabricante. ATENCIÓN — El refrigerante y el gas de soplado de aislamiento son inflamables. Cuando se deseche el electrodoméstico, hacerlo en un centro de eliminación de residuos autorizado. No exponer a las llamas.
- Page 116 por una mala instalación eléctrica. El cable de alimentación no debe alargarse. No utilice ningún alargador, ningún adaptador ni ninguna toma múltiple. Asegurarse de que el cable de alimentación no esté aplastado ni estropeado. Si el cable está aplastado o estropeado, podría sobrecalentarse y provocar un incendio.
- Page 117 del aparato (batidoras, heladeras eléctricas, etc.). Cuando desenchufe el aparato, agarre la toma con las manos y no tire del cable. No colocar objetos calientes cerca de los componentes de plástico de este electrodoméstico. Deben cumplirse estrictamente las recomendaciones de almacenamiento de los electrodomésticos prescritas por el fabricante.
- Page 118 Nunca limpie ninguna parte del aparato con fluidos inflamables. Los humos pueden crear un peligro de incendio o explosión. No utilice objetos cortantes ni puntiagudos para retirar el hielo. Utilice un rascador de plástico. Información importante acerca de la instalación ...
- Page 119 proporcionadas. Cuando sea posible, evite que el aparato toque las paredes murales o entre en contacto con elementos calientes (compresor, condensador) para evitar riesgos de incendio. Respete en todo momento las instrucciones de instalación. El aparato no debe estar situado cerca de radiadores o de fogones de cocción.
-
Page 120: Instrucciones De Seguridad
Este aparato está reservado para uso doméstico exclusivamente. El fabricante declina toda responsabilidad si el aparato se destina a otros usos. R600a Instrucciones de seguridad Atención: No obstruya ninguna rejilla de ventilación del aparato. Atención: No almacene sustancias explosivas como esprays de aerosol inflamables con propulsor en este aparato. -
Page 121: Descripción Del Aparato
2. DESCRIPCIÓN DEL APARATO Puerta Manilla Panel de control Parrillas Condensador Bodega Pies ajustables 3. DATOS TÉCNICOS Ejemplo de placa de características: La placa de características pegada en el interior o en la parte posterior del aparato (según el modelo) contiene toda la información específica de la vinoteca. - Page 122 4. INSTRUCCIONES DE INSTALACIÓN Antes de utilizar este electrodoméstico Retire el embalaje exterior e interior. Antes de conectar el electrodoméstico a la fuente de alimentación, mantenerlo recto durante aproximadamente 24 horas. De este modo, se reducirá la posibilidad de que se produzcan funcionamientos inadecuados en el sistema de refrigeración a causa de las manipulaciones durante el transporte.
- Page 123 Límites de temperatura del ambiente de la sala Este aparato está diseñado para que funcione a temperaturas ambiente especificadas en su clase de temperatura indicada en la placa de características. RANGO DE TEMPERATURAS CLASE SÍMBOLO AMBIENTE (ºC) Extensión de temperaturas Desde +10 a+32 Temperatura Desde +16 a+32...
- Page 124 Instalación del tirador Para instalar el mango provisto con su bodega, lo invitamos a seguir las instrucciones a continuación: Sello Tornillo Manija Marco de puerta 1) Retire el sello interno de la puerta en el lado donde se instalará el mango. Puedes ver dos agujeros para la instalación del mango.
- Page 125 Retire la puerta acristalada aflojando las 8 tuercas (referencias 3 y 4). Coja la puerta con cuidado y sujétela con firmeza una vez haya retirado las tuercas para evitar cualquier daño. Desatornille y coloque de nuevo el soporte de la puerta (referencia 2) en el lado opuesto. Gire la puerta 180°...
- Page 126 Botón ON/OFF; para encender y apagar el dispositivo. Presione una vez para encender. Manténgalo presionado por 5 segundos para apagarlo. Disminuye la temperatura en 1 grado Celsius o 1 grado Fahrenheit. Aumenta la temperatura en 1 grado Celsius o 1 grado Fahrenheit. Visualización electrónica de la temperatura del compartimento superior.
- Page 127 IMPORTANTE: tras haber desconectado, apagado el aparato o después de un corte de corriente, es imprescindible esperar 5 minutos antes de volver a encenderlo. Alarma de temperatura Se activará una alarma y la pantalla comenzará a parpadear si: La temperatura medida en una de las zonas se desvía del rango de temperatura posible (5-12 ° C o 12-20 °...
- Page 128 Concebido por especialistas para enófilos, Avintage ha tenido en cuenta la sensibilidad de los tapones a una humedad ambiente demasiado baja. Esta es la razón por la que la bandeja debe colocarse sobre la parrilla de arriba con el fin de aportar una humedad mínima.
- Page 129 Bandejas Para evitar el deterioro de la junta de la puerta, asegúrese de que la puerta esté bien abierta antes de retirar las bandejas para colocar o retirar las botellas. Para acceder de forma más sencilla al contenido de las bandejas debe deslizar la bandeja hacia el exterior aproximadamente 1/3.
- Page 130 Tipos de botellas: Aquí tenemos 4 tipos de botellas de 75 cl, borgoñonas y bordelesas, de dimensiones diferentes. Existen otros muchos otros tipos, de tamaño y forma diferentes. Puede observar las diferencias de colocación según la altura de las botellas, el diámetro y la manera de cruzarlas. Por ejemplo, si cargamos una vinoteca exclusivamente con botellas de tipo Borgoña, observaremos que nos quedamos aproximadamente un 30% por debajo de la cantidad inicial calculada a partir de las botellas de tipo Burdeos.
- Page 131 8. MANTENIMIENTO Antes de limpiar el aparato (operación que se debe realizar regularmente), desconéctelo retirando el cable de alimentación de la toma de corriente o desconectando el fusible del que dependa. Antes de la primera utilización y de forma regular, aconsejamos que limpie el interior y el exterior (cara delantera, laterales y parte superior) con una mezcla de agua tibia y un detergente suave.
-
Page 132: En Caso De Avería
9. EN CASO DE AVERÍA A pesar de todo el cuidado que ponemos en la fabricación de nuestros productos, las averías no se pueden descartar completamente. Antes de ponerse en contacto con el servicio posventa de su distribuidor, compruebe que: ... -
Page 133: Solución De Problemas
10. SOLUCIÓN DE PROBLEMAS Usted mismo puede resolver muchos problemas sencillos de la vinoteca sin recurrir al servicio postventa. Consulte las siguientes sugerencias: PROBLEMA CAUSA POSIBLE La toma no está conectada El botón marcha/parada se encuentra en La bodega no se enciende posición parada ... - Page 134 Con el fin de mejorar constantemente nuestros productos, nos reservamos la posibilidad de modificar las características técnicas sin aviso previo. Las garantías de los productos de la marca AVINTAGE son proporcionadas de forma exclusiva por una serie de distribuidores que nosotros seleccionamos. Ningún elemento del presente manual podrá...
-
Page 135: Clase Climática
HOJA DE DATOS EUROPEA de acuerdo con la reglamentación (UE) N°1060/2010 ARMARIO DE SERVICIO DE VINO MARCA AVINTAGE REFERENCIA AVI60CDZA SUMINISTRO ELÉCTRICO 220-240 V / 50 Hz DIMENSIONES DEL PRODUCTO (A x P x A) 590 x 562 x 595 mm PESO NETO 33 kg CATEGORÍA DEL APARATO... - Page 136 HOJA DE DATOS EUROPEA de acuerdo con la reglamentación (UE) N°1060/2010 ARMARIO DE SERVICIO DE VINO MARCA AVINTAGE REFERENCIA AVI62XDZA SUMINISTRO ELÉCTRICO 220-240 V / 50 Hz DIMENSIONES DEL PRODUCTO (A x P x A) 590 x 562 x 595 mm...
-
Page 137: Istruzioni Di Sicurezza
Prima dell'uso, leggere e mettere in pratica le istruzioni di sicurezza e d'uso del presente manuale. Grazie per la fiducia dimostrata nel marchio AVINTAGE con l'acquisto di questo apparecchio, speriamo che riuscirà a soddisfare le tue aspettative. Con questo apparecchio è possibile conservare le bottiglie oppure portarle alla temperatura di servizio (a seconda delle bottiglie) grazie al suo ampio intervallo di regolazione. - Page 138 Questo apparecchio è destinato esclusivamente domestico ed è previsto per la conservazione di bevande speciali ad una temperatura di conservazione più alta di quella di uno scomparto prodotti freschi. nessun caso questo apparecchio è destinato a conservare prodotti alimentari freschi. Verificare che la tensione dell'impianto elettrico della casa corrisponda a quella indicata sulla targa informativa: l'apparecchio deve essere collegato ad una presa di terra regolamentare.
- Page 139 Tenere i bambini lontano dall'apparecchio. Non usare l'apparecchio all'esterno. Se si fosse sparso accidentalmente del liquido (rottura di una bottiglia, ecc.) sui componenti elettrici (motore, ecc.), scollegare immediatamente l'apparecchio dalla presa elettrica. Per evitare il rischio di incendio, di scossa elettrica o di lesioni, non immergere il cavo di alimentazione, la spina o l'apparecchio stesso in acqua o in qualsiasi altro liquido.
-
Page 140: Tenere L'apparecchio E Il Suo Cavo Fuori Della Portata Dei
che vengano sorvegliati o istruiti sull'utilizzo dell'apparecchio in sicurezza e che capiscano i pericoli connessi all'utilizzo dell'apparecchio. La pulizia e la manutenzione non devono essere eseguite da bambini, salvo se di età superiore agli 8 anni e sotto sorveglianza. ... - Page 141 Istruzioni di sicurezza generali ATTENZIONE — Questo apparecchio è destinato a funzionare in un ambiente domestico o per usi simili quali: Le zone di cucina riservate al personale di negozi, fabbriche e altri ambienti professionali, Seconde case e luoghi usati da clienti di hotel, motel e altri ambienti residenziali, ...
- Page 142 ATTENZIONE — Il gas refrigerante e il gas isolante sono infiammabili. Per lo smaltimento dell'apparecchio, conferirlo ad un centro per la raccolta differenziata o ad un'isola ecologica. Non esporre l'apparecchio alle fiamme. ATTENZIONE — Il gas refrigerante di quest'apparecchio è il R600a;...
- Page 143 Controllare attentamente che la presa a muro non sia danneggiata. Una presa a muro in cattivo stato potrebbe causare surriscaldamento dell'apparecchio esplosione. Accertarsi di poter raggiungere comodamente la presa a muro a cui è collegato l'apparecchio. Non tirare mai il cavo di alimentazione. ...
- Page 144 Per scollegare l'apparecchio dalla presa di corrente, estrarre la spina afferrandola con le mani e non tirare dal cavo. Non mettere oggetti caldi vicino ai componenti di plastica di questo apparecchio. Si devono rigorosamente rispettare le raccomandazioni del produttore relativa all'immagazzinamento dell'apparecchio.
- Page 145 Non usare oggetti taglienti o appuntiti per togliere il ghiaccio, ma servirsi di un raschietto di plastica. Informazioni importanti per l'installazione Evitare di collocare l'apparecchio in zone umide. Tenere l'apparecchio lontano dalla luce diretta del sole e da fonti di calore (padelle, stufe, termosifoni, ecc.).
- Page 146 attentamente le istruzioni di installazione fornite per garantire una ventilazione adeguata. Per quanto possibile, evitare che l'apparecchio tocchi le pareti contatto elementi caldi (compressore, condensatore) per evitare il rischio di incendio. Rispettare sempre tutte le istruzioni di installazione. L'apparecchio non deve essere collocato vicino a termosifoni o fornelli.
- Page 147 R600a Istruzioni di sicurezza Attenzione — Non ostruire nessuna griglia di ventilazione dell'apparecchio, controllare che le aperture di aerazione siano sempre libere. — Attenzione conservare all'interno dell'apparecchio sostanze esplosive come le bombolette spray con gas infiammabile. — Attenzione danneggiare circuito frigorifero dell'apparecchio.
-
Page 148: Descrizione Dell'apparecchio
2. DESCRIZIONE DELL'APPARECCHIO Porta Maniglia Pannello dei comandi Ripiano Condensatore Scocca Piedino regolabile 3. TARGHETTA INFORMATIVA Qui sotto è illustrato l'esempio di una targhetta informativa: La targhetta informativa incollata all'interno o sul retro dell'apparecchio (a seconda del modello) contiene tutte le caratteristiche tecniche del frigo cantina. Consigliamo di annotare il numero di serie su questo libretto prima dell'installazione, per ulteriore riferimento (intervento tecnico, richiesta di assistenza, ecc.). -
Page 149: Istruzioni Di Installazione
4. ISTRUZIONI DI INSTALLAZIONE Prima di utilizzare il frigo cantina Rimuovere l'imballo esterno ed interno. Lasciare l'apparecchio a riposo in posizione verticale per circa 24 ore prima di metterlo in funzione. Così facendo, si limiterà la possibilità di un eventuale malfunzionamento del sistema di raffreddamento dovuto al trasporto. - Page 150 Intervalli di temperatura ambiente Questo apparecchio è indicato per l'uso in locali con una temperatura ambiente ben specifica; la classe climatica è indicata sulla targhetta informativa. INTERVALLO DI TEMPERATURA AMBIENTE CLASSE SIMBOLO (°C) Temperata estesa Da +10 °C a +32 °C Temperata Da +16 °C a +32 °C Subtropicale...
- Page 151 Montaggio della maniglia Per installare l'impugnatura fornita con la tua cantina, ti invitiamo a seguire le seguenti istruzioni: Guarnizione Viti Maniglia Telaio de porta 1) Rimuovere la guarnizione interna dalla porta sul lato in cui verrà installata la maniglia. Puoi vedere due fori per l'installazione della maniglia.
- Page 152 Svitare le 8 viti (pos. 3 e 4) poi rimuovere la porta facendo attenzione a non danneggiare o rigare il vetro. Svitare le cerniere (pos. 2) in alto e in basso e riposizionarle sull'altro lato. Rovesciare la porta di 180° e rimontarla sulle cerniere. Riavvitare le 8 viti come erano prima. 5.
- Page 153 Pulsante ON/OFF; per accendere e spegnere il dispositivo. Premere una volta per accendere. Premere e tenere premuto per 5 secondi per spegnere. Riduce la temperatura di 1 grado Celsius o 1 grado Fahrenheit. Aumenta la temperatura di 1 grado Celsius o 1 grado Fahrenheit. Visualizzazione elettronica della temperatura del compartimento superiore.
- Page 154 di corrente, è obbligatorio aspettare 5 minuti prima di riaccenderlo. Allarme di temperatura Si attiva un allarme e il display si mette a lampeggiare se: La temperatura misurata in una delle zone si discosta dal possibile intervallo di temperatura (5- 12 °...
- Page 155 Accertarsi che la vaschetta contenga sempre dell'acqua. Pensato dagli specialisti per i conoscitori di vini, la marca Avintage ha preso in considerazione la sensibilità dei tappi ad un'umidità ambiente troppo bassa. È per questo che la vaschetta deve essere collocata sul ripiano sotto il ventilatore, situato sul fondo, per fornire un'umidità...
- Page 156 Per togliere o posizionare i ripiani, spostare il ripiano fino a quando i suoi intagli non sono allineati con i fermi di plastica. Sollevare il ripiano. Quando si rimette a posto il ripiano, accertarsi di riposizionarlo correttamente. 7. CARICO Le quantità...
-
Page 157: Pulizia E Manutenzione
Tipi di disposizione Rovesciata collo contro collo: Notare la differenza di profondità! Rovesciata collo tra i corpi Carico maggiorato - Verificare che sia possibile chiudere la porta senza toccare una bottiglia prima della chiusura. - Quando si carica più bottiglie contemporaneamente, ci vorrà più tempo per l'unità per raggiungere la temperatura desiderata. - Page 158 Se l'apparecchio è stato scollegato dalla presa, è stato spento o c'è stata un'interruzione di corrente, bisognerà aspettare 3-5 minuti prima di riaccenderlo. Se si prova ad accenderlo prima, il compressore si metterà in funzione solo dopo 3/5 minuti (se la temperatura lo necessita). ...
-
Page 159: In Caso Di Guasti
9. IN CASO DI GUASTI Nonostante tutta la cura e l'attenzione che mettiamo nel fabbricare i nostri prodotti, l'eventualità di un guasto non può essere completamente esclusa. Prima di contattare il servizio assistenza del proprio rivenditore, si prega comunque di fare prima questi controlli: ... - Page 160 10. PROBLEMI E POSSIBILI CAUSE In molti casi è possibile risolvere dei semplici problemi del frigo cantina senza doversi rivolgere al servizio assistenza. Provare a seguire i consigli forniti qui sotto. PROBLEMA POSSIBILE CAUSA La spina non è inserita ...
-
Page 161: Protezione Dell'ambiente
Al fine del continuo miglioramento dei nostri prodotti, ci riserviamo la possibilità di modificare le caratteristiche tecniche senza preavviso. Le garanzie dei prodotti del marchio AVINTAGE sono stabilite esclusivamente dai distributori che abbiamo scelto. Nessun elemento contenuto nel presente manuale può essere interpretato come una garanzia supplementare. - Page 162 SCHEDA PRODOTTO EUROPEA secondo il regolamento (UE) N°1060/2010 FRIGO CANTINA DI SERVIZIO MARCA AVINTAGE RIFERIMENTO COMMERCIALE AVI60CDZA DATI ELETTRICI 220-240 V / 50 Hz DIMENSIONI DEL PRODOTTO (L x P x A) 590 x 562 x 595 mm PESO NETTO...
- Page 163 SCHEDA PRODOTTO EUROPEA secondo il regolamento (UE) N°1060/2010 FRIGO CANTINA DI SERVIZIO MARCA AVINTAGE RIFERIMENTO COMMERCIALE AVI62XDZA DATI ELETTRICI 220-240 V / 50 Hz DIMENSIONI DEL PRODOTTO (L x P x A) 590 x 562 x 595 mm PESO NETTO...
- Page 164 AVINTAGE/FRIO ENTREPRISE - 143 boulevard Pierre Lefaucheux 72230 Arnage - FRANCE www.avintage.com – contact@avintage.com...