Table des Matières

Publicité

Les langues disponibles

Les langues disponibles

Liens rapides

16:9 Rear Seat Entertainment Display
Écran 16/9 pour passagers arrière
Owner's Manual
AVD-W6200
This product conforms to CEMA cord colors.
Le code couleur des câbles utilisé pour ce produit est conforme à CEMA
Mode d'emploi

Publicité

Chapitres

Table des Matières
loading

Sommaire des Matières pour Pioneer AVD-W6200

  • Page 1 16:9 Rear Seat Entertainment Display Écran 16/9 pour passagers arrière Owner’s Manual AVD-W6200 Mode d’emploi This product conforms to CEMA cord colors. Le code couleur des câbles utilisé pour ce produit est conforme à CEMA...
  • Page 2: Table Des Matières

    Keeping the Display in Good Condition ..20 Precaution ............6 About the Small Fluorescent Tube ....20 Important ............6 After-sales Service for Pioneer Products ..7 Connecting the System ......21 Product registration .......... 7 Names and Functions of Connection Terminals ..........
  • Page 3 Selecting fine audio equipment such as the unit you’ve just purchased is only the start of your musical enjoyment. Now it’s time to consider how you can maximize the fun and excitement your equipment offers. This manufacturer and the Electronic Industries Association’s Consumer Electronics Group want you to get the most out of your equipment by playing it at a safe level.
  • Page 4: Important Safeguards

    Use of this product is subject to any government laws regarding placement or use. PIONEER does not accept any liability for any problems, damage or loss incurred as a result of the product being used with an incorrect setting or in violation of...
  • Page 5: Fitting And Removing The Display

    Fitting and Removing the Display Precaution: • To prevent failure, be sure to turn the ignition switch or system power OFF before fitting or removing the display. Also take care not to grip the screen or buttons too firmly or to drop the display.
  • Page 6: To Remove The Display

    Fitting and Removing the Display To remove the display • Pull the lock release lever 3 and hold in that position, then slide the display and detach it from its base. • To prevent theft of the display, remove the display when leaving the vehicle. Base Mounting arm (supplied)
  • Page 7: Important Information

    IMPORTANT INFORMATION About This Product • Do not place the display in a position where it will impede the driver’s visibility or affect the operation of your vehicle’s air bags or headrests. • Certain government laws may restrict the placement and use of the display in your car. Please comply with all applicable laws and regulations in the installation and operation of your display.
  • Page 8: After-Sales Service For Pioneer Products

    IMPORTANT INFORMATION After-sales Service for Pioneer Products Please contact the dealer or distributor from where you purchased the product for its after-sales service (including warranty conditions) or any other information. In case the necessary information is not available, please contact the companies listed below: Please do not ship your product to the companies at the addresses listed below for repair without advance contact.
  • Page 9: Before Using This Product

    Before Using This Product To Avoid Battery Exhaustion Always run the vehicle engine while using this unit. Using this unit without running the engine can result in battery drainage. To Protect the LCD Screen of the Display • Do not allow direct sunlight to fall on the Display when this unit is not being used. Extended exposure to direct sunlight can result in LCD screen malfunction due to the resulting high temperatures.
  • Page 10: To Ensure Safe Driving

    Before Using This Product To Ensure Safe Driving This unit senses whether the parking brake is on or off. When installed in the FRONT, it is arranged so that video cannot be viewed while the vehicle is moving. The various settings and adjustments are also not possible while driving.
  • Page 11: Resetting The System

    Resetting the System Resetting the Microprocessor Pressing the RESET button lets you reset the microprocessor to its initial settings without changing the setup function settings. Reset the microprocessor in the following cases: When using this product for the first time after installation. When the product fails to operate properly.
  • Page 12: Key Finder

    Key Finder Component Parts and Features 7 Display Unit 1 Signal receptor 5 Volume control (–/+) buttons This receiver receives signals from a Adjust the volume of the built-in remote control. speaker 8, or change setup items when the setup function is displayed. 2 POWER button Note: Switches power ON/OFF.
  • Page 13: Basic Operation

    Use of this product is subject to any government laws regarding placement or use. PIONEER does not accept any liability for any problems, damage or loss incurred as a result of the product being used with an incorrect setting or in violation of any government laws.
  • Page 14: Volume Adjustment

    Basic Operation Volume Adjustment Adjust the volume of audio output from the built-in speaker. • Raise or lower the speaker volume. The volume of the built-in speaker can be adjusted in a range of 0 to 30. (The volume level will be displayed for about 4 seconds.) Selecting a Source •...
  • Page 15: Changing The Wide Screen Mode

    Changing the Wide Screen Mode You can change the way in which normal video (aspect ratio 4:3) enlarges to wide video (16:9). Select wide modes to suit the kind of video you are viewing. 1. Display a source to view. (Refer to the previous page.) 2.
  • Page 16: Wide Modes Available

    Basic Operation Wide Modes Available FULL Video with an aspect ratio of 4:3 enlarges only horizontally. Enjoy viewing video widened without missing parts. JUST Video appears more extended hor- izontally as it gets closer to both edges of the screen. Because video appears in about the same size as regular video around the middle of the screen, enjoy viewing it with-...
  • Page 17: Operating The Setup Function

    Operating the Setup Function Dimmer Setting [DIMMER] Viewing can become difficult after extended video viewing if the screen is too bright at night or when ambient light darkens. You can select the brightness level from three set- tings; HIGH, MID and LOW viewing. 1.
  • Page 18: Entering The Setup Function

    Operating the Setup Function Entering the Setup Function This system offers a number of functionality setup and adjustment features to make it easi- er to use. Customize the settings to suit your taste and environment. 1. Display the setup function. Press and hold the WIDE/MENU button for 2 seconds.
  • Page 19: Brightness [Brightness]

    Brightness [BRIGHTNESS] You can make black appear darker or lighter (–24 to +24). Contrast [CONTRAST] You can make narrow or widen the gap between black and white (darken) (–24 to +24). Color [COLOR] You can make colors appear lighter or darker (–24 to +24). Hue [HUE] You can adjust the red or green of the picture (–24 to +24).
  • Page 20: Using The Display Correctly

    • If you notice smoke, a strange noise or smell, or any other abnormal signs from the display, turn OFF the power immediately and consult your dealer or the nearest authorized PIONEER service facility. Using the unit in this condition may result in failure of the system.
  • Page 21: About The Liquid Crystal Display (Lcd) Screen

    * When the fluorescent tube reaches the end of its useful life, the screen will be dark and the image will no longer be projected. If this happens, consult your dealer or the nearest authorized PIONEER service facility.
  • Page 22: Connecting The System

    Connecting the System CAUTION • PIONEER does not recommend that you install or service your display your- self. Installing or servicing the product may expose you to risk of electric shock or other hazards. Refer all installation and servicing of your display to authorized Pioneer service personnel.
  • Page 23 Note: • This unit is for vehicles with a 12-volt battery • If this unit is installed in a vehicle that does not and negative grounding. Before installing it in a have an ACC (accessory) position on the ignition recreational vehicle, truck, or bus, check the bat- switch, the red lead of the unit should be con- tery voltage.
  • Page 24: Names And Functions Of Connection Terminals

    Connecting the System Names and Functions of Connection Terminals 7 Hide-away Unit 1 VIDEO1 RCA video input (yellow) 5 Power Supply Receives video, as from a VCR, DVD or Receives the power cable supplied. other AV equipment. 6 Display output (white) 2 VIDEO1 RCA audio input (white, Connects to the display unit.
  • Page 25: Connecting The Power Cable

    Connecting the Power Cable Hide-away Unit Power cable Fuse resistor Orange/white To lighting switch terminal. Black (ground) To vehicle (metal) body. Fuse resistor To the electric terminal controlled by the ignition switch (12 V DC) ON/OFF. Do not connect this lead to power source terminals to which power is continuously supplied.
  • Page 26: Connection Diagram (Video Input)

    Connecting the System Connection Diagram (VIDEO input) Display Unit White 3 m (9ft 10in.) VIDEO1 RCA audio input (white, red) VIDEO1 RCA video input Hide-away Unit (yellow) VIDEO2 INPUT VIDEO1 INPUT Commercial RCA cable (sold separately) To audio output Commercially available portable video component with RCA output...
  • Page 27: Connecting The Rca Audio And Video Output

    Connecting the RCA Audio and Video Output Hide-away Unit RCA video output (yellow) RCA audio output (white, red) Commercial RCA cable (sold separately) Power cable (Refer to page 22.) To audio input (R) To audio input (L) Second display, video deck, etc.
  • Page 28: Installation

    (iii) impair the driver’s ability to safely oper- ate the vehicle. • PIONEER does not recommend that you install or service your display your- self. Installing or servicing the product may expose you to risk of electric shock or other hazards.
  • Page 29: When The Display Is Installed In The Front

    Use of this product is subject to any government laws regarding placement or use. PIONEER does not accept any liability for any problems, damage or loss incurred as a result of the product being used with an incorrect setting or in violation of any government laws.
  • Page 30: Installing The Display Using The Accessory Mounting Arm

    • Usage or placement of this product must strictly adhere to the figure below. PIONEER does not accept any liability for any problems, damage or loss incurred as a result of the incorrect installation or usage of this product.
  • Page 31 1. Push the lock release button, then slide and remove the headrest upward. Head rest Shaft Boots Note: • The supplied mounting arm may not be installed on seats where the lock release button does not face outside. 2. Adjust the shaft guides so that the shafts pass through the mounting arm. Choose holes that match the shafts, then adjust the positions of the shaft guides to match the width between the shafts.
  • Page 32 Installation 3. Install the mounting arm on the boots of the headrest shafts. Slide the mounting arm from the right to the left while holding it down. Slide the U-shaped brackets into the gaps between the boots and the surface of the seat. Boots U-shaped bracket If the mounting arm does not securely fit due to the shape or the material of the seat, use...
  • Page 33 6. Install the display on the arm. Loosen these screws with the hexagonal wrench Display to rotate the arm. To fasten the display, tighten the hidden screw with the hexagonal wrench through this hole. Use the supplied hexagonal wrench to tighten up the screw after the adjustment. If you feel there is still play between the display and the arm after tightening the screw, pull the lock release lever and remove the display, then further tighten the screw with the hexagonal wrench.
  • Page 34: Installing The Hide-Away Unit

    Installation Installing the Hide-away Unit Installation Precautions • Never install in locations such as the following because of the danger of malfunction due to high temperatures or humidity: * Locations such as a dashboard or rear tray where there is exposure to direct sunlight. * Near heater outlets.
  • Page 35: Specifications

    Specifications General Power source ..............14.4 V DC (10.8 — 15.1 V allowed) Grounding system ..............Negative type Max. current consumption ..........2.0 A Display Unit Screen size/Aspect ratio ............6.5 inch wide/16:9 (effective display area: 143.75 × 76 mm [5-5/8 × 3 in]) Pixels ..................
  • Page 36 Quelques mots concernant cet appareil .... 6 Entretien de l’écran ........20 Précaution ............6 A propos du petit tube fluorescent ....20 Service après-vente des produits PIONEER ..7 Enregistrement du produit ........ 7 Branchement du système ...... 21 Noms et fonctions des prises de Avant de vous servir de cet appareil ..
  • Page 37: Cher Client

    Cher Client: La sélection d’un équipement audio de qualité comme l’unité que vous venez d’acheter n’est que le début de votre plaisir musical. Maintenant, il est temps de penser à la manière de profiter au maximum des plaisirs que vous offre votre équipement. Ce fabricant et le Groupe “Consumer Electronics Group”...
  • Page 38: Importantes Mesures De Securite

    L’utilisation de cet appareil est soumise aux lois des gouvernements en ce qui concerne son emplacement et son utilisation. PIONEER ne saurait être tenue responsable en cas d’anomalie, de dommage, ou de perte résultant de l’utilisation de l’appareil dans des conditions incorrectes ou...
  • Page 39: Mise En Place Et Retrait De L'écran

    Mise en place et retrait de l’écran Précautions: • Pour éviter des pannes, coupez la clé de contact du véhicule et mettez le système de navigation hors tension (OFF) avant d’installer ou de retirer l’écran. Prenez soin de ne pas serrer trop fort l’écran ou les boutons et de ne pas laisser tomber l’unité. •...
  • Page 40: Retrait De L'écran

    Mise en place et retrait de l’écran Retrait de l’écran • Tirez le levier de déblocage 3 et maintenez-le dans cette position, puis glissez l’écran et séparez-le de sa base. • Par mesure de précaution contre le vol, retirez l’écran lorsque vous quittez le véhicule. Base Bras de fixation (fourni)
  • Page 41: Informations Importantes

    INFORMATIONS IMPORTANTES Quelques mots concernant cet appareil • Ne placez pas l’écran à un endroit où il réduirait la visibilité du conducteur ou gênerait le fonctionnement des airbags du véhicule ou le réglage des appui-tête. • Les lois de certains gouvernements peuvent limiter l’installation et l’emploi de l’écran dans les voitures.
  • Page 42: Service Après-Vente Des Produits Pioneer

    Veuillez contacter votre revendeur ou distributeur en ce qui concerne le service après- vente (et les conditions de garantie) ou tout autre information. En cas de nécessitée ou lorsque l’information recherchée n’est pas disponible, veuillez contacter Pioneer aux adresses suivantes;...
  • Page 43: Avant De Vous Servir De Cet Appareil

    Avant de vous servir de cet appareil Comment éviter de décharger la batterie Démarrez toujours le moteur du véhicule avant d’utiliser cet appareil. Faites toujours tourner le moteur lorsque vous utilisez l’appareil, sinon la batterie se décharge. Comment protéger l’écran à cristaux liquides •...
  • Page 44: Pour Garantir Une Conduite Sûre

    Avant de vous servir de cet appareil Pour garantir une conduite sûre Cet appareil détecte si le frein de parking est ou n’est pas tiré. Lorsqu’il est installé à l’avant la vidéo ne peut pas être vue lorsque le véhicule est en mouvement. Les différents réglages et mises au point ne peuvent pas non plus être effectués pendant la conduite.
  • Page 45: Réinitialisation De L'appareil

    Réinitialisation de l’appareil Réinitialisation du microprocesseur Une pression sur RESET permet de rétablir les réglages initiaux du microprocesseur sans modifier les réglages de la fonction de mise en oeuvre. Rétablissez les réglages initiaux du microprocesseur dans les cas suivants: Lors de l’utilisation de cet appareil pour la première fois après son installation. Lorsque l’appareil ne fonctionne pas correctement.
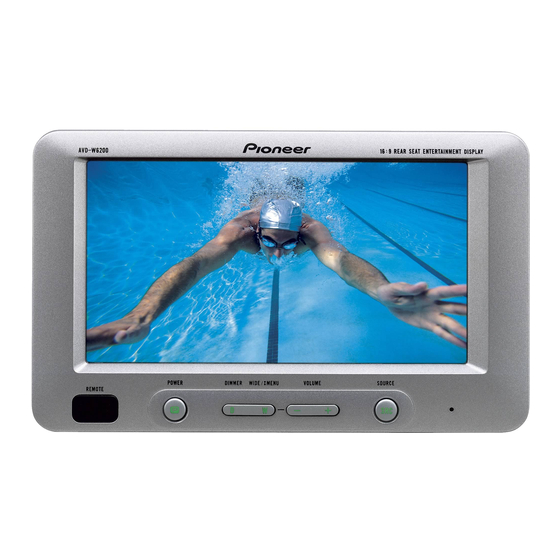
  • Page 46: Tableau Des Commandes

    Tableau des commandes Composants et particularités 7 Unité écran 1 Récepteur de signal 5 Touches de commande de niveau Ce récepteur reçoit les signaux sonore (–/+) provenant du boîtier de télécommande. Ils règlent le niveau sonore du haut- parleur intégré 8, ou changent les 2 Touche POWER postes de réglage quand la fonction de Elle permet de mettre en service, ou...
  • Page 47: Opérations De Base

    L’utilisation de cet appareil est soumise aux lois des gouvernements en ce qui concerne son emplacement et son utilisation. PIONEER ne saurait être tenue responsable en cas d’anomalie, de dommage, ou de perte résultant de l’utilisation de l’appareil dans des conditions incor- rectes ou en violation des lois du gouvernement.
  • Page 48: Réglage Du Niveau Sonore

    Opérations de base Réglage du niveau sonore Réglez le niveau sonore de la sortie audio du haut-parleur intégré. • Augmentez ou diminuez le niveau sonore du haut-parleur. Le niveau sonore du haut-parleur intégré peut être réglé sur la plage de 0 à 30. (La valeur du niveau sonore est affichée pendant 4 secondes.) Sélection d’une source •...
  • Page 49: Changement Du Mode D'affichage Sur L'écran

    Changement du mode d’affichage sur l’écran Vous pouvez changer la manière d’afficher la vidéo de normal (rapport d’image 4:3) à large (16:9). Sélectionnez les modes d’affichage large en fonction du type de vidéo que vous regardez. 1. Affichez la source à regarder. (Reportez-vous à la page précédente.) 2.
  • Page 50: Modes D'agrandissement Disponibles

    Opérations de base Modes d’agrandissement disponibles FULL (Remplir) La vidéo au format 4:3 est agrandie uniquement dans le sens de la largeur (horizontalement). Vous bénéficiez alors d’une zone d’image plus large, sans perdre aucune donnée. JUST (Juste) L’image semble davantage agrandie en largeur au fur et à...
  • Page 51: Utilisation De La Fonction De Mise En Oeuvre

    Utilisation de la fonction de mise en oeuvre Réglage de la luminosité [DIMMER] Regarder l’image peut devenir difficile après une longue période d’observation de la vidéo si l’écran est trop lumineux la nuit ou si la lumière ambiante s’assombrit. Vous pouvez choisir le niveau de luminosité...
  • Page 52: Accès À La Fonction De Mise En Oeuvre

    Utilisation de la fonction de mise en oeuvre Accès à la fonction de mise en oeuvre Ce système offre un certain nombre de possibilités en matière de mise en oeuvre des fonc- tionnalités et des réglages qui le rendent plus facile à utiliser. Personnalisez les réglages pour répondre à...
  • Page 53: Luminosité [Brightness]

    Luminosité [BRIGHTNESS] Vous pouvez agir de manière que le noir semble plus ou moins sombre (-24 à +24). Contraste [CONTRAST] Vous pouvez agir de manière que l’écart entre le noir et le blanc (assombri) soit plus ou moins étendu (-24 à +24). Couleur [COLOR] Vous pouvez agir de manière que les couleurs semblent plus ou moins sombres (-24 à...
  • Page 54: Utilisation Convenable De L'écran

    • Si de l’humidité ou un corps étranger devait s’infiltrer dans l’unité, mettez-la immédiatement hors tension (OFF) et consultez votre concessionnaire ou un centre de service PIONEER agréé. Utiliser l’unité sans vérification pourrait provoquer un incendie, une électrocution ou d’autres problèmes.
  • Page 55: A Propos De L'écran À Cristaux Liquides (Lcd)

    (Notez qu’une utilisation par basse température réduit la durée de service du tube fluorescent.) * Lorsque le tube fluorescent atteint la fin de sa vie utile, l’écran s’assombrit et les images n’y sont plus visibles. Dans ce cas, consultez votre concessionnaire ou un centre de service PIONEER agréé.
  • Page 56: Branchement Du Système

    Branchement du système ATTENTION • PIONEER ne vous recommande pas d’installer ou d’entretenir vous-même cet écran, car ces travaux peuvent présenter un risque d’électrocution ou d’autres dangers. Confiez tous les travaux d’installation et d’entretien de votre écran au personnel de service Pioneer agréé.
  • Page 57 Remarque: • Cet appareil est destiné aux véhicules avec une • Si cette unité est installée dans un véhicule dont batterie de 12 V, avec pôle négatif à la masse. le contacteur d’allumage n’a pas de position Avant de l’installer dans un véhicule de loisir, un ACC (accessoire), le fil rouge de l’unité...
  • Page 58: Noms Et Fonctions Des Prises De Raccordement

    Branchement du système Noms et fonctions des prises de raccordement 7 Appareil déporté 1 Entrée vidéo Cinch (RCA) 5 Alimentation Elle reçoit le câble d’alimentation fourni. VIDEO1 (jaune) Elle reçoit la vidéo provenant d’un 6 Sortie de l’écran (blanc) magnétoscope, d’un lecteur de DVD ou Elle connecte à...
  • Page 59: Branchement Du Câble D'alimentation

    Branchement du câble d’alimentation Appareil deporté Câble d’alimentation Résistance de fusible Orange/blanc A la borne du commutateur d’éclairage. Noir (masse) A la carrosserie (partie métallique) du véhicule. Résistance de fusible Rouge A la borne électrique, contrôlée par la position ON/OFF de la clé de contact (courant continu 12 V).
  • Page 60: Schéma De Connexion (Entrée Video)

    Branchement du système Schéma de connexion (entrée VIDEO) Unité écran Blanc Entrée audio Cinch (RCA) VIDEO1 (blanc, rouge) Entrée vidéo Cinch (RCA) Appareil déporté VIDEO1 (jaune) Entrée VIDEO2 Entrée VIDEO1 Câbles Cinch (RCA) disponibles dans le commerce (vendus séparément) Vers la sortie audio Composant vidéo portatif disponible dans le commerce...
  • Page 61: Connexion À La Sortie Audio Et Vidéo Cinch (Rca)

    Connexion à la sortie audio et vidéo Cinch (RCA) Appareil déporté Sortie vidéo Cinch (RCA) (jaune) Sortie audio Cinch (RCA) (blanc, rouge) Câbles Cinch (RCA) disponibles dans le commerce (vendus séparément) Câble d’alimentation (Reportez-vous à la page 22.) Vers l’entrée audio (R) Vers l’entrée audio (L) Second écran, platine vidéo, etc.
  • Page 62: Installation

    (iii) il diminuerait la sécu- rité de la conduite. • PIONEER ne vous recommande pas d’installer ou d’entretenir vous-même cet écran, car ces travaux peuvent présenter un risque d’électrocution ou d’autres dangers. Confiez tous les travaux d’installation et d’entretien de votre écran au personnel de service PIONEER agréé.
  • Page 63: Si L'écran Et Installé À L'avant

    L’utilisation de cet appareil est soumise aux lois des gouvernements en ce qui concerne son emplacement et son utilisation. PIONEER ne saurait être tenue responsable en cas d’anomalie, de dommage, ou de perte résultant de l’utilisation de l’appareil dans des conditions incor- rectes ou en violation des lois du gouvernement.
  • Page 64: Installation De L'écran Au Moyen Du Bras De Fixation

    • L’utilisation et le positionnement de cet appareil doit être strictement con- forme à l’illustration qui suit. PIONEER ne saurait être tenue responsable des dommages ou des pertes résultant d’une installation ou d’un emploi incorrects de cet appareil.
  • Page 65 1. Appuyez sur le bouton de libération, faites glisser l’appui-tête vers le haut et retirez-le. Appui-tête Montant Garnitures Remarque: • Il se peut que le bras de fixation fourni ne puisse pas être installé sur un siège qui est muni d’un bouton de libération ne faisant pas face à...
  • Page 66 Installation 3. Installez le bras de fixation sur les garnitures en matière plastique des mon- tants de l’appui-tête. Faites glisser le bras de fixation de la droite vers la gauche tout en exerçant Engagez les supports en U dans une pression. l’espace entre les garnitures et la surface du siège.
  • Page 67 6. Installez l’écran sur le bras. Desserrez ces vis à l’aide de la clé à six pans pour tourner le Écran bras de fixation. Pour assurer le maintien de l’écran, serrez la vis invisi- ble en vous servant de la clé à...
  • Page 68: Installation De Appareil Déporté

    Installation Installation de appareil déporté Précautions d’installation • N’installez pas cet appareil dans des emplacements tels que ceux indiqués ci-dessous, à cause des risques de dysfonctionnements dus à une température ou une humidité élevées: * le tableau de bord ou la plage arrière où il est exposé directement aux rayons du soleil. * près des grilles de sortie du chauffage.
  • Page 69: Caractéristiques Techniques

    Caractéristiques techniques Généralités Alimentation ................ 14,4 V CC (de 10,8 à 15,1 V possibles) Mise à la masse ..............Pôle négatif Consommation maximale ............ 2,0 A Unité écran Taille de l’écran; rapport de la largeur à la hauteur .... 6,5 pouces; 16:9 (Surface réelle d’affichage: 143,75 ×...
  • Page 72 TEL: (03) 9586-6300 PIONEER ELECTRONICS OF CANADA, INC. 300 Allstate Parkway, Markham, Ontario L3R OP2, Canada TEL: (905) 479-4411 PIONEER ELECTRONICS DE MEXICO, S.A. de C.V. Blvd.Manuel Avila Camacho 138 10 piso Col.Lomas de Chapultepec, Mexico, D.F. 11000 TEL: 55-9178-4270 Published by Pioneer Corporation.

Table des Matières