Pioneer AVIC-F77DAB Manuel D'installation
Masquer les pouces Voir aussi pour AVIC-F77DAB:
Table des Matières

Publicité

Les langues disponibles
  • FR

Les langues disponibles

  • FRANÇAIS, page 34

Liens rapides

Installation Manual
Manuel d'installation
NAVIGATION AV SYSTEM
SYSTEME DE NAVIGATION AV
SISTEMA DI NAVIGAZIONE AV
SISTEMA DE NAVEGACIÓN AV
NAVIGATIONS-/AV-SYSTEM
AV NAVIGATIESYSTEEM
AVIC-F77DAB
AVIC-F70DAB
AVIC-F970DAB
AVIC-F970BT
AVIC-F9770DAB
AVIC-F9770BT

Publicité

Table des Matières
loading

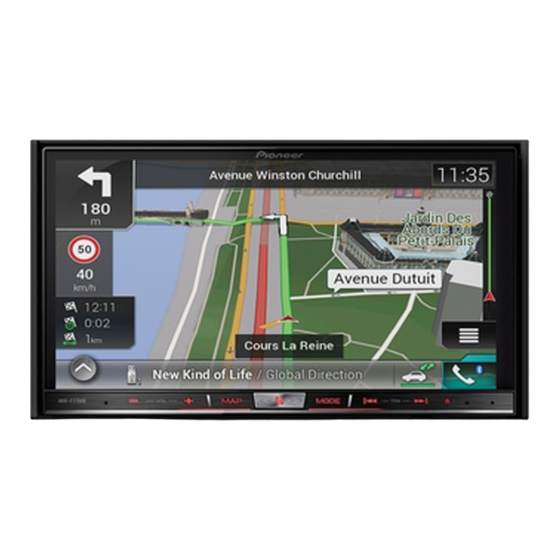
Sommaire des Matières pour Pioneer AVIC-F77DAB

  • Page 1 Installation Manual Manuel d’installation NAVIGATION AV SYSTEM SYSTEME DE NAVIGATION AV SISTEMA DI NAVIGAZIONE AV SISTEMA DE NAVEGACIÓN AV NAVIGATIONS-/AV-SYSTEM AV NAVIGATIESYSTEEM AVIC-F77DAB AVIC-F70DAB AVIC-F970DAB AVIC-F970BT AVIC-F9770DAB AVIC-F9770BT...
  • Page 2: Table Des Matières

    To avoid electromagnetic interference 25 Connecting the power cord (1) 8 Before installing 25 Connecting the power cord (2) 10 – For AVIC-F77DAB and AVIC-F70DAB Connecting the system 12 users 26 Connecting to separately sold power Installing this product 26 amp 13 –...
  • Page 3: Precautions

    Important safeguards manual WARNING ! The navigation features of this product Pioneer does not recommend that you install (and the rear view camera option if pur- this product yourself. This product is de- chased) are intended solely to aid you in signed for professional installation only.
  • Page 4 Section Precautions ! Certain country and government laws may prohibit or restrict the placement and use of this product in your vehicle. Please com- ply with all applicable laws and regulations regarding the use, installation and opera- tion of this product. Engb...
  • Page 5: Connection

    Section Connection Precautions before damaged, resulting in a short circuit or malfunction and permanent damage to connecting the system the product. ! Do not cut the GPS aerial cable to shorten WARNING it or use an extension to make it longer. Do not take any steps to tamper with or dis- Altering the aerial cable could result in a able the handbrake interlock system which...
  • Page 6: To Prevent Damage

    Section Connection ! Since a unique BPTL circuit is employed, To prevent damage do not directly earth the * side of the speaker lead or connect the * side of an- WARNING ! Use speakers over 50 W (output value) other side of the speaker lead together.
  • Page 7: Parts Supplied

    Section Connection Parts supplied This product Power cord GPS aerial Microphone USB cable USB cable identifica- (2 pcs.) tion labels Lock tie*1 Vehicle Bus conversion cable*2 Notes ! (*1) These parts are supplied with AVIC- F77DAB. ! (*2) These parts are supplied with AVIC- F77DAB, AVIC-F70DAB and AVIC- F970DAB.
  • Page 8: Connecting The Power Cord (1)

    Section Connection Connecting the power cord (1) Note Depending on the types of vehicles, the function of *2 and *4 may be different. In this case, be sure to connect *1 to *4 and *3 to *2 as shown in the figure. Connect leads of the same colour to each other.
  • Page 9 Section Connection This product 14 cm Yellow/black (MUTE) If you use equipment with a mute function, connect that equipment to the Audio Mute lead. If not, keep the Audio Mute lead free of any connections. Power supply Note Fuse (10 A) Audio source will be set to mute or attenuate, while the following sounds will not be muted or attenuated.
  • Page 10: Connecting The Power Cord (2)

    Note The position of the speed detection circuit and the position of the handbrake switch vary depending on the vehicle model. For details, consult your authorised Pioneer dealer or an installation professional. Light green (PARKING BRAKE) Used to detect the ON/OFF status of the handbrake. This lead must be connected to the power supply side of the handbrake switch.
  • Page 11 Section Connection This product Power supply Power cord Violet/white (REVERSE-GEAR SIGNAL INPUT) This is connected so that this product can detect whether the vehicle is moving forwards or backwards. Connect the violet/white lead to the lead whose voltage changes when the reverse gear is engaged.
  • Page 12: Connecting The System

    For improved Digital Radio reception, make sure a Digital Radio aerial with phantom power input This product (active type) is used. Pioneer recommends using AN-DAB1 or CA-AN-DAB.001 (sold separately). Current consumption of the Digital Radio aerial should be 100 mA or less.
  • Page 13: Connecting To Separately Sold Power Amp

    Section Connection Connecting to separately sold power amp Power amp (sold separately) cables Rear outputs (sold separately) (REAR OUTPUT) Power amp (sold separately) 15 cm Power amp (sold separately) Front outputs (FRONT OUTPUT) This product Power supply White, Red (SWL, SWR) Power cord Blue/white To system control terminal of the power amp...
  • Page 14: Connecting An Iphone, Ipod, Android Device Or A Mirrorlink™ Device

    Section Connection Connecting an iPhone, iPod, Android device or a MirrorLink device ™ Find your device and the function you want to operate from the list below, and refer to the page for the connection. iPhone 6 Plus/iPhone 6/iPhone 5s/iPhone 5c/iPhone 5 iPod (audio) Refer to Connecting via the USB port on page 16.
  • Page 15 Section Connection Android device HDMI port Refer to Connecting an Android device with an HDMI port on page 19. F77DAB AppRadio Mode MHL port Refer to Connecting an Android device with an MHL port on page 19. F77DAB F70DAB ™ Refer to Connecting the Android or MirrorLink device on page 20.
  • Page 16: Attaching Identification Labels To Usb Cables

    Section Connection Attaching identification Connecting an iPhone with labels to USB cables Lightning connector Attach identification labels to USB cables be- Notes fore installing this product in a vehicle. ! For details on how to connect an external de- Connect USB cables to the USB port 1 vice using a separately sold cable, refer to the and 2 on the rear of this product.
  • Page 17: Connecting Via The Hdmi Port

    Section Connection Connecting via the HDMI port Connecting via the RGB input F77DAB F70DAB F970DAB F970BT The following cables are required for the con- The following cables are required for the con- nection. nection. ! HDMI interface cable for iPod / iPhone ! VGA/USB interface cable for iPod / iPhone (CD-IH202) (sold separately) (CD-IV202AV) (sold separately)
  • Page 18: Connecting An Iphone With 30-Pin Connector

    Section Connection Connecting an iPhone with Connecting via the RGB input 30-pin connector The USB interface cable for iPod / iPhone (CD- IU201S) (sold separately) is required for the Notes connection. ! For details on how to connect an external de- USB port 1 This product vice using a separately sold cable, refer to the...
  • Page 19: Connecting The Android Device

    Section Connection Connecting the Android Connecting an Android device ™ with an MHL port device F77DAB This product App Connectivity Kit (CD-AH200) (sold sepa- rately) is required for the connection. Notes ! For details on how to connect an external de- vice using a separately sold cable, refer to the HDMI port USB port 2...
  • Page 20: Connecting The Android Or Mirrorlink™ Device

    Section Connection Connecting the Android or Securing the High Speed ® MirrorLink device HDMI Cable ™ The USB interface cable for use with Android F77DAB ™ or MirrorLink devices (CD-MU200) (sold sepa- ® Be sure to fix the High Speed HDMI Cable rately) is required for the connection.
  • Page 21: Connecting A Rear View Camera

    Section Connection Connecting a rear view camera Rear view camera (ND-BC6) When this product is used with a rear view (sold separately) camera, it is possible to automatically switch from the video to rear view image when the gearstick is moved to REVERSE (R). Camera To video output View mode also allows you to check what is behind you while driving.
  • Page 22: Connecting The External Video Component

    Section Connection Connecting the external Connecting the video component video component This product Using AV input You can connect an external video component or external camera to this product. Connecting an external camera This product 15 cm 23 cm Yellow (VIDEO INPUT) Red, white (AUDIO INPUT)
  • Page 23: Using An Aux Input

    Section Connection Using an AUX input CAUTION This product Be sure to use a mini-jack AV cable (CD-RM10) (sold separately) for wiring. If you use other cables, the wiring position might differ resulting AUX input in disturbed images and sounds. L : Left audio (White) R : Right audio (Red) Mini-jack AV cable...
  • Page 24: Connecting An Hdmi Device

    Section Connection Connecting an HDMI device Connecting the rear display F77DAB This product This product Yellow (V OUT) Rear audio output Mini pin plug cable (sold separately) RCA cable (sold separately) To audio inputs To video input Rear display with RCA input jacks (sold separately) Notes...
  • Page 25: Installation

    ! FM, MW/LW aerial and its lead compatibility checked by your dealer. If ! DAB aerial and its lead (for AVIC-F77DAB, parts other than supplied or compatible AVIC-F70DAB and AVIC-F970DAB) ones are used, they may damage internal...
  • Page 26: For Avic-F77Dab And Avic-F70Dab Users

    For AVIC-F77DAB and AVIC- tion display, and might otherwise cause re- F70DAB users duced display performance.
  • Page 27: Parts Supplied

    Section Installation ! The cords must not cover the area shown Before installing this product in the figure below. This is necessary to Remove the trim ring. allow the amps and navigation mechanism Extend top and bottom of the trim ring out- to dissipate heat.
  • Page 28: Installation Using The Screw Holes On The Side Of This Product

    Section Installation 1 Dashboard Installation using the screw 2 Holder holes on the side of this product % Fastening this product to the factory Install this product into the holder. radio-mounting bracket. Position this product so that its screw holes are aligned with the screw holes of the brack- et, and tighten the screws at three locations on each side.
  • Page 29: Installing The Gps Aerial

    Section Installation Installing the GPS aerial Parts supplied CAUTION Do not cut the GPS aerial lead to shorten it or use an extension to make it longer. Alter- ing the aerial cable could result in a short cir- GPS aerial Metal sheet cuit or malfunction and permanent damage to this product.
  • Page 30: When Installing The Aerial Inside The Vehicle (On The Dashboard Or Rear Shelf)

    Section Installation When installing the aerial inside the vehicle (on the dashboard or rear shelf) WARNING Do not install the GPS aerial over any sen- sors or vents on the dashboard of the vehicle, as doing so may interfere with the proper functioning of such sensors or vents and may compromise the ability of the metal sheet under the GPS aerial to properly and se-...
  • Page 31: Installing The Microphone

    Section Installation Installing the microphone Attach the microphone clip to the sun visor. ! Install the microphone in a place where its direction and distance from the driver make it easiest to pick up the driver’s voice. ! Be sure to turn off (ACC OFF) the product before connecting the microphone.
  • Page 32: Installation On The Steering Column

    Section Installation 1 Double-sided tape Installation on the steering column 2 Clamps Detach the microphone base from the Use separately sold clamps to secure the microphone clip by sliding the microphone lead where necessary inside the vehicle. base while pressing the tab. Adjusting the microphone angle The microphone angle can be adjusted.
  • Page 33: After Installation

    Section After installation After installing this product Drive down an unobstructed road until the GPS starts receiving the signal nor- Reconnect the negative (–) terminal of mally. the vehicle’s battery. First, double-check that all connections are Note correct and that this product is installed cor- After installing this product, be sure to check at a rectly.
  • Page 34 (1) 40 électromagnétiques 57 Branchement du cordon d’alimentation Avant de procéder à l’installation 58 (2) 42 – Pour les utilisateurs de AVIC-F77DAB et Branchement du système 44 AVIC-F70DAB 58 Connexion à un amplificateur de puissance Installation de ce produit 58 vendu séparément 45...
  • Page 35: Précautions

    Section Précautions Votre nouveau produit et Si l’icône suivante s’affiche, la description s’applique uniquement au modèle indiqué. ce manuel par ex. ! La fonction de navigation de ce produit (et F77DAB la caméra de rétrovisée en option le cas échéant) est uniquement destinée à vous assister lors de la conduite de votre véhi- cule.
  • Page 36: Importantes Mesures De Sécurité

    AVERTISSEMENT ! Certaines lois nationales ou gouvernemen- Pioneer vous recommande de ne pas instal- tales peuvent interdire ou restreindre l’em- ler ce produit vous-même. Ce produit doit placement et l’utilisation de ce produit être exclusivement installé...
  • Page 37: Connexion

    Section Connexion ! La trajectoire des fils ne doit pas être ex- Précautions à prendre avant posée à des températures élevées. Si l’iso- de brancher le système lation chauffe, les fils risquent d’être endommagés, ce qui peut entraîner un AVERTISSEMENT court-circuit ou un dysfonctionnement, et N’essayez pas de modifier ou désactiver le endommager de manière irrémédiable le...
  • Page 38: Pour Éviter Toute Détérioration

    Section Connexion Pour éviter toute c’est-à-dire le connecteur bleu au port bleu, le noir au noir, etc. détérioration ! Pour raccorder l’amplificateur de puis- sance à d’autres unités, veuillez vous repor- AVERTISSEMENT ter au mode d’emploi concerné. ! Utilisez des haut-parleurs de plus de 50 W ! Un circuit BPTL unique étant employé, ne (valeur de sortie) et avec une impédance reliez pas directement l’extrémité...
  • Page 39: Pièces Fournies

    Section Connexion Pièces fournies Ce produit Cordon d’alimentation Antenne GPS Microphone Câble USB Étiquettes d’identifica- (2 pièces) tion des câbles USB Attache de blocage*1 Câble de conversion du bus du véhicule*2 Remarques ! (*1) Ces pièces sont fournies avec AVIC- F77DAB.
  • Page 40: Branchement Du Cordon D'alimentation (1)

    Section Connexion Branchement du cordon d’alimentation (1) Remarque En fonction des types de véhicules, la fonction de *2 et *4 peut être différente. Dans ce cas, veillez à connecter *1 à *4 et *3 à *2 comme illustré dans la figure. Connectez ensemble les fils de même couleur.
  • Page 41 Section Connexion Ce produit 14 cm Jaune/noir (MUTE) Si vous utilisez un équipement avec une fonction silence, connectez cet équipement sur le fil Audio Mute. Dans le cas contraire, ne rien connecter sur ce fil. Alimentation Remarque Fusible (10 A) La source audio sera coupée ou atténuée, alors que les sons Cordon d’alimentation suivants ne seront ni coupés ni atténués.
  • Page 42: Branchement Du Cordon D'alimentation (2)

    La position du circuit de détection de vitesse et la position du contacteur de frein à main varient selon le modèle du véhicule. Pour plus de détails, contactez votre revendeur Pioneer agréé ou un installateur professionnel. Vert clair (PARKING BRAKE) Usato per rilevare lo stato ON/OFF del freno di stazionamento.
  • Page 43 Section Connexion Ce produit Alimentation Cordon d’alimentation Violet/blanc (REVERSE-GEAR SIGNAL INPUT) Il est connecté afin que ce produit puisse détecter si le véhicule avance ou recule. Connectez le fil violet/blanc sur le fil dont la tension varie lorsque la marche arrière est enclenchée.
  • Page 44: Branchement Du Système

    Pour une réception radio numérique améliorée, assurez-vous qu’une antenne radio numérique avec entrée d’alimentation fantôme (type actif) est Ce produit utilisée. Pioneer recommande l’utilisation de AN-DAB1 ou CA-AN-DAB.001 (vendu séparément). La consommation actuelle de l’antenne Radio numérique ne doit pas dépasser 100 mA.
  • Page 45: Connexion À Un Amplificateur De Puissance Vendu Séparément

    Section Connexion Connexion à un amplificateur de puissance vendu séparément Amplificateur de puissance (vendu séparément) Câbles RCA Sorties arrière (vendus séparément) (REAR OUTPUT) Amplificateur de puissance (vendu séparément) 15 cm Amplificateur de puissance (vendu séparément) Sorties avant (FRONT OUTPUT) Ce produit Alimentation Blanc, rouge (SWL, SWR) Cordon d’alimentation...
  • Page 46: Connexion D'un Iphone, Ipod, Appareil Android Ou Appareil Mirrorlink

    Section Connexion Connexion d’un iPhone, iPod, appareil Android ou appareil MirrorLink ™ Trouvez votre appareil et la fonction que vous voulez utiliser dans la liste ci-dessous, puis reportez-vous à la page concernant la connexion. iPhone 6 Plus/iPhone 6/iPhone 5s/iPhone 5c/iPhone 5 iPod (audio) Reportez-vous à...
  • Page 47 Section Connexion Appareil Android Port HDMI Reportez-vous à la page 51, Connexion d’un périphérique Android via un port HDMI. F77DAB AppRadio Mode Port MHL Reportez-vous à la page 51, Connexion d’un périphérique Android via un port MHL. F77DAB F70DAB ™ Reportez-vous à...
  • Page 48: Apposition D'étiquettes D'identification Aux Câbles Usb

    Section Connexion Apposition d’étiquettes Connexion d’un iPhone d’identification aux câbles avec connecteur Lightning Remarques Apposez les étiquettes d’identification aux câ- ! Pour en savoir plus sur la connexion d’un péri- bles USB avant d’installer ce produit dans un phérique externe à l’aide d’un câble vendu sé- véhicule.
  • Page 49: Connexion Via Le Port Hdmi

    Section Connexion = Pour en savoir plus, reportez-vous à la page Connexion via le port HDMI ® 52, Fixation du câble HDMI haute vitesse. F77DAB Les câbles suivants sont nécessaires pour la Connexion via l’entrée RGB connexion. ! Câble d’interface HDMI pour iPod / iPhone F70DAB F970DAB F970BT (CD-IH202) (vendu séparément) Les câbles suivants sont nécessaires pour la...
  • Page 50: Connexion D'un Iphone Avec Connecteur À 30Broches

    Section Connexion Connexion d’un iPhone avec Connexion via l’entrée RGB connecteur à 30 broches Le câble d’interface USB pour iPod / iPhone (CD-IU201S) (vendu séparément) est néces- Remarques saire pour la connexion. ! Pour en savoir plus sur la connexion d’un péri- Port USB 1 Ce produit phérique externe à...
  • Page 51: Connexion D'un Périphérique Android

    Section Connexion Connexion d’un Connexion d’un périphérique Android via un port MHL périphérique Android ™ F77DAB Ce produit Le kit de connexion aux applications (CD- AH200) (vendu séparément) est nécessaire pour la connexion. Remarques ! Pour en savoir plus sur la connexion d’un péri- Port HDMI Port USB 2 phérique externe à...
  • Page 52: Connexion D'un Appareil Android Ou Mirrorlink

    Section Connexion ® Connexion d’un appareil Fixation du câble HDMI Android ou MirrorLink haute vitesse ™ Le câble d’interface USB utilisé avec les appa- F77DAB ™ reils Android ou MirrorLink (CD-MU200) ® Veillez à fixer le câble HDMI haute vitesse à (vendu séparément) est nécessaire pour la l’aide de l’attache de blocage lorsque vous connexion.
  • Page 53: Connexion D'une Caméra De Rétrovisée

    Section Connexion Connexion d’une caméra Caméra de rétrovisée de rétrovisée (ND-BC6) (vendu séparément) Quand ce produit est utilisé avec une caméra de rétrovisée, il est possible de commuter au- tomatiquement entre le signal vidéo et l’image Vers la sortie vidéo de rétrovisée quand le levier de vitesse est placé...
  • Page 54: Connexion D'un Élément Vidéo Externe

    Section Connexion Connexion d’un élément Connexion d’un composant vidéo vidéo externe Ce produit Utilisation de l’entrée AV Vous pouvez connecter un élément vidéo ex- terne ou une caméra externe à ce produit. Connexion d’une caméra externe Ce produit 15 cm 23 cm Jaune (VIDEO INPUT)
  • Page 55: Utilisation D'une Entrée Aux

    Section Connexion Utilisation d’une entrée AUX ATTENTION Ce produit Veillez à utiliser un câble AV mini-jack (CD-RM10) (vendu séparément) pour le raccordement. Si vous utilisez un autre type de câble, la position Entrée AUX du raccordement pourrait différer, entraînant une déformation du son et des images.
  • Page 56: Connexion D'un Périphérique Hdmi

    Section Connexion Connexion d’un Connexion de l’afficheur périphérique HDMI arrière F77DAB Ce produit Ce produit Jaune (V OUT) Sortie audio arrière Câble connecteur mini-prise (vendu Câble RCA séparément) (vendu séparément) Vers les entrées Vers la entrée audio vidéo Écran arrière avec prises d’entrée RCA (vendu séparément) Remarques...
  • Page 57: Installation

    Section Installation Précautions à prendre canisme de coulissement d’un siège, car ceci pourrait provoquer un court-circuit. avant l’installation ! Vérifiez le bon fonctionnement des autres équipements du véhicule après l’installa- ATTENTION tion de ce produit. ! Ne jamais installer ce produit dans un en- ! N’installez pas ce produit dans un endroit droit ou de telle sorte qu’il : où...
  • Page 58: Avant De Procéder À L'installation

    Section Installation — En plein soleil, comme sur le dessus du De plus, vous devez placer ou acheminer le fil d’antenne aussi loin que possible des autres tableau de bord. — Endroits susceptibles d’être exposés à fils d’antenne. Ne les attachez, ne les placez ou ne les acheminez pas ensemble, ni ne les la pluie, près de la portière ou sur le croisez.
  • Page 59: Pièces Fournies

    Section Installation ! Lors de l’installation de l’appareil, laissez suffisamment d’espace derrière le panneau arrière pour permettre une dissipation cor- recte de la chaleur et enroulez tout câble gênant de façon qu’il n’obstrue pas les ori- fices de ventilation. Vis à tête bombée Vis à...
  • Page 60: Avant D'installer Ce Produit

    Section Installation Avant d’installer ce produit Fixez le manchon de montage en utili- sant un tournevis pour courber les pattes Retirez l’anneau de garniture. métalliques (90°) en place. Étirez vers l’extérieur la partie supérieure et in- férieure de l’anneau de garniture pour le reti- rer.
  • Page 61: Installation En Utilisant Les Trous De Vis Sur Les Côtés De Ce Produit

    Section Installation Attachez l’anneau de garniture. Si le cliquet interfère avec l’installation, vous pouvez le replier complètement vers le bas. 1 Support de montage radio d’usine 2 Tableau de bord ou console 3 Vis à tête bombée ou vis à tête plate 1 Anneau de garniture 2 Fente Veillez à...
  • Page 62: Installation De L'antenne Gps

    Section Installation Installation de l’antenne GPS Pièces fournies ATTENTION Ne coupez pas le câble d’antenne GPS pour le raccourcir et n’utilisez pas d’extension pour le rallonger. Le fait d’intervenir sur le Antenne GPS Plaque métallique câble d’antenne risque d’entraîner un court- circuit ou un dysfonctionnement et d’endom- mager de manière irrémédiable ce produit.
  • Page 63: Installation De L'antenne Dans Le Véhicule (Sur Le Tableau De Bord Ou La Lunette Arrière)

    Section Installation Installation de l’antenne dans le véhicule (sur le tableau de bord ou la lunette arrière) AVERTISSEMENT N’installez pas l’antenne GPS par dessus un capteur ou une bouche d’air du tableau de bord du véhicule, car cela pourrait perturber le fonctionnement normal du capteur ou de la bouche d’air et compromettre la capacité...
  • Page 64: Installation Du Microphone

    Section Installation Installation du microphone Fixez l’agrafe pour micro au pare-soleil. ! Installez le microphone dans un endroit permettant une bonne réception de la voix du conducteur. ! Éteignez ce produit (ACC OFF) avant de connecter le microphone. Pièces fournies Microphone Bande adhésive à...
  • Page 65: Installation Sur La Colonne De Direction

    Section Installation Installation sur la colonne de direction Retirez la base du microphone de l’a- grafe pour micro en faisant glisser la base du microphone tout en enfonçant la lan- guette. 1 Bande adhésive à double face 2 Serre-fils Utilisez des serre-fils vendus séparément pour fixer le fil conducteur aux endroits né- 1 Microphone cessaires dans le véhicule.
  • Page 66: Après L'installation

    Section Après l’installation Après avoir installé ce produit Roulez sur une route sans obstacle jus- qu’à ce que le GPS commence à recevoir le Raccordez à nouveau la borne négative signal normalement. (–) de la batterie du véhicule. Vérifiez une nouvelle fois que toutes les conne- Remarque xions ont été...
  • Page 67 Per evitare disturbi elettromagnetici 92 Collegamento a un amplificatore in vendita Prima dell’installazione 93 separatamente 79 – Per gli utenti dei modelli AVIC-F77DAB Collegamento di un iPhone, iPod, dispositivo e AVIC-F70DAB 93 Android o dispositivo MirrorLink™ 80 Installazione del prodotto 93 Applicazione di etichette identificative ai cavi –...
  • Page 68: Precauzioni

    Sezione Precauzioni Il nuovo prodotto e il Se compare la seguente icona, la descrizio- ne è valida solo per il modello indicato. presente manuale Esempio: ! Le caratteristiche di navigazione di questo F77DAB prodotto (e la telecamera di visione poste- riore, se acquistata) sono da considerare soltanto come un ausilio alla conduzione del proprio veicolo.
  • Page 69: Misure Di Sicurezza Importanti

    Misure di sicurezza importanti sicurezza durante l’uso dell’automobile. In caso di incidenti, le lesioni possono essere AVVERTENZA Pioneer raccomanda di non installare perso- molto più gravi se la cintura di sicurezza nalmente il prodotto. Questo prodotto è pro- non è allacciata correttamente.
  • Page 70: Connessione

    Sezione Connessione ! Non posare i fili lungo percorsi in cui risul- Precauzioni prima di tano esposti a temperature elevate. Se l’i- collegare il sistema solamento si scalda, il filo può danneggiarsi e causare cortocircuiti o AVVERTENZA malfunzionamenti e danni permanenti al Non manomettere in alcun modo o disabilita- prodotto.
  • Page 71: Per Evitare Danni

    Sezione Connessione ! Fissare i connettori dello stesso colore alla Per evitare danni corrispondente porta colorata, cioè il con- nettore blu alla porta blu, il nero a quella AVVERTENZA ! Utilizzare diffusori con potenza superiore nera, ecc. ! Fare riferimento al manuale dell’utente per a 50 W (valore di uscita) e tra 4 W e 8 W (va- i dettagli sul collegamento dell’amplificato- lore di impedenza).
  • Page 72: Parti In Dotazione

    Sezione Connessione Parti in dotazione Questo prodotto Cavo di alimentazione Antenna GPS Microfono Cavo USB Etichette identificative (2 pezzi) del cavo USB Fascetta di bloccag- Cavo di conversione gio*1 Bus per veicolo*2 Note ! (*1) Parti in dotazione con il modello AVIC- F77DAB.
  • Page 73 Sezione Connessione...
  • Page 74: Collegamento Del Cavo Di Alimentazione (1)

    Sezione Connessione Collegamento del cavo di alimentazione (1) Nota A seconda del tipo di veicolo, la funzione di 2* e 4* potrebbe essere diversa. In questo caso, accertarsi di collegare 1* a 4* e 3* a 2* come mostrato in figura. Collegare insieme i cavi dello stesso colore.
  • Page 75 Sezione Connessione Questo prodotto 14 cm Giallo/nero (MUTE) Se si utilizza un apparecchio dotato di funzione di silenziamento, collegarlo al cavo di silenziamento audio. In caso contrario, non collegare questo cavo. Alimentazione Nota Fusibile (10 A) La sorgente audio viene disattivata o attenuata, mentre i Cavo di alimentazione seguenti suoni restano attivi e non vengono attenuati.
  • Page 76: Collegamento Del Cavo Di Alimentazione (2)

    La posizione del circuito di rilevamento della velocità e la posizione dell’interruttore del freno di stazionamento possono variare in base al modello del veicolo. Per i dettagli, rivolgersi al proprio rivenditore autorizzato Pioneer oppure a un tecnico installatore. Verde chiaro (PARKING BRAKE) Usato per rilevare lo stato ON/OFF del freno di stazionamento.
  • Page 77 Sezione Connessione Questo prodotto Alimentazione Cavo di alimentazione Violetto/bianco (REVERSE-GEAR SIGNAL INPUT) Va collegato per consentire al prodotto di rilevare quando il veicolo si sta spostando in avanti o indietro. Collegare il cavetto viola/bianco al cavetto la cui tensione cambia quando è...
  • Page 78: Collegamento Del Sistema

    Per ottenere una ricezione radio digitale controllare di Questo prodotto utilizzare un’antenna radio digitale con ingresso di alimentazione phantom (tipo attivo). Pioneer consiglia di usare AN-DAB1 o CA-AN-DAB.001 (venduto separatamente). Il consumo di corrente dell’antenna radio digitale dovrebbe essere 100 mA o inferiore.
  • Page 79: Collegamento A Un Amplificatore In Vendita Separatamente

    Sezione Connessione Collegamento a un amplificatore in vendita separatamente Amplificatore di potenza (venduto separatamente) Cavi RCA Uscite posteriori (venduti separatamente) (REAR OUTPUT) Amplificatore di potenza (venduto separatamente) 15 cm Amplificatore di potenza (venduto separatamente) Uscite anteriori (FRONT OUTPUT) Questo prodotto Alimentazione Bianco, Rosso (SWL, SWR) Cavo di alimentazione...
  • Page 80: Collegamento Di Un Iphone, Ipod, Dispositivo Android O Dispositivo Mirrorlink

    Sezione Connessione Collegamento di un iPhone, iPod, dispositivo Android o dispositivo MirrorLink ™ Trovare il proprio dispositivo e le funzioni che si desidera utilizzare nell’elenco di seguito riportato e fare riferimento alla pagina per il collegamento. iPhone 6 Plus/iPhone 6/iPhone 5s/iPhone 5c/iPhone 5 iPod (audio) Vedere Collegamento tramite la porta USB a pagina 82.
  • Page 81 Sezione Connessione Dispositivo Android Porta HDMI Vedere Collegamento di un dispositivo Android ad una porta HDMI a pagina F77DAB AppRadio Mode Porta MHL Vedere Collegamento di un dispositivo Android ad una porta MHL a pagina ™ F77DAB Vedere Collegamento di un dispositivo Android o dispositivo MirrorLink a pa- F70DAB gina 86.
  • Page 82: Applicazione Di Etichette Identificative Ai Cavi Usb

    Sezione Connessione Applicazione di etichette Collegamento di un iPhone identificative ai cavi USB con connettore Lightning Applicare etichette identificative ai cavi USB Note prima di installare questo prodotto in un veico- ! Per dettagli su come collegare un dispositivo esterno utilizzando un cavo venduto separata- Collegare i cavi USB alle porte USB 1 e 2 mente, consultare il manuale fornito con il sul retro di questo prodotto.
  • Page 83: Collegamento Tramite La Porta Hdmi

    Sezione Connessione Collegamento tramite la porta Nota HDMI ® Quando si collega il cavo HDMI ad alta velocità, utilizzare la fascetta di bloccaggio per fissarlo sal- F77DAB damente. Per il collegamento sono necessari i cavi se- = Per ulteriori dettagli, vedere Fissaggio del cavo ®...
  • Page 84: Collegamento Di Un Iphone Con Connettore A 30 Pin

    Sezione Connessione Collegamento tramite Porta USB 1 Questo prodotto l’ingresso AUX Per il collegamento è necessario il cavo di in- terfaccia USB per iPod / iPhone (CD-IU201V) (venduto separatamente). Porta USB 1 Questo prodotto Ingresso RGB iPhone con connettore Lightning Porta USB 2 Ingresso AUX Prolunga per connettore mini...
  • Page 85: Collegamento Tramite L'ingresso Rgb

    Sezione Connessione Collegamento tramite Collegamento dei l’ingresso RGB dispositivi Android ™ Per il collegamento è necessario il cavo di in- F77DAB terfaccia USB per iPod / iPhone (CD-IU201S) (venduto separatamente). Per il collegamento è necessario il kit di colle- gamento per applicazioni (CD-AH200) (vendu- Porta USB 1 Questo prodotto to separatamente).
  • Page 86: Collegamento Di Un Dispositivo Android Ad Una Porta Mhl

    Sezione Connessione Collegamento di un dispositivo Collegamento di un Android ad una porta MHL dispositivo Android o dispositivo MirrorLink ™ Questo prodotto Per il collegamento è necessario il cavo di in- terfaccia USB da utilizzare con dispositivi Mir- ™ rorLink (CD-MU200) (venduto separatamente).
  • Page 87: Fissaggio Del Cavo Hdmi Ad Alta Velocità

    Sezione Connessione ® Fissaggio del cavo HDMI Collegamento di una ad alta velocità telecamera di visione posteriore F77DAB Quando al prodotto si collega una telecamera ® Assicurarsi di fissare il cavo HDMI ad alta ve- di visione posteriore, innestando REVERSE locità...
  • Page 88: Collegamento Di Un Componente Video Esterno

    Sezione Connessione Collegamento di un Telecamera di visione posteriore componente video esterno (ND-BC6) (venduta separatamente) Uso di un ingresso AV È possibile collegare un componente video esterno o una fotocamera esterna a questo All’uscita video prodotto. Cavo RCA (fornito con ND-BC6) Collegamento di una fotocamera esterna Questo prodotto Questo prodotto...
  • Page 89: Uso Dell'ingresso Aux

    Sezione Connessione Collegamento di un componente video Uso dell’ingresso AUX Questo prodotto Questo prodotto Ingresso AUX Cavo AV con 15 cm mini-spinotto 23 cm (CD-RM10) (venduto separatamente) Giallo (VIDEO INPUT) Rosso, bianco Rosso, bianco Giallo (AUDIO INPUT) Alle uscite audio All’uscita video All’uscita video Alle uscite audio...
  • Page 90: Collegamento Di Un Dispositivo Hdmi

    Sezione Connessione Collegamento di un ATTENZIONE dispositivo HDMI Per il cablaggio, assicurarsi di usare un cavo AV con mini-spinotto (CD-RM10) (venduto separata- F77DAB mente). Se si usano altri cavi vi è la possibilità che la posizione di cablaggio possa variare e che Questo prodotto le immagini e i suoni risultino disturbati.
  • Page 91: Collegamento Del Display Posteriore

    Sezione Connessione Collegamento del display posteriore Questo prodotto Giallo (V OUT) Uscita audio posteriore Cavo mini plug (venduto separatamente) Agli ingressi All’ingresso audio video Display posteriore con connettori d’ingresso RCA (venduto separatamente) Quando si utilizza un display posteriore collegato a un’uscita video posteriore AVVERTENZA Non installare MAI il display posteriore in un...
  • Page 92: Installazione

    Sezione Installazione Precauzioni prima smo di scorrimento dei sedili, causando cortocircuiti. dell’installazione ! Verificare che le altre apparecchiature del veicolo funzionino correttamente dopo ATTENZIONE aver installato il prodotto. ! Non installare mai questo produtto in luo- ! Il prodotto non deve essere installato ove ghi dove, o in maniera che: possa (i) ostruire la visibilità...
  • Page 93: Prima Dell'installazione

    Sezione Installazione ! Installare il prodotto orizzontalmente su Prima dell’installazione una superficie con una tolleranza tra 0 e 30 ! Rivolgersi al più vicino rivenditore se l’in- gradi (entro 5 gradi a destra o a sinistra). stallazione richiede la trapanatura di fori o L’installazione non corretta dell’unità, con altre modifiche del veicolo.
  • Page 94: Parti In Dotazione

    Sezione Installazione ! I cavi non devono coprire la zona mostrata Prima di installare questo prodotto nella figura sotto. Ciò è necessario per con- Rimuovere la cornice di finitura. sentire agli amplificatori e al meccanismo Per rimuovere la cornice di finitura occorre ti- di navigazione di dissipare il calore.
  • Page 95: Installazione Usando I Fori Delle Viti Sul Lato Del Prodotto

    Sezione Installazione Assicurare la fascetta di montaggio uti- Fissare la cornice di finitura. lizzando un cacciavite per piegare le lin- guette metalliche (90°) in posizione. 1 Cruscotto 2 Supporto Installare il prodotto nel supporto. 1 Cornice di finitura 2 Scanalatura Fissare la cornice di finitura con il lato che presenta la scanalatura verso il basso.
  • Page 96 Sezione Installazione Se la linguetta ostacola l'installazione, piegarla verso il basso. 1 Staffa di montaggio radio predisposta in fabbrica 2 Cruscotto o console 3 Vite a testa tonda o vite a testa piatta Assicurarsi di utilizzare le viti fornite con questo prodotto.
  • Page 97: Installazione Dell'antenna Gps

    Sezione Installazione Installazione dell’antenna GPS Parti in dotazione ATTENZIONE Non tagliare il cavetto dell’antenna GPS per accorciarlo e non usare una prolunga per al- lungarlo. L’alterazione del cavo dell’antenna Antenna GPS Lastra metallica può causare cortocircuiti o malfunzionamenti e danni permanenti al prodotto. Note sull’installazione ! L’antenna deve essere installata su una su- perficie piana dove le onde radio siano...
  • Page 98: Quando Si Installa L'antenna All'interno Del Veicolo (Sul Cruscotto O Sul Piano Portaoggetti Posteriore)

    Sezione Installazione Quando si installa l’antenna all’interno del veicolo (sul cruscotto o sul piano portaoggetti posteriore) AVVERTENZA Non installare l’antenna GPS su eventuali sensori o aperture presenti sul cruscotto del veicolo poiché ciò potrebbe interferire con il corretto funzionamento di tali sensori e aper- ture e compromettere il corretto fissaggio della placca metallica dell’antenna GPS al cruscotto.
  • Page 99: Installazione Del Microfono

    Sezione Installazione Installazione del microfono Fissare il morsetto del microfono al pa- rasole. ! Installare il microfono in un luogo dove la sua direzione e distanza dal conducente rendano facile il rilevamento della voce. ! Accertarsi di spegnere il prodotto (ACC OFF) prima di collegare il microfono.
  • Page 100: Installazione Sulla Colonna Di Sterzo

    Sezione Installazione Installazione sulla colonna di sterzo Scollegare la base del microfono dal morsetto facendola scorrere mentre si preme la linguetta. 1 Nastro a doppio lato 2 Morsetti Usare dei morsetti (venduti separatamente) 1 Microfono per fissare il cavo nei punti necessari all’in- 2 Linguetta terno del veicolo.
  • Page 101: Dopo L'installazione

    Sezione Dopo l’installazione Dopo l’installazione del Percorrere una strada senza ostacoli fino a quando il GPS non inizia a ricevere il prodotto segnale normalmente. Ricollegare il terminale negativo (–) della batteria del veicolo. Nota Innanzitutto controllare due volte che tutti i Dopo avere installato questo prodotto, assicurarsi collegamenti siano corretti e che questo pro- di controllare in una posizione sicura che il veico-...
  • Page 102 126 Conexión al amplificador de potencia que se Antes de la instalación 127 vende por separado 113 – Para usuarios de AVIC-F77DAB y AVIC- Conectar un iPhone, iPod, dispositivo F70DAB 127 Android o dispositivo MirrorLink™ 114 Instalación de este producto 127 Colocación de etiquetas de identificación en...
  • Page 103: Precauciones

    Sección Precauciones Su nuevo producto y este Si se muestra el siguiente icono, la descrip- ción es válida solo para el modelo que se manual muestra. ! Las funciones de navegación de este pro- p. ej. ducto (y la opción de cámara de retrovisor, F77DAB si dispone de ella) están pensadas única- mente para ayudarle en la conducción de...
  • Page 104: Precauciones Importantes

    ! Recuerde ponerse siempre el cinturón de ADVERTENCIA Pioneer aconseja que no realice usted mismo seguridad cuando conduzca su vehículo. la instalación del producto. Este producto se En el caso de sufrir un accidente, sus lesio- ha diseñado para que su instalación la realice...
  • Page 105: Conexión

    Sección Conexión ! No enrute cables que vayan a estar some- Precauciones antes de tidos a altas temperaturas. Si se calienta conectar el sistema el aislamiento, los cables pueden resultar dañados y, como consecuencia, puede ADVERTENCIA producirse un cortocircuito o una avería y No trate de forzar ni desactivar el sistema de el producto puede sufrir un deterioro per- interbloqueo del freno de mano que está...
  • Page 106: Para Impedir Daños

    Sección Conexión Para impedir daños color, es decir, el conector azul al puerto azul, el conector negro al puerto negro, etc. ! Consulte el manual del propietario para ob- ADVERTENCIA ! Utilice altavoces con capacidad superior a tener información sobre la conexión del 50 W (valor de salida) y entre 4 W a 8 W amplificador de potencia y de otras unida- des y, a continuación, realice las conexio-...
  • Page 107: Piezas Suministradas

    Sección Conexión Piezas suministradas Este producto Cable de alimentación Antena GPS Micrófono Cable USB Etiquetas de identifica- (2 piezas) ción del cable USB Presilla de sujeción*1 Cable de conversión para bus del ve- hículo*2 Notas ! (*1) Estas piezas se suministran con AVIC- F77DAB.
  • Page 108: Conexión Del Cable De Alimentación (1)

    Sección Conexión Conexión del cable de alimentación (1) Nota Según los tipos de vehículos, la función de *2 y *4 puede ser diferente. En ese caso, asegúrese de conectar *1 a *4 y *3 a *2, tal y como se muestra en la figura. Conecte cables del mismo color.
  • Page 109 Sección Conexión Este producto 14 cm Amarillo/negro (MUTE) Si utiliza un equipo con función de silenciamiento, conecte el equipo al cable de silenciamiento de audio. En caso contrario, deje este cable sin conectar. Fuente de alimentación Nota Fusible (10 A) La fuente de audio se silenciará...
  • Page 110: Conexión Del Cable De Alimentación (2)

    La posición del circuito de detección de velocidad y la posición del interruptor del freno de mano varían según el modelo del vehículo. Para los detalles, consulte a su distribuidor autorizado de Pioneer o a un instalador profesional. Verde claro (PARKING BRAKE) Se utiliza para detectar el estado ACT./DES.
  • Page 111 Sección Conexión Este producto Fuente de alimentación Cable de alimentación Violeta/blanco (REVERSE-GEAR SIGNAL INPUT) Esta conexión se realiza para que este producto pueda detectar si el vehículo se está moviendo hacia delante o hacia atrás. Conecte el cable violeta/blanco al cable cuyo voltaje cambia cuando la palanca de cambios se coloca en la posición de marcha atrás.
  • Page 112: Conexión Del Sistema

    Este producto entrada de alimentacion fantasma (phantom) (tipo activa). Pioneer recomienda utilizar AN-DAB1 o CA-AN-DAB.001 (vendido por separado). La antena para radio digital debe tener un cosumo de corriente de 100 mA o menos.
  • Page 113: Conexión Al Amplificador De Potencia Que Se Vende Por Separado

    Sección Conexión Conexión al amplificador de potencia que se vende por separado Amplificador de potencia (vendido por separado) Cables RCA Salidas traseras (vendidos por separado) (REAR OUTPUT) Amplificador de potencia (vendido por separado) 15 cm Amplificador de potencia (vendido por separado) Salidas frontales (FRONT OUTPUT) Este producto...
  • Page 114: Conectar Un Iphone, Ipod, Dispositivo Android O Dispositivo Mirrorlink

    Sección Conexión Conectar un iPhone, iPod, dispositivo Android o dispositivo MirrorLink ™ Encuentre su dispositivo y la función que desea manejar en la siguiente lista y, para más información acerca de la co- nexión, consulte la página. iPhone 6 Plus/iPhone 6/iPhone 5s/iPhone 5c/iPhone 5 iPod (audio) Consulte Conexión mediante el puerto USB en la página 116.
  • Page 115 Sección Conexión Dispositivo Android Puerto HDMI Consulte Conexión de un dispositivo Android con un puerto HDMI en la pági- na 119. F77DAB AppRadio Mode Puerto MHL Consulte Conexión de un dispositivo Android con un puerto MHL en la página 120. F77DAB F70DAB ™...
  • Page 116: Colocación De Etiquetas De Identificación En Los Cables Usb

    Sección Conexión Colocación de etiquetas de Conexión de un iPhone con identificación en los cables conector Lightning Notas Coloque etiquetas de identificación en los ca- ! Para obtener más información sobre cómo co- bles USB antes de instalar este producto en nectar un dispositivo externo mediante un un vehículo.
  • Page 117: Conexión Mediante El Puerto Hdmi

    Sección Conexión Conexión mediante el puerto HDMI Nota ® Cuando conecte el cable HDMI de alta veloci- F77DAB dad, utilice la presilla de sujeción para fijarlo Se necesitan los siguientes cables para la co- bien. nexión. = Para los detalles, consulte Fijación del cable ! Cable de interfaz HDMI para iPod / iPhone ®...
  • Page 118: Conexión De Un Iphone Con Conector De

    Sección Conexión Conexión mediante la entrada AUX Puerto USB 1 Este producto Para realizar la conexión es necesario un cable de interfaz USB para iPod / iPhone (CD- IU201V) (vendido por separado). Puerto USB 1 Este producto Entrada RGB iPhone con conector Lightning Puerto USB 2 Entrada AUX...
  • Page 119: Conexión Mediante La Entrada Rgb

    Sección Conexión Conexión mediante la entrada RGB Conexión de dispositivos Android ™ Para realizar la conexión es necesario un cable de interfaz USB para iPod / iPhone (CD- F77DAB IU201S) (vendido por separado). Para realizar la conexión es necesario el kit de Puerto USB 1 Este producto conectividad de aplicación (CD-AH200) (vendi-...
  • Page 120: Conexión De Un Dispositivo Android Con Un Puerto Mhl

    Sección Conexión Conexión de un dispositivo Conectar el dispositivo Android con un puerto MHL Android o MirrorLink ™ Para realizar la conexión es necesario un Este producto cable de interfaz USB para el uso con disposi- ™ tivos Android y MirrorLink (CD-MU200) (ven- dido por separado).
  • Page 121: Fijación Del Cable Hdmi De Alta Velocidad

    Sección Conexión ® Fijación del cable HDMI Conexión de una cámara de alta velocidad retrovisor Cuando se utiliza este producto con una cá- F77DAB mara de retrovisor, se puede cambiar automá- ® Asegúrese de fijar el cable HDMI de alta velo- ticamente de la imagen de vídeo a la imagen cidad con la presilla de sujeción cuando co- de vista trasera cuando se desplaza la palanca...
  • Page 122: Conexión Del Componente De Vídeo Externo

    Sección Conexión Conexión del componente Cámara de retrovisor de vídeo externo (ND-BC6) (se vende por separado) Utilización de la entrada AV Puede conectar un componente de vídeo ex- terno o una cámara externa a este producto. A la salida de vídeo Cable RCA Conexión de una cámara externa (incluido con ND-BC6)
  • Page 123: Utilización De Una Entrada Aux

    Sección Conexión Conexión del componente de vídeo Utilización de una entrada AUX Este producto Este producto Entrada AUX Cable AV minijack 15 cm (CD-RM10) 23 cm (vendido por separado) Amarillo (VIDEO INPUT) Rojo, blanco Rojo, blanco Amarillo (AUDIO INPUT) A las salidas A la salida A las salidas A la salida...
  • Page 124: Conexión De Un Dispositivo Hdmi

    Sección Conexión Conexión de un dispositivo PRECAUCIÓN HDMI Asegúrese de utilizar un cable AV minijack (CD- RM10) (se vende por separado) para el cableado. F77DAB Si utiliza otros cables, la posición del cableado puede diferir, provocando imágenes y sonidos in- Este producto terrumpidos.
  • Page 125: Conexión De La Pantalla Trasera

    Sección Conexión Conexión de la pantalla trasera Este producto Amarillo (V OUT) Salida de audio trasera Cable miniconector (vendido por separado) A las entradas A la entrada de audio de vídeo Pantalla trasera con conectores de entrada RCA (vendido por separado) Uso de una pantalla trasera conectada a la salida de vídeo trasera...
  • Page 126: Instalación

    Sección Instalación ! Asegúrese de que los cables no queden Precauciones antes de la atrapados en una puerta ni en el mecanis- instalación mo de deslizamiento de un asiento porque puede producirse un cortocircuito. PRECAUCIÓN ! Compruebe que el resto del equipo de su ! Nunca instale este producto en lugares en vehículo funciona correctamente después los que, o de manera que:...
  • Page 127: Antes De La Instalación

    Para usuarios de AVIC-F77DAB y AVIC-F70DAB No instale este producto en un lugar en el que la apertura del panel LCD se vea obstruida por 30°...
  • Page 128: Piezas Suministradas

    Sección Instalación ! Cuando instale el sistema, para garantizar Piezas suministradas una correcta dispersión del calor durante Las piezas marcadas con un asterisco (*) el uso de esta unidad, asegúrese de dejar están instaladas previamente. un amplio espacio por detrás del panel tra- sero y enrollar los cables sueltos de modo que no bloqueen las aberturas de ventila- ción.
  • Page 129: Antes De Instalar Este Producto

    Sección Instalación Antes de instalar este producto Fije el manguito de montaje utilizando un destornillador para doblar las pestañas Extraiga el anillo embellecedor. metálicas (90°) y colocarlas en su lugar. Extienda la parte superior y la parte inferior del anillo embellecedor hacia fuera para ex- traer el anillo embellecedor.
  • Page 130: Instalación Utilizando Los Orificios De Tornillo Del Lateral De Este Producto

    Sección Instalación Coloque el anillo embellecedor. Si la pestaña interfiere con la instalación, puede doblarla para apartarla. 1 Anillo embellecedor 2 Ranura Coloque el anillo embellecedor con el lado que tiene una ranura mirando hacia abajo. Instalación utilizando los orificios de tornillo del lateral de este producto 1 Soporte de montaje de radio de fábrica 2 Tablero de instrumentos o consola...
  • Page 131: Instalación De La Antena Gps

    Sección Instalación Instalación de la antena GPS Piezas suministradas PRECAUCIÓN No corte el cable de la antena GPS para redu- cir su longitud, ni utilice una extensión para alargarlo. La alteración del cable de la antena Antena GPS Hoja metálica puede provocar un cortocircuito o una avería y daños permanentes en el producto.
  • Page 132: Cuando Instale La Antena En El Interior Del Vehículo (En El Tablero De Instrumentos O En La Bandeja Trasera)

    Sección Instalación Cuando instale la antena en el interior del vehículo (en el tablero de instrumentos o en la bandeja trasera) ADVERTENCIA No instale la antena GPS sobre sensores o aberturas de ventilación en el tablero de ins- trumentos del vehículo, ya que eso puede afectar al funcionamiento correcto de tales sensores o aberturas de ventilación y puede poner en riesgo la habilidad de adherencia...
  • Page 133: Instalación Del Micrófono

    Sección Instalación Instalación del micrófono Fije el clip del micrófono al parasol. ! Instale el micrófono de tal forma que esté correctamente orientado y a la distancia correcta del conductor para que resulte fácil recoger la voz del conductor. ! Asegúrese de apagar (ACC OFF) el produc- to antes de conectar el micrófono.
  • Page 134: Instalación En La Columna De Dirección

    Sección Instalación Instalación en la columna de dirección Desconecte la base del micrófono del clip del mismo deslizándola a la vez que pulsa la lengüeta. 1 Cinta de doble cara 2 Abrazaderas Utilice abrazaderas (se venden por separa- 1 Micrófono do) para fijar el cable en el interior del ve- 2 Lengüeta hículo donde sea necesario.
  • Page 135: Después De La Instalación

    Sección Después de la instalación Después de instalar este Conduzca a través de una carretera des- pejada hasta que el GPS comience a recibir producto la señal de forma normal. Vuelva a conectar el terminal negativo (–) de la batería del vehículo. Nota Primero, cerciórese de que todas las conexio- Tras instalar este producto, asegúrese de compro-...
  • Page 136 Zur Vermeidung elektromagnetischen Anschluss an den separat erhältlichen Rauschens 161 Leistungsverstärker 147 Vor dem Einbau 161 Anschluss eines iPhone, iPod, Android- oder – Für Benutzer von AVIC-F77DAB und MirrorLink™-Gerätes 148 AVIC-F70DAB 161 USB-Kabel mit Kennzeichnungsetiketten Einbau dieses Produkts 161 markieren 150 –...
  • Page 137: Vorsichtsmaßnahmen

    Abschnitt Vorsichtsmaßnahmen Ihr neues Produkt und die mittels der Symbole angezeigten Mo- delle gilt. diese Anleitung Wenn das folgende Symbol erscheint, trifft ! Die Navigationsfunktionen dieses Produk- die Beschreibung nur auf das dargestellte tes (und die Heckkameraoption, sofern er- Modell zu. worben) dienen nur zu Ihrer Unterstützung z.
  • Page 138: Wichtige Sicherheitshinweise

    Bedienung des Geräts auftreten oder das angezeigte Bild schlecht erkennbar ist, sollten weitere Einstellungen WARNUNG Pioneer empfiehlt, das Produkt nicht selbst erst nach dem sicheren Parken des Fahr- einzubauen. Dieses Produkt ist für den Ein- zeugs vorgenommen werden.
  • Page 139: Verbindung

    Abschnitt Verbindung ! Die Kabel so verlegen, dass sie keinen Vor dem Anschließen des hohen Temperaturen ausgesetzt werden. Systems zu beachten Ein Erhitzen der Isolierung kann zu einer Beschädigung der Kabel führen und einen WARNUNG Kurzschluss, eine Fehlfunktion oder einen Vermeiden Sie jegliche Eingriffe zur Manipu- dauerhaften Schaden am Produkt verur- lation oder Deaktivierung des Handbremsen-...
  • Page 140: Zur Vermeidung Von Schäden

    Abschnitt Verbindung ! Um Kurzschlüsse im elektrischen System Zur Vermeidung von Schäden zu verhindern, ist unbedingt vor dem Ein- bau das Minus-Batteriekabel (–) abzuklem- WARNUNG ! Verwenden Sie Lautsprecher mit mehr als men. 50 W (Belastbarkeit) und 4 W bis 8 W (Impe- danz).
  • Page 141: Anmerkung Zum Blau/Weißen Kabel

    ! (*1) Diese Teile sind im Lieferumfang von oder den Antennenverstärker verwendet AVIC-F77DAB enthalten. werden. So ein Anschluss könnte zu extrem ! (*2) Diese Teile sind im Lieferumfang von hohem Stromverbrauch und Fehlfunktio- AVIC-F77DAB, AVIC-F70DAB und AVIC- nen führen. F970DAB enthalten.
  • Page 142: Stromkabel Anschließen (1)

    Abschnitt Verbindung Stromkabel anschließen (1) Hinweis Je nach Fahrzeugtyp unterscheidet sich eventuell die Funktion von *2 und *4. Schließen Sie in diesem Fall *1 an 4* und *3 an *2 an, wie in der Abbildung dargestellt. Verbinden Sie jeweils Kabel mit den gleichen Farben. Gelb (*2) Gelb (*1) Speicherschutz...
  • Page 143 Abschnitt Verbindung Dieses Produkt 14 cm Gelb/Schwarz (MUTE) Schließen Sie ein Gerät mit Stummschaltungsfunktion an das Stummschaltungskabel an. Lassen Sie dieses Stromversorgung Kabel anderenfalls unbenutzt. Hinweis Sicherung (10 A) Die Audioquelle wird stumm geschaltet oder gedämpft, während die folgenden Töne normal ausgegeben werden. Stromkabel Einzelheiten siehe Bedienungsanleitung.
  • Page 144: Stromkabel Anschließen (2)

    Die Position der Geschwindigkeits-Erkennungsschaltung (Tachoimpuls) und die Position des Feststellbremsenschalters hängen vom Fahrzeugmodell ab. Einzelheiten erfahren Sie bei Ihrem autorisierten Pioneer-Händler oder einem Einbauspezialist. Hellgrün (PARKING BRAKE) Dieser Anschluss dient zur Erkennung des EIN/AUS-Status der Feststellbremse. Das Kabel ist an die Stromversorgungsseite des Feststellbremsenschalters anzuschließen.
  • Page 145 Abschnitt Verbindung Dieses Produkt Stromversorgung Stromkabel Violett/Weiß (REVERSE-GEAR SIGNAL INPUT) Dieses Kabel muss angeschlossen sein, damit das Produkt erkennen kann, ob das Fahrzeug vorwärts oder rückwärts fährt. Das violett/weiße Kabel ist mit dem Fahrzeugkabel zu verbinden, dessen Spannung sich beim Einlegen des Rückwärtsgangs ändert. Ohne diesen Anschluss kann der Sensor Fahren in Vorwärts-/Rückwärtsrichtung nicht ordnungsgemäß...
  • Page 146: Anschluss Des Systems

    ACHTUNG: Achten Sie darauf fur einen verbesserten Digitalradioempfang eine Digitalradioantenne mit Dieses Produkt Phantomspeisung (aktiver Typ) zu verwenden. Pioneer empfiehlt die Verwendung von AN-DAB1 oder CA-AN-DAB.001 (separat erhaltlich). Die Stromaufnahme der Digitalradioantenne sollte 100 mA oder weniger betragen. Antennenbuchse Kabelfernbedienungseingang...
  • Page 147: Anschluss An Den Separat Erhältlichen Leistungsverstärker

    Abschnitt Verbindung Anschluss an den separat erhältlichen Leistungsverstärker Leistungsverstärker (separat erhältlich) Cinch-Kabels Heckausgänge (separat erhältlich) (REAR OUTPUT) Leistungsverstärker (separat erhältlich) 15 cm Leistungsverstärker (separat erhältlich) Vordere Ausgänge (FRONT OUTPUT) Dieses Produkt Stromversorgung Weiß, Rot (SWL, SWR) Stromkabel Blau/Weiß An den Systemsteuerungsanschluss des Leistungsverstärkers (max.
  • Page 148: Anschluss Eines Iphone, Ipod, Android- Oder Mirrorlink™-Gerätes

    Abschnitt Verbindung Anschluss eines iPhone, iPod, Android- oder MirrorLink -Gerätes ™ Suchen Sie in der nachfolgenden Liste nach Ihrem Gerät und der gewünschten Funktion und entnehmen Sie Details zum Anschluss der angegebenen Seite. iPhone 6 Plus/iPhone 6/iPhone 5s/iPhone 5c/iPhone 5 iPod (Audio) Siehe Anschluss über den USB-Anschluss auf Seite 150.
  • Page 149 Abschnitt Verbindung Android-Gerät HDMI-Anschluss Siehe Anschluss eines Android-Geräts über den HDMI-Anschluss auf Seite 153. F77DAB AppRadio Mode MHL-Anschluss Siehe Anschluss eines Android-Geräts über den MHL-Anschluss auf Seite 154. F77DAB F70DAB ™ Siehe Anschluss eines Android- oder MirrorLink -Gerätes auf Seite 154. Android Auto Hinweis Für alle oben genannten Anschlüsse können die Optionen aha und AVICSYNC App verwendet werden.
  • Page 150: Usb-Kabel Mit Kennzeichnungsetiketten Markieren

    Abschnitt Verbindung USB-Kabel mit Kennzeich- Anschluss an ein iPhone nungsetiketten markieren mit Lightning Connector Bevor Sie dieses Produkt in einem Fahrzeug Hinweise einbauen, sollten Sie die USB-Kabel mit Kenn- ! Einzelheiten zum Anschluss an ein externes zeichnungsetiketten markieren. Gerät über ein separat erhältliches Kabel fin- Verbinden Sie die USB-Kabel mit den den Sie in der Bedienungsanleitung des Ka- USB-Anschlüssen 1 und 2 an der Rückseite...
  • Page 151: Anschluss Über Den Hdmi- Anschluss

    Abschnitt Verbindung Anschluss über den HDMI- Hinweis Anschluss Verwenden Sie einen Kabelbinder, um das ver- ® wendete High-Speed-HDMI -Kabel sicher zu be- F77DAB festigen. Die folgenden Kabel sind für einen Anschluss = Einzelheiten siehe Befestigen des High-Speed- ® erforderlich. HDMI -Kabels auf Seite 155.
  • Page 152: Anschluss An Ein Iphone Mit 30-Poligem Anschluss

    Abschnitt Verbindung Anschluss über den AUX-Eingang USB-Anschluss 1 Dieses Produkt Der Anschluss erfolgt über ein USB-Schnitts- tellenkabel für iPod / iPhone (CD-IU201V) (ge- trennt erhältlich). USB-Anschluss 1 Dieses Produkt RGB-Eingang iPhone mit Lightning Connector USB-Anschluss 2 AUX-Eingang Minibuchsen-Verlängerungskabel (mit CD-IU201V mitgeliefert) Lightning auf VGA Adapter (Produkt von Apple Inc.) USB-Kabel...
  • Page 153: Anschluss Über Den Rgb-Eingang

    Abschnitt Verbindung Anschluss über den RGB-Eingang Anschluss des Android -Geräts ™ Der Anschluss erfolgt über ein USB-Schnitts- F77DAB tellenkabel für iPod / iPhone (CD-IU201S) (se- parat erhältlich). Der Anschluss erfolgt über das App Connecti- vity Kit (CD-AH200) (separat erhältlich). USB-Anschluss 1 Dieses Produkt Hinweise ! Einzelheiten zum Anschluss an ein externes...
  • Page 154: Anschluss Eines Android-Geräts Über Den Mhl-Anschluss

    Abschnitt Verbindung Anschluss eines Android-Geräts Anschluss eines Android- über den MHL-Anschluss oder MirrorLink -Gerätes ™ Für den Anschluss ist das USB-Schnittstellen- Dieses Produkt kabel zur Verwendung mit Android- oder Mir- ™ rorLink -Geräten (CD-MU200) erforderlich (getrennt erhältlich). Dieses Produkt HDMI-Anschluss USB-Anschluss 2 USB-Kabel 1,5 m...
  • Page 155: Befestigen Des High-Speed-Hdmi ® -Kabels

    Abschnitt Verbindung Befestigen des High-Speed- Anschluss einer Heckkamera ® HDMI -Kabels Wenn dieses Produkt zusammen mit einer Heckkamera verwendet wird, kann das System F77DAB so eingestellt werden, dass automatisch auf Heckansicht umgeschaltet wird, wenn Sie den Verwenden Sie einen Kabelbinder, um das ®...
  • Page 156: Anschluss Einer Externen Videokomponente

    Abschnitt Verbindung Anschluss einer externen Heckkamera Videokomponente (ND-BC6) (separat erhältlich) Verwendung eines AV-Eingangs An dieses Produkt kann eine externe Video- komponenten oder externe Kamera ange- An den Videoausgang schlossen werden. Cinch-Kabel (mit ND-BC6 mitgeliefert) Anschluss einer externen Kamera Dieses Produkt Dieses Produkt Braun (BC IN) 15 cm...
  • Page 157: Verwenden Des Aux-Eingangs

    Abschnitt Verbindung Anschluss einer Videokomponente Verwenden des AUX-Eingangs Dieses Produkt Dieses Produkt AUX-Eingang Mini-Buchsen-AV 15 cm 23 cm Kabel (CD-RM10) (separat erhältlich) Gelb Rot, weiß (VIDEO INPUT) Rot, weiß Gelb (AUDIO INPUT) An die An den An die An den Audioausgänge Videoausgang Audioausgänge...
  • Page 158: Anschluss Eines Hdmi-Geräts

    Abschnitt Verbindung Anschluss eines HDMI-Geräts VORSICHT Verwenden Sie unbedingt das spezielle Mini- F77DAB Buchsen-AV-Kabel (CD-RM10) (separat erhältlich) Dieses Produkt für den Anschluss. Andere Kabel werden unter Umständen anders verlegt, was Bild- und Tonstö- rungen zur Folge haben kann. L : Audio links (weiß) R : Audio rechts (rot) V : Video (gelb) G : Masse...
  • Page 159: Anschluss Des Zusätzlichen Displays

    Abschnitt Verbindung Anschluss des zusätzlichen Displays Dieses Produkt Gelb (V OUT) Hinterer Audioausgang Mini-Klinkenkabel (separat erhältlich) An die An den Audioeingänge Videoeingang Zusätzliches Display mit Cinch-Eingangsbuchsen (separat erhältlich) Bei Verwendung eines zusätzlichen Displays, das an den hinteren Videoausgang angeschlossen ist WARNUNG Installieren Sie das zusätzliche Display NIE- MALS so, dass der Fahrer während der Fahrt...
  • Page 160: Einbau

    Abschnitt Einbau Vor der Installation zu lich. Dieses Produkt und seine Kabel sind so einzubauen, dass der sichere Betrieb beachten des Fahrzeugs nicht gestört oder behin- dert wird. VORSICHT ! Vergewissern Sie sich, dass sich die ! Dieses Produkt niemals so einbauen, Kabel nicht in der Tür oder im Sitzver- dass: stellmechanismus verfangen und dadurch...
  • Page 161: Zur Vermeidung Elektromagnetischen Rauschens

    ! Bauen Sie dieses Produkt nicht an einem nenkabel ! DAB-Antenne und Antennenkabel (für Ort ein, wo eine hohe Temperatur oder Feuchtigkeit herrschen kann, wie z. B.: AVIC-F77DAB, AVIC-F70DAB und AVIC- — Plätze in der Nähe einer Heizung, Lüf- F970DAB) ! GPS-Antenne und Antennenkabel tung oder Klimaanlage.
  • Page 162: Mitgelieferte Teile

    Abschnitt Einbau Mitgelieferte Teile 5° 5° Mit einem (*) markierte Teile sind vorinstal- liert. ! Damit die bei Betrieb dieses Geräts entwik- kelte Wärme richtig abgeleitet werden kann, sorgen Sie beim Einbau dafür, dass Dieses Produkt Halterung* ausreichend Platz hinter der Rückwand bleibt, und wickeln Sie lockere Kabel so, dass diese keine Öffnungen blockieren können.
  • Page 163: Vor Dem Einbau Dieses Produkts

    Abschnitt Einbau Vor dem Einbau dieses Produkts Befestigen Sie den Montagerahmen mithilfe eines Schraubendrehers: Die Me- Entfernen Sie den Abdeckring. tallklammern sind in eine sichere Position Ziehen Sie die obere und die untere Seite des (90°) zu biegen. Abdeckrings nach außen, um den Abdeckring zu entfernen.
  • Page 164: Installation Mit Hilfe Der Schraubenbohrungen An Der Seite

    Abschnitt Einbau Bringen Sie den Abdeckring an. Wenn die Klinke bei der Installation im Weg ist, können Sie sie herabbiegen. 1 Abdeckring 2 Nut Befestigen Sie den Abdeckring mit nach unten zeigender Nut an der Seite. Installation mit Hilfe der Schraubenbohrungen an der Seite dieses Produkts 1 Vorinstallierter Radio-Montagebügel...
  • Page 165: Einbau Der Gps-Antenne

    Abschnitt Einbau Einbau der GPS-Antenne Mitgelieferte Teile VORSICHT Das GPS-Antennenkabel darf nicht verkürzt oder verlängert werden. Veränderungen am Antennenkabel können zu einem Kurz- GPS-Antenne Metallblech schluss oder einer Funktionsstörung und dauerhaften Beschädigung dieses Produkts führen. Hinweise zur Befestigung ! Die Antenne ist auf einer ebenen Fläche zu befestigen, die für Funkwellen gut zugäng- lich sein sollte.
  • Page 166: Einbau Der Antenne Im Fahrzeuginnenraum (Auf Dem Armaturenbrett Oder Der Hutablage)

    Abschnitt Einbau Einbau der Antenne im Fahrzeuginnenraum (auf dem Armaturenbrett oder der Hutablage) WARNUNG Installieren Sie die GPS-Antenne nicht über Sensoren oder Öffnungen am Armaturen- brett des Fahrzeugs, da dies den sachgemä- ßen Betrieb dieser Sensoren oder Öffnungen und die dauerhafte Befestigung der beein- trächtigen könnte.
  • Page 167: Einbau Des Mikrofons

    Abschnitt Einbau Einbau des Mikrofons Befestigen Sie den Mikrofon-Clip an der Sonnenblende. ! Bauen Sie das Mikrofon so ein, dass die Richtung und der Abstand zum Fahrer ideal sind, um die Stimme des Fahrers opti- mal zu empfangen. ! Schalten Sie unbedingt das Produkt aus (ACC OFF), bevor Sie das Mikrofon an- schließen.
  • Page 168: Befestigung Auf Der Lenksäule

    Abschnitt Einbau Befestigung auf der Lenksäule Lösen Sie den Mikrofonsockel vom Mi- krofon-Clip, indem Sie auf die Zunge drük- ken und den Mikrofonsockel dabei herausschieben. 1 Doppelseitiges Klebeband 2 Kabelklemmen 1 Mikrofon Das Kabel je nach Bedarf mit getrennten 2 Zunge erhältlichen Kabelklemmen im Fahrzeugin- 3 Mikrofonsockel nenraum sichern.
  • Page 169: Nach Dem Einbau

    Abschnitt Nach dem Einbau Nach dem Einbau dieses Fahren Sie auf einer freien Straße, bis das GPS-Signal normal empfangen wird. Produkts Schließen Sie den Minuspol (–) wieder Hinweis an die Fahrzeugbatterie an. Nach dem Einbau dieses Produkts an einem si- Vergewissern Sie sich, dass alle Anschlüsse in cheren Ort die korrekte Funktion des Fahrzeugs Ordnung sind und dieses Produkt korrekt ein-...
  • Page 170 Voor u dit product inbouwt 173 storingen 193 Voorkomen van beschadigingen 174 Voor de installatie 194 – Opmerking over de blauw/witte – Voor gebruikers van AVIC-F77DAB en draad 174 AVIC-F70DAB 194 Meegeleverde onderdelen 175 Installeren van dit product 194 Het stroomsnoer aansluiten (1) 176 –...
  • Page 171: Voorzorgen

    Hoofdstuk Voorzorgen Uw nieuwe product en deze Het volgende pictogram geeft aan dat de uitleg alleen op het betreffende model van handleiding toepassing is. ! De navigatie-elementen van dit product (en bijvoorbeeld: de achteruitkijkcamera, indien aange- F77DAB schaft) zijn uitsluitend bedoeld als hulp- middel voor de bediening van uw voertuig.
  • Page 172: Belangrijke Veiligheidsvoorschriften

    ! Tijdens het rijden dient u altijd de veilig- WAARSCHUWING heidsgordel te dragen. Bij een ongeluk is Pioneer raadt u af het product zelf in te bou- de kans op letsel aanzienlijk groter als u de wen. Dit product mag alleen door een vak- veiligheidsgordel niet of niet correct draagt.
  • Page 173: Verbinding

    Hoofdstuk Verbinding Voorzorgen voor het stelbare stoelen, of andere bedieningsorganen van het voertuig. aansluiten van het systeem ! Laat de draden niet langs plaatsen lopen waar ze blootgesteld worden aan hoge WAARSCHUWING temperaturen. Als de isolatie van de dra- Probeer geen wijzigingen aan te brengen in den erg warm wordt, kunnen ze bescha- het interlocksysteem van de handrem of het digd raken, waardoor er kortsluiting of...
  • Page 174: Voorkomen Van Beschadigingen

    Hoofdstuk Verbinding Voorkomen van z. de blauwe stekker op de blauwe poort, zwart op zwart, enz. beschadigingen ! Zie voor nadere informatie over het aanslui- ten van de eindversterker en andere toestel- WAARSCHUWING len de gebruikershandleiding en voer de ! Gebruik luidsprekers van meer dan 50 W aansluiting vervolgens uit zoals hierin be- (uitgangsvermogen) en tussen 4 W t/m 8 W schreven.
  • Page 175: Meegeleverde Onderdelen

    Hoofdstuk Verbinding Meegeleverde onderdelen Dit product Stroomsnoer GPS-antenne Microfoon USB-kabel Identificatielabels USB- (2 st.) kabel Draadbinder*1 Voertuigbusconversie- kabel*2 Opmerkingen ! (*1) Deze onderdelen worden geleverd met AVIC-F77DAB. ! (*2) Deze onderdelen worden geleverd met AVIC-F77DAB, AVIC-F70DAB en AVIC- F970DAB.
  • Page 176: Het Stroomsnoer Aansluiten (1)

    Hoofdstuk Verbinding Het stroomsnoer aansluiten (1) Opmerking Afhankelijk van het type voertuig kan de functie van *2 en *4 verschillend zijn. Verbind in dat geval *1 met *4 en *3 met *2 zoals in de illustratie wordt getoond. Verbind draden van dezelfde kleur met elkaar.
  • Page 177 Hoofdstuk Verbinding Dit product 14 cm Geel/zwart (MUTE) Als u een apparaat met geluiduitschakelingsfunctie gebruikt, moet u dat apparaat aansluiten op de draad voor geluiduitschakeling. Anders verbindt u niets met deze draad. Voeding Zekering (10 A) Opmerking Stroomsnoer De audiobron wordt uitgeschakeld of gedempt, maar de volgende geluidssignalen worden niet gedempt of uitgeschakeld.
  • Page 178: Het Stroomsnoer Aansluiten (2)

    Opmerking De plaats van het snelheidsdetectiecircuit en van de handrem zijn mede afhankelijk van het voertuigmodel. Raadpleeg voor details uw officiële Pioneer dealer of een vakkundige installateur. Lichtgroen (PARKING BRAKE) Gebruik om te detecteren of de handrem gebruikt wordt of niet. Deze draad moet worden aangesloten op dekant van de handremschakelaar die van stroom wordt voorzien.
  • Page 179 Hoofdstuk Verbinding Dit product Voeding Stroomsnoer Paars/wit (REVERSE-GEAR SIGNAL INPUT) Deze wordt zodanig aangesloten dat het product kan detecteren of het voertuig naar voren of naar achteren beweegt. Sluit de paars-witte draad aan op de draad waarvan de spanning verandert wanneer de versnellingshendel in de achteruit wordt gezet.
  • Page 180: Systeemcomponenten Aansluiten

    Digital Radio gebruiken met een Dit product ingang voor phantom power (actieve type). Pioneer raadt het gebruik aan van AN-DAB1 of CA-AN-DAB.001 (afzonderlijk verkocht). Het stroomverbruik van de antenne voor Digital Radio moet 100 mA of minder zijn.
  • Page 181: Aansluiten Op Een Los Verkrijgbare Eindversterker

    Hoofdstuk Verbinding Aansluiten op een los verkrijgbare eindversterker Eindversterker (los verkrijgbaar) RCA-kabels Achteruitgangen (los verkrijgbaar) (REAR OUTPUT) Eindversterker (los verkrijgbaar) 15 cm Eindversterker (los verkrijgbaar) Vooruitgangen (FRONT OUTPUT) Dit product Voeding Wit, rood (SWL, SWR) Stroomsnoer Blauw/wit Naar systeembedieningsaansluiting van de eindversterker (max.
  • Page 182: Een Iphone, Ipod, Android-Apparaat Of Een Mirrorlink Apparaat Aansluiten

    Hoofdstuk Verbinding Een iPhone, iPod, Android-apparaat of een MirrorLink ™ apparaat aansluiten Zoek in onderstaande lijst uw apparaat en de functie die u wilt gebruiken, en raadpleeg de betreffende pagina voor de aansluiting. iPhone 6 Plus/iPhone 6/iPhone 5s/iPhone 5c/iPhone 5 iPod (audio) Zie Aansluiten via de USB-poort op bladzijde 184.
  • Page 183 Hoofdstuk Verbinding Android-apparaat HDMI-poort Zie Een Android-apparaat met een HDMI-poort aansluiten op bladzijde 187. F77DAB AppRadio Mode MHL-poort Zie Een Android-apparaat met een MHL-poort aansluiten op bladzijde 187. F77DAB F70DAB ™ Zie Een Android- of MirrorLink -apparaat aansluiten op bladzijde 188. Android Auto Opmerking Voor elk van bovenstaande aansluitingen kunnen aha en AVICSYNC App gebruikt worden.
  • Page 184: Identificatielabels Bevestigen Aan Usb-Kabels

    Hoofdstuk Verbinding Identificatielabels Een iPhone met Lightning- bevestigen aan USB-kabels connector aansluiten Bevestig identificatielabels aan USB-kabels Opmerkingen voordat u dit product in een voertuig instal- ! Zie de handleiding van de kabel voor details leert. over het aansluiten van een extern apparaat Sluit USB-kabels aan op USB-poort 1 en met een los verkrijgbare kabel.
  • Page 185: Aansluiten Via De Hdmi-Poort

    Hoofdstuk Verbinding ® = Zie De High Speed HDMI Aansluiten via de HDMI-poort -kabel vastzetten op bladzijde 188 voor details. F77DAB Voor deze aansluiting hebt u de volgende ka- Aansluiten via de RGB-ingang bels nodig. ! HDMI-interfacekabel voor de iPod / iPhone F70DAB F970DAB F970BT (CD-IH202) (los verkrijgbaar) Voor deze aansluiting hebt u de volgende ka-...
  • Page 186: Een Iphone Met 30-Pens Connector Aansluiten

    Hoofdstuk Verbinding Een iPhone met 30-pens Aansluiten via de RGB-ingang connector aansluiten Voor deze aansluiting hebt u de USB-interface- kabel voor de iPod / iPhone (CD-IU201S) (los Opmerkingen verkrijgbaar) nodig. ! Zie de handleiding van de kabel voor details USB-poort 1 Dit product over het aansluiten van een extern apparaat met een los verkrijgbare kabel.
  • Page 187: Een Android -Apparaat Aansluiten

    Hoofdstuk Verbinding Een Android -apparaat Een Android-apparaat met een ™ MHL-poort aansluiten aansluiten F77DAB Dit product Voor deze aansluiting hebt u de App-verbin- dingskit (CD-AH200) (los verkrijgbaar) nodig. Opmerkingen ! Zie de handleiding van de kabel voor details over het aansluiten van een extern apparaat HDMI-poort USB-poort 2 met een los verkrijgbare kabel.
  • Page 188: Een Android- Of Mirrorlink - Apparaat Aansluiten

    Hoofdstuk Verbinding ® Een Android- of MirrorLink De High Speed HDMI -kabel ™ apparaat aansluiten vastzetten Voor deze aansluiting hebt u de USB-interface- F77DAB ™ kabel voor Android- of MirrorLink -apparaten Als u een extern apparaat aansluit met de (CD-MU200) (los verkrijgbaar) nodig. ®...
  • Page 189: Een Achteruitkijkcamera Aansluiten

    Hoofdstuk Verbinding Een achteruitkijkcamera Achteruitkijkcamera aansluiten (ND-BC6) (los verkrijgbaar) Wanneer dit product wordt gebruikt met een achteruitkijkcamera, kan er automatisch wor- den overgeschakeld naar het beeld van die ca- Naar video-uitgang mera wanneer de schakelhendel in REVERSE (R) wordt gezet. De Cameraweer- RCA-kabel gave stand stelt u ook in staat te controleren (wordt geleverd met ND-BC6)
  • Page 190: De Externe Videocomponent Aansluiten

    Hoofdstuk Verbinding De externe videocomponent De videocomponent aansluiten aansluiten Dit product Gebruik van de AV-ingang U kunt een externe videocomponent of een ex- terne camera op dit product aansluiten. Een externe camera aansluiten Dit product 15 cm 23 cm Geel Rood, wit (VIDEO INPUT) (AUDIO INPUT)
  • Page 191: De Aux-Ingang Gebruiken

    Hoofdstuk Verbinding De AUX-ingang gebruiken BELANGRIJK Dit product Gebruik een AV-kabel met ministekker (CD-RM10) (los verkrijgbaar) voor de aansluiting. Als u an- dere kabels gebruikt, kan de bedradingsconfigu- AUX-ingang ratie verschillen waardoor beeld en geluid niet goed kunnen worden weergegeven. L : Audio links (wit) AV-kabel met R : Audio rechts (rood)
  • Page 192: Een Hdmi-Apparaat Aansluiten

    Hoofdstuk Verbinding Een HDMI-apparaat aansluiten Het achterdisplay aansluiten F77DAB Dit product Dit product Geel (V OUT) Audio-uitgang achter Mini-pinplugkabel (los verkrijgbaar) RCA-kabel (los verkrijgbaar) Naar Naar video-ingang audio-ingangen Achterdisplay met RCA-ingangsstekkers (los verkrijgbaar) Opmerkingen Bij gebruik van een achterdisplay ! Zie de bedieningshandleiding voor details dat op de achtervideo-uitgang is over de bediening van een HDMI-apparaat.
  • Page 193: Inbouwen

    Hoofdstuk Inbouwen ! Zorg ervoor dat de draden niet geraakt Voorzorgen voor installatie kunnen worden door een portier of stoel- verschuivingsmechanisme, met eventueel BELANGRIJK ! Installeer dit product nooit op plaatsen kortsluiting tot gevolg. ! Controleer of alle andere apparatuur van waar, of op een manier waardoor het: —...
  • Page 194: Voor De Installatie

    Hoofdstuk Inbouwen — Plaatsen die blootgesteld kunnen wor- Bovendien moet u elke antennedraad zo ver mogelijk van andere antennedraden en -kabels den aan regen, zoals dicht bij een por- houden. Bind ze niet samen, laat ze niet langs tier of op de vloer van het voertuig. ! Installeer dit product op een plek die stevig elkaar lopen en laat ze elkaar niet kruisen.
  • Page 195: Meegeleverde Onderdelen

    Hoofdstuk Inbouwen ! Om verzekerd te kunnen zijn van voldoende Meegeleverde onderdelen ventilatie bij gebruik van dit toestel, dient u De met een asterisk (*) gemarkeerde onderde- er bij de installatie voor te zorgen dat u ach- len zijn reeds geïnstalleerd. ter het achterpaneel en rondom het toestel voldoende ruimte vrij laat, en dient u even- tuele losse bedrading samen te bundelen...
  • Page 196: Voor U Dit Product Inbouwt

    Hoofdstuk Inbouwen Voor u dit product inbouwt Zet de montagebehuizing vast door met behulp van een schroevendraaier de Verwijder de afwerkingsrand. metalen lipjes (90°) op hun plaats te bui- Buig de bovenkant en de onderkant van de af- gen. werkingsrand naar buiten om deze te verwijde- ren.
  • Page 197: Installatie Met Gebruik Van De Schroefgaten Aan De Zijkant Van Dit Product

    Hoofdstuk Inbouwen Bevestig de afwerkingsrand. Als de pal de installatie hindert, mag u die naar beneden wegbuigen. 1 Afwerkingsrand 2 Groef Bevestig de afwerkingsrand met de zijde met de groef naar beneden gericht. Installatie met gebruik van de schroefgaten aan de zijkant van dit product 1 Montagebeugel van de originele autoradio 2 Dashboard of console...
  • Page 198: Installeren Van De Gps-Antenne

    Hoofdstuk Inbouwen ! Verf de GPS-antenne niet, aangezien dit de Installeren van de GPS- prestaties van de antenne negatief beïn- antenne vloedt. BELANGRIJK Maak de GPS-antennedraad niet korter en Meegeleverde onderdelen ook niet langer. Wijzigingen aan de antenne- kabel kunnen leiden tot kortsluiting of storin- gen en permanente schade aan dit product.
  • Page 199: Bevestigen Van De Antenne Binnen In De Auto (Op Het Dashboard Of De Hoedenplank)

    Hoofdstuk Inbouwen Bevestigen van de antenne binnen in de auto (op het dashboard of de hoedenplank) WAARSCHUWING Installeer de GPS-antenne niet over andere sensoren of de ventilatie-openingen in het dashboard van het voertuig, want hierdoor kan de juiste werking van de sensoren of ventilatie-openingen belemmerd worden en is het ook mogelijk dat de GPS-antenne niet goed en stevig meer op het dashboard beves-...
  • Page 200: De Microfoon Installeren

    Hoofdstuk Inbouwen De microfoon installeren Bevestig de microfoonklem aan de zon- neklep. ! Installeer de microfoon in de juiste richting en op de juiste afstand zodat de microfoon gemakkelijk de stem van de bestuurder kan opvangen. ! Schakel het product uit (ACC OFF) voordat u de microfoon aansluit.
  • Page 201: Installatie Op Stuurkolom

    Hoofdstuk Inbouwen Installatie op stuurkolom Maak de microfoonvoet los van de mi- crofoonklem door de microfoonvoet te schuiven terwijl op het lipje wordt ge- drukt. 1 Dubbelzijdig plakband 2 Klemmen 1 Microfoon Gebruik los verkrijgbare klemmen om de 2 Lipje draad waar nodig binnenin de auto te be- 3 Microfoonvoet vestigen.
  • Page 202: Na Installatie

    Hoofdstuk Na installatie Na de installatie van dit Rijd over een normale weg totdat de GPS het signaal begint te ontvangen. product Sluit de massapool (–) van de accu van Opmerking het voertuig opnieuw aan. Na de installatie van dit product dient u op een Controleer nogmaals of alle aansluitingen op veilige plaats te controleren of het voertuig nor- de juiste wijze zijn gemaakt en dit product cor-...
  • Page 204 Technische Hotline der Pioneer Electronics Deutschland GmbH TEL: 02154/913-333 PIONEER CORPORATION 1-1, Shin-ogura, Saiwai-ku, Kawasaki-shi, Kanagawa 212-0031, JAPAN PIONEER EUROPE NV Haven 1087, Keetberglaan 1, B-9120 Melsele, Belgium/Belgique © 2015 PIONEER CORPORATION. TEL: (0) 3/570.05.11 All rights reserved. PIONEER ELECTRONICS (USA) INC.

Ce manuel est également adapté pour:

Avic-f70dabAvic-f970dabAvic-f970btAvic-f9770dabAvic-f9770bt

Table des Matières