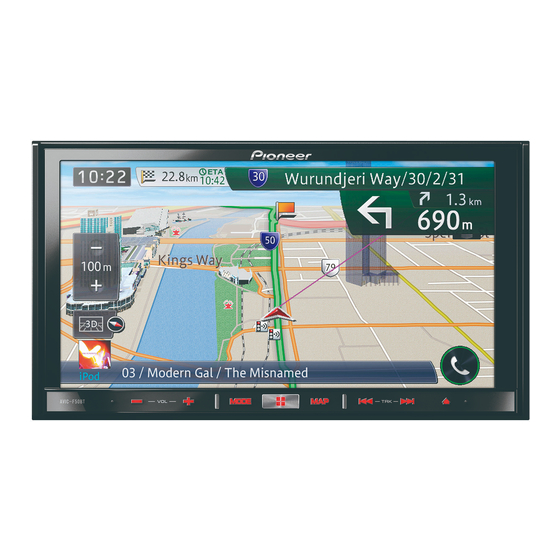
Pioneer AVIC-F50BT Manuel D'installation
Masquer les pouces Voir aussi pour AVIC-F50BT:
Table des Matières

Publicité

Les langues disponibles
  • FR

Les langues disponibles

  • FRANÇAIS, page 30

Liens rapides

Installation Manual
Manuel d'installation
NAVIGATION AV SYSTEM
SYSTEME DE NAVIGATION AV
SISTEMA DI NAVIGAZIONE AV
SISTEMA DE NAVEGACIÓN AV
NAVIGATIONS-/AV-SYSTEM
AV NAVIGATIESYSTEEM
AVIC-F50BT
AVIC-F950DAB
AVIC-F950BT

Publicité

Table des Matières
loading

Sommaire des Matières pour Pioneer AVIC-F50BT

  • Page 1 Installation Manual Manuel d’installation NAVIGATION AV SYSTEM SYSTEME DE NAVIGATION AV SISTEMA DI NAVIGAZIONE AV SISTEMA DE NAVEGACIÓN AV NAVIGATIONS-/AV-SYSTEM AV NAVIGATIESYSTEEM AVIC-F50BT AVIC-F950DAB AVIC-F950BT...
  • Page 2: Table Des Matières

    20 Installation Precautions before installation 21 To avoid electromagnetic interference 21 Before installing 21 – For AVIC-F50BT users 22 Installing the navigation system 22 – Installation notes 22 – Parts supplied 23 – Before installing this navigation unit 24 –...
  • Page 3: Precautions

    WARNING ! The navigation features of this product Pioneer does not recommend that you install (and the rear view camera option if pur- your navigation system yourself. This pro- chased) are intended solely to aid you in duct is designed for professional installation the operation of your vehicle.
  • Page 4 Section Precautions ! Certain country and government laws may prohibit or restrict the placement and use of this system in your vehicle. Please com- ply with all applicable laws and regulations regarding the use, installation and opera- tion of your navigation system. Engb...
  • Page 5: Connecting The System Precautions Before Connecting The System

    Section Connecting the system Precautions before damaged, resulting in a short circuit or malfunction and permanent damage to connecting the system the product. ! Do not cut the GPS aerial cable to shorten WARNING it or use an extension to make it longer. Do not take any steps to tamper with or dis- Altering the aerial cable could result in a able the handbrake interlock system which...
  • Page 6: To Prevent Damage

    Section Connecting the system ! Since a unique BPTL circuit is employed, To prevent damage do not directly earth the * side of the speaker lead or connect the * side of an- WARNING ! Use speakers over 50 W (output value) other side of the speaker lead together.
  • Page 7: Parts Supplied

    Section Connecting the system Parts supplied Installing the HDMI cable ® holder Insert the lower tab of the HDMI cable holder into the groove of this product. Groove The navigation unit Power cord RCA connector GPS aerial Insert the two upper tabs into the this product by pushing the HDMI cable holder.
  • Page 8: Connecting The System

    Section Connecting the system Connecting the system The navigation unit Vehicle Bus adapter input Please refer to the instruction manual for the Vehicle Bus adapter (sold separately). 13 cm DAB aerial input (AVIC-F950DAB only) To receive DAB signals, connect a DAB aerial (AN-DAB1) (sold separately) to the unit.
  • Page 9: When Connecting The Iphone

    Section Connecting the system When connecting the iPhone Connecting an iPhone with Lightning connector HDMI port 17-pin port HDMI cable holder iPhone with Lightning connector (*1) (sold separately) Lightning Digital AV Adapter (Apple Inc. products) (sold separately) ® High speed HDMI cable (*2) (Type A - A) (sold separately)
  • Page 10 Section Connecting the system Connecting an iPhone with 30-pin connector iPhone with 30-pin connector (*1) (sold separately) USB interface cable for iPod / iPhone (*2) (sold separately) (*1) For details concerning operations and compatibility, refer to Operation Manual. (*2) For details of how to connect the separately sold USB interface cable for iPod / iPhone (CD-IU201N) refer to the USB interface cable for iPod / iPhone manual.
  • Page 11: When Connecting The Android™ Device

    Section Connecting the system When connecting the Android device ™ Connecting an Android device with an MHL port High Speed HDMI ® Cable (*1) (Type A - A) MHL adapter (*1) (sold separately) (sold separately) USB cable (*1) HDMI (sold separately) HDMI port cable...
  • Page 12: Connecting The Power Cord (1)

    Section Connecting the system Connecting the power cord (1) Note Notes Depending on the types of vehicles, the · When a subwoofer (*5) is connected to this function of *2 and *4 may be different. In this navigation system instead of a rear speaker, change case, be sure to connect *1 to *4 and *3 to *2 the rear output setting in the initial setting.
  • Page 13 Section Connecting the system The navigation unit Fuse (10 A) RCA connector 15 cm Power cord Yellow/black If you use an equipment with mute function, connect that equipment to the Audio Mute lead. If not, keep this lead free of any connections.
  • Page 14: Connecting The Power Cord (2)

    Note The position of the speed detection circuit and the position of the handbrake switch vary depending on the vehicle model. For details, consult your authorised Pioneer dealer or an installation professional. Light green (PARKING BRAKE) Used to detect the ON/OFF status of the handbrake. This lead must be connected to the power supply side of the handbrake switch.
  • Page 15 Section Connecting the system The navigation unit Power cord Violet/white (REVERSE GEAR SIGNAL INPUT) This is connected so that the navigation system can detect whether the vehicle is moving forwards or backwards. Connect the violet/white lead to the lead whose voltage changes when the reverse gear is engaged.
  • Page 16: When Connecting To Separately Sold Power Amp

    Section Connecting the system When connecting to separately sold power amp Subwoofer outputs (SUB WOOFER OUTPUT) RCA connector 25 cm Rear outputs The navigation unit (REAR OUTPUT) 30 cm Front outputs (FRONT OUTPUT) 30 cm Power cord Blue/white To system control terminal of the power amp (max.
  • Page 17 Section Connecting the system Power amp (sold separately) cables (sold separately) Power amp (sold separately) Power amp (sold separately) System remote control If your vehicle is Left Right equipped with an auto-aerial, connect   Front speaker Front speaker this lead to a power ...
  • Page 18: When Connecting A Rear View Camera

    Section Connecting the system When connecting a rear Rear view camera (e.g. ND-BC6) view camera To video output (sold separately) When this product is used with a rear view RCA cable camera, it is possible to automatically switch from the video to rear view image when the gearstick is moved to REVERSE (R).
  • Page 19: When Connecting The External Video Component

    Section Connecting the system When connecting the CAUTION external video component Be sure to use a mini-jack AV cable (CD-RM10) (sold separately) for wiring. If you use other Using an AV input (AV1) cables, the wiring position might differ resulting in disturbed images and sounds.
  • Page 20: Using An Av Input (Av2)

    Section Connecting the system Using an AV input (AV2) When connecting the rear display The navigation unit The navigation unit 20 cm Red, white, yellow 15 cm (REAR MONITOR OUTPUT) RCA connector Red, white (AUDIO INPUT) RCA connector Yellow (VIDEO INPUT) RCA cables (sold separately) RCA cables...
  • Page 21: Installation

    Section Installation ! Do not install this navigation system Precautions before where it may (i) obstruct the driver’s vi- installation sion, (ii) impair the performance of any of the vehicle’s operating systems or safety CAUTION features, including airbags, hazard lamp ! Never install this product in places where, buttons or (iii) impair the driver’s ability or in a manner that:...
  • Page 22: For Avic-F50Bt Users

    For AVIC-F50BT users tion display, and might otherwise cause re- Do not install this navigation system in a posi- duced display performance.
  • Page 23: Parts Supplied

    Section Installation ! The cords must not cover the area shown Parts supplied in the figure below. This is necessary to Parts marked (*) are pre-installed. allow the amps and navigation mechanism to dissipate heat. The navigation unit Holder* Do not cover this area. ! The semiconductor laser will be damaged if it overheats, so don’t install the naviga- tion unit anywhere hot —...
  • Page 24: Before Installing This Navigation Unit

    Section Installation Before installing this Dashboard navigation unit Remove the trim ring. Extend top and bottom of the trim ring out- wards to remove the trim ring. Holder Install this product into the holder. Trim ring Insert the supplied extraction keys into both sides of the unit until they click into place.
  • Page 25: Installation Using The Screw Holes On The Side Of The Navigation Unit

    Section Installation Installation using the screw holes on the side of the navigation unit % Fastening the navigation unit to the factory radio-mounting bracket. Position the navigation unit so that its screw holes are aligned with the screw holes of the bracket, and tighten the screws at three loca- tions on each side.
  • Page 26: Installing The Gps Aerial

    Section Installation Installing the GPS aerial Parts supplied CAUTION Do not cut the GPS aerial lead to shorten it or use an extension to make it longer. Alter- ing the aerial cable could result in a short cir- GPS aerial Metal sheet cuit or malfunction and permanent damage to the navigation system.
  • Page 27: When Installing The Aerial Inside The Vehicle (On The Dashboard Or Rear Shelf)

    Section Installation When installing the aerial inside the vehicle (on the dashboard or rear shelf) WARNING Do not install the GPS aerial over any sen- sors or vents on the dashboard of the vehicle, as doing so may interfere with the proper functioning of such sensors or vents and may compromise the ability of the metal sheet under the GPS aerial to properly and se-...
  • Page 28: Installing The Microphone

    Section Installation Installing the microphone Attach the microphone clip to the sun visor. ! Install the microphone in a place where its Microphone clip direction and distance from the driver make it easiest to pick up the driver’s voice. ! Make sure to connect the microphone to the navigation system after the system is turned off (ACC OFF).
  • Page 29: Installation On The Steering Column

    Section Installation Installation on the steering column Detach the microphone base from the microphone clip by sliding the microphone base while pressing the tab. Microphone Clamps Use separately sold clamps to secure the Microphone clip Microphone base lead where necessary inside the vehicle.
  • Page 30 Branchement de l’écran arrière 48 – Utilisation d’un écran arrière raccordé à la sortie vidéo arrière 48 Installation Précautions à prendre avant l’installation 49 Pour éviter les parasites électromagnétiques 49 Avant de procéder à l’installation 50 – Pour les utilisateurs AVIC-F50BT 50...
  • Page 31: Précautions

    à un personnel de service Pioneer conduite. agréé, qui a été spécialement formé et est ex- ! N’utilisez jamais ce système de navigation périmenté...
  • Page 32 Section Précautions ! Comme tout autre accessoire de l’habita- cle, le système de navigation ne doit pas détourner votre attention ni nuire à la sécu- rité de la conduite sous peine d’entraîner des blessures graves voire mortelles. Si vous éprouvez des difficultés à utiliser le système ou à...
  • Page 33: Branchement Du Système

    Section Branchement du système ! La trajectoire des fils ne doit pas être ex- Précautions à prendre avant posée à des températures élevées. Si l’iso- de brancher le système lation chauffe, les fils risquent d’être endommagés, ce qui peut entraîner un AVERTISSEMENT court-circuit ou un dysfonctionnement, et N’essayez pas de modifier ou désactiver le...
  • Page 34: Pour Éviter Toute Détérioration

    Section Branchement du système ! Raccordez les connecteurs de même cou- Pour éviter toute leur au port de couleur correspondant, détérioration c’est-à-dire le connecteur bleu au port bleu, le noir au noir, etc. AVERTISSEMENT ! Pour raccorder l’amplificateur de puis- ! Utilisez des haut-parleurs de plus de 50 W sance à...
  • Page 35: Pièces Fournies

    Section Branchement du système Pièces fournies Installation du support pour câble HDMI ® Insérez la languette inférieure du sup- port pour câble HDMI dans la fente de ce produit. Fente Unité de navigation Cordon d’alimentation Connecteur RCA Antenne GPS Languette Insérez les deux languettes supérieures dans ce produit en enfonçant le support pour câble HDMI.
  • Page 36: Branchement Du Système

    Section Branchement du système Branchement du système Unité de navigation Entrée de l’adaptateur du bus du véhicule Veuillez vous reporter au mode d’emploi des adaptateurs du bus du 13 cm véhicule (vendu séparément). Entrée d’antenne DAB (AVIC-F950DAB uniquement) Pour recevoir des signaux DAB, connectez une antenne DAB (AN-DAB1) (vendue séparément) à...
  • Page 37: Lors De La Connexion De L'iphone

    Section Branchement du système Lors de la connexion de l’iPhone Connexion d’un iPhone avec connecteur Lightning Port HDMI Port 17 broches Support pour câble HDMI iPhone avec connecteur Lightning (*1) (vendu séparément) Adaptateur Lightning AV numérique (produits Apple Inc.) (vendu séparément) Câble HDMI ®...
  • Page 38 Section Branchement du système Connexion d’un iPhone avec connecteur à 30 broches iPhone avec connecteur à 30 broches (*1) (vendu séparément) Câble d’interface USB pour iPod / iPhone (*2) (vendu séparément) (*1) Pour en savoir sur le fonctionnement et la compatibilité, reportez-vous au Manuel de fonctionnement. (*2) Pour en savoir plus sur la connexion du câble d’interface USB pour iPod / iPhone (CD-IU201N) vendu séparément, consultez le manuel l’accompagnant.
  • Page 39: Lors De La Connexion De L'appareil Android

    Section Branchement du système Lors de la connexion de l’appareil Android ™ Connexion d’un appareil Android à un port MHL Câble HDMI ® haute vitesse (*1) (Type A - A) Adaptateur MHL (*1) (vendu (vendu séparément) séparément) Câble USB (*1) Port (vendu séparément) Support...
  • Page 40: Branchement Du Cordon D'alimentation (1)

    Section Branchement du système Branchement du cordon d’alimentation (1) Remarque Remarques · Lorsqu’un haut-parleur d’extrêmes graves (*5) est Selon le type de véhicules, la fonction de *2 et raccordé à ce système de navigation à la place d’un *4 peut être différente. Le cas échéant, haut-parleur arrière, changez le réglage de sortie assurez-vous de raccorder *1 à...
  • Page 41 Section Branchement du système Unité de navigation Fusible (10 A) Connecteur RCA 15 cm Cordon d’alimentation Jaune/noir Si vous utilisez un appareil avec une fonction de sourdine, raccordez-le au fil conducteur Sourdine audio. Le cas contraire, ne raccordez rien à ce fil. Remarque La source audio sera coupée ou atténuée, alors que les sons suivants ne seront ni coupés, ni atténués.
  • Page 42: Branchement Du Cordon D'alimentation (2)

    La position du circuit de détection de vitesse et la position du contacteur de frein à main varient selon le modèle du véhicule. Pour plus de détails, contactez votre revendeur Pioneer agréé ou un installateur professionnel. Vert clair (PARKING BRAKE) Utilisé...
  • Page 43 Section Branchement du système Unité de navigation Cordon d’alimentation Violet/blanc (REVERSE GEAR SIGNAL INPUT) Ceci est raccordé pour que le système de navigation puisse détecter si le véhicule avance ou recule. Raccordez le fil conducteur violet/blanc au fil dont la tension change lorsque le pignon de marche arrière est engagé. Sans ce raccordement, le capteur risque de ne pas pouvoir détecter correctement le déplacement en marche avant/arrière de votre véhicule, et par conséquent la position de votre véhicule telle qu’elle est détectée par le...
  • Page 44: Branchement D'un Amplificateur De Puissance Vendu Séparément

    Section Branchement du système Branchement d’un amplificateur de puissance vendu séparément Sorties du haut-parleur d’extrêmes graves (SUB WOOFER OUTPUT) Connecteur RCA 25 cm Sorties arrière Unité de navigation (REAR OUTPUT) 30 cm Sorties avant (FRONT OUTPUT) 30 cm Cordon d’alimentation Bleu/blanc A la borne de commande d’ensemble de l’amplificateur de puissance (max.
  • Page 45 Section Branchement du système Amplificateur de puissance (vendu séparément) Câbles RCA (vendus séparément) Amplificateur de puissance (vendu séparément) Amplificateur de puissance (vendu séparément) Commande à distance du système Si votre véhicule est Gauche Droite équipé d’une antenne   automatique, Haut-parleur avant Haut-parleur avant ...
  • Page 46: Branchement D'une Caméra De Rétrovisée

    Section Branchement du système Branchement d’une caméra Caméra de rétrovisée (par ex., ND-BC6) de rétrovisée À la sortie vidéo (vendu séparément) Quand ce produit est utilisé avec une caméra Câble RCA de rétrovisée, il est possible de commuter au- tomatiquement entre le signal vidéo et l’image de rétrovisée quand le levier de vitesse est Marron (REAR VIEW CAMERA IN)
  • Page 47: Branchement D'un Élément Vidéo Externe

    Section Branchement du système Branchement d’un élément ATTENTION vidéo externe Veillez à utiliser un câble AV mini-jack (CD-RM10) (vendu séparément) pour le raccordement. Si Utilisation d’une entrée AV (AV1) vous utilisez un autre type de câble, la position du raccordement pourrait différer, entraînant une Unité...
  • Page 48: Utilisation D'une Entrée Av (Av2)

    Section Branchement du système Utilisation d’une entrée AV (AV2) Branchement de l’écran arrière Unité de navigation Unité de navigation Rouge, blanc, jaune 15 cm (REAR MONITOR 20 cm OUTPUT) Connecteur Connecteur RCA Rouge, blanc (AUDIO INPUT) Jaune (VIDEO INPUT) Câbles RCA Câbles RCA (vendus (vendus séparément)
  • Page 49: Installation

    Section Installation Précautions à prendre canisme de coulissement d’un siège, car ceci pourrait provoquer un court-circuit. avant l’installation ! Vérifiez le bon fonctionnement des autres équipements du véhicule après l’installa- ATTENTION tion du système de navigation. ! Ne jamais installer ce produit dans un en- ! N’installez pas ce système de navigation droit ou de telle sorte qu’il : dans un endroit où...
  • Page 50: Avant De Procéder À L'installation

    à cette marge de tolérance risque d’accroître le po- tentiel d’erreurs dans l’affichage de l’em- Pour les utilisateurs AVIC-F50BT placement, et de réduire les performances N’installez pas ce système de navigation dans d’affichage. un endroit où l’ouverture du panneau LCD risque d’être entravée par des obstacles, tels...
  • Page 51: Pièces Fournies

    Section Installation ! Lors de l’installation de l’appareil, laissez Pièces fournies suffisamment d’espace derrière le panneau Les pièces indiquées par un astérisque (*) arrière pour permettre une dissipation cor- sont pré-installées. recte de la chaleur et enroulez tout câble gênant de façon qu’il n’obstrue pas les ori- fices de ventilation.
  • Page 52: Avant D'installer Cette Unité De Navigation

    Section Installation Avant d’installer cette unité de Tableau de bord navigation Retirez l’anneau de garniture. Étirez vers l’extérieur la partie supérieure et in- férieure de l’anneau de garniture pour le reti- rer. Support Installez ce produit dans le support. Anneau de garniture Insérez les clés de démontage fournies dans les deux côtés de l’appareil jusqu’au déclic.
  • Page 53: Installation En Utilisant Les Trous De Vis Sur Les Côtés De Cette Unité De Navigation

    Section Installation Installation en utilisant les trous de vis sur les côtés de cette unité de navigation % Fixation de l’unité de navigation dans le tiroir de l’autoradio. Positionnez l’unité de navigation de manière à ce que les trous de vis soient alignés avec les trous de vis de la console, et serrez trois vis de chaque côté.
  • Page 54: Installation De L'antenne Gps

    Section Installation Installation de l’antenne GPS Pièces fournies ATTENTION Ne coupez pas le fil d’antenne GPS pour le raccourcir et n’utilisez pas d’extension pour le rallonger. Le fait d’intervenir sur le câble Antenne GPS Plaque métallique d’antenne risque d’entraîner un court-circuit ou un dysfonctionnement et d’endommager de manière irrémédiable le système de navi- gation.
  • Page 55: Installation De L'antenne Dans Le Véhicule (Sur Le Tableau De Bord Ou La Lunette Arrière)

    Section Installation Installation de l’antenne dans le véhicule (sur le tableau de bord ou la lunette arrière) AVERTISSEMENT N’installez pas l’antenne GPS par dessus un capteur ou une bouche d’air du tableau de bord du véhicule, car cela pourrait perturber le fonctionnement normal du capteur ou de la bouche d’air et compromettre la capacité...
  • Page 56: Installation Du Microphone

    Section Installation Installation du microphone Remarques ! Installez le microphone dans un endroit ! Lors de la fixation de la plaque métallique, permettant une bonne réception de la voix ne la coupez pas en petits morceaux. du conducteur. ! Les vitres de certains modèles de véhicules ! Éteignez le système de navigation (ACC ne laissent pas passer les signaux des sa- OFF) avant de connecter le microphone.
  • Page 57: Installation Sur La Colonne De Direction

    Section Installation Fixez l’agrafe pour micro au pare-soleil. Installation sur la colonne de direction Agrafe pour micro Retirez la base du microphone de l’a- grafe pour micro en faisant glisser la base du microphone tout en enfonçant la lan- guette. Microphone Languette Agrafe pour micro...
  • Page 58: Réglage De L'angle Du Microphone

    Section Installation Serre-fils Utilisez des serre-fils vendus séparément pour fixer le fil conduc- teur aux endroits né- cessaires dans le véhicule. Réglage de l’angle du microphone L’angle du microphone peut être ajusté.
  • Page 59 – Quando si utilizza un display posteriore collegato a un’uscita video posteriore 78 Installazione Precauzioni prima dell’installazione 79 Per evitare disturbi elettromagnetici 79 Prima dell’installazione 80 – Per gli utenti di AVIC-F50BT 80 Installazione del sistema di navigazione 80 – Note sull’installazione 80...
  • Page 60: Precauzioni

    Misure di sicurezza importanti navigazione e il presente AVVERTENZA manuale Pioneer raccomanda di non installare perso- nalmente il sistema di navigazione. Questo ! Le caratteristiche di navigazione di questo prodotto è progettato per essere installato prodotto (e la telecamera di visione poste- esclusivamente da tecnici specializzati.
  • Page 61 Sezione Precauzioni ! Come per altri accessori all’interno del vei- colo, il sistema di navigazione non deve di- strarre il conducente da una guida sicura del veicolo, poiché potrebbero verificarsi in- cidenti con conseguenti lesioni gravi o morte del conducente. Se si hanno difficol- tà...
  • Page 62: Collegamento Del Sistema

    Sezione Collegamento del sistema ! Non posare i fili lungo percorsi in cui risul- Precauzioni prima di tano esposti a temperature elevate. Se l’i- collegare il sistema solamento si scalda, il filo può danneggiarsi e causare cortocircuiti o AVVERTENZA malfunzionamenti e danni permanenti al Non manomettere in alcun modo o disabilita- prodotto.
  • Page 63: Per Evitare Danni

    Sezione Collegamento del sistema ! Fissare i connettori dello stesso colore alla Per evitare danni corrispondente porta colorata, cioè il con- nettore blu alla porta blu, il nero a quella AVVERTENZA ! Utilizzare diffusori con potenza superiore nera, ecc. ! Fare riferimento al manuale dell’utente per a 50 W (valore di uscita) e tra 4 W e 8 W (va- i dettagli sul collegamento dell’amplificato- lore di impedenza).
  • Page 64: Parti In Dotazione

    Sezione Collegamento del sistema Parti in dotazione Installazione del supporto del cavo HDMI ® Inserire la linguetta inferiore del sup- porto del cavo HDMI nella fessura del pro- dotto. Fessura L’unità di navigazione Cavo di alimentazione Connettore RCA Antenna GPS Linguetta Inserire le due linguette superiori nel prodotto esercitando una pressione sul...
  • Page 65: Collegamento Del Sistema

    Sezione Collegamento del sistema Collegamento del sistema L’unità di navigazione Ingresso per l’adattatore Bus per il veicolo Fare riferimento al manuale delle istruzioni degli adattatori Bus per il 13 cm veicolo (venduti separatamente). Ingresso dell’antenna DAB (solo AVIC-F950DAB) Per ricevere i segnali DAB, collegare all’unità...
  • Page 66: Collegamento Dell'iphone

    Sezione Collegamento del sistema Collegamento dell’iPhone Collegamento di un iPhone con connettore Lightning Porta HDMI Porta a 17 pin Supporto del cavo HDMI iPhone con connettore Lightning (*1) (venduto separatamente) Adattatore AV digitale Lightning (prodotti Apple Inc.) (venduto separatamente) ® Cavo HDMI ad alta velocità...
  • Page 67 Sezione Collegamento del sistema Collegamento di un iPhone con connettore a 30 pin iPhone con connettore a 30 pin (*1) (venduto separatamente) Cavo di interfaccia USB per iPod / iPhone (*2) (venduto separatamente) (*1) Per maggiori informazioni sulle funzioni e sulla compatibilità, vedere il Manuale di funzionamento. (*2) Per informazioni sul collegamento del cavo di interfaccia USB per iPod / iPhone venduto separatamente (CD-IU201N), fare riferimento al manuale del cavo di interfaccia USB per iPod / iPhone.
  • Page 68: Collegamento Del Dispositivo Android

    Sezione Collegamento del sistema Collegamento del dispositivo Android ™ Collegamento di un dispositivo Android con porta MHL ® Cavo HDMI alta velocità (*1) (Tipo A - A) (venduto Adattatore MHL (*1) separatamente) (venduto separatamente) Cavo USB (*1) Porta (venduto separatamente) HDMI Supporto Cavo USB - micro USB (*1)
  • Page 69 Sezione Collegamento del sistema...
  • Page 70: Collegamento Del Cavo Di Alimentazione (1)

    Sezione Collegamento del sistema Collegamento del cavo di alimentazione (1) Nota Note A seconda del tipo di veicolo, la funzione di *2 e · Quando si collega a questo sistema di navigazione di *4 può essere diversa. In questo caso, un subwoofer (*5) invece di un diffusore posteriore, nelle impostazioni iniziali cambiare l’impostazione connettere *1 a *4 e *3 a *2 come mostrato...
  • Page 71 Sezione Collegamento del sistema L’unità di navigazione Fusibile (10 A) Connettore RCA 15 cm Cavo di alimentazione Giallo/nero Un eventuale apparecchio con la funzione di disattivazione dell’audio deve essere collegato al cavetto Audio Mute. In caso contrario, lasciare il cavetto senza nessun collegamento. Nota La sorgente audio sarà...
  • Page 72: Collegamento Del Cavo Di Alimentazione (2)

    La posizione del circuito di rilevamento della velocità e la posizione dell’interruttore del freno di stazionamento possono variare in base al modello del veicolo. Per i dettagli, rivolgersi al proprio rivenditore autorizzato Pioneer oppure a un tecnico installatore. Verde chiaro (PARKING BRAKE) Usato per rilevare lo stato ON/OFF del freno di stazionamento.
  • Page 73 Sezione Collegamento del sistema L’unità di navigazione Cavo di alimentazione Viola/bianco (REVERSE GEAR SIGNAL INPUT) Deve essere collegato in modo che il sistema di navigazione possa rilevare se il veicolo si sta spostando in avanti o indietro. Collegare il cavetto viola/bianco al cavetto la cui tensione cambia quando viene innestata la retromarcia.
  • Page 74: Quando Si Effettua Il Collegamento A Un Amplificatore In Vendita Separatamente

    Sezione Collegamento del sistema Quando si effettua il collegamento a un amplificatore in vendita separatamente Uscite del subwoofer (SUB WOOFER OUTPUT) Connettore RCA 25 cm Uscite posteriori L’unità di navigazione (REAR OUTPUT) 30 cm Uscite anteriori (FRONT OUTPUT) 30 cm Cavo di alimentazione Blu/bianco Al morsetto controllo sistema...
  • Page 75 Sezione Collegamento del sistema Amplificatore (venduto separatamente) Cavi RCA (venduti separatamente) Amplificatore (venduto separatamente) Amplificatore (venduto separatamente) Controllo remoto di sistema Se il veicolo è dotato Sinistra Destra di un’antenna automatica,   Diffusore collegare questo Diffusore   anteriore anteriore cavetto a un amplificatore di...
  • Page 76: Quando Si Effettua Il Collegamento A Una Telecamera Di Visione Posteriore

    Sezione Collegamento del sistema Quando si effettua il Telecamera di visione posteriore collegamento a una (ad es. ND-BC6) All’uscita video (venduta telecamera di visione separatamente) posteriore Cavo RCA Quando al prodotto si collega una telecamera Marrone di visione posteriore, innestando REVERSE (REAR VIEW CAMERA IN) (R) si può...
  • Page 77: Quando Si Collega Il Componente Video Esterno

    Sezione Collegamento del sistema Quando si collega il ATTENZIONE componente video esterno Per il cablaggio, assicurarsi di usare un cavo AV con mini-spinotto (CD-RM10) (venduto separata- Uso di un ingresso AV (AV1) mente). Se si usano altri cavi vi è la possibilità che la posizione di cablaggio possa variare e che L’unità...
  • Page 78: Uso Di Un Ingresso Av (Av2)

    Sezione Collegamento del sistema Uso di un ingresso AV (AV2) Quando si collega il display posteriore L’unità di navigazione L’unità di navigazione 20 cm Rosso, bianco, giallo 15 cm (REAR MONITOR OUTPUT) Connettore Rosso, bianco (AUDIO INPUT) Connettore RCA Giallo (VIDEO INPUT) Cavi RCA (venduti...
  • Page 79: Installazione

    Sezione Installazione Precauzioni prima smo di scorrimento dei sedili, causando cortocircuiti. dell’installazione ! Verificare che le altre apparecchiature del veicolo funzionino correttamente dopo ATTENZIONE aver installato il sistema di navigazione. ! Non installare mai questo produtto in luo- ! Non installare questo sistema di naviga- ghi dove, o in maniera che: zione dove può...
  • Page 80: Prima Dell'installazione

    Per gli utenti di AVIC-F50BT stazioni di visualizzazione. Non installare questo sistema di navigazione in una posizione dove l’apertura del pannello LCD è...
  • Page 81: Parti In Dotazione

    Sezione Installazione ! Per assicurare un’adeguata dispersione del Parti in dotazione calore dell’apparecchio nel corso del suo Le parti contrassegnate con (*) sono pre-in- utilizzo, durante l’installazione si racco- stallate. manda di lasciare ampio spazio dietro il pannello posteriore e di avvolgere i cavi al- lentati affinché...
  • Page 82: Prima Di Installare L'unità Di Navigazione

    Sezione Installazione Prima di installare l’unità di Cruscotto navigazione Rimuovere la cornice di finitura. Per rimuovere la cornice di finitura occorre ti- rarne verso l’esterno le parti superiore e infe- riore. Supporto Installare il prodotto nel supporto. Cornice di finitura Inserire le chiavi di estrazione fornite in entrambi i lati dell’unità...
  • Page 83: Installazione Usando I Fori Delle Viti Sul Lato Dell'unità Di Navigazione

    Sezione Installazione Installazione usando i fori delle viti sul lato dell’unità di navigazione % Fissaggio dell’unità di navigazione alla staffa di montaggio radio predisposta in fabbrica. Posizionare l’unità di navigazione in modo che i fori delle viti siano allineati ai fori delle viti sulla staffa, quindi serrare le viti nelle tre posi- zioni per ogni lato.
  • Page 84: Installazione Dell'antenna Gps

    Sezione Installazione Installazione dell’antenna GPS Parti in dotazione ATTENZIONE Non tagliare il cavo dell’antenna GPS per ac- corciarlo e non usare una prolunga per allun- garlo. L’alterazione del cavo dell’antenna può Antenna GPS Lastra metallica causare cortocircuiti o malfunzionamenti e danni permanenti al sistema di navigazione.
  • Page 85: Quando Si Installa L'antenna All'interno Del Veicolo (Sul Cruscotto O Sul Piano Portaoggetti Posteriore)

    Sezione Installazione Quando si installa l’antenna all’interno del veicolo (sul cruscotto o sul piano portaoggetti posteriore) AVVERTENZA Non installare l’antenna GPS su eventuali sensori o aperture presenti sul cruscotto del veicolo poiché ciò potrebbe interferire con il corretto funzionamento di tali sensori e aper- ture e compromettere il corretto fissaggio della placca metallica dell’antenna GPS al cruscotto.
  • Page 86: Installazione Del Microfono

    Sezione Installazione Installazione del microfono Note ! Installare il microfono in un luogo dove la ! Quando si fissa la lastra metallica, evitare sua direzione e distanza dal conducente di tagliarla in pezzi piccoli. rendano facile il rilevamento della voce. ! Alcuni modelli usano per i finestrini un ! Accertarsi di collegare il microfono al siste- vetro che non lascia passare i segnali dai...
  • Page 87: Installazione Sulla Colonna Di Sterzo

    Sezione Installazione Fissare il morsetto del microfono al pa- Installazione sulla colonna di rasole. sterzo Morsetto del microfono Scollegare la base del microfono dal morsetto facendola scorrere mentre si preme la linguetta. Microfono Linguetta Morsetto del micro- Base del microfono fono Montare il microfono sulla colonna di sterzo.
  • Page 88: Regolazione Dell'angolazione Del Microfono

    Sezione Installazione Morsetti Usare dei morsetti (ven- duti separatamente) per fissare il cavo nei punti necessari all’in- terno del veicolo. Regolazione dell’angolazione del microfono L’angolo del microfono è regolabile.
  • Page 89 Precauciones antes de la instalación 109 Para impedir que se produzcan interferencias electromagnéticas 109 Antes de la instalación 110 – Para usuarios de AVIC-F50BT 110 Instalación del sistema de navegación 110 – Notas acerca de la instalación 110 – Piezas suministradas 111 –...
  • Page 90: Su Nuevo Sistema De Navegación Y Este Manual

    ADVERTENCIA ! Las funciones de navegación de este pro- Pioneer aconseja que no realice usted mismo ducto (y la opción de cámara de retrovisor, la instalación del sistema de navegación. si dispone de ella) están pensadas única- Este producto se ha diseñado para que su...
  • Page 91 Sección Precauciones ! Al igual que con cualquier otro accesorio del interior, el sistema de navegación nunca deberá distraerle ni poner en peligro la conducción segura de su vehículo, ya que podrían producirse lesiones graves o incluso la muerte. Si encuentra dificultades al utilizar el sistema o al leer la pantalla, realice los ajustes necesarios con el ve- hículo estacionado en un lugar seguro.
  • Page 92: Conexión Del Sistema

    Sección Conexión del sistema ! No enrute cables que vayan a estar some- Precauciones antes de tidos a altas temperaturas. Si se calienta conectar el sistema el aislamiento, los cables pueden resultar dañados y, como consecuencia, puede ADVERTENCIA producirse un cortocircuito o una avería y No trate de forzar ni desactivar el sistema de el producto puede sufrir un deterioro per- interbloqueo del freno de mano que está...
  • Page 93: Para Impedir Daños

    Sección Conexión del sistema Para impedir daños color, es decir, el conector azul al puerto azul, el conector negro al puerto negro, etc. ! Consulte el manual del propietario para ob- ADVERTENCIA ! Utilice altavoces con capacidad superior a tener información sobre la conexión del 50 W (valor de salida) y entre 4 W a 8 W amplificador de potencia y de otras unida- des y, a continuación, realice las conexio-...
  • Page 94: Piezas Suministradas

    Sección Conexión del sistema Piezas suministradas Instalación del soporte de cable HDMI ® Introduzca la lengüeta inferior del so- porte de cable HDMI en la ranura de este producto. Ranura La unidad de navega- Cable de alimentación ción Conector RCA Antena GPS Lengüeta Introduzca las dos lengüetas superiores...
  • Page 95: Conexión Del Sistema

    Sección Conexión del sistema Conexión del sistema Entrada del adaptador de bus del La unidad de navegación vehículo Consulte el manual de instrucciones para obtener información sobre los adaptadores de bus del vehículo (se venden por separado). 13 cm Entrada de la antena DAB (solo para AVIC-F950DAB) Para recibir señales DAB, conecte una antena DAB...
  • Page 96: Al Conectar El Iphone

    Sección Conexión del sistema Al conectar el iPhone Conexión de un iPhone con conector Lightning Puerto HDMI Puerto de 17 clavijas Soporte de cable HDMI iPhone con conector Lightning (*1) (se vende por separado) Adaptador de conector Lightning a AV digital (producto de Apple Inc.) (se vende por separado) ®...
  • Page 97 Sección Conexión del sistema Conexión de un iPhone con conector de 30 clavijas iPhone con conector de 30 clavijas (*1) (se vende por separado) Cable de interfaz USB para iPod / iPhone (*2) (se vende por separado) (*1) Para los detalles acerca de las operaciones y la compatibilidad, consulte el Manual de operación. (*2) Para los detalles sobre cómo conectar el cable de interfaz USB para iPod / iPhone (CD-IU201N, vendido por separado), consulte el manual del cable de interfaz USB para iPod / iPhone.
  • Page 98: Al Conectar El Dispositivo Android

    Sección Conexión del sistema Al conectar el dispositivo Android ™ Conexión de un dispositivo Android con un puerto MHL Cable HDMI ® de alta velocidad (*1) (Tipo A - A) Adaptador MHL (*1) (se vende por (se vende por separado) separado) Cable USB (*1) Puerto...
  • Page 99 Sección Conexión del sistema...
  • Page 100: Conexión Del Cable De Alimentación (1)

    Sección Conexión del sistema Conexión del cable de alimentación (1) Nota Notas En función de los tipos de vehículos, es posible · Si se conecta un subwoofer (*5) a este sistema de que la función de *2 y *4 sea diferente. En este navegación en lugar de un altavoz trasero, cambie el ajuste de la salida trasera en la configuración inicial.
  • Page 101 Sección Conexión del sistema La unidad de navegación Fusible (10 A) Conector RCA 15 cm Cable de alimentación Amarillo/negro Si utiliza un equipo con la función de silencio, conecte dicho equipo al cable Silencio audio. En el caso contrario, no conecte este cable.
  • Page 102: Conexión Del Cable De Alimentación (2)

    La posición del circuito de detección de velocidad y la posición del interruptor del freno de mano varían según el modelo del vehículo. Para los detalles, consulte a su distribuidor autorizado de Pioneer o a un instalador profesional. Verde claro (PARKING BRAKE) Se utiliza para detectar el estado ACT./DES.
  • Page 103 Sección Conexión del sistema La unidad de navegación Cable de alimentación Violeta/blanco (REVERSE GEAR SIGNAL INPUT) Se conecta para que el sistema de navegación pueda detectar si el vehículo se está desplazando hacia delante o hacia detrás. Conecte el cable violeta/blanco al cable cuyo voltaje cambia cuando se coloca la marcha atrás.
  • Page 104: Conexión Al Amplificador De Potencia Que Se Vende Por Separado

    Sección Conexión del sistema Conexión al amplificador de potencia que se vende por separado Salidas del subwoofer (SUBWOOFER OUTPUT) Conector RCA 25 cm Salidas traseras La unidad de navegación (REAR OUTPUT) 30 cm Salidas frontales (FRONT OUTPUT) 30 cm Cable de alimentación Azul/blanco Al terminal de control del sistema del amplificador de potencia (máx.
  • Page 105 Sección Conexión del sistema Amplificador de potencia (se vende por separado) Cables RCA (se venden por separado) Amplificador de potencia (se vende por separado) Amplificador de potencia (se vende por separado) Control remoto del sistema Si su vehículo está Izquierda Derecha equipado con una antena automática,...
  • Page 106: Conexión De Una Cámara De Retrovisor

    Sección Conexión del sistema Conexión de una cámara de Cámara de retrovisor (p. ej., ND-BC6) retrovisor (se vende por A la salida de vídeo separado) Cuando se utiliza este producto con una cá- Cable RCA mara de retrovisor, se puede cambiar automá- ticamente de la imagen de vídeo a la imagen de vista trasera cuando se desplaza la palanca Marrón...
  • Page 107: Conexión Del Componente De Vídeo Externo

    Sección Conexión del sistema Conexión del componente PRECAUCIÓN de vídeo externo Asegúrese de utilizar un cable AV minijack (CD- RM10) (se vende por separado) para el cableado. Uso de la entrada AV (AV1) Si utiliza otros cables, la posición del cableado puede diferir, provocando imágenes y sonidos in- La unidad de navegación terrumpidos.
  • Page 108: Uso De La Entrada Av (Av2)

    Sección Conexión del sistema Uso de la entrada AV (AV2) Conexión de la pantalla trasera La unidad de navegación La unidad de navegación 20 cm Rojo, blanco, amarillo 15 cm (REAR MONITOR OUTPUT) Conector RCA Rojo, blanco Conector RCA (AUDIO INPUT) Amarillo (VIDEO INPUT) Cables RCA...
  • Page 109: Precauciones Antes De La Instalación

    Sección Instalación ! Asegúrese de que los cables no queden Precauciones antes de la atrapados en una puerta ni en el mecanis- instalación mo de deslizamiento de un asiento porque puede producirse un cortocircuito. PRECAUCIÓN ! Compruebe que el resto del equipo de su ! Nunca instale este producto en lugares en vehículo funciona correctamente después los que, o de manera que:...
  • Page 110: Antes De La Instalación

    Si la unidad se instala de forma incorrecta con una incli- nación de la superficie que supera estas to- Para usuarios de AVIC-F50BT lerancias aumentará la posibilidad de que No instale este sistema de navegación en un...
  • Page 111: Piezas Suministradas

    Sección Instalación ! Cuando instale el sistema, para garantizar Piezas suministradas una correcta dispersión del calor durante Las piezas marcadas con un asterisco (*) el uso de esta unidad, asegúrese de dejar están instaladas previamente. un amplio espacio por detrás del panel tra- sero y enrollar los cables sueltos de modo que no bloqueen las aberturas de ventila- ción.
  • Page 112: Antes De Instalar Esta Unidad De Navegación

    Sección Instalación Antes de instalar esta unidad Tablero de instrumentos de navegación Extraiga el anillo embellecedor. Extienda la parte superior y la parte inferior del anillo embellecedor hacia fuera para ex- traer el anillo embellecedor. Soporte Instale este producto en el soporte. Anillo embellecedor Introduzca las llaves de extracción su- ministradas en ambos lados de la unidad...
  • Page 113: Instalación Utilizando Los Orificios De Tornillo Del Lado De La Unidad De Navegación

    Sección Instalación Instalación utilizando los orificios de tornillo del lado de la unidad de navegación % Fije la unidad de navegación al soporte de montaje de radio de fábrica. Coloque la unidad de navegación de manera que sus orificios de tornillo estén alineados con los orificios de tornillo del soporte, y aprie- te los tornillos en tres puntos de cada lado.
  • Page 114: Instalación De La Antena Gps

    Sección Instalación Instalación de la antena GPS Piezas suministradas PRECAUCIÓN No corte el cable de la antena GPS para redu- cir su longitud, ni utilice una extensión para alargarlo. La alteración del cable de la antena Antena GPS Hoja metálica puede provocar un cortocircuito o una avería y daños permanentes en el sistema de nave- gación.
  • Page 115: Cuando Instale La Antena En El Interior Del Vehículo (En El Tablero De Instrumentos O En La Bandeja Trasera)

    Sección Instalación Cuando instale la antena en el interior del vehículo (en el tablero de instrumentos o en la bandeja trasera) ADVERTENCIA No instale la antena GPS sobre sensores o aberturas de ventilación en el tablero de ins- trumentos del vehículo, ya que eso puede afectar al funcionamiento correcto de tales sensores o aberturas de ventilación y puede poner en riesgo la habilidad de adherencia...
  • Page 116: Instalación Del Micrófono

    Sección Instalación Instalación del micrófono Notas ! Instale el micrófono de tal forma que esté ! Cuando monte la hoja de metal, no la corte correctamente orientado y a la distancia en piezas pequeñas. correcta del conductor para que resulte ! Algunos modelos utilizan ventanas con un fácil recoger la voz del conductor.
  • Page 117: Instalación En La Columna De Dirección

    Sección Instalación Fije el clip del micrófono al parasol. Instalación en la columna de dirección Clip del micrófono Desconecte la base del micrófono del clip del mismo deslizándola a la vez que pulsa la lengüeta. Micrófono Lengüeta Clip del micrófono Base del micrófono Monte el micrófono en la columna de dirección.
  • Page 118: Ajuste Del Ángulo Del Micrófono

    Sección Instalación Abrazaderas Utilice abrazaderas (se venden por separado) para fijar el cable en el interior del vehículo donde sea necesario. Ajuste del ángulo del micrófono Se puede ajustar el ángulo del micrófono.
  • Page 119 Displays, das an den hinteren Videoausgang angeschlossen ist 138 Einbau Vor der Installation zu beachten 139 Zur Vermeidung elektromagnetischen Rauschens 139 Vor dem Einbau 140 – Für Benutzer des AVIC-F50BT 140 Einbau des Navigationssystems 140 – Hinweise zur Befestigung 140...
  • Page 120: Vorsichtsmaßnahmen

    Ihr neues Navigationssystem Wichtige Sicherheitshinweise und diese Anleitung WARNUNG ! Die Navigationsfunktionen dieses Produk- Pioneer empfiehlt, das Navigationssystem tes (und die Heckkameraoption, sofern er- nicht selbst einzubauen. Dieses Produkt ist worben) dienen nur zu Ihrer Unterstützung für den Einbau durch professionelle Fachkräf- beim Fahren Ihres Fahrzeugs.
  • Page 121 Abschnitt Vorsichtsmaßnahmen ! Wie alles andere Zubehör im Innenraum des Fahrzeugs sollte das Navigationssy- stem Ihre Aufmerksamkeit niemals von der sicheren Bedienung Ihres Fahrzeugs ablen- ken, da dies eine schwere Verletzung oder den Tod zur Folge haben kann. Falls Schwierigkeiten hinsichtlich der Bedie- nung des Geräts auftreten oder das ange- zeigte Bild schlecht erkennbar ist, sollten weitere Einstellungen erst nach dem siche-...
  • Page 122: Anschluss Des Systems

    Abschnitt Anschluss des Systems ! Die Kabel so verlegen, dass sie keinen Vor dem Anschließen des hohen Temperaturen ausgesetzt werden. Systems zu beachten Ein Erhitzen der Isolierung kann zu einer Beschädigung der Kabel führen und einen WARNUNG Kurzschluss, eine Fehlfunktion oder einen Vermeiden Sie jegliche Eingriffe zur Manipu- dauerhaften Schaden am Produkt verur- lation oder Deaktivierung des Handbremsen-...
  • Page 123: Zur Vermeidung Von Schäden

    Abschnitt Anschluss des Systems ! Um Kurzschlüsse im elektrischen System Zur Vermeidung von Schäden zu verhindern, ist unbedingt vor dem Ein- bau das Minus-Batteriekabel (–) abzuklem- WARNUNG ! Verwenden Sie Lautsprecher mit mehr als men. 50 W (Belastbarkeit) und 4 W bis 8 W (Impe- danz).
  • Page 124: Anmerkung Zum Blau/Weißen Kabel

    Abschnitt Anschluss des Systems ! Die Anschlussstecker auf die gleichfarbi- Mitgelieferte Teile gen Anschlüsse aufstecken (blauer Stecker auf blauen Anschluss, schwarz auf schwarz usw.) ! Einzelheiten zum Anschluss des Leistungs- verstärkers und anderer Geräte siehe Be- nutzerhandbuch. Die Anschlüsse entsprechend ausführen. Die Navigationseinheit Stromkabel ! Wegen des eingebauten BPTL-Schaltkrei-...
  • Page 125: Anbringen Der Hdmi®-Kabelhalterung

    Abschnitt Anschluss des Systems Anbringen der HDMI ® Kabelhalterung Führen Sie die untere Zunge der HDMI- Kabelhalterung in die Aussparung an die- sem Produkt ein. Aussparung Zunge Lassen Sie die beiden oberen Zungen durch Drücken der HDMI-Kabelhalterung in diesem Produkt einrasten. Zungen p Verwenden Sie die HDMI-Kabelhalterung, wenn Sie dieses Produkt mit dem separat...
  • Page 126: Anschluss Des Systems

    Abschnitt Anschluss des Systems Anschluss des Systems Die Navigationseinheit Fahrzeug-Bus-Adaptereingang Siehe Bedienungsanleitung für die Fahrzeug-Bus-Adapter (separat erhältlich). 13 cm DAB-Antenneneingang (nur AVIC-F950DAB) Für den Empfang von DAB-Signalen eine DAB-Antenne (AN-DAB1) (separat erhältlich) an das Gerät anschließen. Antennenbuchse Eingang für Kabelfernbedienung Siehe Bedienungsanleitung für den fest verdrahteten Kabelfernbedienungsadapter (separat erhältlich).
  • Page 127: Beim Verbinden Des Iphones

    Abschnitt Anschluss des Systems Beim Verbinden des iPhones Anschließen eines iPhones mit Lightning Connector HDMI-Anschluss 17-poliger Port HDMI-Kabelhalterung iPhone mit Lightning Connector (*1) (separat erhältlich) Lightning Digital AV Adapter (Produkt von Apple Inc.) (separat erhältlich) ® High-Speed-HDMI -Kabel (*2) (Typ A - A) (separat erhältlich) USB-Kabel (*2) Lightning auf USB Kabel...
  • Page 128 Abschnitt Anschluss des Systems Anschließen eines iPhones mit 30-poligem Anschluss iPhone mit 30-poligem Anschluss (*1) (separat erhältlich) USB-Schnittstellenkabel für iPod / iPhone (*2) (separat erhältlich) (*1) Einzelheiten zu Bedienfunktionen und Kompatibilität siehe Bedienungsanleitung. (*2) Einzelheiten zum Anschließen des getrennt erhältlichen USB-Schnittstellenkabels für iPod / iPhone (CD-IU201N) siehe Anleitung des USB-Schnittstellenkabels für iPod / iPhone.
  • Page 129: Bei Anschluss Eines Android™-Geräts

    Abschnitt Anschluss des Systems Bei Anschluss eines Android -Geräts ™ Anschließen eines Android-Geräts mit einem MHL-Anschluss High-Speed- ® HDMI -Kabel (*1) (Typ A - A) (separat erhältlich) MHL-Adapter (*1) HDMI- (separat erhältlich) Kabelhalterung USB-Kabel (*1) (separat erhältlich) HDMI- Anschluss USB - Micro-USB-Kabel (*1) USB-Anschluss (Typ USB A - Micro-USB B) (1,6 A, 5 V DC)
  • Page 130: Stromkabel Anschließen (1)

    Abschnitt Anschluss des Systems Stromkabel anschließen (1) Hinweis Hinweise Je nach Fahrzeugtyp können die Funktionen *2 · Wenn anstelle von Hecklautsprechern ein Subwoofer und *4 anders sein. In diesem Fall muss *1 mit (*5) an dieses Navigationssystem angeschlossen wird, ändern Sie die Einstellung des Heckausgangs in die *4 und *3 mit *2 verbunden werden, wie in der Grundeinstellung.
  • Page 131 Abschnitt Anschluss des Systems Die Navigationseinheit Sicherung (10 A) Cinch-Verbinder 15 cm Stromkabel Gelb/Schwarz Wenn Sie ein Gerät mit Stummschaltfunktion verwenden, schließen Sie dieses an das Audio Mute-Kabel an. Wenn nicht, lassen Sie das Audio Mute-Kabel unbeschaltet. Hinweis Die Audioquelle wird stummgeschaltet oder leiser gestellt, während die nachstehenden Tonsignale des Navigationssystems nicht stummgeschaltet oder leiser gestellt werden.
  • Page 132: Stromkabel Anschließen (2)

    Die Position der Geschwindigkeits-Erkennungsschaltung (Tachoimpuls) und die Position des Feststellbremsenschalters hängen vom Fahrzeugmodell ab. Einzelheiten erfahren Sie bei Ihrem autorisierten Pioneer-Händler oder einem Einbauspezialist. Hellgrün (PARKING BRAKE) Dieser Anschluss dient zur Erkennung des EIN/AUS-Status der Feststellbremse. Das Kabel ist an die Stromversorgungsseite des Feststellbremsenschalters anzuschließen.
  • Page 133 Abschnitt Anschluss des Systems Die Navigationseinheit Stromkabel Violett/Weiß (REVERSE GEAR SIGNAL INPUT) Über diesen Anschluss erkennt das Navigationssystem, ob der Wagen vorwärts oder rückwärts fährt. Das violett/weiße Kabel mit dem Kabel verbinden, dessen Spannung sich ändert, wenn der Rückwärtsgang eingelegt wird. Ohne diese Verbindung erkennt der Sensor möglicherweise nicht genau, ob Ihr Fahrzeug vorwärts oder rückwärts fährt, und die vom Sensor ermittelte Fahrzeugposition kann von der tatsächlichen Position abweichen.
  • Page 134: Beim Anschluss An Den Separat Erhältlichen Leistungsverstärker

    Abschnitt Anschluss des Systems Beim Anschluss an den separat erhältlichen Leistungsverstärker Subwoofer-Ausgänge (SUB WOOFER OUTPUT) Cinch-Verbinder 25 cm Heckausgänge Die Navigationseinheit (REAR OUTPUT) 30 cm Frontausgänge (FRONT OUTPUT) 30 cm Stromkabel Blau/Weiß Zum Systemsteueranschluss des Leistungsverstärkers (max. 300 mA 12 V DC). Hinweise ·...
  • Page 135 Abschnitt Anschluss des Systems Leistungsverstärker (separat erhältlich) Cinch-Kabel (separat erhältlich) Leistungsverstärker (separat erhältlich) Leistungsverstärker (separat erhältlich) Systemfernbedienung Wenn Ihr Fahrzeug mit Links Rechts einer Automatikantenne ausgestattet ist,   verbinden Sie dieses Lautsprecher Lautsprecher   vorne vorne Kabel mit einem Leistungsverstärker.
  • Page 136: Beim Anschluss Einer Heckkamera

    Abschnitt Anschluss des Systems Beim Anschluss einer Heckkamera (z. B. ND-BC6) Heckkamera An Video-Ausgang (separat erhältlich) Wenn dieses Produkt zusammen mit einer Cinch-Kabel Heckkamera verwendet wird, kann das System so eingestellt werden, dass automatisch auf Heckansicht umgeschaltet wird, wenn Sie den Braun (REAR VIEW CAMERA IN) Schalthebel in die Position REVERSE (R)
  • Page 137: Bei Anschluss Der Externen Videokomponente

    Abschnitt Anschluss des Systems Bei Anschluss der externen VORSICHT Videokomponente Verwenden Sie unbedingt das spezielle Mini- buchsen-AV-Kabel (CD-RM10) (separat erhältlich) Verwendung eines AV-Eingangs für den Anschluss. Andere Kabel werden unter (AV1) Umständen anders verlegt, was Bild- und Tonstö- rungen zur Folge haben kann. Die Navigationseinheit L : Audio links (Weiß) R : Audio rechts (Rot)
  • Page 138: Verwendung Eines Av-Eingangs (Av2)

    Abschnitt Anschluss des Systems Verwendung eines AV-Eingangs Bei Anschluss des (AV2) zusätzlichen Displays Die Navigationseinheit Die Navigationseinheit Rot, weiß, gelb 15 cm 20 cm (REAR MONITOR OUTPUT) Cinch-Verbinder Cinch-Verbinder Rot, weiß (AUDIO INPUT) Gelb (VIDEO INPUT) Cinch-Kabel (separat Cinch-Kabel erhältlich) (separat erhältlich) Videoeingang Audioeingänge...
  • Page 139: Einbau

    Abschnitt Einbau Vor der Installation zu lich. Dieses Produkt und seine Kabel sind so einzubauen, dass der sichere Betrieb beachten des Fahrzeugs nicht gestört oder behin- dert wird. VORSICHT ! Vergewissern Sie sich, dass sich die ! Dieses Produkt niemals so einbauen, Kabel nicht in der Tür oder im Sitzver- dass: stellmechanismus verfangen und dadurch...
  • Page 140: Vor Dem Einbau

    Fläche innerhalb einer Tole- ranz von 0 bis 30 Grad ein (mit 5 Grad nach Für Benutzer des AVIC-F50BT links oder rechts). Eine nicht vorschriftsmä- ßige Montage der Einheit, bei der die Flä- Installieren Sie dieses Navigationssystem che außerhalb dieser Toleranz liegt, erhöht...
  • Page 141: Mitgelieferte Teile

    Abschnitt Einbau Mitgelieferte Teile 5° 5° Mit einem (*) markierte Teile sind vorinstal- liert. ! Damit die bei Betrieb dieses Geräts entwik- kelte Wärme richtig abgeleitet werden kann, sorgen Sie beim Einbau dafür, dass Die Navigationseinheit Halterung* ausreichend Platz hinter der Rückwand bleibt, und wickeln Sie lockere Kabel so, dass diese keine Öffnungen blockieren können.
  • Page 142: Vor Der Installation Der Navigationseinheit

    Abschnitt Einbau Vor der Installation der Armaturenbrett Navigationseinheit Entfernen Sie den Abdeckring. Ziehen Sie die obere und die untere Seite des Abdeckrings nach außen, um den Abdeckring zu entfernen. Halterung Bauen Sie dieses Produkt in die Halte- rung ein. Abdeckring Führen Sie die mitgelieferten Entriege- lungsschlüssel bis zum Einrasten an beiden Seiten des Geräts ein.
  • Page 143: Installation Mit Hilfe Der Schraubenbohrungen An Der Seite Der Navigationseinheit

    Abschnitt Einbau Installation mit Hilfe der Schraubenbohrungen an der Seite der Navigationseinheit % Befestigen Sie die Navigationseinheit an den vorinstallierten Radio-Montagebü- geln. Positionieren Sie die Navigationseinheit so, dass ihre Schraubenbohrungen mit den Schraubenbohrungen des Bügels zur Dek- kung kommen, und ziehen Sie die Schrauben an drei Stellen an jeder Seite an.
  • Page 144: Einbau Der Gps-Antenne

    Abschnitt Einbau Einbau der GPS-Antenne Mitgelieferte Teile VORSICHT Das GPS-Antennenkabel darf nicht verkürzt oder verlängert werden. Veränderungen am Antennenkabel können zu einem Kurz- GPS-Antenne Metallblech schluss oder einer Funktionsstörung und dauerhaften Beschädigung des Navigations- systems führen. Hinweise zur Befestigung ! Die Antenne ist auf einer ebenen Fläche zu befestigen, die für Funkwellen gut zugäng- lich sein sollte.
  • Page 145: Einbau Der Antenne Im

    Abschnitt Einbau Einbau der Antenne im Fahrzeuginnenraum (auf dem Armaturenbrett oder der Hutablage) WARNUNG Installieren Sie die GPS-Antenne nicht über Sensoren oder Öffnungen am Armaturen- brett des Fahrzeugs, da dies den sachgemä- ßen Betrieb dieser Sensoren oder Öffnungen und die dauerhafte Befestigung der beein- trächtigen könnte.
  • Page 146: Einbau Des Mikrofons

    Abschnitt Einbau Einbau des Mikrofons Hinweise ! Bauen Sie das Mikrofon so ein, dass die ! Beim Einbau des Metallblechs keine ande- Richtung und der Abstand zum Fahrer ren Bauteile beschädigen. ideal sind, um die Stimme des Fahrers opti- ! Einige Modelle sind mit Scheiben ausge- mal zu empfangen.
  • Page 147: Befestigung Auf Der Lenksäule

    Abschnitt Einbau Befestigen Sie den Mikrofon-Clip an Befestigung auf der Lenksäule der Sonnenblende. Lösen Sie den Mikrofonsockel vom Mi- Mikrofon-Clip krofon-Clip, indem Sie auf die Zunge drük- ken und den Mikrofonsockel dabei herausschieben. Mikrofon Zunge Mikrofon-Clip Mikrofonsockel Befestigen Sie das Mikrofon auf der Lenksäule.
  • Page 148: Anpassen Des Mikrofonwinkels

    Abschnitt Einbau Kabelklemmen Das Kabel je nach Be- darf mit getrennten er- hältlichen Kabelklem- men im Fahrzeuginnenraum si- chern. Anpassen des Mikrofonwinkels Der Mikrofonwinkel kann eingestellt werden.
  • Page 149 – Bij gebruik van een achterdisplay dat op de achtervideo-uitgang is aangesloten 168 Inbouwen Voorzorgen voor installatie 169 Voorkomen van elektromagnetische storingen 169 Voor de installatie 170 – Voor AVIC-F50BT gebruikers 170 Inbouwen van het navigatiesysteem 170 – Opmerkingen betreffende de installatie 170...
  • Page 150: Voorzorgen

    ! De navigatie-elementen van dit product (en WAARSCHUWING de achteruitkijkcamera, indien aange- Pioneer raadt u af het navigatiesysteem zelf schaft) zijn uitsluitend bedoeld als hulp- in te bouwen. Dit product mag alleen door middel voor de bediening van uw voertuig.
  • Page 151 Hoofdstuk Voorzorgen ! Evenals bij het gebruik van andere acces- soires in uw auto dient u erop te letten dat het navigatiesysteem niet uw aandacht van het veilig besturen van uw voertuig afleidt, want dit kan resulteren in ernstig of fataal letsel.
  • Page 152: Systeemcomponenten Aansluiten

    Hoofdstuk Systeemcomponenten aansluiten Voorzorgen voor het stelbare stoelen, of andere bedieningsorganen van het voertuig. aansluiten van het systeem ! Laat de draden niet langs plaatsen lopen waar ze blootgesteld worden aan hoge WAARSCHUWING temperaturen. Als de isolatie van de dra- Probeer geen wijzigingen aan te brengen in den erg warm wordt, kunnen ze bescha- het interlocksysteem van de handrem of het...
  • Page 153: Voorkomen Van Beschadigingen

    Hoofdstuk Systeemcomponenten aansluiten Voorkomen van z. de blauwe stekker op de blauwe poort, zwart op zwart, enz. beschadigingen ! Zie voor nadere informatie over het aanslui- ten van de eindversterker en andere toestel- WAARSCHUWING len de gebruikershandleiding en voer de ! Gebruik luidsprekers van meer dan 50 W aansluiting vervolgens uit zoals hierin be- (uitgangsvermogen) en tussen 4 W t/m 8 W...
  • Page 154: Meegeleverde Onderdelen

    Hoofdstuk Systeemcomponenten aansluiten Meegeleverde onderdelen De HDMI -kabelhouder ® monteren Steek het onderste lipje van de HDMI- kabelhouder in de groef van dit product. Groef De navigatie-eenheid Stroomsnoer RCA-aansluiting GPS-antenne Lipje Steek de twee bovenste lipjes in dit product door tegen de HDMI-kabelhouder te drukken.
  • Page 155: Systeemcomponenten Aansluiten

    Hoofdstuk Systeemcomponenten aansluiten Systeemcomponenten aansluiten De navigatie-eenheid Ingang voertuigbusadapter Raadpleeg de handleiding van de voertuigbusadapter (los verkrijgbaar). 13 cm DAB-antenne ingangsaansluiting (alleen voor de AVIC-F950DAB) Om DAB-signalen te kunnen ontvangen, moet u een DAB-antenne (AN-DAB1) (los verkrijgbaar) aansluiten op het toestel.
  • Page 156: Wanneer De Iphone Wordt Verbonden

    Hoofdstuk Systeemcomponenten aansluiten Wanneer de iPhone wordt verbonden Een iPhone met Lightning-connector aansluiten HDMI-poort 17-pens poort HDMI-kabelhouder iPhone met Lightning-connector (*1) (los verkrijgbaar) Lightning digitale AV-adapter (Apple Inc. producten) (los verkrijgbaar) High Speed HDMI ® -kabel (*1) (Type A - A) (los verkrijgbaar) USB-kabel (*2) Lightning-naar-USB-kabel...
  • Page 157 Hoofdstuk Systeemcomponenten aansluiten Een iPhone met 30-pens connector aansluiten iPhone met 30-pens connector (*1) (los verkrijgbaar) USB-interfacekabel voor de iPod / iPhone (*2) (los verkrijgbaar) (*1) Zie de Bedieningshandleiding voor meer details over de bediening en compatibiliteit. (*2) Voor details over het aansluiten van de los verkrijgbare USB-interfacekabel voor de iPod / iPhone (CD-IU201N) wordt u verwezen naar de handleiding van de USB-interfacekabel voor de iPod / iPhone.
  • Page 158: Wanneer Het Android™ Apparaat Wordt Aangesloten

    Hoofdstuk Systeemcomponenten aansluiten Wanneer het Android apparaat wordt aangesloten ™ Verbinden van een Android apparaat met een MHL-poort High Speed HDMI ® -kabel (*1) (Type A - A) (los verkrijgbaar) MHL-adapter (*1) (los verkrijgbaar) HDMI-kabelhouder USB-kabel (*1) (los verkrijgbaar) HDMI- poort USB - micro-USB-kabel (*1) USB-poort...
  • Page 159 Hoofdstuk Systeemcomponenten aansluiten...
  • Page 160: Het Stroomsnoer Aansluiten (1)

    Hoofdstuk Systeemcomponenten aansluiten Het stroomsnoer aansluiten (1) Opmerking Opmerkingen · Wanneer er een subwoofer (*5) wordt aangesloten op Afhankelijk van het type voertuig kunnen de dit systeem in plaats van een achterluidspreker, moet functies van *2 en *4 anders zijn. In een de beginwaarde voor de instelling voor de dergelijk geval moet u *1 aansluiten op *4 en *3 achter-uitgang worden gewijzigd.
  • Page 161 Hoofdstuk Systeemcomponenten aansluiten De navigatie-eenheid Zekering (10 A) RCA-aansluiting 15 cm Stroomsnoer Geel/zwart Als u apparatuur met een dempingsfunctie gebruikt, moet u deze aansluiten op de audiodempingsdraad. Doet u dit niet, dan mag er niets anders op deze draad worden aangesloten. Opmerking De geluidsweergave van de audiobron wordt uitgeschakeld of gedempt terwijl de volgende geluidssignalen niet worden...
  • Page 162: Het Stroomsnoer Aansluiten (2)

    Opmerking De plaats van het snelheidsdetectiecircuit en van de handrem zijn mede afhankelijk van het voertuigmodel. Raadpleeg voor details uw officiële Pioneer dealer of een vakkundige installateur. Lichtgroen (PARKING BRAKE) Gebruik om te detecteren of de handrem gebruikt wordt of niet. Deze draad moet worden aangesloten op de kant van de handremschakelaar die van stroom wordt voorzien.
  • Page 163 Hoofdstuk Systeemcomponenten aansluiten De navigatie-eenheid Stroomsnoer Violet/wit (REVERSE GEAR SIGNAL INPUT) Deze moet zodanig worden aangesloten dat het navigatiesysteem kan detecteren of het voertuig naar voren of naar achteren beweegt. Sluit de violet/witte draad aan op de draad waarvan de spanning verandert wanneer de versnellingshendel in de achteruit wordt gezet.
  • Page 164: Bij Aansluiting Op Een Los Verkrijgbare Eindversterker

    Hoofdstuk Systeemcomponenten aansluiten Bij aansluiting op een los verkrijgbare eindversterker Subwooferuitgangen (SUB WOOFER OUTPUT) RCA-aansluiting 25 cm Achteruitgangen De navigatie-eenheid (REAR OUTPUT) 30 cm Vooruitgangen (FRONT OUTPUT) 30 cm Stroomsnoer Blauw/wit Naar de Systeem-afstandsbedieningsaansluiting van de eindversterker (max. 300 mA 12 V DC). Opmerkingen ·...
  • Page 165 Hoofdstuk Systeemcomponenten aansluiten Eindversterker (los verkrijgbaar) RCA-kabels (los verkrijgbaar) Eindversterker (los verkrijgbaar) Eindversterker (los verkrijgbaar) Systeem-afstandsbediening Als uw voertuig is Links Rechts uitgerust met een automatische   antenne, moet u deze Voorluidspreker Voorluidspreker   draad aansluiten op een eindversterker. ...
  • Page 166: Bij Aansluiting Van Een Achteruitkijkcamera

    Hoofdstuk Systeemcomponenten aansluiten Bij aansluiting van een Achteruitkijkcamera (bijv. ND-BC6) achteruitkijkcamera Naar video-uitgang (los verkrijgbaar) Wanneer dit product wordt gebruikt met een RCA-kabel achteruitkijkcamera, kan er automatisch wor- den overgeschakeld naar het beeld van die ca- mera wanneer de schakelhendel in Bruin (REAR VIEW CAMERA IN) REVERSE (R) wordt gezet.
  • Page 167: Bij Aansluiting Van Een Externe Videocomponent

    Hoofdstuk Systeemcomponenten aansluiten Bij aansluiting van een BELANGRIJK externe videocomponent Gebruik een AV-kabel met ministekker (CD-RM10) (los verkrijgbaar) voor de aansluiting. Als u an- Gebruik van een AV-ingang (AV1) dere kabels gebruikt, kan de bedradingsconfigu- ratie verschillen waardoor beeld en geluid niet De navigatie-eenheid goed kunnen worden weergegeven.
  • Page 168: Gebruik Van Een Av-Ingang (Av2)

    Hoofdstuk Systeemcomponenten aansluiten Gebruik van een AV-ingang (AV2) Bij aansluiten van het achterdisplay De navigatie-eenheid De navigatie-eenheid 20 cm Rood, wit, geel 15 cm (REAR MONITOR OUTPUT) RCA-aansluiting Rood, wit RCA-aansluiting (AUDIO INPUT) Geel (VIDEO INPUT) RCA-kabels (los verkrijgbaar) RCA-kabels (los verkrijgbaar) Naar Naar...
  • Page 169: Inbouwen

    Hoofdstuk Inbouwen ! Zorg ervoor dat de draden niet geraakt Voorzorgen voor installatie kunnen worden door een portier of stoel- verschuivingsmechanisme, met eventueel BELANGRIJK ! Installeer dit product nooit op plaatsen kortsluiting tot gevolg. ! Controleer of alle andere apparatuur van waar, of op een manier waardoor het: —...
  • Page 170: Voor De Installatie

    Voor AVIC-F50BT gebruikers het voertuig en kan ook op andere manie- Dit navigatiesysteem mag niet op een positie...
  • Page 171: Meegeleverde Onderdelen

    Hoofdstuk Inbouwen ! Om verzekerd te kunnen zijn van voldoende Meegeleverde onderdelen ventilatie bij gebruik van dit toestel, dient u De met een asterisk (*) gemarkeerde onderde- er bij de installatie voor te zorgen dat u ach- len zijn reeds geïnstalleerd. ter het achterpaneel en rondom het toestel voldoende ruimte vrij laat, en dient u even- tuele losse bedrading samen te bundelen...
  • Page 172: Vóór Het Installeren Van Deze Navigatie-Eenheid

    Hoofdstuk Inbouwen Vóór het installeren van deze Dashboard navigatie-eenheid Verwijder de afwerkingsrand. Buig de bovenkant en de onderkant van de af- werkingsrand naar buiten om deze te verwijde- ren. Houder Installeer dit product in de houder. Afwerkingsrand Steek de bijgeleverde uittreksleutels in beide zijden van het apparaat totdat deze op de plaats vastklikken.
  • Page 173: Installatie Met Gebruik Van De Schroefgaten Aan De Zijkant Van De Navigatie-Eenheid

    Hoofdstuk Inbouwen Installatie met gebruik van de schroefgaten aan de zijkant van de navigatie-eenheid % De navigatie-eenheid op de montage- beugel van de originele autoradio vastzet- ten. Plaats de navigatie-eenheid zo dat de schroef- gaten uitgelijnd zijn met de schroefgaten in de beugel en draai aan elke kant op drie plaatsen de schroeven vast.
  • Page 174: Installeren Van De Gps-Antenne

    Hoofdstuk Inbouwen ! Verf de GPS-antenne niet, aangezien dit de Installeren van de GPS- prestaties van de antenne negatief beïn- antenne vloedt. BELANGRIJK Maak de GPS-antennedraad niet korter en Meegeleverde onderdelen ook niet langer. Wijzigingen aan de antenne- kabel kunnen leiden tot kortsluiting of storin- gen en permanente schade aan het navigatiesysteem.
  • Page 175: Bevestigen Van De Antenne Binnen In De Auto (Op Het Dashboard Of De Hoedenplank)

    Hoofdstuk Inbouwen Bevestigen van de antenne binnen in de auto (op het dashboard of de hoedenplank) WAARSCHUWING Installeer de GPS-antenne niet over andere sensoren of de ventilatie-openingen in het dashboard van het voertuig, want hierdoor kan de juiste werking van de sensoren of ventilatie-openingen belemmerd worden en is het ook mogelijk dat de GPS-antenne niet goed en stevig meer op het dashboard beves-...
  • Page 176: De Microfoon Installeren

    Hoofdstuk Inbouwen De microfoon installeren Opmerkingen ! Installeer de microfoon in de juiste richting ! Knip of snijd het metalen plaatje voor het en op de juiste afstand zodat de microfoon aanbrengen niet in kleine stukken. gemakkelijk de stem van de bestuurder kan ! De ruiten van sommige auto’s laten de sig- opvangen.
  • Page 177: Installatie Op Stuurkolom

    Hoofdstuk Inbouwen Bevestig de microfoonklem aan de zon- Installatie op stuurkolom neklep. Maak de microfoonvoet los van de mi- Microfoonklem crofoonklem door de microfoonvoet te schuiven terwijl op het lipje wordt ge- drukt. Microfoon Lipje Microfoonklem Microfoonvoet Bevestig de microfoon op de stuurko- lom.
  • Page 178: De Hoek Van De Microfoon Aanpassen

    Hoofdstuk Inbouwen Klemmen Gebruik los verkrijgbare klemmen om de draad waar nodig binnenin de auto te bevestigen. De hoek van de microfoon aanpassen De hoek van de microfoon kan worden inge- steld.
  • Page 180 Technische Hotline der Pioneer Electronics Deutschland GmbH TEL: 02154/913-333 PIONEER CORPORATION 1-1, Shin-ogura, Saiwai-ku, Kawasaki-shi, Kanagawa 212-0031, JAPAN PIONEER EUROPE NV Haven 1087, Keetberglaan 1, B-9120 Melsele, Belgium/Belgique © 2013 PIONEER CORPORATION. TEL: (0) 3/570.05.11 All rights reserved. PIONEER ELECTRONICS (USA) INC.

Ce manuel est également adapté pour:

Avic-f950dabAvic-f950bt

Table des Matières