DSR PROBOOSTER DSR103 Manuel D'utilisation
Table des Matières
Les langues disponibles
Les langues disponibles
Liens rapides
OWNERS MANUAL
MANUAL DEL USUARIO
MANUEL D'UTILISATION
Models / Modelos / Modèles :
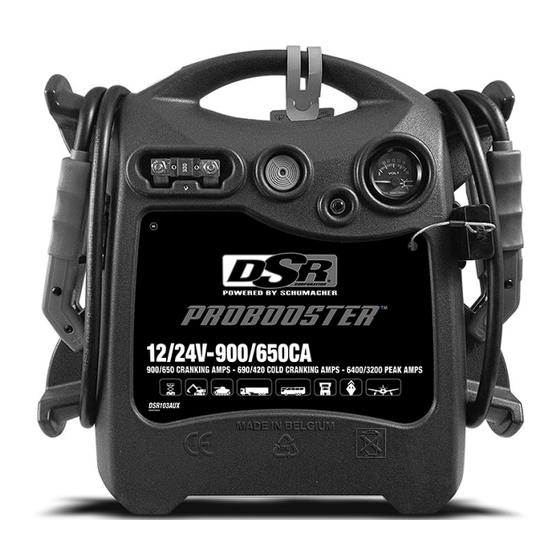
DSR103, DSR103AUX
Booster
Arrancador
Aide au démarrage
DSR103
™
DSR103AUX
PLEASE SAVE THIS OWNER'S MANUAL AND READ BEFORE EACH USE.
This manual will explain how to use the booster and charger safely and effectively.
Please read and follow these instructions and precautions carefully.
POR FAVOR GUARDE ESTE MANUAL DEL PROPIETARIO Y LEER ANTES DE
CADA USO. En este manual se explica cómo utilizar el arrancador y cargador con
seguridad y eficacia. Por favor, lea y siga las siguientes instrucciones y precauciones.
VEILLEZ A CONSERVER CES INSTRUCTIONS ET LES LIRE AVANT CHAQUE
UTILISATION. Ce guide vous montrera comment utiliser le booster efficacement
et en toute sécurité. Veuillez lire et suivre ces instructions et précautions.
0099001650-03
Table des Matières
Dépannage

Manuels Connexes pour DSR PROBOOSTER DSR103

Sommaire des Matières pour DSR PROBOOSTER DSR103
- Page 1 OWNERS MANUAL MANUAL DEL USUARIO MANUEL D’UTILISATION Models / Modelos / Modèles : DSR103, DSR103AUX Booster Arrancador Aide au démarrage DSR103 ™ DSR103AUX PLEASE SAVE THIS OWNER’S MANUAL AND READ BEFORE EACH USE. This manual will explain how to use the booster and charger safely and effectively. Please read and follow these instructions and precautions carefully.
-
Page 2: Table Des Matières
CONTENTS IMPORTANT SAFETY INSTRUCTIONS ................5 PERSONAL SAFETY PRECAUTIONS .................. 5 PREPARING TO USE THE BOOSTER .................. 6 BOOSTER LOCATION ......................6 INSTALLATION INSTRUCTIONS ................... 6 FEATURES ..........................6 CHARGING THE INTERNAL BATTERY OF THE BOOSTER ..........7 OPERATING INSTRUCTIONS ....................8 MAINTENANCE INSTRUCTIONS.................. - Page 4 TABLE DES MATIÈRES CONSIGNES DE SÉCURITÉ IMPORTANTES ..............24 MESURES DE SÉCURITÉ PERSONNELLES ..............24 PRÉPARATION À L’UTILISATION DU BOOSTER ............... 25 EMPLACEMENT DU BOOSTER ..................25 INSTRUCTIONS POUR L’INSTALLATION ................25 CARACTÉRISTIQUES ......................25 CHARGE DE LA BATTERIE INTERNE DU BOOSTER ............26 CONSIGNES D’UTILISATION ....................
-
Page 24: Consignes De Sécurité Importantes
1. CONSIGNES DE SÉCURITÉ IMPORTANTES CONSERVEZ CES INSTRUCTIONS. 1.1 CONSERVEZ CES INSTRUCTIONS – tombé par terre ou a été endommagé. Ce manuel contient d’importantes Faites appel à une personne qualifiée. consignes de sécurité et d’exploitation. 1.9 Ne démontez pas le booster. Apportez-le AVERTISSEMENT! RISQUE DE CHOC à... -
Page 25: Préparation À L'utilisation Du Booster
immédiatement l’endroit avec de l’eau et du 2.10 Si l’acide de batterie est avalée savon. Si l’acide entre en contact avec vos accidentellement : boire du lait, du blanc yeux, rincez immédiatement l’œil avec de d’œuf ou de l’eau. NE PAS faire vomir. l’eau froide coulante pendant au moins 10 Consulter un médecin immédiatement. -
Page 26: Charge De La Batterie Interne Du Booster
6.1 CHARGEUR INVERSION DES PINCES Bouton de marche/arrêt DE CONTACT, LE VOYANT LED Appuyez pour charger immédiatement (rouge) clignotant : la batterie alors qu'elle est correctement les connexions ont été inversées. branchée. Si vous n’appuyez pas sur le bouton, la charge devrait débuter dans LE VOYANT LED DE CHARGE 10 minutes. -
Page 27: Consignes D'utilisation
7.3 Modes de charge Mode de maintien (Surveillance du mode de flottement) Mode de charge automatique Lorsque le voyant LED vert (CHARGÉ / Lorsqu’une charge automatique est MAINTIEN) clignote, le chargeur passe effectuée, le chargeur reste en mode en mode maintien. Ce mode permet de automatique après que la batterie soit garder la batterie complètement chargée chargée. - Page 28 8.4 Démarrage d’un moteur de véhicule. B. Pour les véhicules mis à la masse positive, connectez la IMPORTANT : l’utilisation du booster pince NÉGATIVE (BLEUE) de sans batterie installée dans le véhicule l’unité à la borne de la batterie peut causer des dommages au système NÉGATIVE (NEG, N, -), non mise électrique du véhicule.
- Page 29 CC auxiliaire. Cette connexion ne • la reconduction des gaz à l’intérieur de peut être utilisée qu’avec des câbles CC la batterie ; auxiliaires DSR. • aux éléments internes de la batterie IMPORTANT : l’utilisation du booster de refroidir.
-
Page 30: Instructions D'entretien
ou si la batterie du véhicule est à 0 de sortie. Ensuite, débranchez volt. Ceci peut endommager les diodes successivement le câble CC auxiliaire de l’alternateur et les composants du véhicule et du booster. Retirez le électroniques du véhicule. couvercle de la connexion du câble CC auxiliaire du booster. -
Page 31: Pieces De Rechange
12. PIECES DE RECHANGE Booster Voltmètre ....................5399200032Z Bouton poussoir ..................0499000177Z Batterie interne (12 V, 32 Ah) ..............5799000042Z Pinces (bleue et rouge) ................2299002913Z Fusible (AMG ultra-robuste, 500 A) ............3999002114Z Chargeur Chargeur SC3DSR ................... 2299002873Z Kit prise ..................... 2299002914Z 13. - Page 32 PROBLÈME CAUSE POSSIBLE SOLUTION Si vous n’appuyez pas sur le Pas de problème, cette situation La batterie est bien branchée bouton MARCHE/ARRÊT, la est normale. mais le VOYANT LED DE charge devrait débuter dans 10 CHARGE ne s’est pas minutes. allumé...
-
Page 33: Avant De Retourner Pour Les Réparations
14. AVANT DE RETOURNER POUR LES RÉPARATIONS Pour plus d’informations sur le dépannage, communiquez avec le service à la clientèle pour obtenir de l’aide : services@schumacherelectric.com www.batterychargers.com ou composez le 1-800-621-5485 Pour une RÉPARATION OU un RETOUR, contactez le service technique au 1-800-621-5485. NE PAS ENVOYER L’UNITÉ... -
Page 35: Carte De Garantie
CARTE DE GARANTIE PAS BESOIN DE VOIE POSTAL ! ACTIVEZ VOTRE GARANTIE SUR INTERNET – LA VOIE PLUS RAPIDE ET FACILE ! Aller sur www.batterychargers.com pour enregistrer votre produit en ligne. (Pas d’accès internet? Envoyer la carte de garantie par poste.) INSCRIPTION AU PROGRAMME DE GARANTIE LIMITÉE DE UN AN...