Publicité

Les langues disponibles
  • FR

Les langues disponibles

Liens rapides

EOH2H004K
EOH2H004W
EOH2H004X
User Manual
Oven
Notice d'utilisation
Four
Benutzerinformation
Backofen
Istruzioni per l'uso
Forno
Manual de instrucciones
Horno
electrolux.com/register
EN
2
FR 22
DE 45
IT
67
ES 89

Publicité

Table des Matières
loading

Sommaire des Matières pour Electrolux EOH2H004K

  • Page 1 User Manual Oven Notice d'utilisation FR 22 EOH2H004K Four EOH2H004W Benutzerinformation DE 45 EOH2H004X Backofen Istruzioni per l’uso Forno Manual de instrucciones ES 89 Horno electrolux.com/register...
  • Page 2: Table Des Matières

    WE’RE THINKING OF YOU Thank you for purchasing an Electrolux appliance. You’ve chosen a product that brings with it decades of professional experience and innovation. Ingenious and stylish, it has been designed with you in mind. So whenever you use it, you can be safe in the knowledge that you’ll get great results every time.
  • Page 3 for any injuries or damage that are the result of incorrect installation or usage. Always keep the instructions in a safe and accessible location for future reference. 1.1 Children and vulnerable people safety This appliance can be used by children aged from 8 years •...
  • Page 4: Safety Instructions

    Do not use the appliance before installing it in the built-in • structure. Do not use a steam cleaner to clean the appliance. • Do not use harsh abrasive cleaners or sharp metal scrapers • to clean the glass door since they can scratch the surface, which may result in shattering of the glass.
  • Page 5 • Do not let mains cables touch or come • Do not change the specification of this near the appliance door or the niche appliance. below the appliance, especially when it • Make sure that the ventilation openings operates or the door is hot. are not blocked.
  • Page 6: Installation

    • Remove the door catch to prevent children or pets from becoming trapped in WARNING! the appliance. Risk of electric shock. 3. INSTALLATION 3.1 Building in WARNING! Refer to Safety chapters. www.youtube.com/electrolux www.youtube.com/aeg How to install your AEG/Electrolux Oven - Column installation ENGLISH...
  • Page 7 (*mm) min. 550 min. 560 ±1 (*mm) min. 550 min. 560 ±1 3.2 Securing the oven to the cabinet ENGLISH...
  • Page 8: Product Description

    4. PRODUCT DESCRIPTION 4.1 General overview Control panel Knob for the heating functions Knob for the timer Control knob (for the temperature) Temperature indicator / symbol Heating element Lamp Aqua cleaning container Shelf positions 4.2 Accessories For cakes and biscuits. To bake and roast or as a pan to collect fat.
  • Page 9: Daily Use

    6. DAILY USE WARNING! Heating Application Refer to Safety chapters. function 6.1 How to set: Heating function To bake and roast food on one shelf position. Refer to "Care and cleaning" chap‐ Conventional ter for more information about: Aqua Step 1 Turn the knob for the heating functions Cooking / Clean.
  • Page 10: Using The Accessories

    To set a heating function without a set cooking time, turn the knob for the timer to the initial position. 8. USING THE ACCESSORIES 8.1 Inserting accessories WARNING! Refer to Safety chapters. Wire shelf: Push the shelf between the guide bars of the shelf support and make sure that the feet point down.
  • Page 11 If you cannot find the settings for a special Leave the meat for approximately 15 minutes recipe, look for the similar one. before carving so that the juice does not seep out. The oven has a special system which circulates the air and constantly recycles the To prevent too much smoke in the oven steam.
  • Page 12 Conventional Cook‐ Fan Cooking CAKES (min) (°C) (°C) Eclairs, two levels 110 - 120 Baking tray Plate tarts 50 - 60 Baking tray Rich fruit cake 12 - 20 Baking tray Victoria sandwich 25 - 35 Baking tray Preheat the empty oven. Conventional Cooking Fan Cooking BREAD AND PIZZA...
  • Page 13 Conventional Cooking Fan Cooking MEAT (min) (°C) (°C) Beef 50 - 70 Pork 90 - 120 Veal 90 - 120 English roast beef, 50 - 60 rare English roast beef, 60 - 70 medium English roast beef, 70 - 75 well done Conventional Cooking Fan Cooking...
  • Page 14 Use the fourth shelf position. Grill with the maximum temperature setting. GRILL (kg) (min) (min) 1st side 2nd side Fillet steaks, 4 pieces 12 - 15 12 - 14 Beef steak, 4 pieces 10 - 12 6 - 8 Sausages, 8 12 - 15 10 - 12 Pork chops, 4 pieces...
  • Page 15 Ramekins Pizza pan Baking dish Flan base tin Ceramic Dark, non-reflective Dark, non-reflective Dark, non-reflective 8 cm diameter, 5 28 cm diameter 26 cm diameter 28 cm diameter cm height 10.6 Moist Fan Baking For the best results follow suggestions listed in the table below.
  • Page 16 (°C) (min) Vegetables, poached, baking tray or dripping pan 35 - 45 0.4 kg Vegetarian omelette pizza pan on wire shelf 35 - 45 Mediterranean vege‐ baking tray or dripping pan 35 - 45 tables, 0.7 kg 10.7 Information for test institutes Tests according to IEC 60350-1.
  • Page 17: Care And Cleaning

    (°C) (min) Toast, 4 - 6 Grill Wire shelf max. 2 - 3 minutes first Preheat the oven for 3 pieces side; 2 - 3 minutes minutes. second side Beef burger, Grill Wire shelf max. 20 - 30 Put the wire shelf on 6 pieces, and dripping the fourth level and the...
  • Page 18 Step 4 Let the oven work for 30 min. Step 6 Wait until the oven is cold. Dry the cavi‐ ty with a soft cloth. Step 5 Turn off the oven. 11.3 How to remove and install: Door The oven door has two glass panels. You can remove the oven door and the internal glass panel to clean it.
  • Page 19: Troubleshooting

    Step 8 Clean the glass panels with water and soap. Dry the glass panels carefully. Do not clean the glass panels in the dishwasher. Step 9 After cleaning, install the glass panel and the oven door. The screen-printing zone must face the inner side of the door.
  • Page 20: Energy Efficiency

    ......... Serial number (S.N.) ......... 13. ENERGY EFFICIENCY 13.1 Product Information and Product Information Sheet* Supplier's name Electrolux EOH2H004K 949496733 Model identification EOH2H004W 949496732 EOH2H004X 949496734 Energy Efficiency Index 95.2 Energy efficiency class Energy consumption with a standard load, conventional mode 0.89 kWh/cycle...
  • Page 21 13.2 Energy saving Residual heat When the cooking duration is longer than 30 min, reduce the oven temperature to The oven has features which minimum 3 - 10 min before the end of help you save energy during cooking. The residual heat inside the oven everyday cooking.
  • Page 22 NOUS PENSONS À VOUS Merci d'avoir acheté un appareil Electrolux. Vous avez choisi un produit qui bénéficie de décennies d'expérience professionnelle et d'innovation. Ingénieux et élégant, cet appareil a été conçu pour vous. C'est la raison pour laquelle vous pouvez avoir la certitude d'obtenir d'excellents résultats à...
  • Page 23 responsable des blessures et dégâts résultant d'une mauvaise installation ou utilisation. Conservez toujours les instructions dans un lieu sûr et accessible pour vous y référer ultérieurement. 1.1 Sécurité des enfants et des personnes vulnérables Cet appareil peut être utilisé par des enfants âgés d'au •...
  • Page 24: Consignes De Sécurité

    Avant d'effectuer une opération de maintenance, • débranchez l'appareil de la prise secteur. AVERTISSEMENT : Assurez-vous que l'appareil est éteint • et débranché avant de remplacer l'éclairage afin d'éviter tout risque de choc électrique. N'utilisez pas l'appareil avant de l'avoir installé dans la •...
  • Page 25 • L'installation électrique doit comporter un dispositif d'isolation qui vous permet de Longueur du câble d’ali‐ 1500 mm déconnecter l'appareil du secteur à tous mentation secteur. Le câ‐ ble est placé dans le coin les pôles. Le dispositif d'isolement doit droit de la face arrière avoir une largeur d'ouverture de contact de 3 mm minimum.
  • Page 26 2.4 Entretien et Nettoyage • N'exercez jamais de pression sur la porte ouverte. • N'utilisez jamais l'appareil comme plan de AVERTISSEMENT! travail ou comme plan de stockage. Risque de blessure, d'incendie • Ouvrez prudemment la porte de l'appareil. ou de dommages matériels sur Si vous utilisez des ingrédients contenant l'appareil.
  • Page 27: Installation

    • Débranchez l'appareil de l'alimentation électrique. 3. INSTALLATION 3.1 Encastrement AVERTISSEMENT! Reportez-vous aux chapitres concernant la sécurité. www.youtube.com/electrolux www.youtube.com/aeg How to install your AEG/Electrolux Oven - Column installation (*mm) min. 550 min. 560 ±1 FRANÇAIS...
  • Page 28 (*mm) min. 550 min. 560 ±1 3.2 Fixation du four au meuble FRANÇAIS...
  • Page 29: Description De L'appareil

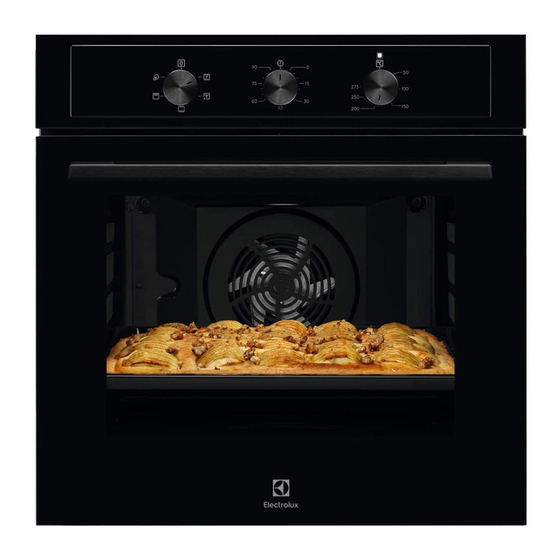
    4. DESCRIPTION DE L'APPAREIL 4.1 Vue d’ensemble Bandeau de commande Manette de sélection des modes de cuisson Manette du minuteur Thermostat Indicateur / symbole de température Élément chauffant Éclairage Ventilateur Bac de nettoyage Aqua Clean Position des grilles 4.2 Accessoires Pour les gâteaux et les biscuits.
  • Page 30: Utilisation Quotidienne

    6. UTILISATION QUOTIDIENNE AVERTISSEMENT! Mode de Application Reportez-vous aux chapitres cuisson concernant la sécurité. Pour cuire et rôtir des aliments sur 6.1 Comment régler : Mode de un seul niveau. Reportez-vous au chapitre « Entre‐ cuisson Chauffage tien et nettoyage » pour obtenir plus Haut/ Bas / d'informations sur : Aqua Clean.
  • Page 31: Utilisation Des Accessoires

    Étape 1 Sélectionnez la fonction du four et la température. Étape 2 Tournez la manette du minuteur sur sa position maximale. Étape 3 Tournez la manette du minuteur pour définir l'heure d’arrêt. Lorsque la durée définie est écoulée, le signal sonore retentit et le four s'éteint. Étape 4 Tournez la manette de sélection des fonctions du four et celle du thermostat sur la position Arrêt.
  • Page 32: Conseils Et Astuces

    10. CONSEILS ET ASTUCES Si vous utilisez deux plaques de cuisson en Reportez-vous aux chapitres même temps, laissez un niveau libre entre concernant la sécurité. les deux. Cuisson de viande et de poisson 10.1 Conseils de cuisson Pour les aliments très gras, utilisez un plat à Le four dispose de cinq niveaux de grille.
  • Page 33 Chauffage Haut/ Bas Chaleur tournante GÂ‐ TEAUX (min) (°C) (°C) Gâteau de Noël, 90 à 120 Moule à gâteau, Ø préchauffer le four 20 cm à vide Gâteau aux pru‐ 50 à 60 Moule à pain nes, préchauffer le four à vide Biscuits 140 à...
  • Page 34 Chauffage Haut/ Bas Chaleur tournante PAIN ET PIZZA (min) (°C) (°C) Petits pains, 6 à 8 230 à 250 230 à 250 10 à 12 Plateau de cuis‐ petits pains Pizza 10 à 12 Plateau de cuis‐ son / Plat à rôtir Scones 10 à...
  • Page 35 Chauffage Haut/ Bas Chaleur tournante VIANDE (min) (°C) (°C) Palette de porc, avec 120 à 150 couenne Jarret de porc, 2 mor‐ 100 à 120 ceaux Gigot d’agneau 110 à 130 Poulet entier 70 à 85 Dinde entière 210 à 240 Canard entier 120 à...
  • Page 36 GRIL (kg) (min) (min) 1ère face 2e face Poulet, demi, 2 30 - 35 25 - 30 Brochettes, 4 10 - 15 10 - 12 Blanc de poulet, 4 morceaux 12 - 15 12 - 14 Hamburgers, 6 20 - 30 Filet de poisson, 4 morceaux 12 - 14 10 - 12...
  • Page 37 10.6 Chaleur tournante humide Pour de meilleurs résultats, suivez les suggestions indiquées dans le tableau ci- dessous. (°C) (min) Petits pains sucrés, Plateau de cuisson ou plat à 40 - 50 (12 pièces) rôtir Petits pains, (9 piè‐ Plateau de cuisson ou plat à 35 - 45 ces) rôtir...
  • Page 38 (°C) (min) Tartelettes, (8 pièces) Plateau de cuisson ou plat à 30 - 40 rôtir Légumes, pochés, Plateau de cuisson ou plat à 35 - 45 0.4 kg rôtir Omelette végétarien‐ plaque à pizza sur la grille mé‐ 35 - 45 tallique Légumes méditerra‐...
  • Page 39: Entretien Et Nettoyage

    (°C) (min) Génoise, Chaleur tour‐ Grille métal‐ 2 et 4 40 - 60 Préchauffez le four moule à gâ‐ nante lique pendant 10 minutes. teau de 26 cm Sablé Chaleur tour‐ Plateau de 140 - 20 - 40 nante cuisson Sablé...
  • Page 40 Après chaque utilisation, lavez tous les accessoires et séchez-les. Utilisez un chiffon doux avec de l’eau tiède et un détergent doux. Ne lavez pas les accessoires au lave-vaisselle. Ne nettoyez pas les accessoires antiadhésifs avec un produit nettoyant abrasif ou des objets tranchants.
  • Page 41 Étape 5 Tenez la garniture de porte (B) sur le bord supérieur de la porte des deux côtés et poussez vers l'intérieur pour libérer le joint du clip. Étape 6 Tirez la garniture de porte vers l'avant pour la déposer. Étape 7 Prenez le panneau de verre de la porte par son bord supérieur et tirez-le doucement.
  • Page 42: Dépannage

    Modèle (MOD.) ......... Référence du produit (PNC) ......... Numéro de série (S.N.) ......... 13. RENDEMENT ÉNERGÉTIQUE 13.1 Informations produit et Fiche d’informations produit* Nom du fournisseur Electrolux EOH2H004K 949496733 Identification du modèle EOH2H004W 949496732 EOH2H004X 949496734 Index d'efficacité énergétique 95.2 FRANÇAIS...
  • Page 43 0.80 kWh/cycle Nombre de cavités Source de chaleur Électricité Volume 68 l Type de four Four encastrable EOH2H004K 26.0 kg Masse EOH2H004W 26.0 kg EOH2H004X 26.0 kg * Pour l’Union européenne conformément aux Règlements UE 65/2014 et 66/2014. Pour la République de Biélorussie conformément à STB 2478-2017, Annexe G ; STB 2477-2017, Annexes A et Pour l’Ukraine conformément à...
  • Page 44 14. EN MATIÈRE DE PROTECTION DE L'ENVIRONNEMENT Recyclez les matériaux portant le symbole portant le symbole avec les ordures ménagères. Emmenez un tel produit dans . Déposez les emballages dans les votre centre local de recyclage ou contactez conteneurs prévus à cet effet. Contribuez à vos services municipaux.
  • Page 45 WIR DENKEN AN SIE Vielen Dank, dass Sie sich für ein Gerät von Electrolux entschieden haben. Sie haben ein Produkt gewählt, hinter dem jahrzehntelange professionelle Erfahrung und Innovation stehen. Bei der Entwicklung dieses großartigen und eleganten Geräts haben wir an Sie gedacht.
  • Page 46: Sicherheitshinweise

    SICHERHEITSHINWEISE Lesen Sie vor der Montage und dem Gebrauch des Geräts zuerst die Bedienungsanleitung. Bei Verletzungen oder Schäden infolge nicht ordnungsgemäßer Montage oder Verwendung übernimmt der Hersteller keine Haftung. Bewahren Sie die Anleitung zum Nachschlagen an einem sicheren und zugänglichen Ort auf. 1.1 Sicherheit von Kindern und schutzbedürftigen Personen Das Gerät kann von Kindern ab 8 Jahren und Personen mit...
  • Page 47: Sicherheitsanweisungen

    WARNUNG: Das Gerät und die zugänglichen Geräteteile • werden während des Betriebs heiß. Seien Sie vorsichtig und berühren Sie niemals die Heizelemente. Verwenden Sie zum Anfassen des Zubehörs und der Töpfe • wärmeisolierende Handschuhe. Ziehen Sie bitte vor jeder Wartungsmaßnahme den •...
  • Page 48 müssen so befestigt werden, dass sie nicht ohne Werkzeug entfernt werden Schranktiefe 550 (550) mm können. Höhe der Gerätevordersei‐ 589 mm • Stecken Sie den Netzstecker erst nach Abschluss der Montage in die Steckdose. Stellen Sie sicher, dass der Netzstecker Höhe der Geräterückseite 571 mm nach der Montage noch zugänglich ist.
  • Page 49 2.3 Gebrauch – Gehen Sie beim Herausnehmen oder Einsetzen des Zubehörs sorgfältig vor. WARNUNG! • Verfärbungen der Email- oder Verletzungs-, Verbrennungs-, Edelstahlbeschichtung haben keine Stromschlag- oder Auswirkung auf die Leistung des Geräts. Explosionsgefahr. • Dieses Gerät ist nur zum Kochen •...
  • Page 50: Montage

    • Verwenden Sie nur Lampen mit der gleichen Leistung . 2.6 Service • Wenden Sie sich zur Reparatur des Geräts an den autorisierten Kundendienst. 3. MONTAGE 3.1 Montage WARNUNG! Siehe Kapitel Sicherheitshinweise. www.youtube.com/electrolux www.youtube.com/aeg How to install your AEG/Electrolux Oven - Column installation DEUTSCH...
  • Page 51 (*mm) min. 550 min. 560 ±1 (*mm) min. 550 min. 560 ±1 3.2 Befestigung des Ofens am Möbel DEUTSCH...
  • Page 52: Gerätebeschreibung

    4. GERÄTEBESCHREIBUNG 4.1 Gesamtansicht Bedienblende Einstellknopf für die Ofenfunktionen Timer-Einstellknopf Einstellknopf (für die Temperatur) Temperaturanzeige/-symbol Heizelement Lampe Ventilator Behälter für die Aqua-Reinigungsfunktion Einschubebenen 4.2 Zubehör Für Kuchen und Plätzchen. Zum Backen und Braten oder zum Auffangen von • Kombirost abtropfendem Fett. Für Kochgeschirr, Kuchenformen, Braten.
  • Page 53: Täglicher Gebrauch

    6. TÄGLICHER GEBRAUCH WARNUNG! Ofenfunkti‐ Anwendung Siehe Kapitel Sicherheitshinweise. Zum Backen und Braten auf einer 6.1 Einstellung: Ofenfunktion Ebene. Weitere Informationen zu folgenden Ober-/Unter‐ Themen finden Sie im Kapitel „Pfle‐ hitze / Aqua ge und Reinigung“: Aqua-Reinigung. Schritt 1 Drehen Sie den Backofen-Einstellknopf Reinigung auf eine Ofenfunktion.
  • Page 54: Verwendung Des Zubehörs

    Schritt 3 Stellen Sie die Ausschaltzeit durch Drehen des Timer-Einstellknopfs ein. Wenn die eingestellte Zeit abgelaufen ist, ertönt der Signalton und der Backofen wird ausgeschal‐ tet. Schritt 4 Drehen Sie den Backofen-Einstellknopf und den Temperaturwahlknopf in die Position Aus. Drehen Sie zum Einstellen einer Ofenfunktion ohne Garzeiteinstellung den Timer-Einstellknopf in die Aus‐ gangsposition.
  • Page 55: Tipps Und Hinweise

    10. TIPPS UND HINWEISE Garen von Fleisch und Fisch Siehe Kapitel Setzen Sie bei Speisen mit hohem Fettgehalt Sicherheitshinweise. eine Brat- und Fettpfanne ein, damit keine hartnäckigen Flecken im Backofen 10.1 Garempfehlungen verbleiben. Der Backofen hat fünf Einschubebenen. Lassen Sie das Fleisch vor dem Anschneiden etwa 15 Minuten ruhen, damit Die Ebenen werden vom Boden des der Fleischsaft nicht ausläuft.
  • Page 56 Ober-/Unterhitze Umluft KU‐ CHEN (Min.) (°C) (°C) Christstollen, Hei‐ 90–120 Kuchenform, Ø zen Sie den lee‐ 20 cm ren Backofen vor Rosinenkuchen, 50–60 Brotform Heizen Sie den leeren Backofen Kekse 140–150 30–35 Backblech Kekse, zwei Ebe‐ 140–150 2 und 4 35–40 Backblech Kekse, drei Ebe‐...
  • Page 57 Ober-/Unterhitze Umluft BROT UND PIZZA (Min.) (°C) (°C) Pizza 10–20 Backblech / Tiefes Blech Scones 10–20 Backblech Heizen Sie den leeren Backofen vor. Verwenden Sie eine Kuchenform. Ober-/Unterhitze Umluft FLANS (Min.) (°C) (°C) Nudelauflauf, Vorhei‐ 40–50 zen ist nicht erforder‐ lich Gemüseauflauf, Vor‐...
  • Page 58 Ober-/Unterhitze Umluft FLEISCH (Min.) (°C) (°C) Schweineschulter, mit 120–150 Schwarte Schweinshaxe, 2 100–120 Stück Lammkeule 110–130 Hähnchen, ganz 70–85 Pute, ganz 210–240 Ente, ganz 120–150 Gans, ganz 150–200 Kaninchen, in Stücke 60–80 geschnitten Kaninchen, in Stücke 150–200 geschnitten Fasan, ganz 90–120 Ober-/Unterhitze Umluft...
  • Page 59 GRILL (kg) (Min.) (Min.) Erste Seite Zweite Seite Schweinekoteletts, 4 Stück 12 - 16 12 - 14 Hähnchen, halbiert, 2 30 - 35 25 - 30 Spieße, 4 10 - 15 10 - 12 Hähnchenbrust, 4 Stück 12 - 15 12 - 14 Frikadellen, 6 20 - 30...
  • Page 60 Förmchen Pizzapfanne Backform Tortenbodenform Keramikform Dunkel, nicht reflektierend Dunkel, nicht reflektierend Dunkel, nicht reflektierend 8 cm Durchmes‐ 28 cm Durchmesser 26 cm Durchmesser 28 cm Durchmesser ser, 5 cm Höhe 10.6 Feuchte Umluft Beachten Sie für beste Ergebnisse die unten in der Tabelle aufgeführten Empfehlungen.
  • Page 61 (°C) (Min.) Törtchen, 8 Stück Backblech oder tiefes Blech 30 - 40 Gemüse, pochiert, Backblech oder tiefes Blech 35 - 45 0,4 kg Vegetarisches Ome‐ Pizzapfanne auf Kombirost 35 - 45 lett Mediterranes Gemü‐ Backblech oder tiefes Blech 35 - 45 se, 0,7 kg 10.7 Informationen für Prüfinstitute Tests gemäß...
  • Page 62: Reinigung Und Pflege

    (°C) (Min.) Mürbeteig‐ Ober-/Unterhit‐ Backblech 140 - 25 - 45 gebäck Toast, 4 - 6 Grill Kombirost Max. 2 - 3 Minuten auf Backofen 3 Min. vor‐ Stück der ersten Seite, 2 heizen. - 3 Minuten auf der zweiten Seite Hamburger Grill Kombirost...
  • Page 63 11.2 Verwendung: Aqua Reinigung Schritt 3 Stellen Sie die Temperatur auf 90 °C. Bei dieser Reinigungsfunktion werden mithilfe von Feuchtigkeit Fett- und Schritt 4 Lassen Sie den Backofen 30 Min. lang eingeschaltet. Speisereste aus dem Backofen entfernt. Schritt 5 Schalten Sie den Ofen aus. Schritt 1 Füllen Sie Wasser in die Garraumver‐...
  • Page 64 Schritt 6 Ziehen Sie die Türabdeckung nach vorn, um sie abzunehmen. Schritt 7 Halten Sie die Oberkante der Türglasscheibe fest und ziehen Sie vorsichtig heraus. Ach‐ ten Sie darauf, dass die Glasscheiben voll‐ ständig aus den Halterungen gezogen wer‐ den. Schritt 8 Reinigen Sie die Glasscheiben mit Wasser und Spülmittel.
  • Page 65: Fehlersuche

    Wir empfehlen, hier folgende Daten zu notieren: Modell (MOD.) ......... Produktnummer (PNC) ......... Seriennummer (S.N.) ......... 13. ENERGIEEFFIZIENZ 13.1 Produktinformationen und Produktdatenblatt* Herstellername Electrolux EOH2H004K 949496733 Modellidentifikation EOH2H004W 949496732 EOH2H004X 949496734 Energieeffizienzindex 95.2 Energieeffizienzklasse Energieverbrauch bei Standardbeladung, Ober-/Unterhitze 0.89 kWh/Programm Energieverbrauch bei Standardbeladung, Umluft 0.80 kWh/Programm Anzahl der Garräume...
  • Page 66 EOH2H004K 26.0 kg Gewicht EOH2H004W 26.0 kg EOH2H004X 26.0 kg * Für die Europäische Union gemäß EU-Richtlinien 65/2014 und 66/2014. Für die Republik Weißrussland gemäß STB 2478-2017, Anhang G; STB 2477-2017, Anlagen A und B. Für die Ukraine gemäß 568/32020.
  • Page 67 PENSATI PER VOI Grazie per aver acquistato un'apparecchiatura Electrolux. Avete scelto un prodotto che ha alle spalle decenni di esperienza professionale e innovazione. Ingegnoso ed elegante, è stato progettato pensando a voi. Quindi, in qualsiasi momento desiderate utilizzarlo, potete esser certi di ottenere sempre i migliori risultati.
  • Page 68 di eventuali lesioni o danni derivanti da un'installazione o un uso scorretti. Conservare sempre le istruzioni in un luogo sicuro e accessibile per poterle consultare in futuro. 1.1 Sicurezza di bambini e persone vulnerabili Questa apparecchiatura può essere usata da bambini a •...
  • Page 69: Istruzioni Di Sicurezza

    AVVERTENZA: Assicurarsi che l’apparecchiatura sia • spenta prima di sostituire la lampadina per evitare la possibilità di scosse elettriche. Non usare l'apparecchiatura prima di installarla nella • struttura a incasso. Non usare una pulitrice a vapore per pulire • l'apparecchiatura. Non utilizzare detergenti abrasivi o raschietti di metallo per •...
  • Page 70 • L'impianto elettrico deve essere dotato di un dispositivo di isolamento che consenta Lunghezza del cavo di ali‐ 1500 mm di scollegare l'apparecchiatura dalla presa mentazione. Il cavo è collo‐ cato nell'angolo destro del di corrente a tutti i poli. Il dispositivo di lato posteriore.
  • Page 71 • Non esercitare pressione sulla porta l’uso non chiudere il pannello dell'armadio aperta. finché l'apparecchiatura non si è • Non utilizzare l'apparecchiatura come completamente raffreddata. superficie di lavoro o come piano di 2.4 Pulizia e cura appoggio. • Aprire la porta dell'apparecchiatura con cautela.
  • Page 72: Installazione

    2.7 Smaltimento AVVERTENZA! Rischio di lesioni o soffocamento. 3. INSTALLAZIONE 3.1 Incasso AVVERTENZA! Fare riferimento ai capitoli sulla sicurezza. www.youtube.com/electrolux www.youtube.com/aeg How to install your AEG/Electrolux Oven - Column installation (*mm) min. 550 min. 560 ±1 ITALIANO...
  • Page 73: Descrizione Del Prodotto

    (*mm) min. 550 min. 560 ±1 3.2 Fissaggio nel mobile 4. DESCRIZIONE DEL PRODOTTO 4.1 General overview Pannello di controllo Manopola di regolazione delle funzioni di riscaldamento Manopola del timer Manopola di regolazione (per la temperatura) Indicatore della temperatura / simbolo Resistenza Lampadina Ventilatore...
  • Page 74: Prima Di Utilizzare L'elettrodomestico

    Posizioni dei ripiani 4.2 Accessori Per la cottura di torte e biscotti. Per cuocere al forno, arrostire o come • Griglia recipiente per raccogliere i grassi. Per pentole, stampi per dolci, arrosti. • Teglia universale 5. PRIMA DI UTILIZZARE L'ELETTRODOMESTICO AVVERTENZA! Fare riferimento ai capitoli sulla sicurezza.
  • Page 75: Funzioni Del Timer

    Funzione Applicazione Funzione Applicazione cottura cottura Per arrostire o arrostire e cuocere al Per cuocere la pizza al forno. Per forno gli alimenti con la stessa tem‐ abbrustolire in modo intensivo ed peratura di cottura su più ripiani, avere un fondo croccante. Imposta‐ Cottura venti‐...
  • Page 76: Utilizzo Degli Accessori

    8. UTILIZZO DEGLI ACCESSORI 8.1 Inserimento di accessori AVVERTENZA! Fare riferimento ai capitoli sulla sicurezza. Griglia: Spingere il ripiano fra le guide del supporto e veri‐ ficare che i piedini siano rivolti verso il basso. Leccarda: Spingere la lamiera tra le guide del supporto ripia‐ 9.
  • Page 77 Contare le posizioni della griglia dal basso Cottura di carni e pesce del forno. Usare una leccarda per alimenti ad alto contenuto di grassi, onde evitare che nel Il vostro nuovo forno può cuocere o arrostire forno si formino macchie che non possono in modo differente rispetto al forno posseduto più...
  • Page 78 Cottura convenziona‐ Cottura ventilata TOR‐ TE E DOLCI (min) (°C) (°C) Meringhe 15 - 20 Lamiera dolci Focaccine, preri‐ 25 - 35 Lamiera dolci scaldare il forno vuoto Eclair, un livello 45 - 70 Lamiera dolci Eclair, due livelli 110-120 Lamiera dolci Crostatine 50 - 60...
  • Page 79 Cottura convenzionale Cottura ventilata FLAN (min) (°C) (°C) Flan di pasta, il preri‐ 40-50 scaldamento non è ne‐ cessario Flan di verdure, il pre‐ 45 - 60 riscaldamento non è necessario Quiche 50 - 60 Lasagne 180 - 190 180 - 190 25 - 40 Cannelloni 180 - 190...
  • Page 80 Cottura convenzionale Cottura ventilata CARNE (min) (°C) (°C) Oca intera 150 - 200 Coniglio, in pezzi 60 - 80 Lepre, tagliata a pezzi 150 - 200 Fagiano intero 90 - 120 Cottura convenzionale Cottura ventilata PESCE (min) (°C) (°C) Trota / Orata/ , 3 - 4 pesce 190 40 - 55 Tonno / Salmone, 4 - 6 fi‐...
  • Page 81 10.4 Essicatura - Cottura ventilata Coprire le teglie con carta resistente al grasso o carta da forno. VERDURE (°C) (ore) Per ottenere risultati migliori, spegnere il forno a metà del tempo di asciugatura, aprire Verdure per minestrone 60 - 70 5 - 6 lo sportello e lasciarlo raffreddare per una Funghi...
  • Page 82 (°C) (min.) Pizza surgelata, 0,35 ripiano a filo 45 - 55 Rotolo con marmella‐ vassoio di cottura o leccarda 30 - 40 Brownie vassoio di cottura o leccarda 45 - 50 Soufflé, 6 pezzi stampini di ceramica sulla gri‐ 45 - 55 glia Base pan di Spagna teglia per timballo su griglia...
  • Page 83 (°C) (min) Dolcetti, 20 Cottura conven‐ Vassoio da 20 - 30 per lamiera zionale forno dolci Dolcetti, 20 Cottura ventila‐ Vassoio da 150 - 20 - 35 per lamiera forno dolci Dolcetti, 20 Cottura ventila‐ Vassoio da 2 e 4 150 - 20 - 35 per lamiera...
  • Page 84: Pulizia E Cura

    11. PULIZIA E CURA AVVERTENZA! Fare riferimento ai capitoli sulla sicurezza. 11.1 Note sulla pulizia Pulire la parte anteriore del forno con un panno morbido imbevuto di acqua tiepida e deter‐ gente delicato. Pulire e controllare la guarnizione della porta attorno al telaio della cavità. Servirsi di una soluzione detergente per pulire le superfici metalliche.
  • Page 85 Fase 1 Aprire completamente la porta e tenere le due cerniere. Fase 2 Alzare e ruotare le levette completamente sulle due cerniere. Fase 3 Chiudere la porta del forno fino alla prima posizione di apertura circa metà. Quindi sol‐ levare e tirare in avanti la porta sfilandola dalla sua sede.
  • Page 86: Risoluzione Dei Problemi

    Accertarsi che la serigrafia sia sul lato interno della porta. Verificare che dopo l'installazione, la superficie della cornice del pannello di vetro, nei punti delle seri‐ grafie, non risulti ruvida al tatto. Se installato correttamente, il profilo della porta emet‐ te un clic.
  • Page 87: Efficienza Energetica

    ......... Numero di serie (S.N.) ......... 13. EFFICIENZA ENERGETICA 13.1 Informazioni sul prodotto e Scheda informativa sul prodotto* Nome fornitore Electrolux EOH2H004K 949496733 Identificativo modello EOH2H004W 949496732 EOH2H004X 949496734 Indice di efficienza energetica 95.2 Classe di efficienza energetica Consumo di energia con un carico standard, in modalità tradiziona‐...
  • Page 88 13.2 Risparmio energetico Cucinare con ventola Ove possibile, servirsi delle funzioni di cottura con la ventola per risparmiare Il forno è dotato di funzioni che energia. consentono di aiutarvi a risparmiare energia durante le Calore residuo operazioni di cottura di tutti i Quando la durata di cottura è...
  • Page 89 PENSAMOS EN USTED Gracias por adquirir un aparato Electrolux. Ha escogido un producto que contiene décadas de experiencia e innovación profesionales. Ingenioso y elegante, se ha diseñado pensando en usted. Así pues, siempre que lo utilice, puede tener la seguridad de que conseguirá...
  • Page 90 responsable de lesiones o daños producidos como resultado de una instalación o un uso incorrectos. Conserve siempre estas instrucciones en lugar seguro y accesible para futuras consultas. 1.1 Seguridad de niños y personas vulnerables Este aparato puede ser utilizado por niños de 8 años en •...
  • Page 91: Instrucciones De Seguridad

    ADVERTENCIA: Asegúrese de que el aparato está • desconectado antes de reemplazar la lámpara con el fin de impedir que se produzca una descarga eléctrica. No utilice el aparato antes de instalarlo en la estructura • empotrada. No utilice un limpiador a vapor para limpiar el aparato. •...
  • Page 92 2.2 Conexión eléctrica • El aparato solo se suministra con un cable de alimentación. ADVERTENCIA! Riesgo de incendios y Tipos de cables aplicables para su instala‐ descargas eléctricas. ción o cambio para Europa: H07 RN-F, H05 RN-F, H05 RRF, H05 VV-F, H05 •...
  • Page 93 • Procure que no haya chispas ni fuego • Asegúrese de que el aparato esté frío. encendido cerca cuando se abra la puerta Los paneles de cristal pueden romperse. del aparato. • Cambie inmediatamente los paneles de • No coloque productos inflamables ni cristal de la puerta que estén dañados.
  • Page 94: Instalación

    3. INSTALACIÓN 3.1 Empotrado ADVERTENCIA! Consulte los capítulos sobre seguridad. www.youtube.com/electrolux www.youtube.com/aeg How to install your AEG/Electrolux Oven - Column installation (*mm) min. 550 min. 560 ±1 (*mm) min. 550 min. 560 ±1...
  • Page 95: Descripción Del Producto

    3.2 Fijación del horno al mueble 4. DESCRIPCIÓN DEL PRODUCTO 4.1 Resumen general Panel de control Mando de las funciones de cocción Mando del temporizador Mando de en control (de la temperatura) Indicador/símbolo de temperatura Resistencia Bombilla Ventilador Contenedor de limpieza con agua Posiciones de los estantes 4.2 Accesorios •...
  • Page 96: Uso Diario

    Paso 1 Paso 2 Limpie el horno Precaliente el horno vacío Retire todos los accesorios del horno. Seleccione la temperatura máxima para la función: Limpie el horno y los accesorios con un paño sua‐ ve humedecido en agua templada y jabón neutro. Tiempo: 1 h.
  • Page 97: Funciones Del Reloj

    La puerta del horno debe estar cerrada ventil.. Puede consultar recomendaciones durante la cocción para que la función no se generales para ahorrar energía en el capítulo interrumpa y que el horno funcione con la "Eficiencia energética", bajo consumo máxima eficiencia energética posible. energético.
  • Page 98: Funciones Adicionales

    Bandeja honda: Introduzca la bandeja entre las guías del carril de apoyo. 9. FUNCIONES ADICIONALES 9.1 Ventilador de enfriamiento sobrecalentamientos peligrosos. Para evitarlo, el horno dispone de un termostato Cuando el horno funciona, el ventilador de de seguridad que interrumpe la alimentación. enfriamiento se pone en marcha El horno se vuelve a encender automáticamente para mantener frías las...
  • Page 99 Tiempos de cocción (de calor, tiempo de cocción, etc.) para sus Los tiempos de cocción dependen del tipo de recipientes, recetas y cantidades cuando alimento, de su consistencia y del volumen. utilice este horno. Inicialmente, supervise el rendimiento cuando cocine. Busque los ajustes óptimos 10.2 Horneado y asado Cocción convencio‐...
  • Page 100 Cocción convencional Cocción ventil. PAN Y PIZZA (min) (°C) (°C) Pan blanco, 1 - 2 60 - 70 trozos, 0,5 kg ca‐ da uno Pan de centeno, 30 - 45 Molde para pan no se necesita precalentar Pan/Rollitos, 6 - 8 230 - 250 230 - 250 10 - 20...
  • Page 101 Cocción convencional Cocción ventil. CARNE (min) (°C) (°C) Rosbif en su punto 60 - 70 Rosbif muy hecho 70 - 75 Cocción convencional Cocción ventil. CARNE (min) (°C) (°C) Paletilla de cerdo, con 120 - 150 corteza Morcillo de cerdo, 2 100 - 120 trozos Pata de cordero...
  • Page 102 GRILL (kg) (min) (min) 1ª cara 2ª cara Filetes de solomillo, 4 piezas 12 - 15 12 - 14 Bistec de vaca, 4 piezas 10 - 12 6 - 8 Salchichas, 8 12 - 15 10 - 12 Chuletas de cerdo, 4 piezas 12 - 16 12 - 14 Pollo, medio, 2...
  • Page 103 Ramequines Bandeja para pizza Bandeja para hornear Molde para base Cerámica Oscuro, mate Oscuro, mate Oscuro, mate 8 cm de diámetro, 28 cm de diámetro 26 cm de diámetro 28 cm de diámetro 5 cm de altura 10.6 Horneado húmedo + ventil. Para obtener el mejor resultado, siga las recomendaciones de la tabla siguiente.
  • Page 104 (°C) (min) Tarta salada, 16 pie‐ bandeja o bandeja honda 35 - 45 Galletas crujientes de bandeja o bandeja honda 40 - 50 masa quebrada, 20 piezas Tartaletas, 8 piezas bandeja o bandeja honda 30 - 40 Verduras pochadas, bandeja o bandeja honda 35 - 45 0,4 kg Tortilla vegetariana...
  • Page 105: Mantenimiento Y Limpieza

    (°C) (min) Bizcocho, Cocción ventil. Parrilla 2 y 4 40 - 60 Precaliente el horno 10 molde de re‐ minutos. postería Ø26 cm Mantecados Cocción ventil. Bandeja de 140 - 20 - 40 cocción Mantecados Cocción ventil. Bandeja de 2 y 4 140 - 25 - 45 cocción...
  • Page 106 Limpie todos los accesorios después de cada uso y déjelos secar. Use un paño suave hu‐ medecido en agua caliente y detergente suave. No lave los accesorios en el lavavajillas No limpie los accesorios no adherentes utilizando un limpiador abrasivo ni objetos afilados. Accesorios 11.2 Instrucciones de uso: Limpieza con agua...
  • Page 107 Paso 5 Sujete por ambos lados el acabado de la puerta (B), situado en el borde superior de ésta, y empuje hacia dentro para soltar el sello de resorte. Paso 6 Tire del borde de la puerta hacia delante pa‐ ra desengancharla.
  • Page 108: Solución De Problemas

    Número de producto (PNC) ......... Número de serie (S.N.) ......... 13. EFICACIA ENERGÉTICA 13.1 Información del producto y Hoja de información del producto* Nombre del proveedor Electrolux EOH2H004K 949496733 Identificación del modelo EOH2H004W 949496732 EOH2H004X 949496734 Índice de eficiencia energética 95.2 ESPAÑOL...
  • Page 109 0.80 kWh/ciclo Número de cavidades Fuente de calor Electricidad Volumen 68 l Tipo de horno Horno empotrado EOH2H004K 26.0 kg Masa EOH2H004W 26.0 kg EOH2H004X 26.0 kg * Para la Unión Europea según los Reglamentos de la UE 65/2014 y 66/2014.
  • Page 110 14. ASPECTOS MEDIOAMBIENTALES deseche los aparatos marcados con el Recicle los materiales con el símbolo símbolo junto con los residuos Coloque el material de embalaje en los domésticos. Lleve el producto a su centro de contenedores adecuados para su reciclaje. reciclaje local o póngase en contacto con su Ayude a proteger el medio ambiente y la oficina municipal.
  • Page 112 electrolux.com...

Ce manuel est également adapté pour:

Eoh2h004wEoh2h004x

Table des Matières