Comelit UT2020/4 Manuel Technique
IT
EN
MANUALE
TECHNICAL
TECNICO
MANUAL
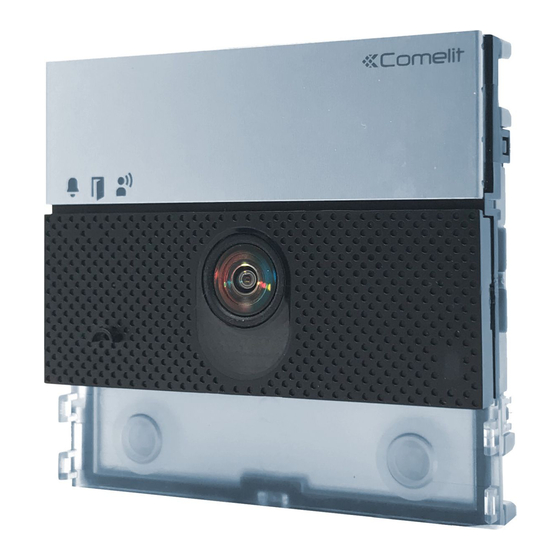
Modulo audio/video Ultra Simplebus2
Ultra Simplebus2 audio/video module
Module audio/vidéo Ultra Simplebus2
Audio/videomodule Ultra Simplebus2
Audio/Video-Modul Ultra Simplebus2
Módulo audio/vídeo Ultra Simplebus2
Módulo áudio/vídeo Ultra Simplebus2
FR
NL
MANUEL
TECHNISCHE
TECHNIQUE
HANDLEIDING
Art. UT2020/4
DE
ES
TECHNISCHES
MANUAL
HANDBUCH
TÉCNICO
Passion.Technology. Design.
PT
MANUAL
TÉCNICO
Table des Matières

Manuels Connexes pour Comelit UT2020/4


Sommaire des Matières pour Comelit UT2020/4
- Page 1 TECHNISCHES MANUAL MANUAL TECNICO MANUAL TECHNIQUE HANDLEIDING HANDBUCH TÉCNICO TÉCNICO Modulo audio/video Ultra Simplebus2 Ultra Simplebus2 audio/video module Module audio/vidéo Ultra Simplebus2 Audio/videomodule Ultra Simplebus2 Art. UT2020/4 Audio/Video-Modul Ultra Simplebus2 Passion.Technology. Design. Módulo audio/vídeo Ultra Simplebus2 Módulo áudio/vídeo Ultra Simplebus2...
-
Page 2: Avvertenze
Avvertenze • Questo prodotto Comelit è progettato e realizzato con lo scopo di essere utilizzato nella realizzazione di impianti per comunicazione audio e video in edifici residenziali, commerciali, industriali e in edifici pubblici o ad uso pubblico. • Tutte le attività connesse all’installazione dei prodotti Comelit devono essere realizzate da personale tecnicamente qualificato, seguendo attentamente le indicazioni di manuali / istruzioni dei prodotti stessi. - Page 3 • Se aconseja no colocar los conductores de la instalación en el mismo conducto eléctrico por donde pasan los cables de potencia (230 V o superiores). • Para el uso seguro de los productos Comelit, es necesario seguir con atención las indicaciones de los manuales / las instrucciones e garantizar que la instalación realizada con los productos Comelit no pueda ser manipulada ni dañada.
- Page 4 Descrizione Beschrijving Descripción Description Beschreibung Descrição Description 4. 5. 6. 15. 16. 1. LED di segnalazione 11. Regolazione volume microfono chiamata inviata (verde) 12. Pulsante di conferma programmazione impianto occupato (rosso) 13. Microfono digitale apriporta attivato 14. Morsettiera di connessione: fonica attiva RTE ingresso programmabile RTE (ingresso apriporta locale) o DO (segnalazione porta aperta)
-
Page 5: Connecteur Pour Modules Supplémentaires
1. Indicator LEDs 11. Microphone volume control call sent (green) 12. Programming confirmation button system busy (red) 13. Digital microphone lock-release enabled 14. Terminal block for connection: RTE programmable RTE (local lock-release input) or audio enabled DO input (door open indication) 2. - Page 6 1. Anzeige-LED 12. Bestätigungstaste der Programmierung 13. Digitales Mikrofon Ruf gesendet (grün) / Anlage besetzt (rot) 14. Anschlussklemmleiste: Türöffner aktiviert RTE Programmierbarer Eingang RTE (Eingang lokaler Türöffner) oder DO (Anzeige Tür offen) Sprechverbindung aktiv GND SE- Minus Bezugsspannung Eingang RTE und Türschloss 2.
- Page 7 100 mm Caratteristiche tecniche Technische Daten Technical specifications Características técnicas Caractéristiques techniques Características técnicas Technische eigenschappen SISTEMI COMPATIBILI ENVIRONMENTAL AND CONFORMITY SPECIFICATIONS Audio/video Simplebus 2 con alimentatore Art. 1210/1210A Operating temperature (°C) -25 to 55 Operating humidity (max 25 to 95 CARATTERISTICHE AUDIO RH - %) Microfono Sensore audio digitale MEMS,...
- Page 8 COMPATIBELE SYSTEMEN SISTEMAS COMPATIBLES Audio/video Simplebus 2 met voedingseenheid Art. 1210/1210A Audio/vídeo Simplebus 2 con alimentador Art. 1210/1210A AUDIOSPECIFICATIES CARACTERÍSTICAS DEL AUDIO Microfoon MEMS digitale audiosensor, Micrófono Sensor digital de audio MEMS, omnidirectioneel omnidireccional Luidspreker 28mm (Ø), 8 Ohm, 1W (2) Altavoz 28 mm (Ø), 8 Ohm, 1 W (2) CAMERASPECIFI CATIES CARACTERÍSTICAS DE LA CÁMARA...
-
Page 9: Programación
Programmation Programmazione Programmierung Programação Programming Programmering Programación Per una corretta programmazione, seguire Für eine korrekte Programmierung folgen Sie der nell'ordine le seguenti istruzioni Reihe nach den folgenden Anweisungen Configurazione tipo pulsante Konfiguration des Tastentyps Indirizzamento moduli pulsanti Adressierung der Tastenmodule III. - Page 10 Indirizzamento moduli pulsanti Adressierung der Tastenmodule Addressing button modules Direccionamiento de módulos pulsadores Adressage modules boutons Endereçamento de módulos botões Adressering drukknopmodules 1 2 3 4 2 3 4 DIP 1-5: indirizzamento modulo pulsanti di DIP 1-5: Adressierung Ruftasten-Modul (siehe chiamata (vedi TAB.
- Page 11 Programmazione smart indirizzi consecutivi Intelligente Programmierung aufeinanderfolgender Adressen Smart programming of consecutive addresses Programación inteligente de direcciones consecutivas Programmation smart d’adresses consécutives Programação Smart de endereços Smart programmering opeenvolgende adressen consecutivos • Consente la programmazione rapida dei • Ermöglicht die Schnellprogrammierung der pulsanti con gli indirizzi consecutivi 1, 2, 3, 4 Tasten mit fortlaufenden Adressen 1, 2, 3, 4 •...
- Page 12 Premere il pulsante a cui si desidera associare l’indirizzo di chiamata impostato tramite DIP-switch Press the button you want to associate with the call address set using the DIP switches Appuyer sur le bouton à associer à l’adresse d’appel définie par DIP switch Druk op de drukknop waaraan u het ingestelde oproepadres wilt koppelen via DIP-switch Die Taste drücken, welcher die über Dipschalter eingestellte Rufadresse...
- Page 13 Gestione illuminazione LED telecamera e retroilluminazione dei pulsanti Camera LED lighting and button backlighting management Gestion éclairage à leds pour caméra et rétroéclairage des boutons Regeling led-cameraverlichting en achtergrondverlichting van de drukknoppen Steuerung der LED-Beleuchtung der Kamera und Hintergrundbeleuchtung der Tasten Gestión de la iluminación con led de la cámara y retroiluminación de los pulsadores Gestão da iluminação LED da câmara e retroiluminação dos botões Il sensore crepuscolare di default è...
- Page 14 LED telecamera LED pulsanti Camera LED Button LEDs LEDs de la caméra LEDs des boutons LEDs camera LEDs drukknoppen LED der Kamera LED der Tasten Ledes de la cámara Ledes de los pulsadores LED câmara LED botões AUTO (default) AUTO (default) 1 2 3 4 1 2 3 4 1 2 3 4...
- Page 15 Configurazioni speciali tramite DIP Sonderkonfigurationen mit DIP Special configurations via DIP Configuraciones especiales mediante DIP Configurations spéciales via DIP Configurações especiais através de DIP Speciale configuraties via DIP-switches Per informazioni complete su tutte le programmazioni e configurazioni installative consultare il manuale completo dell'Art. UT2020 sul sito pro.comelitgroup.com For detailed information regarding all programming procedures and installation configurations, please refer to the full manual for Art.
- Page 16 *UTP cable with multi-cable connection: FOLLOW THE COLOURS SHOWN IN THE DIAGRAM! *Câble UTP avec connexion paires Comelit Art. 4577/4579 1 mm² (Ø 1,2 mm AWG 17) torsadées multiples : RESPECTER LES COULEURS INDIQUÉES DANS LA FIGURE ! *UTP-kabel met multi-paar aansluiting: DE IN DE AFBEELDING AANGEGEVEN UTP5 cat.
- Page 17 6601W (MAX 4) 1214/2C 6801W (MAX 4) 1214/2C 1212/B 6601W 6601W 6601W/BM 6601W/BM 1210A 1210 1212/B 6801W 6801W UT2020/4 6801W/BM 6801W/BM A MAX B MAX C MAX H MAX 6701W 6701W 6701W 6701W 6701W/8 6701W/8 6701W/8 6701W/8 D MAX Art. 1216...
- Page 18 34-35 Vdc 1210A 1210 32-34 Vdc R GND NO NC UT2020/4 UT9200 Max 20 m. Pulsante comando apriporta locale. Max 20 m. Lokale Türöffnertaste. Max 20 m. Local door-opener button. 20 m máx. Pulsador abrepuertas local. Max 20 m. Bouton commande ouvre-porte local.
- Page 19 1 2 3 4 1 2 3 4 230V 230V 1210A 1210A 1210 1210 R GND R GND NO NC NO NC UT2020/4 UT9200 UT2020/4 UT9200 230V 1210A 1210 R GND NO NC UT2020/4 UT9200 Max 20 m. Pulsante comando apriporta locale.
- Page 20 Variant met veiligheidsslot 12/24V 1210A AC/DC 1210 R GND NO NC UT2020/4 UT9200 Attivazione del relè C.NC.NO della pulsantiera Aktivierung des Relais mit Öffner-/ tramite pulsante comando attuatore Schließerkontakt der Türstation mithilfe der Taste für Relaisansteuerung Activation of the entrance panel C.NC.NO Activación del relé...