Philips GoZero Manuel D'utilisation
Masquer les pouces Voir aussi pour GoZero:

Publicité

Les langues disponibles

Les langues disponibles

Liens rapides

Water Solutions
GoZero
Soda Maker
Product image for reference only
EN
User manual
DE
Gebrauchsanleitung
FR
Manuel d'utilisation

Publicité

Table des Matières
loading

Sommaire des Matières pour Philips GoZero

  • Page 1 Water Solutions GoZero Soda Maker Product image for reference only User manual Gebrauchsanleitung Manuel d’utilisation...
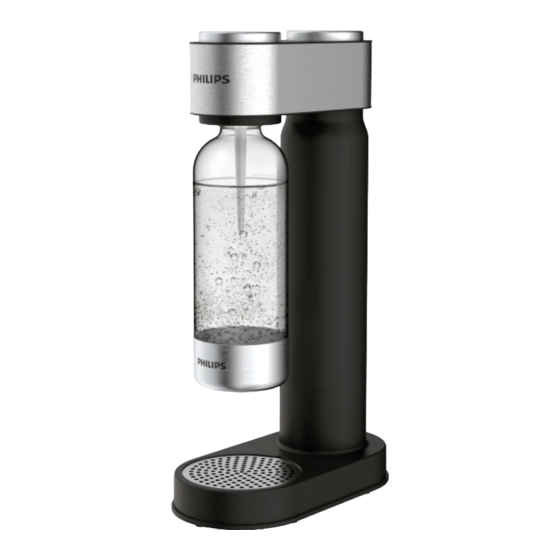
  • Page 3 1. Knopf 1. Touche 1. Button 2. Dekorative Abdeckung 2. Capot décoratif 2. Decorative cover 3. Fach für Gaszylinder 3. Compartiment du cylindre du gaz 3. Gas cylinder compartment 4. Untere Abdeckung 4. Capuchon inférieur 4. Bottom cap 5. Halterung 5.
  • Page 4 A2-1 A2-2 A3-1 A3-2 A3-3 A3-4...
  • Page 5: Table Des Matières

    TABLE OF CONTENTS 1. Introduction 2. For your safety 3. General description 4. Before creating fun 5. Let the fun begin 6. Cleaning 7. Guarantee & service 1. Einführung 2. Für Ihre Sicherheit 3. Allgemeine Beschreibung 4. Bevor der Spaß beginnt 5.
  • Page 6: Introduction

    - Never wash the plastic bottle in dishwashers. DO NOT wash it in hot water exceeding 40°C. - Philips bottels are clearly marked with an expiration date.Do not use the carbonating bottle after the expiry date. - Never use a bottle that has been deformed, discolored or scratched. Before such use,check the expiration date on the bottle,and check for damage and deformation.
  • Page 7: General Description

    Installing the gas cylinder 1. Place the Philips soda maker in an upright position and on a flat surface. Remove the carbonating bottle before installing or replacing the cylinder if it is filled with water. Remove the drip tray grid and then carefully lay the soda maker down on the side.
  • Page 8: Let The Fun Begin

    2. Remove seal and cap from the CO cylinder. Carefully insert the cylinder through the hole at the bottom. Don’t drop the cylinder into the hole. When you feel that it reaches the bottom, begin screwing the cylinder clockwise until it is fastened. Don’t screw too hard since this might break the A2-1 threads holding the gas cylinder in place.
  • Page 9: Guarantee & Service

    · Wipe the drip tray to keep it dry. 7 Guarantee & service If you need information or if you have any problems, please visit the Philips website at www.philips.com or contact the Philips Customer Care Center in your country.
  • Page 10: Einführung

    - Befüllen Sie die Flasche nur mit frischem und kühlem Wasser; beachten Sie dabei die Fülllinie. - VERWENDEN SIE KEINE anderen Flaschen, die nicht speziell für den Philips Soda Maker vorgesehen sind. Ihr Philips Soda Maker eignet sich ausschließlich für die Verwendung mit der Philips Sodaflasche.
  • Page 11: Allgemeine Beschreibung

    - Verwenden Sie keine verformte, verfärbte oder zerkratzte Flasche. Prüfen Sie das auf der Flasche angegebene Ablaufdatum vor der Verwendung und prüfen Sie die Flasche auf Schäden und Verformungen. Ersetzen Sie abgelaufene, beschädigte oder verformte Sprudlerflaschen durch neue. Nachfolgendes gilt nur für die Sprudlerflasche aus Volledelstahl: - Verwenden Sie keine verformte, verfärbte oder zerkratzte Flasche.
  • Page 12: Bevor Der Spaß Beginnt

    4 Bevor der Spaß beginnt Einbau des Glaszylinders 1. Stellen Sie den Philips Soda Maker in einer aufrechten Position auf eine ebene Oberfläche. Entfernen Sie die Sodaflasche vor dem Einbau bzw. Auswechseln des Zylinders, wenn diese mit Wasser befüllt ist. Entfernen Sie die Tropfschale und legen Sie den Soda Maker dann vorsichtig auf die Seite.
  • Page 13: Reinigung

    Philips www.philips.com/water oder setzen Sie sich mit dem Philips Kundenservice in Ihrem Land in Verbindung. Gibt es keinen Kundenservice in Ihrem Land, wenden Sie sich bitte an Ihren Philips-Händler vor Ort. Bewahren Sie diese Gebrauchsanleitung bitte in einem zur weiteren Verwendung geeigneten Zustand auf.
  • Page 14: Introduction

    - Ne remplir la bouteille qu’avec de l’eau fraîche et claire ; remplir jusqu’à la jauge de niveau. - NE PAS utiliser de bouteilles autres que celles spécifiquement conçues pour la machine à soda Philips. Votre machine à soda Philips est conçue pour n’être utilisée qu’avec des bouteilles de gazéification Philips.
  • Page 15 - N'utilisez jamais une bouteille ayant subi une déformation ou une décoloration, ou présentant des éraflures. Avant utilisation, vérifiez la date d'expiration sur la bouteille, et assurez-vous qu'il n'y ait ni détérioration, ni déformation. Remplacez toute bouteille de gazéification dont la date limite d'utilisation est dépassée, ou qui est endommagée ou déformée, par une neuve.
  • Page 16: Avant De Créer Du Plaisir

    Installation du cylindre de gaz 1. Placer la machine à soda Philips à la verticale et sur une surface plane. Retirer la bouteille de gazéification avant d’installer ou remplacer le cylindre si elle est remplie d’eau. Retirer la grille du bac de récupération puis coucher soigneusement la machine à...
  • Page 17: Nettoyage

    Philips à l’adresse www.philips.com/water ou contacter le centre du service Client Philips de son pays. En cas d’absence de centre de service Client dans son pays, se rendre chez son revendeur Philips local. Conserver ce manuel d'utilisation pour toute consultation future.
  • Page 20 Speci�cations are subject to change without notice © 2021 AquaShield All rights reserved. The Philips trademark and the Philips Shield Emblem are registered trademarks of Koninklijke Philips N.V. used under license. This product has been manufactured by and is sold under the responsibility of Hong Kong AquaShield Health Technology Company Limited and Hong Kong AquaShield Health Technology Company Limited is the warrantor in relation to this product.

Table des Matières