Foster FL F46 Guide De L'utilisateur
Table des Matières
Les langues disponibles
Les langues disponibles
Liens rapides
Chapitres
Table des Matières

Manuels Connexes pour Foster FL F46


Sommaire des Matières pour Foster FL F46
- Page 1 Instruction Manual Guide de l'utilisateur FL F46 MICRO SUPERSILVER...
- Page 43 Instructions pour l'installation ......................80 Installation du four ........................... 83 Cher client, Nous vous remercions d'avoir préféré notre produit FOSTER USA. Nous sommes certains que ce four à micro-ondes moderne, fonctionnel et pratique, fabriqué avec des matériaux de première qualité, vous donnera toute satisfaction.
-
Page 44: Instructions Pour Lier À La Terre
INSTRUCTIONS POUR LIER À LA TERRE L’appareil doit être lié à la terre. En cas de court-circuit électrique, la liaison à la terre réduit le risque de choc électrique grâce a la fuite permise par le fil de terre. L’appareil vient équipé avec un fil de terre ainsi que la prise de terre. La fiche doit être branchée dans une prise correctement installée et liée à... -
Page 45: Consignes De Sécurité Importantes
CONSIGNES DE SÉCURITÉ IMPORTANTES Lors de l'utilisation des appareils électriques les précautions bases de sécurité doivent être respectées, y compris ce qui suit. Attention! Pour réduire le risque de brûlures, d’électrocution, d’incendie, de blessure ou d'exposition à l'énergie micro-ondes excessive : ... -
Page 46: Cela Pourrait Provoquer Que Des Liquides Très Chauds
CONSIGNES DE SÉCURITÉ IMPORTANTES Lors du nettoyage de surfaces de la porte et du four qui se réunit à la fermeture de la porte, utilisez uniquement du savon léger et non abrasif ou du détergent et une éponge ou un chiffon doux. Pour réduire le risque d'incendie dans la cavité... -
Page 47: Précautions Pour Éviter Une Exposition Aux Micro- Ondes
PRÉCAUTIONS POUR ÉVITER UNE EXPOSITION AUX MICRO- ONDES (a) Ne pas faire fonctionner ce four avec la porte ouverte, car le fonctionnement de la porte peut entraîner a une dangereuse exposition d'énergie des micro- ondes. Il est important de ne pas annuler ou de ne pas modifier les dispositifs de verrouillage de sécurité.. - Page 48 PRÉCAUTIONS À ÊTRE OBSERVÉES AVANT ET DURANT L'ENTRETIEN POUR ÉVITER UNE POSSIBLE EXPOSITION À UN EXCÈS D'ÉNERGIE DU MICRO ONDES (a) Ne pas opérer ou permettre que le four soit utilisé avec la porte ouverte. (b) Faire les vérifications suivantes sur tous les fours à être utilisés avant d'activer le magnétron ou une autre source de micro ondes, et faire les réparations nécessaires: opération de verrouillage, fermeture de la porte correcte, joints et surfaces d’étancheité...
-
Page 49: Instructions Concernant La Sécurité
Instructions concernant la sécurité - Il y a fréquemment un arc électrique à l'intérieur, malgré l'absence de tout objet métallique. Le four ne peut être réutilisé qu'après avoir été réparé par un technicien du Service d'assistasse Attention ! Vous devez surveiller votre four si technique. - Page 50 Instructions concernant la sécurité Votre four est exclusivement destiné à un Ne vous appuyez pas, ne mettez aucun usage domestique ! poids sur la porte ouverte du four. Cela Utilisez votre four exclusivement pour la pourrait endommager la zone des gonds. préparation des repas.
-
Page 51: Les Avantages Des Micro-Ondes
Les avantages des micro-ondes Avec une cuisinière traditionnelle, la chaleur créée Comment les aliments chauffent-ils? par les brûleurs de gaz ou par les résistances pénètre lentement de l'extérieur vers l'intérieur de Tous les aliments contiennent de l'eau dont les l'aliment. Il y a par conséquent une grande perte molécules vibrent sous l'action des micro-ondes. -
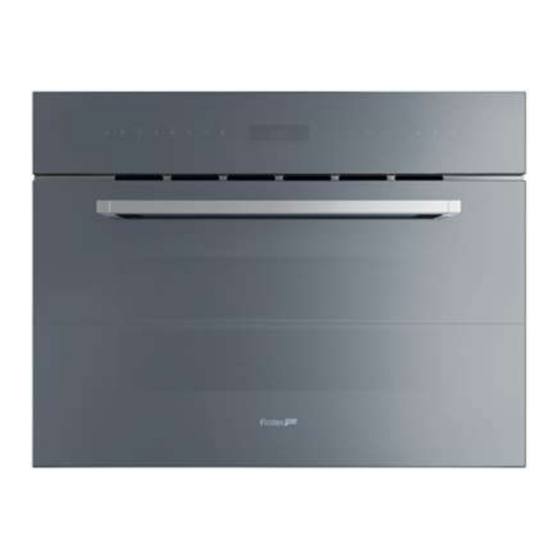
Page 52: Description Du Four
Description du four 1. – Tableau de commandes 6. – Manchon du moteur 2. – Vitre de la porte 7. – Support plateau 3. – Cran pour support du plateau 8. – Plateau rotatif 4. – Verrou 9. – Plateau en verre 5. - Page 53 Description du four Description des fonctions Puissance Micro- Symbole Fonction Aliments ondes Décongeler lentement les aliments délicats ; pour décongeler 200 W et continuer de cuire à faible puissance. Cuire de la viande, du poisson et du riz. 400 W Décongeler rapidement de petites quantités et aliments pour bébés, comme par exemple les biberons.
-
Page 54: Réglages De Base
Réglages de base Réglage de l'horloge Après une coupure d'électricité, ou si le four a été 3. Appuyez de nouveau sur la touche Horloge rebranché, l'horloge clignote pour indiquer que pour définir les minutes. Les minutes clignotent. l'indication de l'heure n'est pas correcte. Pour 4. - Page 55 Réglages de base Arrêter le plateau tournant 1. Pour arrêter le plateau tournant, appuyez 2. Pour remettre en marche le plateau, en même temps sur les touches «+» et appuyez à nouveau en même temps sur «Stop». les touches «+» et «Stop».
-
Page 56: Fonctions De Base
Fonctions de base Micro-ondes Utilisez cette fonction pour cuire et chauffer légumes, pommes de terre, riz, poisson et viande. 1. Appuyez sur la touche de fonction Micro- 5. Définissez le temps de fonctionnement désiré ondes. La touche de fonction s'allume. avec les touches «... - Page 57 Fonctions de base Gril Utilisez cette fonction pour dorer rapidement la surface des aliments. 1. Appuyez sur la touche de fonction Gril. Le 3. Appuyez sur « - » et « + » pour sélectionner le témoin s'allume. temps voulu (par exemple 15 minutes). 2.
- Page 58 Fonctions de base Air chaud Utiliser cette fonction pour cuire et rôtir. 1. Appuyez sur la touche de fonction Air chaud. 4. Appuyez sur Sélection de Temps, pour Le voyant de la touche s'allume. modifier le temps de fonctionnement souhaité. Le témoin respectif clignote.
- Page 59 Fonctions de base Gril avec Ventilateur Utiliser cette fonction pour dorer viande, poisson, volailles ou frites. 1. Appuyez sur la touche de fonction Gril + 4. Appuyez sur la touche Sélection de temps Ventilateur. Le voyant de la touche s'allume. pour modifier le temps de fonctionnement désiré.
- Page 60 Fonctions de base Décongélation en fonction du poids (automatique) Utilisez cette fonction pour décongeler rapidement viande, volailles, poisson, fruit et pain. 1. Appuyez touche fonction 4. Appuyez sur Sélection de poids pour modifier Décongélation en fonction du poids. La le poids sélectionné. Le témoin clignote. touche s'allume.
- Page 61 Fonctions de base Décongélation en fonction du temps (manuel) Utilisez cette fonction pour décongeler rapidement tout type d'aliment. 1. Appuyez sur Décongélation en fonction du 4. Appuyez touche Start. four temps. La touche s'allume. commence à fonctionner. 2. Appuyez sur la touche Sélection de Temps Observations : Remuez ou retournez les aliments pour modifier le temps de fonctionnement.
-
Page 62: Fonctions Spéciales
Fonctions spéciales Fonction Spéciale F1: Chauffer des aliments Utilisez cette fonction pour chauffer des différents types d'aliments. 1. Appuyez sur la touche de fonction Spécial 1. 4. Appuyez Sélection poids pour La touche de fonction s'allume. sélectionner le poids correspondant à l'aliment. Le témoin clignote. - Page 63 Fonctions spéciales Fonction Spéciale F2: Cuisiner Utilisez cette fonction pour cuisiner des aliments frais. 1. Appuyez sur la touche de fonction Spécial 2. 4. Appuyez sur Sélection de poids pour sélec- La touche de fonction s'allume. tionner le poids de l'aliment. Le témoin s'allume. 2.
-
Page 64: Utiliser Uniquement De La Vaisselle
Fonctions spéciales Fonction Spéciale F3: Décongeler et gratiner Utilisez cette fonction pour décongeler et gratiner différents types d'aliments. 1. Appuyez sur la touche de fonction Spécial 3. 4. Appuyez sur la touche Sélection de poids La touche de fonction s'allume. pour sélectionner le poids de l'aliment. -
Page 65: Pendant Le Fonctionnement
Pendant le fonctionnement... Interruption d'une cuisson Annuler une cuisson Vous pouvez interrompre le fonctionnement du Si vous souhaitez annuler le processus de four à tout instant en appuyant une fois sur la cuisson, appuyez sur Start/Stop pendant 3 touche Start/Stop ou en ouvrant la porte du four. secondes. -
Page 66: Décongélation
Décongélation fonction du type et du poids des aliments, et aussi Le tableau ci-dessous présente, d'une manière les respectives recommandations générale, différents temps pour décongélation et pour le repos (de façon à ce que l'aliment soit uniformément réchauffé) en Temps de Temps de repos Aliment Poids... - Page 67 Décongélation Indications générales pour la décongélation 1. Pour décongeler, utilisez uniquement de la 8. Mettez les volailles dans un plat creux pour que vaisselle adaptée au micro-ondes (porcelaine, le jus de la viande s'écoule plus facilement. verre, plastique approprié). 9. Le pain doit être enveloppé dans une serviette 2.
-
Page 68: Cuisiner Aux Micro-Ondes
Cuisiner aux micro-ondes température ambiante est basse. La sécurité Attention ! Lisez attentivement le chapitre four n'est cause. Après « Indications de sécurité » avant de cuisiner l'utilisation, essuyez l'eau de condensation. avec votre micro-ondes. Pour chauffer des liquides, utilisez des Quand vous cuisinez avec le micro-ondes, suivez récipients avec une grande ouverture, les recommandations suivantes :... -
Page 69: Tableaux Et Suggestions - Cuisiner Les Légumes
Cuisiner aux micro-ondes Tableaux et suggestions – Cuisiner les légumes Puissanc Addition de Temps de Quantité Temps Aliment Indications (OZ) liquides repos (Watt) 17-18 100 ml 9-11 Choux-fleur 50 ml Couper en rondelles. Couvrir Brocolis Champignons 25 ml 10-11 Petits pois et 100 ml carottes, Couper en morceaux ou en... -
Page 70: Cuisiner Au Gril
Cuisiner au gril Pour obtenir de bons résultats avec le gril, utilisez 4. Le thermostat sécurité fait la grille fournie avec le four. résistances s'éteignent temporairement lors Positionnez la grille de façon à ce qu'elle d'une utilisation prolongée du gril. n'entre pas en contact avec les surfaces 5. -
Page 71: Tableaux Et Suggestions - Micro-Ondes + Gril
Cuisiner au gril Tableaux et suggestions – Micro-ondes + Gril La fonction Micro-ondes avec Gril est idéale pour micro-ondes gril fonctionnent cuisiner rapidement et dorer en même temps les simultanément. Les micro-ondes cuisent et le gril aliments. Vous pouvez également les gratiner. gratine. -
Page 72: Rôtir Et Cuire
Rôtir et cuire Tableaux et suggestions – Préparation de viande et gâteaux Micro-ondes / Air chaud Puissance Temps Temps de Aliment Quantité (oz) Température Indications (Watt) (mn) repos (mn) Récipient sans couvercle, 35-53 Rôti 30-40 tourner 1x Filet de porc Côtelette ou os Récipient sans couvercle, 28-36... - Page 73 Rôtir et cuire Les récipients en verre, quand ils sont chauds, Conseils pour la cuisson doivent être posés sur un chiffon de cuisine sec. Au contact d'une surface froide ou mouillée, le Retournez les pièces de viande à la moitié du verre pourrait se fendiller et éclater.
-
Page 74: Tableaux Et Suggestions - Cuire / Air Chaud
Cuire Tableaux et suggestions – Cuire / Air chaud Aliment Récipient Niveau Température Temp (mn) Gâteau aux noix Moule creux Plateau rotatif 50-60 Tarte aux fruits Moule de Ø 28 cm Plateau rotatif 55-60 Gâteau anglais Moule creux Plateau rotatif 55-65 Tarte salée Moule rond en verre... -
Page 75: Quel Type De Vaisselle Pouvez-Vous Utiliser
Quel type de vaisselle pouvez-vous utiliser? Suivez les recommandations du fabricant Fonction Micro-ondes figurant sur l'emballage. Prenez garde que les micro-ondes sont réfléchies Ces récipients en aluminium ne doivent par les surfaces métalliques. Le verre, la pas avoir une hauteur supérieure à 3 cm porcelaine, la terre cuite, le plastique et le papier ni entrer en contact avec les parois de la laissent passer les micro-ondes. - Page 76 Quel type de vaisselle pouvez-vous utiliser? Tableau – Vaisselle Le tableau suivant vous indique de manière générale quel type de vaisselle est adapté à chaque situation. Mode de Micro-ondes Gril + Air Fonctions fonctionnement Décongeler / chaud combinées Cuisiner réchauffer Type vaisselle Verre et porcelaine 1) Vaisselle non résistante au feu, peut...
-
Page 77: Nettoyage Et Entretien Du Four
Nettoyage et entretien du four Le nettoyage est l'unique entretien normalement Intérieur du four nécessaire. Après chaque utilisation, nettoyez les parois Attention ! Le four micro-ondes doit être nettoyé intérieures avec un chiffon humide. Il est ainsi régulièrement, éclaboussures petites plus facile d'enlever éclaboussures et particules. - Page 78 Nettoyage et entretien du four Plafond du four Le couvercle en mica (3) situé dans le plafond Quand le plafond du four est sale, le gril peut être doit toujours être propre. particules abaissé pour en faciliter le nettoyage. d'aliments accumulent peuvent endommager le four ou provoquer des étincelles.
-
Page 79: Que Faire En Cas De Mauvais Fonctionnement
Que faire en cas de mauvais fonctionnement ? L'aliment est excessivement chaud, ATTENTION ! Toute réparation ne peut être desséché ou brûlé ! Vérifiez que vous effectuée que par des techniciens spécialisés. Toute réparation effectuée par des personnes avez sélectionné... -
Page 80: Caractéristiques Techniques
Caractéristiques techniques Spécifications Tension AC ................. 240V, 2ph, 60Hz Puissance requise............... 3300 W Puissance du gril................. 1500 W Puissance de l'air chaud ............. 1500 W Puissance de sortie des micro-ondes......... 1000 W Fréquence des micro-ondes… ........... 2450 MHz ... -
Page 81: Instructions Pour L'installation
Instructions pour l'installation Installez le four sur une surface stable, le plus loin Avant l'installation possible des radios, télévisions et de tout ce qui produit de la chaleur. Vérifiez que la tension de l'alimentation de l'appareil, indiquée plaque Alimentation Electrique caractéristiques correspond à... - Page 82 Instructions pour l'installation Au Canada: Mettre à la masse par un conducteur neutre est interdit pour les nouvelles installations de circuit Les fils doivent être conformes au code électrique (1996 NEC); les mobile homes; et les électrique canadien C22.1- dernière édition. véhicules de parc, ou dans les régions où...
- Page 83 Instructions pour l'installation Après l'installation Connexion à 4 Fils (Pour des US ou Le four ne fonctionne que si la porte est CANADA) correctement fermée. Avant la première utilisation, nettoyez l'intérieur du Selon la Figure suivant : four ainsi que les accessoires en suivant les ...
-
Page 84: Installation
Installation / Installation du four Push oven completely into the cabinet and centre it. Open microwave door and fasten the appliance to the cabinet using the four screws provided. Insert the screws through the front holes. Introduisez le four dans le meuble jusqu'à... - Page 88 1631085-a...