Table des Matières
Publicité
Liens rapides
?
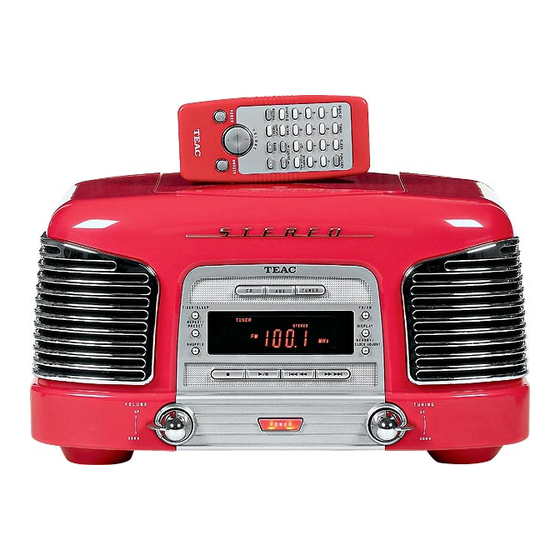
AM/FM STEREO RADIO CD-PLAYER WITH DIGITAL CLOCK
SL - D90
Thank you for choosing TEAC. Read this
manual carefully to get the best
performance from this unit.
Before Use.................................................... 4
Compact Disc ............................................... 5
Remote Control Unit .................................... 6
Connection.................................................... 7
Names of Each Control............................... 8
CD
Playing a CD ............................................... 12
Programmed Playback ............................. 14
Repeat Playback........................................ 16
Shuffle Playback........................................ 17
Intro Check ................................................. 17
AUX
Listening to the External Sources............ 17
Listening to the Radio ............................... 18
How to Preset Stations............................. 19
Sleep Timer................................................. 20
Clock Adjustment....................................... 20
Timer.............................................................21
Troubleshooting......................................... 22
Specifications ............................................ 23
OWNER'S MANUAL
MANUEL DU PROPRIETAIRE
Nous vous remercions pour l'achat d'un
appareil TEAC. Lire ce manuel avec
attention pour obtenir les meilleures
performances possibles de cet appareil.
Avant Utilisation........................................... 4
Disques Compacts....................................... 5
Boîtier de télécomande .............................. 6
Connexions ................................................... 7
Nomenclature ............................................ 10
CD
Lecture du CD............................................. 12
Lecture programmée ................................ 14
Lecture répétitive ...................................... 16
Lecture aléatoire ....................................... 17
Function de contrôle d'introductions ..... 17
AUX
Ecoute à partir d'une source externe...........17
TUNER
Ecoute radio ............................................... 18
Comment préréglé une station................ 19
Minuterie sommeil..................................... 20
Réglage de l'horloge ................................. 20
Minuterie..................................................... 21
Guide de dépannage................................. 22
Spécifications ............................................ 23
9A09453600
Publicité
Table des Matières

Manuels Connexes pour Teac SL-D90


Sommaire des Matières pour Teac SL-D90
-
Page 1: Table Des Matières
SL - D90 AM/FM STEREO RADIO CD-PLAYER WITH DIGITAL CLOCK OWNER’S MANUAL MANUEL DU PROPRIETAIRE Thank you for choosing TEAC. Read this Nous vous remercions pour l’achat d’un manual carefully to get the best appareil TEAC. Lire ce manuel avec performance from this unit. - Page 2 Plug the equipment into a different outlet so that it is not on the same circuit as the receiver. If necessary, consult the dealer or an experienced radio/TV technician for additional suggestions. CAUTION Changes or modifications to this equipment not expressly approved by TEAC CORPORATION for compliance could void the user's authority to operate this equipment. For CANADA...
- Page 3 Important Safety Instructions CAUTION Note to CATV system installer: This reminder is provided to call the CATV system installer’s attention to Section 820-40 of the NEC which provides guidelines for proper grounding and, in particular, specifies that the cable ground shall be <...
-
Page 4: Before Use
à la chaleur, au froid ou à l'humidité. < Do not place the unit on an amplifier/receiver. < Ne pas placer SL-D90 sur le dessus de l’amplificateur/récepteur. < Do not open the cabinet as this might result in damage to the <... -
Page 5: Compact Disc
Compact Disc Disques Compacts Discs which can be used with this unit: Disques qui peuvent être jouer sur cet appareil, Conventional audio CDs DC audio conventionnel Properly finalized CD-R discs Enregistrements CD-R finalisés correctement Veuillez noter : Note: Dépendant de la qualité du disque et/ou la condition de Depending on the quality of the disc and/or the condition of the l’enregistrement, certain disques CD-R ne joueront pas. -
Page 6: Remote Control Unit
Remote Control Unit Boîtier de télécommande The provided Remote Control Unit allows the Le boîtier de télécommande fourni permet la unit to be operated from a distance. commande à distance defourni permet la When operating the remote control unit, commande à distance de l'appareil. Pour point it towards the REMOTE SENSOR on the l'utilisation du boîtier de télécommande, le front panel of the unit. -
Page 7: Connection
How to connect external sources Pour connecter des appareils externes < Read instructions of each component you intend to use with the SL-D90. < Lisez les instructions de chaque appareil que vous avez l’intention d’utiliser avec votre SL-D90. AUX IN jacks <... -
Page 8: Names Of Each Control
Names of Each Control SIDE FRONT REMOTE CONTROL REAR... - Page 9 Names of Each Control SKIP/SEARCH buttons (. m / , /) Disc cover RESET Switch Press these buttons to skip tracks. Press the L mark on the disc cover to Hold down these buttons to search for a open it. part of a track.
-
Page 10: Nomenclature
Nomenclature DESSUS DEVANT CÔTÉ TÉLÉCOMMANDE DERRIÈRE... - Page 11 Nomenclature Touche PLAY/PAUSE (y/J) Couvercle du disque Commutateur RESET Utiliser cette touche pour débuter ou Appuyez sur la marque L située sur le pausé la lecture. couvercle du disque pour l’ouvrir.. Touches SKIP/SEARCH(. m / , /) Touche SNOOZE Appuyer sur ces touches pour sauter des Après que l’appareil s’est allumé, utilisez pistes cette touche pour l’éteindre pour 5...
-
Page 12: Playing A Cd 1
Playing a CD 1 Lecture du CD 1 Press the POWER switch to turn the unit Appuyer commutateur d’alimentation pour allumer l’appareil. Press the CD button to select "CD". Appuyer sur la touche CD pour choisir “CD” Press the FUNCTION button repeatedly to select "CD", when using the remote Appuyez sur la touche FUNCTION control unit. - Page 13 Playing a CD 2 Lecture du CD 2 To skip to the next or a previous track Pour sauter vers la piste suivante ou précédente During playback, press the SKIP/SEARCH button (. m or , /) repeatedly Durant la lecture, appuyer sur la touche until the desired track is found.
-
Page 14: Programmed Playback 1
Programmed Playback 1 Lecture programmée 1 Up to 20 tracks can be programmed in the Jusqu’à 20 pistes peuvent être programmer desired order. dans l’ordre désiré. < Shuffle playback does not work during < La lecture aléatoire ne fonctionne pas program playback. - Page 15 Programmed Playback 2 Lecture programmée 2 Numeric buttons Touches num riques STOP To check the programmed order Pour vérifier l’ordre de programmation stop mode, press En mode d’arrêt, appuyez sur la touche MEMORY/CLOCK ADJ button repeatedly MEMORY/CLOCK ADJ répététivement, to show the track numbers that have pour voir les numéros de pistes been stored in memory.
-
Page 16: Repeat Playback
Repeat Playback Lecture répétitive Every time the REPEAT/PRESET button is Chaque fois que la touche REPEAT/PRESET pressed, the REPEAT indicator lights or est appuyée, l’indicateur REPEAT s’allume blinks, and the mode is changed as follows : ou clignote et le mode est changé tel qu’il suit : repeat one track répétition d’une piste... -
Page 17: Shuffle Playback
Shuffle Playback Lecture aléatoire Tracks can be played randomly. Les pistes peuvent être jouer aléatoirement Press the SHUFFLE button in the stop or play Appuyez sur la touche SHUFFLE mode arrêt mode. (stop) ou en mode lecture (play). The tracks will be played randomly. Les pistes seront sélectionnées et lues de <... -
Page 18: Tuner
Listening to the Radio Ecoute radio Press the POWER switch to turn the unit Appuyer sur le commutateur POWER pour allumer l’appareil. Press the TUNER button to select Appuyez sur la touche TUNER pour "TUNER". sélectionner le "TUNER". Or, press the FUNCTION button Ou appuyez sur la touche FUNCTION repeatedly to select "TUNER", when using répététivement pour choisir “TUNER”,... -
Page 19: How To Preset Stations
How to Preset Stations Comment préréglé une station In each band, up to 10 stations can be Pour chaque bande, jusqu’à 10 stations stored in preset memories. peuvent être entreposer en mémoire. Press the FM/AM button to select FM or Appuyez sur la touche BAND pour sélectionner FM ou AM. -
Page 20: Clock Adjustment
Clock Adjustment Réglage de l’horloge In the CD mode or the TUNER mode, En mode de CD ou de TUNER, appuyez press the DISPLAY button to select clock sur la touche DISPLAY pour choisir display. l’affichage de l’horloge. ":" blinks in the clock display. ( ) “:”... -
Page 21: Timer 2
Timer 2 Minuterie 2 Within 4 seconds, press and hold the En dedans de 4 secondes, appuyez et MEMORY/CLOCK ADJUST button for 2 or retenez la touche MEMORY/CLOCK ADJUST more seconds to change the timer pour 2 secondes ou plus pour changer le setting mode. -
Page 22: Troubleshooting
TEAC service center. revendeur ou le centre de service client TEAC. General Généralité No power L'appareil ne s'allume pas. -
Page 23: Specifications
Specifications Spécifications TUNER Section Section SYNTONISATEUR Frequency Range(FM) ..87.50 MHz to 108.00 MHz Gamme de fréquence(FM) ..87,50 MHz à 108,00 MHz Frequency Range(AM) ..520 kHz to 1710 kHz Gamme de fréquence(AM) . - Page 24 TEAC NEDERLAND BV Oeverkruid 15, NL-4941 VV Raamsdonksveer, Nederland Phone: 0162-510210 TEAC BELGIUM NV/SA c/o TEAC NEDERLAND BV, Oeverkruid 15, NL-4941 VV Raamsdonksveer, Nederland Phone: +31-162-510860 TEAC ITALIANA S.p.A. Via C. Cantù 11, 20092 Cinisello Balsamo, Milano, Italy Phone: 02-66010500 TEAC AUSTRALIA PTY., LTD.