Table des Matières

Publicité

Les langues disponibles
  • FR

Les langues disponibles

  • FRANÇAIS, page 58

Liens rapides

KEN001AKI
18.09.2017 • v09
Induction hob
Induktionskochfeld
Plaque à induction
Piano cottura a induzione
Placa de inducción
Inductiekookplaat
Instruction manual / Gebrauchsanleitung / Manuel d'utilisation
Istruzioni per l'uso / Manual de instrucciones / Handleiding
MODEL
Viesta I2Z
Viesta I3Z
Viesta I4Z
[English] [Deutsch] [Français] [Italiano] [Español] [Nederlands]
[p. 2 - 29]
[S. 30 - 57]
[p. 58 - 85]
[p. 86 - 113]
[p. 114 - 141]
[p. 142 - 169]

Publicité

Table des Matières
loading

Sommaire des Matières pour Viesta Viesta I2Z

  • Page 1 Placa de inducción Inductiekookplaat Instruction manual / Gebrauchsanleitung / Manuel d‘utilisation Istruzioni per l’uso / Manual de instrucciones / Handleiding MODEL Viesta I2Z Viesta I3Z Viesta I4Z [English] [Deutsch] [Français] [Italiano] [Español] [Nederlands] [p. 2 - 29] [S. 30 - 57] [p.
  • Page 2: Table Des Matières

    KEN001AKI 18.09.2017 • v09 [English] Content Content ........................ 2 Safety warnings ....................3 Product overview ....................7 A word on induction cooking ................10 Choosing the right cookware ................11 Using your induction hob ................... 12 Using the touch controls ................12 Locking the controls...................
  • Page 3: Safety Warnings

    KEN001AKI 18.09.2017 • v09 [English] Safety warnings Your safety is important to us. Please read this information before using your cooktop. Please note that the induction hob must be installed by a qualified technician. Do not install yourself, as your warranty expires immediately when not properly installed.
  • Page 4 KEN001AKI 18.09.2017 • v09 [English] Electrical shock hazard during operation and maintenance • Do not cook on a broken or cracked cooktop. If the cooktop surface should break or crack, switch the appliance off immediately at the mains power supply (wall switch) and contact a qualified technician.
  • Page 5 KEN001AKI 18.09.2017 • v09 [English] Important safety instructions • Never leave the appliance unattended when in use. Boil over causes smoking and greasy spillovers that may ignite. • Never use your appliance as a work or storage surface. • Never leave any objects or utensils on the appliance. •...
  • Page 6 KEN001AKI 18.09.2017 • v09 [English] Important safety instructions • This appliance is intended to be used in household and similar applications such as: -staff kitchen areas in shops, offices and other working environments; -farm houses; -by clients in hotels, motels and other residential type environments ; -bed and breakfast type environments.
  • Page 7: Product Overview

    For installation, please read the installation section. Read all the safety instructions carefully before use and keep this Instruction / Installation Manual for future reference. Product overview Viesta I4Z Top view 1. 2000 W zone, Ø 180mm 2. 1500 W zone, Ø 180mm 3.
  • Page 8 KEN001AKI 18.09.2017 • v09 [English] Product overview Viesta I3Z Top view 1. 2000 W zone, Ø 180mm 2. 1500 W zone, Ø 180mm 3. 2000 W zone, Ø 280mm 4. Glass plate 5. Control panel Control panel 1. Heating zone selection controls 2.
  • Page 9 KEN001AKI 18.09.2017 • v09 [English] Product overview Viesta I2Z Top view 1. 2000 W zone, Ø 180mm 2. 1500 W zone, Ø 180mm 3. Glass plate 4. ON/OFF control 5. Control panel Control panel 1. ON/OFF control 2. Power / Timer regulating controls 3.
  • Page 10: A Word On Induction Cooking

    KEN001AKI 18.09.2017 • v09 [English] A word on induction cooking Induction cooking is a safe, advanced, efficient, and economical cooking technology. It works by electromagnetic vibrations generating heat directly in the pan, rather than indirectly through heating the glass surface. The glass becomes hot only because the pan eventually warms it up.
  • Page 11: Choosing The Right Cookware

    KEN001AKI 18.09.2017 • v09 [English] Choosing the right cookware • Only use cookware with a base suitable for induction cooking. Look for the induction symbol on the packaging or on the bottom of the pan. • You can check whether your cookware is suitable by carrying out a magnet test.
  • Page 12: Using Your Induction Hob

    KEN001AKI 18.09.2017 • v09 [English] Using your induction hob To start cooking 1. Touch the ON/OFF control. After power on, the buzzer beeps once, all displays show “ – “ or “ – – “, indicating that the induction hob has entered the state of standby mode. 2.
  • Page 13 KEN001AKI 18.09.2017 • v09 [English] Using your induction hob If the display flashes alternately with the heat setting This means that: • you have not placed a pan on the correct cooking zone or, • the pan you’re using is not suitable for induction cooking or, •...
  • Page 14: Locking The Controls

    KEN001AKI 18.09.2017 • v09 [English] Locking the controls • You can lock the controls to prevent unintended use (for example children accidentally turning the cooking zones on). • When the controls are locked, all the controls except the ON/OFF control are disabled.
  • Page 15 KEN001AKI 18.09.2017 • v09 [English] Over-temperature protection A temperature sensor equipped can monitor the temperature inside the Induction hob. When an excessive temperature is monitored, the Induction hob will stop operation automatically. Detection of small articles When an unsuitable size or non-magnetic pan (e.g. aluminium), or some other small item (e.g.
  • Page 16: Using The Timer

    KEN001AKI 18.09.2017 • v09 [English] Using the timer You can use the timer in two different ways: • You can use it as a minute minder. In this case, the timer will not turn any cooking zone off when the set time is up. •...
  • Page 17 KEN001AKI 18.09.2017 • v09 [English] 5. When the time is set, it will begin to count down immediately. The display will show the remaining time and the timer indicator will flash for 5 seconds. 6. Buzzer will beep and the timer indicator will show “- - “...
  • Page 18 KEN001AKI 18.09.2017 • v09 [English] 4. Touching the “-”, the timer is cancelled, and the “00” will show in the minute display. 5. When the time is set, it will begin to count down immediately. The display will show the remaining time and the timer indicator flash for 5 seconds.
  • Page 19: Cooking Guidelines

    KEN001AKI 18.09.2017 • v09 [English] Cooking Guidelines Take care when frying as the oil and fat heat up very quickly, particularly if you’re using PowerBoost. At extremely high termperatures oil and fat will ignite spontaneously and this presents a serious fire risk. Cooking Tips •...
  • Page 20: Heat Settings

    KEN001AKI 18.09.2017 • v09 [English] Heat settings Heat settings The settings below are guidelines only. The exact setting will depend on several factors, including your cookware and the amount you are cooking. Experiment with the induction hob to find the settings that best suit you. Heat setting Suitability 1 - 2...
  • Page 21: Care And Cleaning

    KEN001AKI 18.09.2017 • v09 [English] Care and cleaning What? How? Important! Everyday soiling on 1. Switch the power to the • When the power to the glass (fingerprints, cooktop off. cooktop is switched off, marks, stains left by 2. Apply a cooktop cleaner there will be no ‘hot surface’...
  • Page 22: Hints And Tips

    KEN001AKI 18.09.2017 • v09 [English] Hints and tips Problem Possible causes What to do The induction hob cannot No power. Make sure the induction hob is be turned on connected to the power supply and that it is switched on. Check whether there is a power outage in your home or area.
  • Page 23: Technical Specification

    Please do not disassemble the unit by yourself to avoid any dangers and damages to the induction hob. Technical specification Cooking Hob Viesta I4Z Viesta I3Z Viesta I2Z Cooking Zones 4 Zones 3 Zones 2 Zones Supply Voltage 220-240V~ 50/60Hz...
  • Page 24: Installation

    A(mm) B(mm) X(mm) Viesta I4Z 50 mini Viesta I3Z Viesta I2Z 62.5 58.5 50 mini Under any circumstances, make sure the induction cooker hob is well ventilated and the air inlet and outlet are not blocked. Ensure the Induction cooker hob is in good work state. As shown below Note: The safety distance between the hotplate and the cupboard above the hotplate should be at least 760mm.
  • Page 25 KEN001AKI 18.09.2017 • v09 [English] Installation A(mm) B(mm) C(mm) 50 mini 20 mini Air intake Air exit 5mm Before you install the hob, make sure that • the work surface is square and level, and no structural members interfere with space requirements •...
  • Page 26: Before Locating The Fixing Brackets

    KEN001AKI 18.09.2017 • v09 [English] Installation When you have installed the hob, make sure • the power supply cable is not accessible through cupboard doors or drawers • there is adequate flow of fresh air from outside the cabinetry to the base of the •...
  • Page 27: Connecting The Hob To The Mains Power Supply

    KEN001AKI 18.09.2017 • v09 [English] Installation Cautions 1. The induction hotplate must be installed by qualified personnel or technicians. Do not install yourself, as your warranty expires immediately when not properly installed. 2. The hob will not be installed directly above a dishwasher, fridge, freezer, washing machine or clothes dryer, as the humidity may damage the hob electronics 3.
  • Page 28 KEN001AKI 18.09.2017 • v09 [English] Installation Viesta I4Z, Viesta I3Z Viesta I2Z 220V~ / 32A 2 x 220V~ / 16A 220V~ / 16A L1 L2 L3 N L1 L2 L3 N L1 L2 L3 N • If the cable is damaged or to be replaced, the operation must be carried out the by after-sale agent with dedicated tools to avoid any accidents.
  • Page 29 KEN001AKI 18.09.2017 • v09 [English] This appliance is labeled in compliance with European directive 2002/96/EC for Waste Electrical and Electronic Equipment (WEEE). By ensuring that this appliance is disposed of correctly, you will help prevent any possible damage to the environment and to human health, which might otherwise be caused if it were disposed of in the wrong way.
  • Page 30 KEN001AKI 18.09.2017 • v09 [Deutsch] Inhaltsverzeichnis Inhaltsverzeichnis ....................30 Gefahrenhinweise....................31 Produktinformationen ..................35 Einige Worte zum Kochen mit Induktion ............38 Auswahl des richtigen Kochgeschirrs ..............39 Gebrauch Ihres Induktionskochfelds ..............40 Touch-Bedienfeld Anleitung ................40 Tastensperre ...................... 42 Verwendung der Zeitschaltuhr ................
  • Page 31: Gefahrenhinweise

    KEN001AKI 18.09.2017 • v09 [Deutsch] Gefahrenhinweise Ihre Sicherheit ist uns wichtig. Bitte lesen Sie diese Informationen, bevor Sie Ihr Kochfeld benutzen. Bitte beachten Sie, dass das Induktionsfeld nur von qualifiziertem Fachpersonal oder Technikern installiert werden darf. Nehmen Sie den Anschluss niemals selbst vor, da bei unsachgemäßer Installation Ihr Gewährleistungsanspruch erlischt.
  • Page 32 KEN001AKI 18.09.2017 • v09 [Deutsch] Stromschlaggefahr bei Betrieb und Wartung • Kochen Sie nicht auf einem defekten oder gerissenen Kochfeld. Sollte die Oberfläche des Kochfelds brechen oder reißen, schalten Sie das Gerät sofort an der Hauptstromzufuhr (Wandschalter) aus und setzen Sie sich mit einem qualifizierten Techniker in Verbindung.
  • Page 33 KEN001AKI 18.09.2017 • v09 [Deutsch] Wichtige Sicherheitshinweise • Lassen Sie das Gerät niemals unbeaufsichtigt, wenn es in Gebrauch ist. Durch Überkochen kann es zu rauchenden und fettigen Verschmutzungen kommen, die sich entzünden können. • Verwenden Sie Ihr Gerät nicht als Arbeits- oder Ablagefläche. •...
  • Page 34 KEN001AKI 18.09.2017 • v09 [Deutsch] Wichtige Sicherheitshinweise • Dieses Gerät ist für die Verwendung in Haushalten oder ähnlichen Anwendungen vorgesehen wie: - Mitarbeiterküchen in Läden, Büros und anderen Arbeitsumfeldern; - Bauernhöfen; - von Kunden in Hotels, Motels und in anderen wohnraumartigen Umfeldern; - in Bed &...
  • Page 35 Installation bitte den Abschnitt Einbau. Lesen Sie alle Gefahrenhinweise vor der Anwendung sorgfältig durch und bewahren Sie diese Bedienungs-/Einbauan- leitung zum späteren Nachschlagen auf. Produktinformation Viesta I4Z Draufsicht 1. 2000 W Zone, Ø 180mm 2. 1500 W Zone, Ø 180mm 3.
  • Page 36 KEN001AKI 18.09.2017 • v09 [Deutsch] Produktinformation Viesta I3Z Draufsicht 1. 2000 W Zone, Ø 180mm 2. 1500 W Zone, Ø 180mm 3. 2000 W Zone, Ø 280mm 4. Glasplatte 5. Bedienfeld Bedienfeld 1. Kochfeld Auswahlregler 2. Temperatur- oder Zeitschaltuhrsteuerung 3. Tastensperre 4.
  • Page 37 KEN001AKI 18.09.2017 • v09 [Deutsch] Produktinformation Viesta I2Z Draufsicht 1. 2000 W Zone, Ø 180mm 2. 1500 W Zone, Ø 180mm 3. Glasplatte 4. Ein- / Ausschalter 5. Bedienfeld Bedienfeld 1. Ein- / Ausschalter 2. Temperatur- oder Zeitschaltuhrsteuerung 3. Kochfeld Auswahlregler 4.
  • Page 38: Einige Worte Zum Kochen Mit Induktion

    KEN001AKI 18.09.2017 • v09 [Deutsch] Einige Worte zum Kochen mit Induktion Kochen mit Induktion ist eine sichere, moderne, effiziente und wirtschaftliche Kochtechnik. Es funktioniert durch elektromagnetische Schwingungen die Wärme direkt in der Pfanne erzeugen, statt dem Erhitzen der Glasoberfläche. Die Herdplatte erwärmt sich nur, weil die Pfanne Wärme an sie abgibt. Eisentopf Magnetkreis Glaskeramikplatte...
  • Page 39: Auswahl Des Richtigen Kochgeschirrs

    KEN001AKI 18.09.2017 • v09 [Deutsch] Auswahl des richtigen Kochgeschirrs • Verwenden Sie nur Kochgeschirr nur mit einem für Induktionskochen geeigneten Boden. Suchen Sie nach dem Induktions- symbol auf der Verpackung oder auf dem Boden der Pfanne. • Sie können überprüfen, ob Ihr Kochgeschirr Induktionsgeschirr ist, indem sie ein Magnet-Test machen.
  • Page 40: Gebrauch Ihres Induktionskochfelds

    KEN001AKI 18.09.2017 • v09 [Deutsch] Gebrauch Ihres Induktionskochfelds Mit dem Kochen beginnen 1. Tippen Sie auf die EIN / AUS-Taste. Nach dem Einschalten ertönt der Summer einmal, alle Displays zeigen „-“ oder „- -“, was darauf hinweist, dass das Induktionskochfeld sich im Standby-Modus befindet.
  • Page 41 KEN001AKI 18.09.2017 • v09 [Deutsch] Gebrauch Ihres Induktionskochfelds Wenn die Anzeige im Wechsel mit der Wärmeeinstellung blinkt Das bedeutet: • Sie haben den Topf nicht auf die richtige Kochzone gestellt, oder • Der Topf den Sie benutzen ist nicht für das Induktionskochen geeignet, oder •...
  • Page 42: Tastensperre

    KEN001AKI 18.09.2017 • v09 [Deutsch] Tastensperre • Sie können die Tasten sperren, um unabsichtliche Bedienung zu verhindern (zum Beispiel, dass Kinder zufällig die Kochfelder einschalten). • Wenn die Tasten gesperrt sind, ist nur die Ein-/Ausschalttaste aktiv. Zum Sperren der Tasten Berühren Sie die Taste für die Tastensperre Die Zeitschaltuhranzeige zeigt „Lo“...
  • Page 43 KEN001AKI 18.09.2017 • v09 [Deutsch] Überhitzungsschutz Ein integrierter Temperaturfühler überwacht die Temperatur im Inneren des Induktionskochfelds. Wenn zu hohe Temperaturen festgestellt werden, stellt das Induktionskochfelds den Betrieb sofort ein. Erkennung von Kleinteilen Wenn eine Pfanne eine ungeeignete Größe hat oder nicht magnetisch ist (z.B.
  • Page 44: Verwendung Der Zeitschaltuhr

    KEN001AKI 18.09.2017 • v09 [Deutsch] Verwenden der Zeitschaltuhr Sie können die Zeitschaltuhr auf zwei verschiedene Weisen benutzen: • Sie können sie als Kurzzeitmesser verwenden. In diesem Fall schaltet die Zeitschaltuhr keine Kochzone aus, wenn die eingestellte Kochzeit abgelaufen ist. • Sie können sie so einstellen, dass sie eine Kochzone ausschaltet, wenn die eingestellte Zeit abgelaufen ist.
  • Page 45 KEN001AKI 18.09.2017 • v09 [Deutsch] 5. Der Countdown startet sofort, nachdem die Zeit eingestellt wurde. Auf dem Bedienfeld wird die verbleibende Zeit angezeigt und die Zeitschaltuhranzeige blinkt 5 Sekunden lang auf. 6. Wenn die eingestellte Zeit abgelaufen ist, ertönt der Summer und die Zeitschaltuhranzeige zeigt “- - “...
  • Page 46 KEN001AKI 18.09.2017 • v09 [Deutsch] 4. Durch Berühren der „-“, wird die Zeit aufgehoben und die „00“ wird wieder angezeigt in der Anzeige angezeigt. 5. Der Countdown startet sofort, nachdem die Zeit eingestellt wurde. Auf dem Bedienfeld wird die verbleibende Zeit angezeigt und die Zeitschaltuhranzeige blinkt 5 Sekunden lang auf.
  • Page 47: Richtlinien Zum Kochen

    KEN001AKI 18.09.2017 • v09 [Deutsch] Richtlinien zum Kochen Achten Sie beim Braten darauf, dass Öl- und Fett sich sehr schnell erhitzen, vor allem wenn Sie die Powerboost-Funktion nutzen. Bei extrem hohen Temperaturen entzünden sich Öl und Fett spontan und dies stellt eine ernsthafte Brandgefahr dar. Kochtipps •...
  • Page 48: Temperatureinstellungen

    KEN001AKI 18.09.2017 • v09 [Deutsch] Heat settings Temperatureinstellungen Die nachstehenden Einstellungen sind lediglich Richtlinien. Die genaue Einstellung hängt von verschiedenen Faktoren ab, unter anderem von Ihrem Kochgeschirr und der Menge, die Sie zubereiten. Experimentieren Sie mit dem Induktionskochfeld, um die für Sie am besten geeigneten Einstellungen zu finden.
  • Page 49: Reinigung Und Pflege

    KEN001AKI 18.09.2017 • v09 [Deutsch] Reinigung und Pflege Was? Wie? Wichtig! Alltägliche Verschmutzun- 1. Schalten Sie die Stromzufuhr des • Wenn die Stromzufuhr des gen auf dem Glas (Finger- Kochfelds aus. Kochfelds ausgeschaltet ist, ist abdrücke, Abrücke, Flecken 2. Tragen Sie einen keine Warnung vor heißen von Lebensmitteln oder Glaskeramikfreiniger auf,...
  • Page 50: Hinweise Und Tipps

    KEN001AKI 18.09.2017 • v09 [Deutsch] Hinweise und Tipps Problem Mögliche Ursachen Was zu tun ist Das Induktionskochfeld Kein Strom. Vergewissern Sie sich, dass das lässt sich nicht Induktionskochfeld an die einschalten. Stromversorgung angeschlossen und eingeschaltet ist. Überprüfen Sie, ob in Ihrem Haus oder Gebiet ein Stromausfall vorliegt.
  • Page 51: Technische Daten

    Oben aufgeführt ist die Beurteilung und Beobachtung von gemeinsamen Ausfällen. Um mögliche Gefahren und Schäden am Induktionskochfeld zu vermeiden, nehmen Sie das Gerät bitte nicht selbst auseinander. Technische Daten Kochfeld Viesta I4Z Viesta I3Z Viesta I2Z Anzahl Kochzonen 4 Zonen 3 Zonen 2 Zonen Volt 220-240V~ 50/60Hz...
  • Page 52: Einbau

    A(mm) B(mm) X(mm) Viesta I4Z 50 mini Viesta I3Z Viesta I2Z 62.5 58.5 50 mini Stellen Sie unter allen Umständen sicher, dass das Induktionskochkochfeld gut belüftet wird und Lufteinlass und -auslass nicht blockiert sind. Stellen Sie sicher, dass sich das Induktionskochkochfeld in gutem Funktionszustand befindet.
  • Page 53 KEN001AKI 18.09.2017 • v09 [Deutsch] Einbau A(mm) B(mm) C(mm) 50 min. 20 min. Lufteinlass Luftauslass 5mm Bevor Sie die Kochplatte einrichten, stellen Sie sicher, dass • Die Arbeitsoberfläche ist rechtwinklig und eben, und keine Bauteile stören den Platzbedarf • die Arbeitsfläche besteht aus einem wärmebeständigen Material •...
  • Page 54: Vor Dem Positionieren Der Halterungen

    KEN001AKI 18.09.2017 • v09 [Deutsch] Einbau Wenn Sie die Kochplatte eingebaut haben, stellen Sie sicher • das Stromversorgungskabel ist nicht durch Schranktüren oder Schubladen unzugänglich • eine ausreichende Frischluftzufuhr von außerhalb ist gewährleistet • wenn das Kochfeld über einer Schublade oder einem Schrankraum installiert ist, ist eine Wärmeschutz Barriere unterhalb der Basis des Kochfeldes installiert •...
  • Page 55: Anschließen Des Kochfelds An Die Stromversorgung

    KEN001AKI 18.09.2017 • v09 [Deutsch] Einbau Vorsichtsmaßnahmen 1. Das Induktionsfeld muss von qualifiziertem Personal oder Technikern installiert werden. Nehmen Sie den Anschluss niemals selbst vor, da bei unsachgemäßer Installation Ihr Gewährleistungsanspruch erlischt. 2. Das Induktionsfeld darf nicht an Kühlgeräten, Geschirrspülern und Wäschetrocknern angebracht werden.
  • Page 56 KEN001AKI 18.09.2017 • v09 [Deutsch] Einbau Viesta I4Z, Viesta I3Z Viesta I2Z 220V~ / 32A 2 x 220V~ / 16A 220V~ / 16A L1 L2 L3 N L1 L2 L3 N L1 L2 L3 N • Wenn das Kabel beschädigt ist oder ausgetauscht werden muss, sollte das zur Vermeidung von Unfällen durch einen Kundendiensttechniker unter...
  • Page 57 KEN001AKI 18.09.2017 • v09 [Deutsch] Dieses Gerät wurde in Übereinstimmung mit der europäischen Direktive 2002/96/EC für Elektro- und Elektronik-Altgeräte (Waste Electrical and Electronic Equipment, WEEE) gekennzeichnet. Indem Sie gewährleisten, dass dieses Gerät richtig entsorgt wird, tragen Sie zum Verhindern von Schädigungen der Umwelt und menschlichen Gesundheit bei, zu denen es bei falscher Entsorgung kommen kann.
  • Page 58 KEN001AKI 18.09.2017 • v09 [Français] Table des matières Table des matières .................... 58 Avertissements de sécurité ................59 Informations produit ................... 63 Un mot sur la cuisson à induction..............66 Choisir le bon matériel de cuisine..............67 Utiliser votre plaque à induction ................ 68 Instructions commande tactile ..............
  • Page 59: Avertissements De Sécurité

    KEN001AKI 18.09.2017 • v09 [Français] Avertissements de sécurité Votre sécurité est importante pour nous. Veuillez lire ces informations avant d‘utiliser votre plaque de cuisson. S‘il vous plaît noter que la plaque d‘induction doit être installé par un technicien qualifié. Ne pas installer vous-même, votre garantie expire immédiatement lorsqu‘ils n’est pas installés correctement.
  • Page 60 KEN001AKI 18.09.2017 • v09 [Français] Fonctionnement et maintenance risque d‘électrocution • Ne pas cuisiner sur une plaque de cuisson cassée ou fendue. Si la surface de la plaque casse ou craque, éteignez immédiatement l‘appareil en utilisant l‘interrupteur d‘alimentation électrique (interrupteur mural) et contactez un technicien qualifié.
  • Page 61 KEN001AKI 18.09.2017 • v09 [Français] Instructions de sécurité importantes • Ne laissez jamais l‘appareil sans surveillance quand il fonctionne. L‘eau bouillante débordante peut causer des fumées et les renversements de graisse peuvent prendre feu. • Ne vous servez jamais de votre appareil comme d‘une surface de travail ou de rangement.
  • Page 62 KEN001AKI 18.09.2017 • v09 [Français] Instructions de sécurité importantes • Cet appareil est conçu pour une utilisation domestique et des applications similaires telles que : - zone de cuisine des personnels dans des boutiques, des bureaux et autres environnements de travail ; - fermes ;...
  • Page 63 Vue d‘ensemble Viesta I4Z 1. 2000 W zone, Ø 180mm 2. 1500 W zone, Ø 180mm 3. 2000 W zone, Ø 180mm 4.
  • Page 64 KEN001AKI 18.09.2017 • v09 [Français] Vue d‘ensemble Viesta I3Z 1. 2000 W zone, Ø 180mm 2. 1500 W zone, Ø 180mm 3. 2000 W zone, Ø 280mm 4. Plaque de verre 5. Paneau de commande Paneau de commande 1. Contrôles de sélection de zone de chauffage 2.
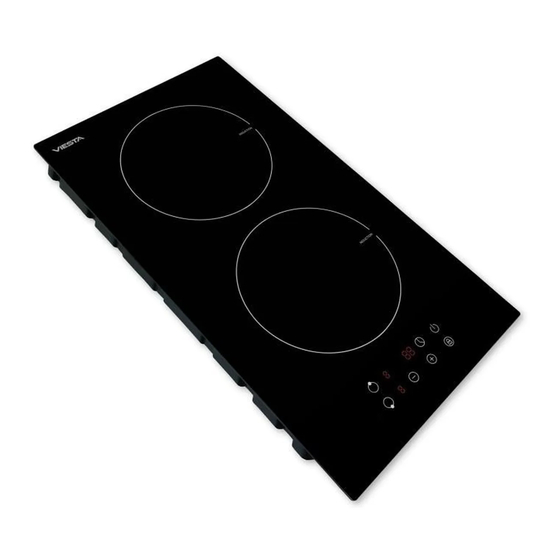
  • Page 65 KEN001AKI 18.09.2017 • v09 [Français] Vue d‘ensemble Viesta I2Z 1. 2000 W zone, Ø 180mm 2. 1500 W zone, Ø 180mm 3. Plaque de verre 4. Contrôle ON / OFF 5. Paneau de commande Paneau de commande 1. Contrôle ON / OFF 2.
  • Page 66: Un Mot Sur La Cuisson À Induction

    KEN001AKI 18.09.2017 • v09 [Français] Un mot sur la cuisson à induction La cuisson à induction est une technologie de cuisson sécuritaire, avancé, efficace et économique. Il fonctionne par des vibrations électromagnétiques qui générant de la chaleur directement dans la poêle, plutôt qu‘indirectement par le chauffage de la surface du verre.
  • Page 67: Choisir Le Bon Matériel De Cuisine

    KEN001AKI 18.09.2017 • v09 [Français] Choisir le bon matériel de cuisine • Utilisez uniquement des ustensiles avec un sol adapté de cuisson à induction. Recherchez le symbole d‘induction sur l‘emballage ou sur le fond de la casserole. • Vous pouvez vérifier si votre batterie de cuisine est adaptable à...
  • Page 68 KEN001AKI 18.09.2017 • v09 [Français] Instructions des commandes tactiles Pour commencer à cuisiner 1. Appuyez sur la commande ON / OFF. Après de s’allumer, le buzzer émet un bip, tous les écrans affichent „-“ ou „- -“, indiquant que la table à induction est entré...
  • Page 69 KEN001AKI 18.09.2017 • v09 [Français] Instructions des commandes tactiles Si l‘affichage clignote en alternance avec le réglage de chaleur Cela signifie que: • Vous n’avez pas placé la casserole sur la zone de cuisson choisi, ou • la casserole que vous utilisez ne convient pas à la cuisson par induction, ou •...
  • Page 70: Verrouiller Les Commandes

    KEN001AKI 18.09.2017 • v09 [Français] Verrouiller les commandes. • Vous pouvez verrouiller les commandes pour éviter un usage involontaire (par exemple des enfants allumant les zones de cuisson). • Quand les commandes sont verrouillées, toutes les commandes sont désactivées sauf ON/OFF. Pour verrouiller les commandes Touchez la commande de verrouillage L‘indicateur de minuteur affichera...
  • Page 71 KEN001AKI 18.09.2017 • v09 [Français] Protection contre la surtempérature Un capteur de température équipé peut gérer la température à l‘intérieur de la plaque de cuisson à induction. Quand une température excessive est contrôlée, la plaque de cuisson arrêtera de fonctionner automatiquement. La détection de petits objets Lorsque la taille du poêle et inappropriée ou le poêle est antimagnétique (par exemple l‘aluminium), ou petit objet (par exemple, couteau, fourchette,...
  • Page 72: Utiliser Le Minuteur

    KEN001AKI 18.09.2017 • v09 [Français] Utiliser le minuteur Vous pouvez utiliser le minuteur de deux manières différentes : • Vous pouvez vous en servir comme d‘un minuteur. Dans ce cas-ci, le minuteur n‘éteindra aucune zone de cuisson que le temps réglé est écoulé. •...
  • Page 73 KEN001AKI 18.09.2017 • v09 [Français] 5. Quand le temps est réglé, le compte à rebours commencera immédiatement. L‘affichage montrera le temps restant et l‘indicateur de minuteur clignotera 5 secondes. 6. Le bipeur bippera et l‘indicateur de minuteur affichera « -- » quand le réglage du temps sera fini.
  • Page 74 KEN001AKI 18.09.2017 • v09 [Français] 4. Toucher le „-“, la minuterie est annulé, et le „00“ montrera dans l’écran de la minuterie. 5. Quand le temps est réglé, le compte à rebours commencera immédiatement. L‘affichage montrera le temps restant et l‘indicateur de minuteur clignotera 5 secondes.
  • Page 75: Directives De Cuisine

    KEN001AKI 18.09.2017 • v09 [Français] Directives de cuisine Faites attention que l‘huile et la graisse se réchauffent très rapidement, surtout si vous utilisez la fonction PowerBoost. A températures extrêmement hautes, l‘huile et la graisse enflamment spontanément et cela représente un grave risque d‘incendie. Astuces de cuisine •...
  • Page 76: Réglages De Chaleur

    KEN001AKI 18.09.2017 • v09 [Français] Heat settings Réglages de chaleur Réglages de chaleur Convient 1 - 2 • chauffage délicat pour de petites quantités de nourriture • faire fondre du chocolat, du beurre, et des aliments brûlant vite • faire mijoter doucement •...
  • Page 77: Entretien Et Nettoyage

    KEN001AKI 18.09.2017 • v09 [Français] Entretien et nettoyage Quoi ? Comment ? Important ! Les salissures de tous les 1. Eteignez l‘alimentation de la • Quand la puissance de la plaque jours sur le verre plaque de cuisson. de cuisson est éteinte, il n‘y aura (empreintes digitales, 2.
  • Page 78: Tuyaux Et Astuces

    KEN001AKI 18.09.2017 • v09 [Français] Tuyaux et astuces Problème Causes possibles Que faire La plaque de cuisson ne Pas d‘alimentation électrique. Assurez-vous que la plaque de peut pas être allumée. cuisson est branchée à l‘alimentation et allumée. Vérifiez s‘il y a une panne de courant dans votre maison ou dans le quartier.
  • Page 79: Spécification Technique

    Pour éviter les risques potentiels et les dommages à la table de cuisson à induction, ne démontez pas l‘appareil. Spécification technique Modèle Viesta I4Z Viesta I3Z Viesta I2Z Zone de cuisson 4 Zone 3 Zone 2 Zone Voltage 220-240V~ 50/60Hz...
  • Page 80: Installation

    A(mm) B(mm) X(mm) Viesta I4Z 50 mini Viesta I3Z Viesta I2Z 62.5 58.5 50 mini Assurez-vous à tout moment que la plaque de cuisson à induction soit bien ventilée et que l‘admission et l‘évacuation d‘air ne soient pas bloqués. Assurez-vous que la plaque de cuisson à induction soit en bon état.
  • Page 81 KEN001AKI 18.09.2017 • v09 [Français] Installation A(mm) B(mm) C(mm) 50 mini 20 mini Admission d‘air Sortie d‘air 5 mm Avant l‘installation de la table de cuisson, assurez-vous que • La surface de travail est d’équerre et plate, et il n’y a pas des composants qui dérangent.
  • Page 82: Avant De Localiser Les Supports De Fixation

    KEN001AKI 18.09.2017 • v09 [Français] Installation Après l‘installation de la table de cuisson, assurez-vous que • le câble d‘alimentation n‘est pas inaccessible à travers les portes d‘armoires ou des tiroirs • un approvisionnement suffisant de l‘air frais est assuré • Si la table de cuisson est installée sur un tiroir ou une armoire, une protection thermique est installé...
  • Page 83: Brancher La Plaque De Cuisson À L'alimentation Électrique

    KEN001AKI 18.09.2017 • v09 [Français] Installation ATTENTION 1. La table de cuisson doit être installé par du personnel ou un technicien qualifié. Ne pas installer vous-même, votre garantie expire immédiatement lorsqu‘ils n’est pas installés correctement. 2. La table de cuisson ne doit pas être installée directement sur un lave-vaisselle, réfrigérateur, congélateur, lave-linge ou sèche-linge, parce que l‘humidité...
  • Page 84 KEN001AKI 18.09.2017 • v09 [Français] Installation Viesta I4Z, Viesta I3Z Viesta I2Z 220V~ / 32A 2 x 220V~ / 16A 220V~ / 16A L1 L2 L3 N L1 L2 L3 N L1 L2 L3 N • Si le câble est endommagé ou doit être remplacé, ce doit être fait par un technicien après-vente utilisant les outils appropriés afin d‘éviter les accidents.
  • Page 85 KEN001AKI 18.09.2017 • v09 [Français] Cet appareil est étiqueté en accord de la directive européenne 2002/96/EC déchets d‘équipements électriques et électronique. En assurant que cet appareil soit jeté correctement, vous aiderez à éviter tout dommage à l‘environnement et à la santé humaine, dommages qui pourraient être autrement causés si l‘appareil était jeté...
  • Page 86 KEN001AKI 18.09.2017 • v09 [Italiano] Indice Indice ......................... 86 Indicazioni di pericolo ..................87 Informazioni sul prodotto ................... 91 Alcune nozioni sulla cottura a induzione ............94 Scelta delle pentole adatte ................95 Utilizzo del suo piano cottura a induzione ............96 Istruzioni per l’uso comandi touch screen ............
  • Page 87: Indicazioni Di Pericolo

    KEN001AKI 18.09.2017 • v09 [Italiano] Indicazioni di pericolo La sua sicurezza è importante per noi. Leggere le presenti informazioni prima di utilizzare il piano cottura. Verificare che il piano a induzione venga installato soltanto da personale specializzato o da tecnici qualificati. Si raccomanda di non eseguire mai da soli l’allaccio in quanto il diritto alla garanzia decade in caso di errata installazione.
  • Page 88 KEN001AKI 18.09.2017 • v09 [Italiano] Pericolo di folgorazione durante l’uso e la manutenzione • Non cucinare su un piano cottura difettoso o danneggiato. Qualora la superficie del piano cottura dovesse rompersi o spaccarsi, scollegare subito l’apparecchio dall’alimentazione elettrica (tramite l’interruttore a parete) e contattare un tecnico qualificato. •...
  • Page 89 KEN001AKI 18.09.2017 • v09 [Italiano] Importanti indicazioni di sicurezza • Non lasciare mai l’apparecchio incustodito durante l’utilizzo. Un eventuale surriscaldamento può causare la formazione di residui grassi fumanti che potrebbero infiammarsi. • Non utilizzare l’apparecchio come piano di lavoro o superficie di appoggio. •...
  • Page 90 KEN001AKI 18.09.2017 • v09 [Italiano] Importanti indicazioni di sicurezza • Questo apparecchio è progettato per l’utilizzo in ambiti domestici o per scopi simili, come: - cucine per i dipendenti in negozi, uffici e altri ambienti lavorativi; - agriturismi; - per i clienti di hotel, motel e altri ambienti abitativi; - in Bed &...
  • Page 91: Informazioni Sul Prodotto

    Per quanto riguarda l’installazione si rimanda al paragrafo “Installazione”. Si prega di leggere attentamente le indicazioni di pericolo prima dell’utilizzo e di conservare le presenti istruzioni per l’utilizzo successivo. Informazioni sul prodotto Viesta I4Z Vista dall’alto 1. Fuoco 2000 W, Ø 180mm 2. Fuoco 1500 W, Ø 180mm 3.
  • Page 92 KEN001AKI 18.09.2017 • v09 [Italiano] Informazioni sul prodotto Viesta I3Z Vista dall’alto 1. Fuoco 2000 W, Ø 180mm 2. Fuoco 1500 W, Ø 180mm 3. Fuoco 2000 W, Ø 280mm 4. Lastra in vetro 5. Comandi Comandi 1. Tasto di selezione del fuoco desiderato 2.
  • Page 93 KEN001AKI 18.09.2017 • v09 [Italiano] Informazioni sul prodotto Viesta I2Z Vista dall’alto 1. Fuoco 2000 W, Ø 180mm 2. Fuoco 1500 W, Ø 180mm 3. Lastra in vetro 4. Accensione/Spegnimento 5. Comandi Comandi 1. Accensione/Spegnimento 2. Regolazione temperatura o timer 3.
  • Page 94 KEN001AKI 18.09.2017 • v09 [Italiano] Alcune parole sulla cottura a induzione La cottura a induzione è una tecnica sicura, moderna, efficiente e economica per preparare i propri cibi. Funziona attraverso onde elettromagnetiche che generano calore direttamente nella padella piuttosto che riscaldare la superficie in vetro. La piastra si riscalda soltanto perché...
  • Page 95: Scelta Delle Pentole Adatte

    KEN001AKI 18.09.2017 • v09 [Italiano] Scelta delle pentole adatte • Utilizzi soltanto pentole con fondo adatto alla cottura a induzione. Cerchi il simbolo dell’induzione sull’imballaggio o sul fondo della padella. • Può verificare se le pentole sono adatte alla cottura a induzione facendo un test magnetico. Muovere una calamita sul fondo della padella.
  • Page 96: Utilizzo Del Suo Piano Cottura A Induzione

    KEN001AKI 18.09.2017 • v09 [Italiano] Utilizzo del suo piano cottura a induzione Iniziare a cucinare 1. Dopo l’accensione il dispositivo di segnalamento acustico suona una volta, tutte le spie indicano „-“ oppure „- -“, il che significa che il piano cottura a induzione è...
  • Page 97 KEN001AKI 18.09.2017 • v09 [Italiano] Utilizzo del suo piano cottura a induzione Se la spia lampeggia alternandosi alla regolazione della temperatura Significa che: • la pentola non è posizionata sul fuoco giusto, oppure • la pentola che sta utilizzando non è adatta per la cottura sul piano a induzione, oppure •...
  • Page 98: Blocco Tasti

    KEN001AKI 18.09.2017 • v09 [Italiano] Blocco tasti • È possibile bloccare i tasti per evitarne l’accensione involontaria (ad esempio per prevenire che i bambini azionino i fuochi per caso). • Quando i tasti sono bloccati funziona soltanto l’interruttore on/off. Bloccare i tasti Toccare il tasto per bloccare i tasti;...
  • Page 99 KEN001AKI 18.09.2017 • v09 [Italiano] Termostato di sicurezza Un sensore integrato monitora la temperatura all’interno del piano cottura a induzione. Se si rilevano temperature troppo alte il piano cottura a induzione si spegne immediatamente. Riconoscimento di piccoli oggetti Se una pentola non è delle dimensioni giuste o non è in un materiale magnetico (ad es.
  • Page 100: Utilizzo Del Timer

    KEN001AKI 18.09.2017 • v09 [Italiano] Utilizzo del timer È possibile utilizzare il timer in due modi diversi: • Come contaminuti. In questo caso il timer non spegne nessun fuoco al termine del tempo di cottura impostato. • Per spegnere un fuoco al termine del tempo di cottura impostato. •...
  • Page 101 KEN001AKI 18.09.2017 • v09 [Italiano] 5. Il conto alla rovescia inizia subito dopo aver impostato la durata. Sul display viene mostrato il tempo rimanente e la spia del timer lampeggia per 5 secondi. 6. Allo scadere dell’intervallo impostato il dispositivo di segnalamento acustico suona e sull’indicatore del timer compare “- - “.
  • Page 102 KEN001AKI 18.09.2017 • v09 [Italiano] 4. Toccando il tasto „-“ il tempo si azzera e l’indicatore riporta nuovamente „00“. 5. Il conto alla rovescia inizia subito dopo aver impostato la durata. Sul display viene mostrato il tempo rimanente e la spia del timer lampeggia per 5 secondi. NOTA: Il puntino rosso illuminato accanto all’indicatore della temperatura indica il fuoco selezionato.
  • Page 103: Linee Guida Per La Cottura

    KEN001AKI 18.09.2017 • v09 [Italiano] Linee guida per la cottura Olio e grasso si riscaldano rapidamente, fare pertanto attenzione durante la cottura, soprattutto se si utilizza la funzione Powerboost. A temperature estremamente elevate olio e grasso possono infiammarsi spontaneamente, comportando un serio rischio di incendio. Suggerimenti per la cottura •...
  • Page 104: Regolazione Della Temperatura

    KEN001AKI 18.09.2017 • v09 [Italiano] Heat settings Regolazione della temperatura Le seguenti impostazioni sono semplici linee guida. La precisa regolazione delle impostazioni dipende da diversi fattori, tra gli altri dalle pentole utilizzate e dai quantitativi preparati. Fare delle prove con il piano a induzione per trovare le impostazioni giuste. Regolazione della temperatura 1 - 2...
  • Page 105: Pulizia E Manutenzione

    KEN001AKI 18.09.2017 • v09 [Italiano] Pulizia e manutenzione Cosa? Come? Importante! Sporco quotidiano che si 1. Staccare l’alimentazione del • Quando l’alimentazione del piano forma sul piano in vetro piano cottura. cottura è spenta l’avviso che mette (impronte, macchie di 2.
  • Page 106: Avvertenze E Suggerimenti

    KEN001AKI 18.09.2017 • v09 [Italiano] Avvertenze e suggerimenti Problema Possibili cause Cosa fare Il piano a induzione non Manca la corrente. Assicurarsi che il piano cottura a si accende. induzione sia collegato alla rete di alimentazione e acceso. Verificare che non sia mancata la corrente in casa o nella zona.
  • Page 107 Per prevenire possibili pericoli e guasti al piano a induzione si prega di non smontare l’apparecchio da soli. Data tecnici Piano cottura Viesta I4Z Viesta I3Z Viesta I2Z Numero di fuochi 4 fuochi 3 fuochi 2 fuochi Voltaggio 220-240V~ 50/60Hz...
  • Page 108: Montaggio

    A(mm) B(mm) X(mm) Viesta I4Z 50 mini Viesta I3Z Viesta I2Z 62.5 58.5 50 mini Assicurarsi in ogni caso che il piano cottura a induzione sia ben ventilato e che l’ingresso e l’uscita dell’aria non siano bloccati. Assicurarsi che il piano cottura a induzione funzioni bene.
  • Page 109 KEN001AKI 18.09.2017 • v09 [Italiano] Montaggio A(mm) B(mm) C(mm) 50 min. 20 min. Ingresso Uscita dell’aria 5mm Prima di installare il piano cottura assicurarsi che: • Il piano di lavoro sia liscio e posizionato perpendicolarmente e che non ci siano componenti che occupano lo spazio necessario •...
  • Page 110: Prima Del Posizionamento Dei Supporti

    KEN001AKI 18.09.2017 • v09 [Italiano] Montaggio Una volta installato il piano cottura assicurarsi che: • il cavo di alimentazione non sia reso inaccessibile da ante o cassetti • sia garantita sufficiente aerazione dall’esterno • venga installata una barriera termica protettiva al di sotto della base del piano cottura nel caso in cui si installi il piano cottura al di sopra di un cassetto o di un armadietto •...
  • Page 111: Allacciamento Del Piano Cottura All'alimentazione Elettrica

    KEN001AKI 18.09.2017 • v09 [Italiano] Montaggio Misure di sicurezza 1. Il piano a induzione deve essere installato da personale o tecnici qualificati. Non eseguire mai da soli l’allaccio in quanto il diritto alla garanzia decade in caso di errata installazione. 2.
  • Page 112 KEN001AKI 18.09.2017 • v09 [Italiano] Montaggio Viesta I4Z, Viesta I3Z Viesta I2Z 220V~ / 32A 2 x 220V~ / 16A 220V~ / 16A L1 L2 L3 N L1 L2 L3 N L1 L2 L3 N • Se il cavo è danneggiato o deve essere sostituito, per prevenire incidenti è...
  • Page 113 KEN001AKI 18.09.2017 • v09 [Italiano] Su questo apparecchio è riportata la sigla prevista dalla direttiva europea 2002/96/EC per i Rifiuti di Apparecchiature Elettriche ed Elettroniche (Waste Electrical and Electronic Equipment, WEEE). Smaltendo questo apparecchio nel modo corretto contribuirà a evitare i danni all’ambiente e alla salute umana che deriverebbero da un errato smaltimento.
  • Page 114 KEN001AKI 18.09.2017 • v09 [Español] Índice Índice ....................... 114 Indicaciones de seguridad ................115 Información del producto ................. 119 Antes de comenzar a cocinar con inducción ........... 122 Cómo elegir la batería de cocina correcta ............123 Cómo utilizar su placa de cocina de inducció..........124 Instrucciones del panel de control táctil .............
  • Page 115: Indicaciones De Seguridad

    KEN001AKI 18.09.2017 • v09 [Español] Indicaciones de seguridad Su seguridad es importante para nosotros. Por favor, lea estas instrucciones antes de utilizar la placa de cocina. Tenga en cuenta que la cocina de inducción solo podrá ser instalada por personal técnico especializado. Nunca conecte la placa usted mismo ya que una instalación inadecuada anulará...
  • Page 116 KEN001AKI 18.09.2017 • v09 [Español] Peligro de descarga eléctrica durante el funcionamiento y el mantenimiento • Nunca cocine sobre una placa de cocina defectuosa o rota. Si se rompe o rasga la superficie de una placa, apague inmediatamente el aparato desde el cuadro principal de corriente (interruptor de pared) y póngase en contacto con un técnico cualificado.
  • Page 117 KEN001AKI 18.09.2017 • v09 [Español] Información de seguridad importante • Nunca deje el aparato sin vigilancia mientras esté en uso. Cocinar en exceso puede provocar restos de grasa y de humo que podrían resultar inflamables. • Nunca utilice el aparato como encimera o superficie almacenamiento. •...
  • Page 118 KEN001AKI 18.09.2017 • v09 [Español] Información de seguridad importante • Este aparato está indicado para usos domésticos o similares como: - Cocinas para empleados en tiendas, oficinas u otros entornos de trabajo - Fincas - Clientes de hoteles, moteles y otros espacios habitables - Establecimientos tipo Bed &...
  • Page 119: Información Del Producto

    Información del producto Viesta I4Z Vista superior 1. Zona 2000 W, Ø 180mm 2. Zona 1500 W, Ø 180mm 3.
  • Page 120 KEN001AKI 18.09.2017 • v09 [Español] Información del producto Viesta I3Z Vista superior 1. Zona 2000 W, Ø 180mm 2. Zona 1500 W, Ø 180mm 3. Zona 2000 W, Ø 280mm 4. Placa de vidrio 5. Panel de control Panel de control 1.
  • Page 121 KEN001AKI 18.09.2017 • v09 [Español] Información del producto Viesta I2Z Vista superior 1. Zona 2000 W, Ø 180mm 2. Zona 1500 W, Ø 180mm 3. Placa de vidrio 4. Interruptor de encendido y apagado 5. Panel de control Panel de control 1.
  • Page 122: Antes De Comenzar A Cocinar Con Inducción

    KEN001AKI 18.09.2017 • v09 [Español] Antes de cocinar con inducción La cocina con inducción es una técnica de cocción segura, moderna, eficiente y económica. Está basada en unas oscilaciones electromagnéticas que generan calor directamente en la olla, en lugar de calentar la superficie de vidrio. La placa solo se calienta porque la olla/sartén le da calor.
  • Page 123: Cómo Elegir La Batería De Cocina Correcta

    KEN001AKI 18.09.2017 • v09 [Español] Cómo elegir la batería de cocina correcta • Utilice exclusivamente batería de cocina con una base adecuada para la cocina de inducción. Busque el símbolo de inducción en el empaquetado o en la base de la olla/sartén. •...
  • Page 124: Cómo Utilizar Su Placa De Cocina De Inducció

    KEN001AKI 18.09.2017 • v09 [Español] Cómo utilizar su placa de cocina de inducción Comenzar a cocinar 1. Toque el botón de ENCENDIDO/APAGADO. Tras encender el aparato se escuchará un sonido una sola vez y todas las pantallas indicarán « – » o « – – », lo que significa que la placa de inducción se encuentra en modo de pausa.
  • Page 125 KEN001AKI 18.09.2017 • v09 [Español] Cómo utilizar su placa de cocina de inducción Si los indicadores parpadean alternándose con el ajuste de temperatura Esto significa: • Que no ha colocado la olla sobre la zona de cocción adecuada • Que la batería de cocina que está utilizando no es apta para la cocina de inducción •...
  • Page 126: Bloqueo De Botones

    KEN001AKI 18.09.2017 • v09 [Español] Bloqueo de botones • Usted puede bloquear los botones para evitar que el aparato se utilice sin vigilancia (por ejemplo, que un niño encienda la placa por accidente). • Mientras los botones estén bloqueados, solo el interruptor de encendido / apagado permanecerá...
  • Page 127 KEN001AKI 18.09.2017 • v09 [Español] Protección contra sobrecalentamiento El sensor de temperatura integrado controla la temperatura desde el interior de la placa de inducción. Cuando detecta una temperatura demasiado elevada, este sensor apaga de inmediato el funcionamiento de la placa de inducción. Detección de piezas pequeñas La placa de cocina se pondrá...
  • Page 128: Cómo Utilizar El Temporizador

    KEN001AKI 18.09.2017 • v09 [Español] Cómo utilizar el temporizador Puede utilizar el temporizador de dos maneras distintas: • Puede utilizarlo como avisador de cocina. En este caso, una vez transcurrido el tiempo de cocción ajustado, el temporizador no apaga ninguna zona de cocción. •...
  • Page 129 KEN001AKI 18.09.2017 • v09 [Español] 5. La cuenta atrás comenzará justo después de regular el tiempo. En el panel de control se indicará el tiempo restante y el indicador del temporizador parpadeará durante 5 segundos 6. Cuando el tiempo seleccionado se haya agotado, sonará...
  • Page 130 KEN001AKI 18.09.2017 • v09 [Español] 4. Al pulsar el botón « – », el tiempo se restablecerá y el indicador volverá a marcar «00». 5. La cuenta atrás comenzará justo después de regular el tiempo. En el panel de control se indicará el tiempo restante y el indicador del temporizador parpadeará...
  • Page 131: Guía Para Cocinar

    KEN001AKI 18.09.2017 • v09 [Español] Guía para cocinar Al freír tenga en cuenta que el aceite y la grasa se calientan muy rápido, sobre todo al utilizar la función rápida «Powerboost». El aceite y la grasa pueden comenzar a arder de manera espontánea y provocar un incendio si se encuentran a temperaturas extremadamente altas.
  • Page 132: Ajustes De Temperatura

    KEN001AKI 18.09.2017 • v09 [Español] Heat settings Ajuste de temperatura Los siguientes ajustes que indicamos son solo orientativos. El ajuste exacto depende de distintos factores, entre otros, de su batería de cocina y de la cantidad de alimentos que cocine. Experimente con su placa de inducción para encontrar los ajustes más apropiados.
  • Page 133: Limpieza Y Cuidados

    KEN001AKI 18.09.2017 • v09 [Español] Limpieza y cuidados ¿Qué? ¿Cómo? ¡Importante! Suciedad normal sobre el 1. Desconecte la corriente eléctrica • Mientras la corriente eléctrica vidrio (huellas dactilares, de la placa. de la placa esté desconectada no salpicaduras, manchas de habrá...
  • Page 134: Advertencias Y Consejos

    KEN001AKI 18.09.2017 • v09 [Español] Advertencias y consejos Problema Causas posibles Qué hacer No puedo encender la No hay corriente eléctrica. Asegúrese de que la placa de placa de inducción. inducción esté conectada al suministro eléctrico y encendida. Compruebe si ha habido un apagón en su casa o en su zona.
  • Page 135: Características Técnicas

    Para evitar posibles peligros y daños en la placa de inducción nunca desmonte las piezas del aparato usted mismo. Características técnicas Placa de cocina Viesta I4Z Viesta I3Z Viesta I2Z Número de placas 4 zonas 3 zonas 2 zonas de cocción...
  • Page 136: Montaje

    A(mm) B(mm) X(mm) Viesta I4Z 50 mini Viesta I3Z Viesta I2Z 62.5 58.5 50 mini Asegúrese principalmente de que la placa de inducción esté bien ventilada y que las entradas y salidas de aire no estén bloqueadas. Asegúrese de que la placa de inducción se encuentre en buen estado de funcionamiento.
  • Page 137 KEN001AKI 18.09.2017 • v09 [Español] Montaje A(mm) B(mm) C(mm) 50 min. 20 min. Entrada de Salida de aire aire 5 mm Antes de instalar la placa de cocina, asegúrese de que • La encimera sea rectangular y lisa y que ninguna pieza interfiera en el espacio de trabajo •...
  • Page 138: Antes De Colocar Los Soportes

    KEN001AKI 18.09.2017 • v09 [Español] Montaje Cuando haya instalado la placa de cocina, asegúrese de que • El cableado del suministro eléctrico no quede inaccesible por las puertas de los armarios y los cajones • Se garantice la ventilación de aire fresco suficiente •...
  • Page 139 KEN001AKI 18.09.2017 • v09 [Español] Montaje Precaución 1. La cocina de inducción solo podrá ser instalada por personal técnico especializado o cualificado. Nunca conecte la placa usted mismo ya que una instalación inadecuada anulará su derecho de garantía. 2. La placa de inducción no puede instalarse sobre equipos frigoríficos, lavavajillas ni secadoras.el aparato.
  • Page 140 KEN001AKI 18.09.2017 • v09 [Español] Montaje Viesta I4Z, Viesta I3Z Viesta I2Z 220V~ / 32A 2 x 220V~ / 16A 220V~ / 16A L1 L2 L3 N L1 L2 L3 N L1 L2 L3 N • Si el cable está dañado o tiene que ser reemplazado, solo un técnico del servicio técnico provisto de las herramientas adecuadas podrá...
  • Page 141 KEN001AKI 18.09.2017 • v09 [Español] Este aparato cumple con la directiva europea 2002/96/CE sobre Residuos de Aparatos Eléctricos y Electrónicos (RAEE) (Waste Electrical and Electronic Equipment, WEEE). Al garantizar que este aparato se deseche adecuadamente, estará contribuyendo a evitar los daños en el medioambiente y en la salud de las personas que podría provocar una eliminación inadecuada.
  • Page 142 KEN001AKI 18.09.2017 • v09 [Nederlands] Inhoudsopgave Inhoudsopgave ....................142 Gevarenaanduidingen ..................143 Productinformatie .................... 147 Een paar woorden over het koken met inductie ..........150 Het kiezen van het juiste kookgerei ..............151 Gebruik van uw inductiekookplaat ..............152 Touch-bedieningsveld handleiding ............. 152 Blokkeringstoets ....................
  • Page 143: Gevarenaanduidingen

    KEN001AKI 18.09.2017 • v09 [Nederlands] Gevarenaanduidingen Uw veiligheid is belangrijk voor ons. Lees deze informatie door voordat u uw kookplaat gebruikt Houd er rekening mee dat de inductiekookplaat alleen door gekwalificeerd deskundig personeel of technici mag worden geïnstalleerd. Voer de aansluiting nooit zelf uit, omdat bij onjuiste installatie de garantie vervalt.
  • Page 144 KEN001AKI 18.09.2017 • v09 [Nederlands] Risico op elektrische schokken tijdens het gebruik en onderhoud • Kook niet op een defecte of gebarsten kookplaat. Als het oppervlak van de kookplaat breekt of scheurt,schakel het apparaat direct uit via de hoofdvoeding (wandschakelaar) en neem contact op met een gekwalificeerd technicus. •...
  • Page 145 KEN001AKI 18.09.2017 • v09 [Nederlands] Belangrijke veiligheidsinstructies • Laat het apparaat nooit onbeheerd achter, terwijl het in gebruik is. Door overkoken kan rook en vettig vuil ontstaan, dat kan ontbranden. • Gebruik uw apparaat niet als werkblad of opslagruimte. • Laat geen (gebruiks)voorwerpen op het apparaat liggen.
  • Page 146 KEN001AKI 18.09.2017 • v09 [Nederlands] Belangrijke veiligheidsinstructies • Dit apparaat is bedoeld voor het gebruik in huishoudens of soortgelijke toepassingen, zoals: - personeelskeukens in winkels, kantoren en andere werkomgevingen; - landbouwbedrijven; - door klanten in hotels, motels en in andere huiskamerachtige omgevingen; - in bed &...
  • Page 147: Productinformatie

    Lees voor de installatie de sectie Installatie. Lees alle gevaarsinstructies voor het gebruik zorgvuldig door en bewaar deze gebruiks- en montagehandleiding voor toekomstig gebruik. Productinformatie Viesta I4Z Bovenaanzicht 1. 2000 W zone, Ø 180mm 2. 1500 W zone, Ø 180mm 3.
  • Page 148 KEN001AKI 18.09.2017 • v09 [Nederlands] Productinformatie Viesta I3Z Bovenaanzicht 1. 2000 W zone, Ø 180mm 2. 1500 W zone, Ø 180mm 3. 2000 W zone, Ø 280mm 4. Glasplaat 5. Gebruiksgebied Gebruiksgebied 1. Keuzeregelaar kookplaat 2. Temperatuur- en timerbesturing 3. Blokkeringstoets 4.
  • Page 149 KEN001AKI 18.09.2017 • v09 [Nederlands] Productinformatie Viesta I2Z Bovenaanzicht 1. 2000 W zone, Ø 180mm 2. 1500 W zone, Ø 180mm 3. Glasplaat 4. Aan- / uit-schakelaar 5. Gebruiksgebied Gebruiksgebied 1. Aan- / uit-schakelaar 2. Temperatuur- en timerbesturing 3. Keuzeregelaar kookplaat 4.
  • Page 150: Een Paar Woorden Over Het Koken Met Inductie

    KEN001AKI 18.09.2017 • v09 [Nederlands] Een paar woorden over het koken met inductie Koken met inductie is een veilige, moderne, efficiënte en zuinige manier van koken. Het werkt door elektromagnetische trillingen die warmte direct in de pan brengen, in plaats van het verhitten van het glasoppervlak. De verwarmingsplaat warmt alleen op omdat de pan hier warmte aan geeft.
  • Page 151: Het Kiezen Van Het Juiste Kookgerei

    KEN001AKI 18.09.2017 • v09 [Nederlands] Het kiezen van het juiste kookgerei • Gebruik alleen kookgerei met een geschikte bodem voor inductiekoken. Zoek naar het inductiesymbool op de verpakking of op de bodem van de pan. • U kunt controleren of uw kookgerei inductiegerei is, door een magneettest te doen.
  • Page 152: Gebruik Van Uw Inductiekookplaat

    KEN001AKI 18.09.2017 • v09 [Nederlands] Gebruik van uw inductiekookplaat Met het koken beginnen 1. Tik op de AAN / UIT-toets. Na het inschakelen toont piept de zoemer een keer, alle displays tonen „-“ of „- -“, wat erop wijst, dat de inductiekookplaat zich in de standby-modus bevindt.
  • Page 153 KEN001AKI 18.09.2017 • v09 [Nederlands] Gebruik van uw inductiekookplaat Als het display afwisselend met de warmteinstelling knippert Dit betekent: • U hebt de pan niet op de juiste kookzone geplaatst, of • De pan die u gebruikt is niet voor inductiekoken geschikt, of •...
  • Page 154: Blokkeringstoets

    KEN001AKI 18.09.2017 • v09 [Nederlands] Blokkeringstoets • U kunt de toetsen blokkeren, om onbedoeld gebruik te voorkomen (bijvoorbeeld kinderen die toevallig de kookplaat inschakelen). • Wanneer de toetsen geblokkeerd zijn, is alleen de Aan-/Uitschakelaar actief. Blokkeren van de toetsen Raak de toets aan voor de toetsenblokkering Het timerdisplaygeeft „Lo“...
  • Page 155 KEN001AKI 18.09.2017 • v09 [Nederlands] Beveiliging tegen oververhitting Een geïntegreerde temperatuursensor bewaakt de temperatuur in het inwendige deel van de inductiekookplaat. Wanneer een te hoge temperatuur wordt vastgesteld, schakelt de inductiekookplaat vanzelf uit. Detectie van kleine delen Wanneer een pan een ongeschikte grootte heeft of niet magnetisch is (bijv.
  • Page 156: Gebruik Van De Timer

    KEN001AKI 18.09.2017 • v09 [Nederlands] Gebruiken van de timer U kunt de timer op twee verschillende manier gebruiken: • U kunt deze als timer gebruiken. Zó dat de timer geen kookzone uischakelt, wanneer de ingestelde tijd is afgelopen. • U kunt deze ook zo instellen, dat een kookzone uitschakelt, wanneer de ingestelde tijd is afgelopen.
  • Page 157 KEN001AKI 18.09.2017 • v09 [Nederlands] 5. Het aftellen start direct nadat de tijd is ingesteld. Op het bedieningspaneel wordt de resterende tijd weergegeven en de timer knippert voor 5 seconden. 6. Wanneer de ingestelde tijd afgelopen is, klinkt de zoemer en de timer toont “- - “. Instellen van de timer voor het uitschakelen van een kookzone Kookzone voor deze functie instellen: 1.
  • Page 158 KEN001AKI 18.09.2017 • v09 [Nederlands] 4. Door het aanraken van de „-“, wordt de timer geannuleerd en „00“ opnieuw weergegeven in het display. 5. Het aftellen start direct nadat de tijd is ingesteld. Op het bedieningspaneel wordt de resterende tijd weergegeven en de timer knippert voor 5 seconden.
  • Page 159: Richtlijnen Om Te Koken

    KEN001AKI 18.09.2017 • v09 [Nederlands] Richtlijnen om te koken Let er bij het braden op dat olie en vet zeer snel verhitten, vooral als u de Powerboost-functie gebruikt. Bij extreem hoge temperaturen ontbranden olie en vet spontaan en dit vormt een ernstig risico op brand. Kooktips •...
  • Page 160: Temperatuurinstellingen

    KEN001AKI 18.09.2017 • v09 [Nederlands] Heat settings Temperatuurinstellingen De volgende instellingen zijn slechts richtlijnen. De precieze instelling hang af van verschillende factoren, waaronder uw kookgerei en de hoeveelheid die u voorbereidt. Experimenteer met de inductiekookplaat, om de beste instellingen voor u te vinden.
  • Page 161: Reiniging En Onderhoud

    KEN001AKI 18.09.2017 • v09 [Nederlands] Reiniging en onderhoud Wat? Hoe? Belangrijk! Normale verontreiniging op 1. Schakel de stroomtoevoer van • Wanneer de stroomtoevoer van het glas (vingerafdrukken, de kookplaat uit. de kookplaat is uitgeschakeld, is afdrukken, vlekken van 2. Breng een reinigingsmiddel voor er geen waar-schuwing voor hete voeding of vloeistoffen glaskeramiek aan zolang het...
  • Page 162: Instructies En Tips

    KEN001AKI 18.09.2017 • v09 [Nederlands] Instructies en tips Probleem Mogelijke oorzaken Wat te doen De inductiekookplaat kan Geen stroom. Zorg ervoor dat de niet worden ingeschakeld. Inductiekookplaat op de voeding is aangesloten en ingeschakeld. Controleer of er in uw huis of gebied een stroomstoring is.
  • Page 163: Technische Gegevens

    Hierboven is de evaluatie en observatie van veelvoorkomend falen genoemd. Haal de inductiekookplaat niet zelf uit elkaar om mogelijke risico’s en schade aan de inductiekookplaat te vermijden. Technische gegevens Kookplaat Viesta I4Z Viesta I3Z Viesta I2Z Aantal kookzones 4 zones 3 zones 2 zones Volt 220-240V~ 220-240V~...
  • Page 164: Montage

    D(mm) A(mm) B(mm) X(mm) Viesta I4Z 50 mini Viesta I3Z Viesta I2Z 62.5 58.5 50 mini Zorg ervoor dat onder alle omstandigheden de inductiekookplaat goed wordt geventileerd en dat de luchtinlaat en -uitlaat niet worden geblokkeerd. Zorg ervoor dat de inductiekookplaat zich in een goed werkende staat bevindt.
  • Page 165 KEN001AKI 18.09.2017 • v09 [Nederlands] Montage A(mm) B(mm) C(mm) 50 min. 20 min. Luchtinlaat Luchtuitlaat 5mm Voordat u de kookplaat inricht, moet u controleren dat • het werkoppervlak vierkant en vlak is, en er geen constructieonderdelen de benodigde ruimte in de weg zitten •...
  • Page 166: Voor Het Plaatsen Van De Beugels

    KEN001AKI 18.09.2017 • v09 [Nederlands] Montage Wanneer u de kookplaat hebt geïnstalleerd, zorg er dan voor dat • het netsnoer niet door kastdeurtjes of laden bereikbaar is • voldoende toevoer van verse lucht van buiten wordt gewaarborgd • wanneer de kookplaat boven een lade of een kast is geïnstalleerd, er een beschermende warmte barrière onder de basis van de kookplaat is geïnstalleerd •...
  • Page 167: Aansluiten Van De Kookplaat Op De Voedingsspanning

    KEN001AKI 18.09.2017 • v09 [Nederlands] Montage Aandachtspunten 1. De inductiekookplaat moet door gekwalificeerd personeel of monteurs worden geïnstalleerd. Voer de aansluiting nooit zelf uit, omdat bij onjuiste installatie de aanspraak op garantie vervalt. 2. De inductiekookplaat mag niet op koelkasten, vaatwassers en drogers worden geïnstalleerd.
  • Page 168 KEN001AKI 18.09.2017 • v09 [Nederlands] Montage Viesta I4Z, Viesta I3Z Viesta I2Z 220V~ / 32A 2 x 220V~ / 16A 220V~ / 16A L1 L2 L3 N L1 L2 L3 N L1 L2 L3 N • Wanneer de kabel is beschadigd of moet worden vervangen, moet dat voor het voorkomen van ongevallen door een servicemonteur met behulp van de juiste gereedschappen gebeuren.
  • Page 169 KEN001AKI 18.09.2017 • v09 [Nederlands] Dit apparaat wordt in overeenstemming met de Europese richtlijn 2002/96/EC voor afgedankte elektrische en elektronische apparatuur (Waste Electrical and Electronic Equipment, WEEE) gekenmerkt. Terwijl u ervoor zorgt dat dit apparaat juist wordt weggegooid, draagt u bij tot het voorkomen van het schade toebrengen aan het milieu en de menselijke gezondheid, wat kan ontstaan bij onjuiste verwijdering.

Ce manuel est également adapté pour:

Viesta i3zViesta i4z

Table des Matières