HQ Power EXCALIBOR II Notice D'emploi
Table des Matières
Les langues disponibles
Les langues disponibles
Liens rapides
VDPL3601MHW10
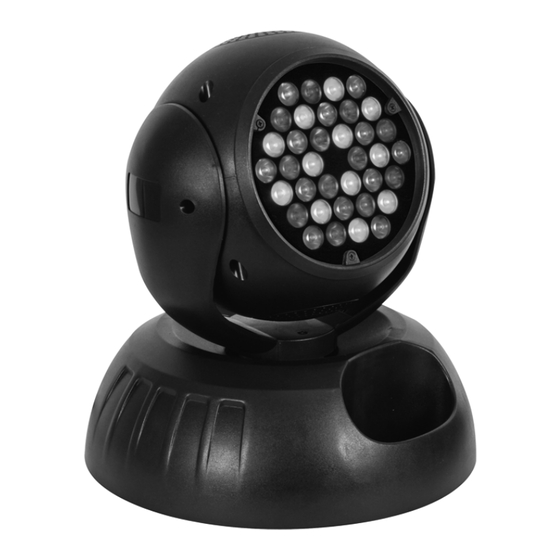
EXCALIBOR II - LED MOVING HEAD - 36 x 1W LEDs
EXCALIBOR II - LED MOVING HEAD - 36 x 1W LEDS
EXCALIBOR II - PROJECTEUR LYRE À LED - 36 LED DE 1W
EXCALIBOR II – CABEZA MÓVIL CON LEDs - 36 LEDs DE 1W
EXCALIBOR II - LED MOVING-HEAD-SCHEINWERFER - 36 x 1W LEDs
USER MANUAL
GEBRUIKERSHANDLEIDING
NOTICE D'EMPLOI
MANUAL DEL USUARIO
BEDIENUNGSANLEITUNG
Table des Matières

Manuels Connexes pour HQ Power EXCALIBOR II


Sommaire des Matières pour HQ Power EXCALIBOR II
- Page 1 EXCALIBOR II - LED MOVING HEAD - 36 x 1W LEDs EXCALIBOR II - LED MOVING HEAD - 36 x 1W LEDS EXCALIBOR II - PROJECTEUR LYRE À LED - 36 LED DE 1W EXCALIBOR II – CABEZA MÓVIL CON LEDs - 36 LEDs DE 1W...
- Page 2 VDPL3601MHW10 HQPOWER...
-
Page 10: Technische Specificaties
Voor meer informatie omtrent dit product, zie www.hqpower.com. De informatie in deze handleiding kan te allen tijde worden gewijzigd zonder voorafgaande kennisgeving. VDPL3601MHW10 – EXCALIBOR II - PROJECTEUR LYRE À LED - 36 LED DE 1W 1. Introduction Aux résidents de l'Union européenne Des informations environnementales importantes concernant ce produit Ce symbole sur l'appareil ou l'emballage indique que l’élimination d’un appareil en fin de vie peut polluer... -
Page 11: Directives Générales
• Ne pas regarder directement la source lumineuse comme ceci peut entraîner des crises d’épilepsie chez certains gens. • L’usure mécanique ne tombe pas sous la garantie. • Les dommages occasionnés par des modifications à l’appareil par le client, ne tombent pas sous la garantie. •... - Page 12 5. Configuration a. Valeurs DMX détaillées par canal Canal Fonction À Description Gradateur 0 ~ 100% Gradateur – Stroboscope 0 ~ 100% stroboscope Pleine puissance Rouge 0 ~ 100% Vert 0 ~ 100% Bleu 0 ~ 100% 0 ~ 450° Tilt 0 ~ 270°...
-
Page 13: Nettoyage Et Entretien
6. Use Consulter la page 2 pour un aperçu complet du menu. a. Mode manuel Gradateur RGB Gradateur rouge Gradateur vert Gradateur bleu Rotation vertical (tilt) Rotation horizontal (pan) b. Mode automatique Fondu en ouverture et en fermeture automatique des 7 couleurs Transition à...