Table des Matières

Publicité

Les langues disponibles

Les langues disponibles

Liens rapides

SERIES / SERIE / SÉRIE / SERIEN
CK
3 / 6 / 15 / 30
OPERATION MANUAL
MANUAL DE UTILIZACION
MANUEL D´UTILISATION
BENUTZERHANDBUCH

Publicité

Table des Matières
loading

Sommaire des Matières pour Gram CK 3 Série

  • Page 1 SERIES / SERIE / SÉRIE / SERIEN 3 / 6 / 15 / 30 OPERATION MANUAL MANUAL DE UTILIZACION MANUEL D´UTILISATION BENUTZERHANDBUCH...
  • Page 2: Table Des Matières

    INDEX English Power Power consumption Battery Display description Keyboard description Keys function Standard calibration ECF-1 Weight Calibration ECF-2 Zero Calibration ECF-3 SPAN Calibration Counting pieces function Piece weight setup Number of pieces setup Limits function Functions setup UF-1 Internal Value / Display Battery Voltage UF-2 Piece Weight Auto-average UF-3 Auto Power-off UF-4 Backlight...
  • Page 3 ÍNDICE Español Alimentación Consumo Duración de la batería Descripción del display Descripción del teclado Función de las teclas Calibración standard Calibración de peso ECF-1 Calibración del cero ECF-2 Calibración del span ECF-3 Función cuentapiezas Introducción del peso unitario Muestra (Número de piezas) Límites de peso Configuración de funciones UF-1 Valor interno / Voltaje de la batería...
  • Page 4 SOMMAIRE Français Alimentation Consommation Durée de la batterie Description de l’écran Description du clavier Fonctions des touches Mode d’utilisation Etalonnage Etalonnage de poids ECF-1 Etalonnage du zéro ECF-2 Etalonnage du span ECF-3 Fonction compte-piéces Comptage de pièces Comptage par échantillonnage Limite de poids supérieure Configuration des paramètres UF-1 Valeur interne / Voltage de la batterie...
  • Page 5 INHALT Deutsch Stromversorgung Verbrauch Akku-betriebsdauer Beschreibung des displays Beschreibung der tastatur Tastenfunktionen Standard-kalibrierung Gewicht-Kalibrierung ECF-1 Nullpunkt-Kalibrierung ECF-2 Messbereich-Kalibrierung ECF-3 Stückzählfunktion Eingabe des einzelgewichts Stichprobe (stückzahl) Stückzählen mit toleranzbereich Funktionseinstellungen UF-1 Interner Wert / Akkuspannung UF-2 Automatische Optimierung des durchschnittlichen Einzelgewichts UF-3 Automatische Abschaltung UF-4 Displaybeleuchtung UF-5 Summenfunktion...
  • Page 6: Power

    ENGLISH POWER Input: 100 ~ 240V 50/60Hz Output: DC 12V/1A 12W Rechargeable battery: 6V/4AH POWER CONSUMPTION Approx. 12mA Approx. 36mA with backlight display Approx. 48mA with backlight display and the RS-232 (optional) BATTERY Approx. 320 hours with the backlight off. DISPLAY DESCRIPTION...
  • Page 7: Keyboard Description

    KEYBOARD DESCRIPTION KEYS FUNCTION To turn off the scale, keep the OFF key pressed until the display shows “Off” for 2 seconds. Press this key to turn on the balance. To select the desired weighing unit. Function 1: To reset the weight to 0, but the displayed weight value has to be less than ±...
  • Page 8: Standard Calibration

    To access the counting function. Memory recover function. Accumulation Key. Clear Key. Choose PLU Number keys. Enter PLU memories STANDARD CALIBRATION Press the key and the key to start Standard Calibrations. ECF-1 Weight Calibration (Zero and Span). ECF-2 Zero Calibration. ECF-3 SPAN Calibration.
  • Page 9: Ecf-2 Zero Calibration

    ECF-2 Zero Calibration 1. Press the key to start and go to the ECF-2 mode, and press the key to exit menu and back to weighing mode. 2. Press the key to set the zero weight. 3. Calibration procedure completed and the scale will return back to weighing mode automatically.
  • Page 10: Number Of Pieces Setup

    Number of pieces setup Use the 0-9 numbers keys to input the desired sample quantity, when the display weights shows the weight, press the key, the piece weight window shows the unit weight and total count window displays the total pieces number.
  • Page 11: Piece Weight Auto-Average

    • The Unit Weight / Peso Unit display shows the current battery voltage. • The Count parts / Piezas display shows the internal value (zero). 2. Press the key to exit menu. UF-2 Piece Weight Auto-average AAVG 0: Disable AAVG 1: Enable 1.
  • Page 12: Backlight

    2. Use 0 ~ 9 keys to enter auto power-off time. 3. Press the key to confirm. 4. To exit and return back to weighing mode, press the key. UF-4 Backlight Modes: Lit 2: Backlight off. • Lit 0: Auto light-up. •...
  • Page 13: Rs232 Output

    0. The weight has to return to zero to accept next accumulation. 1. The weight does not have to return to zero to accept next accumulation. 2. No tare weight to accept next accumulation. Factory default: ACCU00 (Stable required and the weight has to return to zero). UF-6 RS232 Output 0.
  • Page 14: Output Examples

    Start-Bit Data bits Stop-Bits Format 1 (232 1 – 3) HEAD 1 (2 BYTES) HEAD 2 (2 BYTES) OL – Over Load ST – Stable NT – Net Weight US – Unstable GS – Gross Weight Fixed 20 BYTES ASCII Head 1 Head 2 Data...
  • Page 15 Format 2 (232 x1) Press the key to output. Press the key for 3 seconds key to output. 1. Press the key to access programming functions. 2. Use 0 ~ 4 keys to enter RS232 output formats. 3. Press the key to confirm.
  • Page 16: Adc Update Rate

    UF-7 ADC Update Rate SPEEd 0 Low speed 7.5 hz. SPEEd 1 Standard speed 15 hz. SPEEd 2 High speed 30 hz. Factory speed: SPEEd 0 1. Press the key to access programming functions. 2. Use 0 ~ 2 keys to enter ADC speed. 3.
  • Page 17: Save And Delete Product Memories (Plu)

    This scale is guaranteed for one year from the delivery date. The guarantee covers any fabrication defect of the material. During this period GRAM PRECISION, SL, covers the manpower and the spare parts for the reparation of the scale. This guarantee does not cover the failures caused by an inappropriate use or overcharge.
  • Page 18: Alimentación

    ESPAÑOL ALIMENTACIÓN Entrada: 100~240V 50/60hz Salida: 12V/1A DC 12W Batería recargable: 6V/4AH CONSUMO Aprox. 12mA Aprox. 36mA con la iluminación interna del display Aprox. 48mA con la iluminación interna del display y el interface RS-232 (opcional) DURACIÓN DE LA BATERÍA Aprox.
  • Page 19: Descripción Del Teclado

    DESCRIPCIÓN DEL TECLADO FUNCIÓN DE LAS TECLAS Para apagar la balanza, mantener pulsada la tecla OFF hasta que el display visualice “Off” durante 2 segundos. Pulsar esta tecla para conectar la balanza. Para seleccionar la unidad de pesada deseada. Función 1: Para poner a cero la lectura del display, siempre y cuando el valor del peso sea menor al ±...
  • Page 20: Calibración Standard

    Para acceder a la función de límites. Para acceder a la función de cuentapiezas. Recuperación de memoria en función acumulación de pesadas. Función acumulación de pesadas Tecla de borrar datos Seleccionar los números de PLU Introducir memorias de PLU CALIBRACIÓN STANDARD Pulsar las teclas para acceder a la función de calibración standard.
  • Page 21: Calibración Del Cero Ecf

    4. Colocar la pesa sobre el plato y pulsar la tecla 5. La balanza realizará la calibración automáticamente y volverá al modo normal de pesaje. Calibración del cero ECF-2 1. Pulsar la tecla para acceder al modo ECF-2 ó la tecla para salir del menú...
  • Page 22: Función Cuentapiezas

    FUNCIÓN CUENTAPIEZAS Introducción del peso unitario Colocar las piezas a contar sobre el plato, utilizar las teclas 0-9 y tecla decimal (.) para introducir el peso unitario de la pieza. El display Peso mostrará el peso total, el display Peso Unit. mostrará el peso unitario de la pieza y el display Total mostrará...
  • Page 23: Configuración De Funciones

    CONFIGURACIÓN DE FUNCIONES Presione las teclas para ingresar los parámetros. Para acceder a la configuración de la función: Usa la tecla para moverte hacia la derecha. Usa la tecla para moverte hacia la izquierda. Use la tecla para ingresar al modo de configuración deseado. UF-1 Valor interno / Voltaje de la batería 1.
  • Page 24: Autodesconexión

    3. Pulsar la tecla para conirmar. 4. Pulsar la tecla para salir. UF-3 Autodesconexión Modos: AoFF 00: Autodesconexión desactivada • • AoFF 01: La balanza se autodesconectará transcurrido 1 minuto sin ser utilizada AoFF 02: La balanza se autodesconectará transcurridos 2 minutos sin •...
  • Page 25: Acumulación De Pesadas

    • Lit 1: Iluminación siempre activada. El valor por defecto es: Lit 0 (automática) 1. Pulsar la tecla para acceder a la programación de la iluminación del display. 2. Utilizar la teclas 0 ó 2 para seleccionar el modo deseado. 3.
  • Page 26: Salida Rs-232

    3. Pulsar la tecla para confirmar. 4. Para salir y volver al modo de pesaje, pulsar la tecla UF-6 Salida RS-232 0. Velocidad de transmisión 1200 1. Velocidad de transmisión 2400 2. Velocidad de transmisión 4800 3. Velocidad de transmisión 9600 4.
  • Page 27: Ejemplos De Transmisión

    Bit de comienzo Datos de los bits Parada bits Formato 1 (232 1 – 3) CABECERA 1 (2 BYTES) CABECERA 2 (2 BYTES) OL – Sobrecarga ST – Estable NT – Peso neto US – Inestable GS – Peso bruto Fixed 20 BYTES ASCII Head 1 Head 2...
  • Page 28 Formato 2 (232 x1) Pulsar la tecla para transmitir. Pulsar la tecla durante 3 segundos para transmitir. 1. Pulsar la tecla para acceder a la programación 2. Utilizar la teclas 0 - 4 para seleccionar el modo deseado. 3. Pulsar la tecla para confirmar.
  • Page 29: Adc Actualización De La Frecuencia

    UF-7 ADC actualización de la frecuencia SPEEd 0 Velocidad baja 7.5 hz SPEEd 1 Velocidad Standard 15 hz SPPEd 2 Velocidad alta 30 hz Valor por defecto: SPEED 0. 1. Pulsar la tecla para acceder a la programación. 2. Utilizar la teclas 0 – 2 para seleccionar la velocidad ADC deseada. 3.
  • Page 30: Guardar Y Eliminar Memorias De Producto (Plu)

    Esta balanza está garantizada contra todo defecto de fabricación y de material, por un periodo de 1 año a partir de la fecha de entrega. Durante este periodo, GRAM PRECISION, SL, se hará cargo de la reparación de la balanza.
  • Page 31: Alimentation

    FRANÇAIS ALIMENTATION Entrée: 100~240V 50/60hz Sortie: 12V/1A DC 12W Batterie rechargeable: 6V/4AH CONSOMMATION Aprox. 12mA Aprox. 36mA avec l’éclairage interne du display Aprox. 48mA avec l’éclairage interne du display et l’interface RS-232 (optionnel) DURÉE DE LA BATTERIE Approx. 320 heures, avec l’éclairage du display désactivé DESCRIPTION DE L’ÉCRAN...
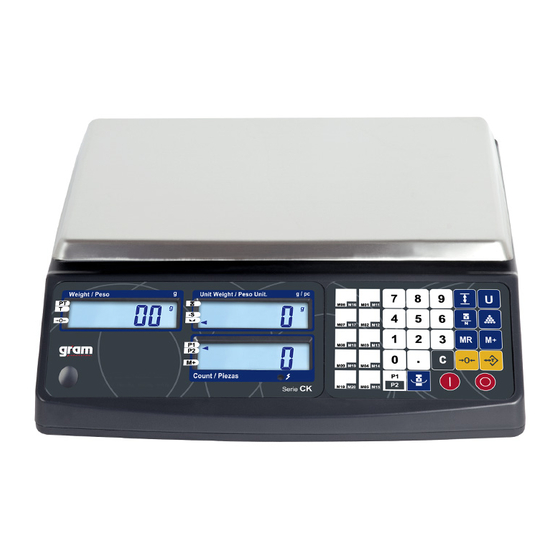
  • Page 32: Description Du Clavier

    DESCRIPTION DU CLAVIER FONCTIONS DES TOUCHES Eteindre la balance. Maintenir la touche appuyée pendant 2 secondes jusqu’à ce que le display « Weight/Peso » affiche “OFF”. Allumer la balance. Fonction1: Mettre à zéro la lecture de l’écran, (±2%de la capacité maximale).
  • Page 33 Fonction 2: Confirmer pour entrer dans le mode de configuration sélectionné. Visualiser le total des pesées accumulées. Appuyer sur la touche de façon continue pour effacer les données des pesées accumulées et remettre l’écran à Zéro. Sur l’écran Weight/Peso: le total des pesées effectuées sera affiché Sur l’écran Unit Weight/Peso Unit.: le nombre total des pesées effectuées sera affiché.
  • Page 34: Etalonnage

    ETALONNAGE Appuyer sur les touches pour entrer dans le menu d’étalonnage. ECF-1 Etalonnage du poids (Zéro et points de signal) ECF-2 Etalonnage du Zéro ECF-3 Etalonnage des points de signal Etalonnage de poids ECF-1 1. Appuyer sur la touche pour accéder au mode ECF-1 ou la touche pour sortir du menu et revenir au mode normal de pesage.
  • Page 35: Etalonnage Du Span Ecf

    Etalonnage du span ECF-3 1. Appuyer sur la touche pour accéder au mode ECF-3 ou sur la touche pour sortir du menu et revenir au mode normal de pesage. 2. Avec les touches 0 à 9, introduire la valeur du poids de calibration et confirmer avec la touche 3.
  • Page 36: Fonction Compte-Piéces

    FONCTION COMPTE-PIÉCES Comptage de pièces introduction du poids unitaire connu 1. Introduire le poids unitaire à l’aide du clavier numérique 0-9 et la touche décimale(.). 2. Appuyer sur la touche 3. Le display “Weight/Peso” affichera le poids total. Le display “Unit Weight/Peso Unit” affichera le poids unitaire de la pièce. Le display “Total”...
  • Page 37: Configuration Des Paramètres

    3. Appuyer sur la touche pour mémoriser l’échantillon. 4. Une fois l’échantillon mémorisé, déposer sur le plateau le poids maximum qui correspondra à la valeur de la limite supérieure. 5. Appuyer sur la touche pour confirmer. 6. Retirer le poids. Note: Une fois cette opération effectuée, la balance émettra un signal sonore acoustique et affichera le message “HI”...
  • Page 38: Moyenne Automatique Du Poids Unitaire

    de la batterie. Sur le display “Count/Pièces” s’affichera la valeur interne du zéro. • 2. Appuyer sur la touche pour sortir du menu UF-1. Appuyer sur la touche pour revenir au mode pesée normal. UF-2 Moyenne automatique du poids unitaire AAVG 0: Désactivé.
  • Page 39: Rétro-Éclairage De L'écran

    sans utilisation. 1. Appuyer sur la touche pour accéder à la programmation de l’auto- déconnexion. 2. Utiliser les touches 0 à 9 pour sélectionner le mode souhaité. 3. Appuyer sur la touche pour confirmer et sortir du menu UF-3. 4. Appuyer sur la touche pour revenir au mode pesée normal.
  • Page 40: Accumulation De Pesées

    UF-5 Accumulation de pesées Modes: ACCU 0. Stabilité nécessaire. 1. Stabilité non nécessaire. 0. La lecture du display doit revenir au zéro pour accepter la prochaine accumulation. 1. Il n’est pas nécessaire que la lecture du display retourne au zéro pour faire une autre accumulation.
  • Page 41: Sortie Rs-232

    UF-6 Sortie RS-232 Modes: 0. Vitesse de transmission 1200 1. Vitesse de transmission 2400 2. Vitesse de transmission 4800 3. Vitesse de transmission 9600 4. Vitesse de transmission 19200 0. Sortie RS-232 désactivée 1. Transmission manuelle – Format 2 2. Transmission stable – Format 1 3.
  • Page 42: Exemples De Transmissions

    Bit de début Données des bits Arrèt bits Format 1 (232 1 – 3) TÈTE 1 (2 BYTES) TÊTE 2 (2 BYTES) OL – Surcharge ST – Stable NT – Poids net US – Instable GS – Poids brut Fixed 20 BYTES ASCII Head 1 Head 2 Data...
  • Page 43 Format 2 (232 x1) Appuyer sur la touche pour transmettre. Appuyer sur la touche pendant 3 secondes pour transmettre. 1. Appuyer sur la touche pour accéder à la programmation. 2. Utiliser les touches 0 à 4 pour sélectionner le mode souhaité. 3.
  • Page 44: Adc Actualisation De La Fréquence

    UF-7 ADC actualisation de la fréquence SPEEd 0 Vitesse basse 7.5 hz. SPEEd 1 Vitesse Standard 15 hz. SPPEd 2 Vitesse haute 30 hz. Note: La valeur par défaut est: SPEED 0 1. Appuyer sur la touche pour accéder à la programmation. 2.
  • Page 45: Enregistrer Et Éliminer Des Mémoires De Produit (Plu)

    ENREGISTRER ET ÉLIMINER DES MÉMOIRES DE PRODUIT (PLU) 1. Placez l’échantillon sur le plateau de pesée. 2. À l’aide du clavier numérique, saisissez le nombre de pièces placées sur le plateau. 3. Appuyez sur pour calculer le poids unitaire. 4. Appuyez sur , et ensuite sur la touche où...
  • Page 46: Garantie

    Cette balance est garantie contre les défauts de fabrication ou de pièce, pendant une année, à partir de la date de livraison. Durant cette période, GRAM PRECISON, SL, se chargera de la réparation de la balance. Cette garantie n’inclut pas les dommages causés par une utilisation impropre, surcharge, ou par faute de ne pas avoir suivi les recommandations écrites dans ce manuel (particulièrement de l’aparté...
  • Page 47: Stromversorgung

    DEUTSCH STROMVERSORGUNG Eingang: 100~240V 50/60hz. Ausgang: 12V/1A DC 12W. Akku: 6V/4Ah. VERBRAUCH Etwa 12mA. Etwa 36mA, bei aktivierter interner Displaybeleuchtung. Etwa 48mA, bei aktivierter interner Displaybeleuchtung und mit RS-232 Schnittstelle (Optional). AKKU-BETRIEBSDAUER Etwa 320 Stunden, bei deaktivierter interner Displaybeleuchtung. BESCHREIBUNG DES DISPLAYS...
  • Page 48: Beschreibung Der Tastatur

    BESCHREIBUNG DER TASTATUR TASTENFUNKTIONEN Um die Waage abzuschalten, halten Sie die Taste OFF solange gedrückt, bis auf dem Display 2 Sekunden lang “Off” angezeigt wird. Drücken Sie diese Taste, um die Waage einzuschalten. Zur Auswahl der gewünschten Wiegeeinheit. Funktion 1: Zum Nullstellen der Displayanzeige, insofern das Gewichtswert unter 2% des maximalen Wägebereichs liegt.
  • Page 49: Standard-Kalibrierung

    Um die der Funktion Wägen mit Toleranzbereich aufzurufen. Um die Stückzählfunktion aufzurufen. Speicherabruf während der Summenfunktion. Zur Ausführung der Summenfunktion Zum Löschen von Eingaben Zur Eingabe von PLU-Speichern Zur Auswahl der PLU-Nummern STANDARD-KALIBRIERUNG Drücken Sie die Tasten , um die Funktion der Standard- Kalibrierung aufzurufen.
  • Page 50: Nullpunkt-Kalibrierung Ecf

    3. Geben Sie mit den Tasten 0 ~ 9 den Wert des Kalibrierungsgewichts ein und bestätigen Sie die Eingabe mit der Taste 4. Legen Sie das Gewicht auf die Wägeplatte und drücken Sie die Taste 5. Die Waage führt die Kalibrierung automatisch durch und kehrt dann in den normalen Wiegemodus zurück.
  • Page 51: Stückzählfunktion

    STÜCKZÄHLFUNKTION Eingabe des einzelgewichts Legen Sie die zu zählenden Gegenstände auf die Wägeplatte und verwenden Sie die Tasten 0-9, sowie die Dezimalpunkt-Taste, um das Einzelgewicht des Gegenstands einzugeben. Das Display Weight/Peso zeigt das Gesamtgewicht an, das Display Unit Weight/Peso Unit zeigt das Einzelgewicht des Gegenstands an und das Display Count/Piezas zeigt die Gesamtanzahl der Gegenstände an.
  • Page 52: Funktionseinstellungen

    akustisches Signal abgeben und die Nachricht “HI” auf dem Display anzeigen, sobald das Gewicht den vorgegebenen oberen Grenzwert überschreitet. FUNKTIONSEINSTELLUNGEN Zum Aufrufen der Funktionseinstellungen drücken Sie die Tasten Drücken Sie die Taste , um zwischen den verschiedenen Menüs zu wechseln. UF-1 Interner Wert / Akkuspannung 1.
  • Page 53: Automatische Abschaltung

    1. Drücken Sie die Taste , um die Einstellungen aufzurufen. 2. Verwenden Sie die Tasten 0 und 1, um den gewünschten Modus auszuwählen. 3. Drücken Sie die Taste , um die Eingabe zu bestätigen. 4. Zum Verlassen drücken Sie die Taste UF-3 Automatische Abschaltung Modus: AoFF 00: Automatische Abschaltung deaktiviert.
  • Page 54: Displaybeleuchtung

    UF-4 Displaybeleuchtung Modus: Lit 2: Displaybeleuchtung deaktiviert. • Lit 0: Displaybeleuchtung automatisch. • Lit 1: Displaybeleuchtung immer aktiviert. • Standardeinstellung: Lit 0 (automatisch). 1. Drücken Sie die Taste , um die Einstellung der Displaybeleuchtung aufzurufen. 2. Verwenden Sie die Tasten 0 oder 2, um den gewünschten Modus auszuwählen.
  • Page 55: Datenausgang Rs-232

    0. Die Gewichtsanzeige muss erneut auf “Null“ zurückfallen, um die nächste Akkumulation durchführen zu können. 1. Es ist nicht notwendig, dass die Gewichtsanzeige auf “Null“ zurückfällt, um eine weitere Akkumulation durchzuführen. 2. Es ist nicht notwendig, zu tarieren, um eine weitere Akkumulation durchzuführen.
  • Page 56: Kommunikationsprotokoll

    0. Ausgang RS-232 deaktiviert 1. Übertragung manuell – Format 2 2. Übertragung stabil – Format 1 3. Übertragung durch Befehlseingabe – Format 1 Kommunikationsprotokoll UART Signal von EIA-RS232 C Format: 1. Serielle Datenübertragung: 1200/2400/4800/9600/19200/38400 BPS. 2. Bit-Anzahl: 8 Bits. 3. Paritätsbits: keine. 4.
  • Page 57: Datenübertragungsbeispiele

    Head 1 Head 2 Data Unit CR LF Datenübertragungsbeispiele 1. Beispiel +0.876 kg stabiles Nettogewicht: 0D 0A 2. Beispiel -1.568 lb instabiles Bruttogewicht: 0D 0A Format 2 (232 x1) Drücken Sie die Taste , um die Datenübertragung zu starten.
  • Page 58: Aktualisierung Der Adc-Frequenz

    Halten Sie die Taste 3 Sekunden lang gedrückt, um die Datenübertragung zu starten. 1. Drücken Sie die Taste , um die Einstellungen aufzurufen. 2. Verwenden Sie die Tasten 0 - 4, um den gewünschten Modus auszuwählen. 3. Drücken Sie die Taste , um die Eingabe zu bestätigen.
  • Page 59: Einstellung Des Nullbereichs

    UF-8 Einstellung des Nullbereichs ZP 0 Funktion deaktiviert ZP 1 1 Nachkommastelle wird nicht angezeigt ZP 2 2 Nachkommastellen werden nicht angezeigt ZP 3 3 Nachkommastellen werden nicht angezeigt ZP 4 4 Nachkommastellen werden nicht angezeigt ZP 5 5 Nachkommastellen werden nicht angezeigt Standardeinstellung: ZP 1 1.
  • Page 60: Artikelspeicher (Plu) Speichern Und Löschen

    ARTIKELSPEICHER (PLU) SPEICHERN UND LÖSCHEN 1. Stichprobe auf die Wägeplatte legen. 2. Die Anzahl der auf die Wägeplatte platzierten Probeteile mit den Zahlentasten eingeben. 3. Die Taste drücken, um das Stückgewicht zu berechnen. 4. Die Taste , und dann die Taste drücken, unter der der Artikelspeicher gespeichert werden soll (es stehen 10 direkte Speicher zur Verfügung (M1 bis M10)).
  • Page 61: Garantie

    GARANTIE Diese Waage hat eine Garantie auf jegliche Herstellungs- und Materialdefekte während eines Zeitraums von einem Jahr ab Lieferdatum. Innerhalb dieser Zeit übernimmt GRAM PRECISION, SL, die Reparatur der Waage. Diese Garantie schließt keine Schäden durch unsachgemäße Verwendung oder Überlastungen ein.
  • Page 64 004/11012018 Gram Precision S.L. Travesía Industrial, 11 · 08907 Hospitalet de Llobregat · Barcelona (Spain) Tel. +34 902 208 000 · +34 93 300 33 32 Fax +34 93 300 66 98 gram.es comercial www.gram-group.com...

Ce manuel est également adapté pour:

Ck 6 sérieCk 15 sérieCk 30 série

Table des Matières