Publicité

Les langues disponibles
  • FR

Les langues disponibles

Liens rapides

User Guide
English ( 2 – 14 )
Guía del usuario
Español ( 15 – 27 )
Guide d'utilisation
Français ( 28 – 41 )
Guida per l'uso
Italiano ( 42 – 55 )
Benutzerhandbuch
Deutsch ( 56 – 69 )
Appendix
English ( 70 – 71 )

Publicité

Table des Matières
loading

Sommaire des Matières pour M-Audio KEYSTATION61 MK3

  • Page 1 User Guide English ( 2 – 14 ) Guía del usuario Español ( 15 – 27 ) Guide d’utilisation Français ( 28 – 41 ) Guida per l’uso Italiano ( 42 – 55 ) Benutzerhandbuch Deutsch ( 56 – 69 ) Appendix English ( 70 –...
  • Page 2: Quick Start

    User Guide (English) Introduction Thank you for purchasing the Keystation 61 MK3. At M-Audio, we know how serious music is to you. That’s why we design our equipment with only one thing in mind—to make your performance the best it can be.
  • Page 3 Setup Items not listed under Introduction > Box Contents are sold separately. COMPUTER POWER ADAPTER (optional) SOUND MODULE SUSTAIN PEDAL...
  • Page 4: Recommended Installation

    Keystation 61 MK3 so you can get started making music with professional software right out of the box. Register your Keystation 61 MK3 on m-audio.com, and follow the Pro Tools | First M-Audio Edition install instructions in your User Account.
  • Page 5 Pro Tools | First M-Audio Edition Setup Connect Keystation 61 MK3 to an available USB port on your computer using the supplied USB cable, and launch Pro Tools | First M-Audio Edition. Open or Create a Project. Select the Setup pulldown menu and open MIDI Input Devices. Enable MIDI Input from the Keystation 61 MK3 by clicking the box next to the Keystation 61 MK3.
  • Page 6: Configuration

    Configuration Once you have finished installation you will need to configure your MIDI software to use the Keystation. Please note that when you press a key on the keyboard, you will not hear any sound. This is because pressing a key causes the keyboard to send out MIDI data. MIDI data gives instructions on how a sound should play, but in order to actually hear that sound you need to configure your music software to read the MIDI data being sent from the Keystation and play the sound back accordingly.
  • Page 7 Modulation Wheel: The modulation wheel is typically used for modulation of the sound you are playing. This type of real-time controller was originally introduced on electronic keyboard instruments to give the performer options such as adding vibrato, just like players of acoustic instruments do. The modulation wheel is fully MIDI-assignable. Advanced Button: The Advanced button is used to access all the advanced functions of the keyboard.
  • Page 8: Advanced Functions

    (just like the sustain pedal on a piano). You can plug a foot pedal of any polarity into the foot pedal input on your M-Audio keyboard. The keyboard will automatically detect the correct polarity when powering up. If you want to reverse the polarity, simply depress the pedal when you switch on your keyboard.
  • Page 9 Octave Shift Another method of shifting the Keystation octaves is with the use of the keys labeled “Octave +” and “Octave -”. After the Advanced button has been pressed, placing the keyboard in Edit Mode, pressing these keys will shift the keyboard’s pitch up or down one or more octaves (one for each time pressed).
  • Page 10 Program Change Program Changes are used to change the instrument or voice you are using. For the sake of example, we will change the instrument to a bass sound. To do this we need to send a program change of 32. There are two ways to send a program change: Incremental/Decremental Program Change: Press the Advanced button.
  • Page 11 MIDI Channel MIDI data from the keyboard can be sent on any of 16 MIDI Channels. However, certain MIDI devices and MIDI software applications require the keyboard to send data on a specified channel. If this is the case, you can change the channel the data is sent using the following method: Press the Advanced button to engage Edit Mode.
  • Page 12 Volume Slider Assignment To assign the Volume Slider to an effect: Press the Advanced button to engage Edit Mode. Press the black key labeled “FADER.” Use the Numerical Data Entry keys to enter the CC number you want to assign to the Volume Fader.
  • Page 13 Solution 1: Switch off the unit and let it sit for 10 seconds. Then restart your computer and try again. Problem 2: I have plugged a sustain pedal into my M-Audio keyboard, but it works the wrong way around. Solution 2: The polarity of the sustain pedal is calculated by the keyboard when it is powered up.
  • Page 14 MIDI Functionality The Keystation keyboards have been designed to make working with MIDI on your computer as simple as possible. Nonetheless, you may still experience some difficulties. In many cases, the keyboard is not at fault; the problem lies with the receiving device. To counter this, there is a useful MIDI function: Reset All Controllers.
  • Page 15 Guía del usuario (Español) Introducción Gracias por comprar el Keystation 61 MK3. En M-Audio, sabemos que usted se toma la música en serio. Por eso es que diseñamos nuestros equipos con una sola cosa en mente— hacer que pueda tocar su mejor interpretación.
  • Page 16 Instalación Los elementos que no se enumeran en Introducción > Contenido de la caja se venden por separado. COMPUTADORA ADAPTADOR DE ALIMENTACIÓN (opcional) MÓDULO DE SONIDO PEDAL DE SOSTENIDO...
  • Page 17: Instalación Recomendada

    Instalación recomendada Pro Tools | First M-Audio Edition: Hemos incluido Pro Tools | First M-Audio Edition con su Keystation 61 MK3 de modo que puede comenzar a hacer música con software profesional en cuanto lo saca de la caja. Registre su Keystation 61 MK3 en m-audio.com y siga las instrucciones de instalación de Pro Tools | First M-Audio Edition en su Cuenta de usuario.
  • Page 18 Configuración del Pro Tools | First M-Audio Edition Conecte el Keystation 61 MK3 a un puerto USB disponible en su ordenador utilizando el cable USB suministrado y abra Pro Tools | First M-Audio Edition. Abra o cree un proyecto. Seleccione el menú desplegable Setup y abra MIDI Input Devices. Active MIDI Input desde el Keystation 61 MK3 haciendo clic en la casilla junto al Keystation 61 MK3.
  • Page 19: Características

    Guía de inicio rápido Una vez concluida la instalación deberá configurar su software MIDI para poder utilizar el Keystation. Recuerde que de momento el teclado no producirá ninguna clase de sonido cuando pulse una tecla. Esto se debe a que, al pulsar una tecla, el teclado se limita a enviar datos MIDI.
  • Page 20 Deslizador volume: El deslizador de volumen envía un mensaje MIDI que controla el volumen de las notas que está tocando. También puede asignarlo a diferentes efectos, como por ejemplo el panorama (balance), ataque, reverberación o chorus, entre otros. Para más información, consulte la sección Funciones avanzadas.
  • Page 21 NOTA: Para lograr un funcionamiento realista del pedal, consulte sobre el SP-2. El SP-2 es el pedal de sostenido conmutable de M-Audio que tiene la capacidad de conectarse a una de las entradas para pedal de sostenido del Keystation 61 MK3.
  • Page 22: Funciones Avanzadas

    Funciones avanzadas Además de determinar el cambio de octava, los botones de octava “+” y “-” mencionados anteriormente en la sección “Botones de octava” también pueden usarse para controlar una de las 7 funciones MIDI disponibles. Las 7 primeras teclas negras se usan para seleccionar la función de los botones de octava. Algunas de las funciones asignadas a estas teclas no admiten valores inferiores a 0.
  • Page 23 También existe otro método para cambiar rápidamente el rango de octavas que puede ser útil si usa los botones de octava para controlar otra función. Haga lo siguiente: Pulse el botón Advanced Functions para acceder al modo de programación. Pulse la tecla negra representa “OCTAVA +”, desplazando el rango de octava hacia arriba (si la pulsa dos veces, lo desplazará...
  • Page 24 Cambio de control Para asignar los botones Octave/Data al envío de mensajes de cambio de control que se puedan activar y desactivar, realice los siguientes pasos: 1. Pulse el botón Advanced para activar el modo de edición. 2. Pulse la tecla negra etiquetada "CC" (Eb3). 3.
  • Page 25 Banco LSB y Banco MSB Los cambios de programa son los mensajes que más se utilizan para seleccionar instrumentos y voces. Sin embargo, el número de instrumentos disponibles mediante cambios de programa está limitado a 128. Dado que algunos dispositivos ofrecen más de 128 voces, la selección de estas voces adicionales requiere el uso de un método distinto.
  • Page 26: Resolución De Problemas

    He aquí las respuestas a algunas preguntas frecuentes relacionadas con su teclado Keystation: Problema 1: Mi hardware M-Audio ha dejado de funcionar de repente, cuando hasta ahora lo he estado utilizando sin problemas. Solución 1: Apague la unidad durante unos 10 segundos. A continuación, reinicie la computadora e inténtelo de nuevo.
  • Page 27 Es altamente recomendable utilizar una buena interfaz de audio. Visite m-audio.com para encontrar una selección de tarjeta. Si ya dispone de una interfaz de audio adecuada, intente reinstalar la última versión de los controladores o reduzca los tamaños de búfer de los controladores de audio.
  • Page 28: Présentation

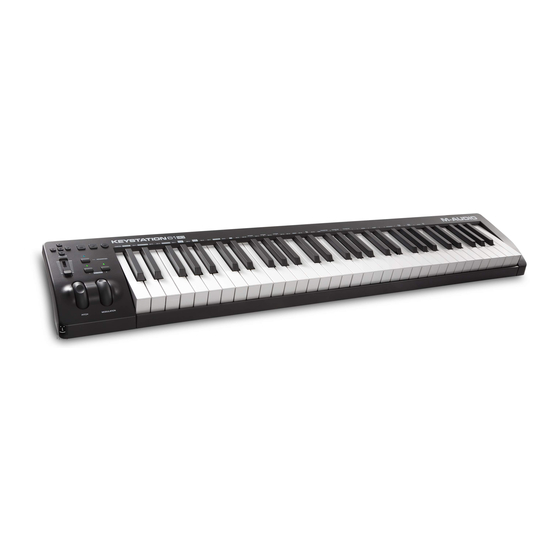
    Guide d’utilisation (Français) Présentation Merci d’avoir fait l’acquisition du Keystation 61 MK3. Chez M-Audio, nous savons à quel point la musique est importante pour vous. C’est pourquoi nous concevons nos produits avec une seule chose en tête — faire de votre performance la meilleure qui soit.
  • Page 29: Démarrage

    Démarrage Les éléments qui ne figurent pas dans Présentation > Contenu de la boîte sont vendus séparément. ORDINATEUR ADAPTATEUR DE ALIMENTATION (optionnel) MODULE DE SON PÉDALE DE SUSTAIN...
  • Page 30: Installation Recommandée

    Installation recommandée Pro Tools | First M-Audio Edition: Nous avons inclus l’application Pro Tools | First M-Audio Edition avec le Keystation 61 MK3 afin que vous puissiez commencer à créer de la musique avec un logiciel de qualité professionnelle aussitôt que vous le sortez de la boîte. Veuillez enregistrer le Keystation 61 MK3 sur le site m-audio.com et suivre les instructions d’installation...
  • Page 31 Installation Pro Tools | First M-Audio Edition Utilisez le câble USB fourni pour brancher le Keystation 61 MK3 au port USB d’un ordinateur, puis lancez Pro Tools | First M-Audio Edition. Ouvrir ou créer un projet. À partir du menu déroulant Setup, sélectionnez l’option MIDI Input Devices. Activez MIDI Input du Keystation 61 MK3 en cochant la case à...
  • Page 32: Caractéristiques

    Démarrage Une fois l’installation terminée, vous devrez configurer votre logiciel pour utiliser Keystation. Veuillez remarquer que si vous appuyez sur une touche du clavier, vous n’entendrez aucun son. En effet, quand vous appuyez sur une touche, le clavier envoie les données MIDI vers l’extérieur.
  • Page 33 Les touches de sélection de l’octave « + » et « - » peuvent être assignées à l’une des sept fonctions MIDI. (Veuillez consulter la section Fonctions avancées afin d’en savoir plus.) Curseur de volume: Le curseur de volume envoie un message MIDI qui contrôle le volume des notes que vous jouez.
  • Page 34 REMARQUE : Pour une pédale piano des plus réalistes, jetez un coup d’oeil sur la SP-2. La SP-2 est la pédale de sustain commutable de M-Audio qui peut être reliée à l’entrée pour pédale de sustain du Keystation 61 MK3.
  • Page 35: Les Fonctions Avancées

    Les fonctions avancées En plus de pouvoir décaler les octaves, les deux boutons d’octaves “+” et “-” que nous avons décrits plus haut dans ce manuel peuvent aussi être utilisés pour commander l’une des 7 fonctions MIDI. Que les 7 premières touches sont utilisées pour sélectionner la fonction désirée des boutons d’octaves.
  • Page 36 Pour cela, suivez les instructions ci-dessous : Appuyez sur le bouton «Advanced Functions» pour mettre votre clavier en mode de programmation. Enfoncez la touche noire représente “OCTAVE +”, et augmente l’octave d’une unité (vous pouvez appuyer dessus une nouvelle fois pour l’augmenter de 2, et ainsi de suite).
  • Page 37 Transposition Il est parfois préférable d’augmenter ou de réduire la hauteur tonale de plusieurs demi-tons plutôt que d’une octave entière. Par exemple, si vous accompagnez un chanteur qui rencontre des difficultés à produire les notes les plus hautes, vous pourriez souhaiter réduire la hauteur tonale d’un ou deux demi-tons.
  • Page 38 Changement de programme Les changements de programme (Program Changes) servent à changer l’instrument ou la voix que vous utilisez. Par exemple, changeons un instrument et passons en son de basse. Pour cela, nous devons envoyer un changement de programme de valeur 32, qui sélectionnera un son de basse acoustique.
  • Page 39 Le curseur de volume Pour assigner le curseur de volume à un effet : Appuyez sur le bouton «Advanced Functions» pour mettre votre clavier en mode de programmation. Appuyez sur la touche noire libellée “FADER”. Utilisez les touches de saisie numérique afin d’entrer le numéro CC que vous désirez assigner au curseur de volume.
  • Page 40: Dépannage

    à nouveau. Si le problem persiste, il se peut que vous deviez réinstaller les pilotes de l’appareil. Problème 2 : J’ai branché une pédale à mon clavier M-Audio, mais elle fonctionne à l’envers. Solution 2 : La polarité de la pédale est calculée par le clavier lors de la mise en marche. Lors de la mise en marche, le clavier suppose que la pédale est en position «inactive».
  • Page 41 MIDI : en dernier recours Les claviers Keystation ont été conçus pour rendre le travail avec MIDI sur votre ordinateur aussi simple que possible. Il est toutefois possible que vous rencontriez des difficultés. Dans de nombreux cas, les problèmes ne viennent pas du clavier mais plutôt du dispositif récepteur.
  • Page 42: Inizio Rapido

    Guida per l’uso (Italiano) Introduzione Grazie per aver acquistato il Keystation 61 MK3. Noi di M-Audio sappiamo che per te la musica è una cosa seria. Ecco perché progettiamo i nostri dispositivi con un unico obiettivo in mente: rendere le tue prestazioni le migliori possibili.
  • Page 43 Configurazione Elementi non elencati sotto Introduzione > Contenuti della confezione sono venduti separatamente. COMPUTER ADATTATORE DI ALIMENTAZIONE (opzionale) MODULO AUDIO ESTERNO PEDALE SUSTAIN...
  • Page 44: Installazione Consigliata

    Installazione consigliata Pro Tools | First M-Audio Edition: Con l’Keystation 61 MK3 abbiamo incluso il Pro Tools | First M-Audio Edition in modo da consentirvi di iniziare immediatamente a fare musica con software professionale. Registrare l’Keystation 61 MK3 su m-audio.com, e seguire le istruzioni di installazione di Pro Tools | First M-Audio Edition nel proprio Account utente.
  • Page 45 Configurazione Pro Tools | First M-Audio Edition Collegare l’Keystation 61 MK3 a una porta USB disponibile del computer servendosi del cavo USB in dotazione e lanciare Pro Tools | First M-Audio Edition. Aprire o creare un progetto. Selezionare il menu a discesa Setup e aprire MIDI Input Devices. Abilitare l’ingresso MIDI Input dell’Keystation 61 MK3 facendo clic sulla casella a fianco a Keystation 61...
  • Page 46: Guida Introduttiva

    Guida introduttiva Una volta terminata l’installazione, è necessario configurare l’applicazione per poter utilizzare Keystation. Infatti, se si preme qualsiasi tasto della tastiera, non si udirà alcun suono. Ciò è dovuto al fatto che la pressione del tasto determina l’invio da parte della tastiera di dati MIDI. Questi forniscono le istruzioni su come riprodurre il suono, ma per udire effettivamente tale suono, occorre configurare il programma musicale per la lettura dei dati MIDI inviati dalla Keystation e per la relative riproduzione.
  • Page 47 Ruota Modulation: Questa ruota viene generalmente utilizzata per la modulazione del suono in esecuzione. Questo tipo di controller in tempo reale è stato originariamente introdotto sugli strumenti a tastiera elettronici per offrire al musicista l’effetto vibrato, tipicamente disponibile con gli strumenti acustici. La ruota modulation è completamente assegnabile via MIDI.
  • Page 48 È possibile collegare un pedale con qualsiasi polarità nell’ingresso “foot switch” della tastiera M-Audio. La tastiera sarà in grado di rilevare la corretta polarità al momento dell’accensione. Se si desidera invertire la polarità, è sufficiente tenere premuto il pedale al momento dell’accensione della tastiera.
  • Page 49: Funzioni Avanzate

    Funzioni avanzate Oltre che per l’impostazione dello spostamento di ottava, i due pulsanti di ottava “+” e “-” illustrati in precedenza alla sezione “Pulsanti di ottava” servono per controllare una delle 7 funzioni MIDI disponibili. I primi 7 tasti vengono utilizzati per selezionare la funzione dei pulsanti di ottava. Alcune funzioni per le quali è...
  • Page 50 Spostamento di ottava I tasti di ottava “Octave +” e “Octave -” Un altro metodo per lo spostamento delle ottave della Keystation è con l’uso dei tasti contrassegnati come ottava “+” e “-”. Dopo che il pulsante Advanced Functions è stato premuto, ponendo quindi la tastiera in modalità di programmazione, la pressione di questi tasti estende il pitch in su o in giù...
  • Page 51 Trasposizione In alcuni casi è utile ridurre o aumentare il pitch di diversi semitoni invece che di un’intera ottava. Se ad esempio si sta suonando una canzone con un interprete che presenta difficoltà a raggiungere note elevate, è opportuno ridurre il pitch di uno o due semitoni. Questo si ottiene mediante la funzione MIDI denominata “Trasposizione.”...
  • Page 52 Selezione rapida del cambio di programma: Premere il pulsante Advanced Functions. Premere il tasto nero sopra F4 (denominato F#4), che rappresenta “Program #”. Premere i tasti “3,” “2,” “ENTER.” A questo punto la tastiera è impostata per suonare il suono basso GM 32. Questo metodo è...
  • Page 53 Ruota Modulation È possibile assegnare messaggi CC e MIDI diversi alla rotella di modulazione. Alcuni messaggi utili sono: MIDI CC 01 (Modulazione), MIDI CC 07 (Volume), MIDI CC 10 (Pan) e MIDI CC 05 (Portamento). In tutto ci sono 132 messaggi. Tuttavia, affinché i messaggi abbiano effetto sul suono, il dispositivo MIDI ricevente deve essere in grado di leggere e rispondere a tali messaggi MIDI.
  • Page 54: Risoluzione Dei Problemi

    Il software esegue quindi un grande numero di calcoli complessi per la creazione del suono emesso: tale operazione richiede tempo. Si consiglia un’ interfaccia audio. Consultare il sito m-audio.com per una selezione di schede interfaccia audio. Se invece si dispone di una scheda audio adeguata, provare a installare...
  • Page 55 Risoluzione dei problemi MIDI Le tastiere Keystation sono state progettate per funzionare con il MIDI sul computer nel modo più semplice possibile. Ciononostante, è possibile che si verifichino alcune difficoltà. In molti casi, la tastiera non è guasta; il problema risiede nella periferica ricevente. Per replicare, è disponibile un’utile funzione MIDI Reset All Controllers.
  • Page 56 Benutzerhandbuch (Deutsch) Einführung Vielen Dank für den Kauf des Keystation 61 MK3. Wir von M-Audio wissen, wie wichtig Ihnen die Musik ist. Darum entwerfen wir unsere Geräte stets nur mit einem einzigen Ziel vor Augen: Ihre Performance so gut wie möglich zu unterstützen.
  • Page 57 Setup Teile, die nicht unter Einführung > Lieferumfang angegeben sind, sind separat erhältlich. COMPUTER NETZTEIL (wahlweise) EXTERNES SOUND- MODUL SUSTAIN- PEDAL...
  • Page 58: Empfohlene Installation

    Empfohlene Installation Pro Tools | First M-Audio Edition: Wir liefern Keystation 61 MK3 mit Pro Tools | First M-Audio Edition aus, damit Sie Ihre Musikproduktion gleich mit professioneller Software starten können. Registrieren Sie Ihren Keystation 61 MK3 zuerst auf m-audio.com und folgen den Installationsanweisungen von Pro Tools | First M-Audio Edition in Ihrem Benutzerkonto.
  • Page 59 Pro Tools | First M-Audio Edition Setup Verbinden Sie zuerst den Keystation 61 MK3 über das mitgelieferte USB-Kabel mit einem freien USB-Port Ihres Computers und starten Sie Pro Tools | First M-Audio Edition. Öffnen oder erstellen Sie ein Projekt. Wählen Sie das Setup-Pulldown-Menü und öffnen Sie MIDI-Eingabegeräte. Aktivieren Sie die MIDI-Eingabe vom Keystation 61 MK3, indem Sie auf das Kästchen neben...
  • Page 60: Erste Schritte

    Erste Schritte Nach der Installation der Gerätetreiber müssen Sie Ihre MIDI-Software für Keystation konfigurieren. Bitte beachten Sie, dass Sie nach der Treiberinstallation bei Tastendruck noch keinen Sound hören werden, da über Keystation lediglich MIDI-Daten übertragen werden. MIDI-Daten beinhalten Informationen zur Art und Weise der Wiedergabe. Für die tatsächliche Soundwiedergabe müssen Sie Ihre Audiosoftware entsprechend konfigurieren.
  • Page 61 Pitchrad: Mit dem Pitchrad können Sie die Tonhöhe einzelner Noten während des Spielens verändern. So können Sie Sounds erzeugen, die normalerweise nicht mit Keyboard-Klängen assoziiert werden — zum Beispiel Gitarrenriffs. In welchem Umfang Sie die Tonhöhe verändern können, hängt von Ihrer Soundquelle ab. Normalerweise wird der Bereich von zwei Halbtönen beansprucht;...
  • Page 62 Sie die Tasten gedrückt halten müssen. HINWEIS: Für realistische Pedalbetätigung bietet sich das SP-2 an. Das SP-2 ist das umschaltbare Sustain-Pedal von M-Audio, das an den Sustain-Pedal-Eingang von Keystation 61 MK3 angeschlossen werden kann. HINWEIS: Die Polarität des Sustain-Pedals wird automatisch ermittelt, sobald Keystation eingeschaltet wird.
  • Page 63: Erweiterte Funktionen

    Erweiterte Funktionen Die beiden Up & Down-Tasten für die Veränderung der Oktavlage (siehe Abschnitt “Oktavtasten”) können zusätzlich für die Steuerung der MIDI-Funktionen genutzt werden. Über Die ersten 7 schwarzen Tasten können sie die gewünschte Spezialfunktion für die Octave Up & Down-Tasten auswählen. Für manche dieser Funktionen können allerdings keine Werte unter 0 gesendet werden.
  • Page 64 So geht’s: Drücken Sie die Funktionstaste, um den Edit-Modus zu aktivieren. Zur Einstellung eines höheren Oktavbereichs drücken Sie die schwarze Taste OCTAVE +. Im Edit-Modus entspricht diese Taste der Funktion “OCTAVE +”, d.h. der Tonbereich wird eine Oktave erhöht. Drücken Sie die Taste so oft, wie der Oktavbereich erhöht werden soll (bis zu 3 Mal).
  • Page 65 Wenn Sie die Octave Up & Down-Tasten für die Transponierung verwenden wollen, gehen Sie wie folgt vor: Drücken Sie die Funktionstaste, um den Edit-Modus zu aktivieren. Drücken Sie dann die schwarze Taste TRASPOSE, welche für die Funktion “TRANSPOSE” programmiert ist. Danach wird der Edit-Modus beendet. Wenn Sie nun die Octave Up-Taste (“+”) drücken, können Sie hören, wie der Ton transponiert wird.
  • Page 66 Program Change Mittels Program Change-Befehlen können Sie zwischen verschiedenen Instrumenten und Stimmen wechseln. Hier ein Beispiel: Sie wollen Ihr aktuelles Instrument durch einen Bass ersetzen. Hierzu können Sie den Program Change-Befehl “32” senden, der aus der General MIDI Instrumentenliste einen Acoustic-Bass-Sound. Es gibt zwei Methoden, Program Change- Befehle auszuwählen: Aufsteigender / Absteigender Program Change: Drücken Sie die Funktionstaste, um den Edit-Modus zu aktivieren.
  • Page 67 Lautstärke-Slider Gehen sie wie hierzu wie folgt vor: Drücken Sie die Funktionstaste, um den Edit-Modus zu aktivieren. Drücken Sie die schwarze Taste entspricht der Funktion “FADER”. Verwenden Sie die Tasten zur numerischen Dateneingabe, um die CC-Ziffer einzugeben, die Sie dem Lautstärke-Fader zuweisen möchten. Falls Sie einen falschen Zahlenwert eingegeben haben, können Sie den Edit-Modus mit der CANCEL-Taste (C1) verlassen, ohne den programmierten Effekt zu verändern.
  • Page 68 Hier finden Sie Antworten auf häufig gestellte Fragen zur Fehlerbehebung bei den Keyboards der Keystation-Serie. Problem 1: Mein M-Audio-Gerät funktioniert plötzlich nicht mehr, obwohl es seit der Installation problemlos in Betrieb war. Lösung 1: Schalten Sie das Gerät für 10 Sekunden aus. Starten Sie Ihren Computer neu.
  • Page 69 MIDI-Funktionen Die Keystation-Keyboards wurden so konstruiert, dass die MIDI-Verarbeitung mit ihrem Computer so einfach wie möglich wird. Nichtsdestotrotz können unter Umständen Schwierigkeiten mit den MIDI-Funktionen auftreten. Oft liegt der Fehler in diesen Fällen nicht am Keyboard, sondern am Empfängergerät. Um dem entgegenzuwirken, gibt es eine nützliche MIDI-Funktion : Reset All Controllers.
  • Page 70 Appendix (English) +/- Button User Assignments 00 Bank Select 39 Channel Volume LSB 73 Attack Time 01 Modulation 40 Balance LSB 74 Cut- off Frequency 02 Breath Control 41 Controller 41 75 Controller 75 03 Controller 3 42 Pan LSB 76 Controller 76 04 Foot Control 38 Data Entry LSB...
  • Page 71: Technical Specifications

    Specifications are subject to change without notice. Trademarks & Licenses M-Audio is a trademark of inMusic Brands, Inc., registered in the U.S. and other countries. Kensington and the K & Lock logo are registered trademarks of ACCO Brands. iPad and macOS are trademarks of Apple Inc., registered in the U.S.
  • Page 72 Manual Version 1.0...

Ce manuel est également adapté pour:

Keystation 88 mkiii

Table des Matières