Table des Matières
Publicité
Les langues disponibles
Les langues disponibles
Liens rapides
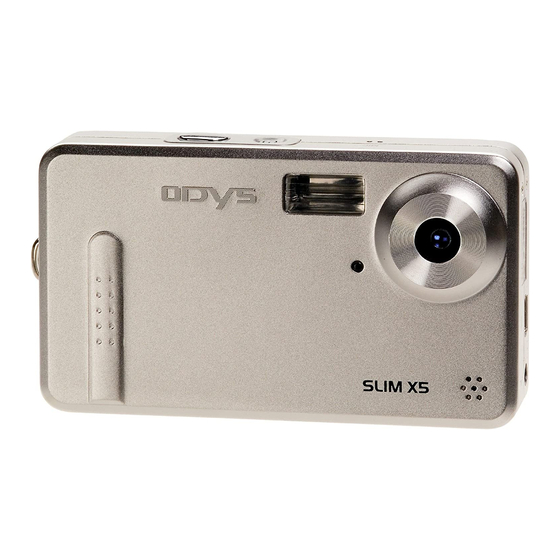
Caméra numérique ODYS-Slim X5
Macchina fotografica digitale ODYS-Slim X5
Цифровой фотоаппарат ODYS-Slim X5
BENUTZERHANDBUCH
USER MANUAL
MANUEL D'UTILISATION
GEBRUIKSHANDLEIDING
MANUAL DE INSTRUÇÕES
MANUAL DEL USUARIO
MANUALE PER L'UTENTE
ANVÄNDARHANDBOK
РУКОВОДСТВО ПО ЭКСПЛУАТАЦИИ
Digitalkamera ODYS-Slim X5
ODYS-Slim X5 Digital Camera
Digitale camera ODYS-Slim X5
Câmara digital ODYS-Slim X5
Cámara digital ODYS-Slim X5
Publicité
Chapitres
Table des Matières

Manuels Connexes pour Odys Slim X5

Sommaire des Matières pour Odys Slim X5
- Page 1 Digitalkamera ODYS-Slim X5 ODYS-Slim X5 Digital Camera Caméra numérique ODYS-Slim X5 Digitale camera ODYS-Slim X5 Câmara digital ODYS-Slim X5 Cámara digital ODYS-Slim X5 Macchina fotografica digitale ODYS-Slim X5 Цифровой фотоаппарат ODYS-Slim X5 BENUTZERHANDBUCH USER MANUAL MANUEL D’UTILISATION GEBRUIKSHANDLEIDING MANUAL DE INSTRUÇÕES...
- Page 83 Sommaire Nous vous remercions d'avoir acheté notre produit. Lisez attentivement le présent mode d’emploi afin de vous familiariser avec les fonctions du produit et d'assurer son bon fonctionnement. Conservez le mode d'emploi à portée de main afin de pouvoir le consulter en cas de besoin. 1 Matériel livré...
- Page 84 Liste des options de menu ............21 Correction d’exposition ............23 Sélectionner la langue ............. 23 Modifier la résolution ............... 24 Sélectionner la qualité d’image ..........24 Sélectionner un effet visuel ............. 25 5.10 Sélectionner un pilote .............. 26 5.11 Protéger des photos contre l’effacement involontaire ..... 26 5.12 Afficher des photos sur un téléviseur ........
-
Page 85: Matériel Livré
1 Matériel livré Vérifiez le contenu de la livraison : 1 x Appareil photo numérique ODYS-Slim X5 1 x Manuel d’utilisation 2 x Pile AAA 1 x Câble USB 1 x Câble audio 1 x Lecteur de CD-ROM (pilote et logiciel d’application) -
Page 86: Introduction
2 Introduction Le produit est un système vidéo numérique comprenant un appareil photo numérique, un magnétoscope numérique, un enregistreur audio numérique et une caméra numérique. L'appareil vous permet d'enregistrer des photos et des vidéos numériques ainsi que des sons et peut être utilisé comme caméra Web. Caractéristiques du produit •... -
Page 87: Mise En Service
3 Mise en service 3.1 Composants de votre caméra Avant d'utiliser votre caméra numérique, familiarisez-vous avec ses composants. Ceci vous facilitera la manipulation de la caméra. Déclencheur Touche Marche/arrêt Flash Objectif Témoin pour déclecheur Prise USB automatique Compartiment Sortie TV de piles Compartiment de la carte... -
Page 88: Insérer Les Piles
3.2 Insérer les piles Utilisez 2 piles AAA (Micro). Faites glisser le couvercle dans le sens indiqué pour ouvrir le compartiment de piles. Ouvrez le couvercle du compartiment de piles. Insérez les piles dans le compartiment en respectant la polarité. Refermez le couvercle du compartiment de piles en l’abaissant et le faisant glisser vers l’arrière. -
Page 89: Insérer Et Retirer La Carte Sd/Mmc
3.3 Insérer et retirer la carte SD/MMC Pour augmenter la capacité de stockage de la caméra, vous pouvez utiliser des cartes SD ou MMC. Mettez la caméra hors tension avant d’y installer une carte mémoire. Insérez la carte selon le schéma suivant (les images et les enregistrements vidéo/audio ne sont plus enregistrés dans la mémoire interne, mais sur la carte). -
Page 90: Montage De La Dragonne
3.4 Montage de la dragonne Pour votre confort et des raisons de sécurité, veuillez monter la dragonne. Faites passer la dragonne par l’œillet de fixation (voir illustration). Faites passer l’autre bout de la dragonne par le passant fin, et serrez la dragonne. -
Page 91: Fonctionnement De Base
4 Fonctionnement de base 4.1 Mise sous/hors tension Touche Marche/arrêt Mise sous tension Appuyez sur la touche marche/ arrêt pendant 1-2 secondes pour mettre la caméra sous tension. Si l’appareil ne se met pas sous tension, vérifiez l’état de charge et la polarité... -
Page 92: Utiliser Les Touches De Mode
4.2 Utiliser les touches de mode La caméra offre 5 modes d’utilisation. Après la mise sous tension, la caméra passe automatiquement en mode photo. Sélectionnez le mode désiré avec les touches mode suivantes. Sélection du mode Touches mode photo et du mode réglage Mode lecture Mode Enregistrement... -
Page 93: Prendre Des Photos Fixes
4.3 Prendre des photos fixes 4.3.1 Informations affichées sur l'écran LCD Symbole d‘état en mode photo Nombre de photos prises Mode photo 0,5 méga pixels Nombre de photos disponibles État de charge des piles Mode photo 0,8 méga pixels Mode photo seule Mode photo 2,0 méga pixels Mode photo en série Mode photo 3,0 méga pixels... -
Page 94: Prise De Vue
4.3.2 Prise de vue Appuyez sur la touche marche/arrêt pour mettre la caméra sous tension. Touche mode Sélectionnez le mode Photo/Réglage photo seule Après la mise sous tension, la caméra passe automatiquement en mode photo. Si tel n'est pas le cas, appuyez sur la touche mode Lorsque le symbole affiché... - Page 95 Les photos prises avec la caméra sont enregistrées en format JPEG. Vous pouvez sélectionner les fonctions suivantes en appuyant sur la touche menu en mode photo : • Capture Mode (Caractéristiques du mode photo) • Strobe (Réglage du flash) • Resolution (Résolution) •...
-
Page 96: Enregistrer Des Fichiers Audio
4.4 Enregistrer des fichiers audio Activez la fonction d’enre- gistrement numérique en appuyant sur la touche Le symbole est affiché sur l’écran LCD. Avant que l’enregistrement démarre, l’écran représenté à droite est affiché. Appuyez une fois sur le déclencheur pour démarrer l’enregistrement audio. -
Page 97: Enregistrer Des Vidéos
4.5 Enregistrer des vidéos 4.5.1 Informations affichées sur l'écran LCD Le temps écoulé est affiché dans le coin supérieur droit. Le temps restant est affiché dans le coin inférieur gauche. L’affichage ne change pas pendant l’enregistrement et sera mis à jour dés que l’enregistrement est terminé. -
Page 98: Visualiser Vos Photos, Fichiers Musique Et Vidéos
Visualiser vos photos, fichiers musique et vidéos 4.6.1 Informations affichées sur l'écran LCD Symbole d‘état en mode lecture 2004:02:11 Heure système actuelle : 11.02.2004, 12:02:47 12:02:47 01/10 Nombre de photos enregistrées/nombre total de photos Photo protégée Photo non protégée Fichier courant : image (JPG) Fichier courant : vidéo (AVI) Fichier courant : audio (WAV) 4.6.2 Lecture d’image, de vidéos et de fichiers audio... -
Page 99: Affichage Miniature
Affichage miniature Pendant la lecture de photos, de vidéos ou de vos enregistrements audio, vous pouvez démarrer l’affichage en miniature avec la touche de confirmation (touche OK). Le mode miniature vous permet d’afficher plusieurs photos, vidéos ou enregistrements audio à la fois. Vous pouvez sélectionner un fichier avec les touches de navigation puis démarrer la lecture avec la touche OK. -
Page 100: Fonctions Avancées
Formater la mémoire Passez en mode réglage avec la touche Sélectionnez « Format » (Formater), appuyez sur la touche OK et sélectionnez « Yes » (Oui) afin de démarrer le formatage. Le menu réapparaît après le formatage. Cette méthode vous permet également de supprimer des vidéos ou des enregistrements audio. -
Page 101: Utiliser Les Touches Rapide
Appuyez une ou plusieurs fois sur la touche afin de sélectionner un des trois modes flash. Chaque fois que vous appuyez sur la touche, le mode flash passe de « Auto » à « Permanent » à « Éteint ». Le symbole d’état du flash correspondant est affiché... -
Page 102: Modifier Les Options De Menu
5.3 Modifier les options de menu La caméra dispose de 3 menus : Photo, Lecture et Réglage. Pour sélectionner ces menus en mode photo, lecture ou réglage, appuyez sur la touche menu. Dans les menus, sélectionnez l’option désirée avec les touches (flèche haut) et (flèche bas). -
Page 103: Liste Des Options De Menu
5.4 Liste des options de menu Le contenu des menus dépend du mode d’opération. Le contenu des menus peut varier selon votre caméra. Pour plus d’informations, consultez la section « Caractéristiques techniques » à la page 34. Mode photo Menu Paramètre Description Single (Seule) -
Page 104: Mode Lecture
Mode lecture Menu Paramètre Description Lock Current (Protéger Protéger la photo contre l’effacement photo actuelle) involontaire Unlock Current Ôter la protection de la photo actuelle (Ôter la protection de la photo actuelle) Protect (Protéger) Lock All (Protéger Protéger toutes les photos contre toutes les photos) l’effacement involontaire Unlock All (Ôter la... -
Page 105: Correction D'exposition
5.5 Correction d’exposition La modification de la valeur d’exposition (EV – Exposure Value) permet de corriger la luminosité des photos. Sélectionner le mode photo Appuyez sur la touche menu en mode photo. Sélectionner l’option EV Sélectionnez l’option de menu EV et appuyez sur la touche OK pour accéder au réglage de l’exposition. -
Page 106: Modifier La Résolution
Sélectionnez l’option « Language » (Langue), et confirmez la sélection avec la touche OK. Sélectionnez la langue désirée. 5.7 Modifier la résolution La résolution est de 3 méga pixels par défaut. Appuyez sur la touche menu en mode photo. Sélectionnez l’option « Resolution » (Résolution) avec les touches , et confirmez votre sélection avec la touche Vous pouvez choisir entre 6 paramètres de résolution :... -
Page 107: Sélectionner Un Effet Visuel
Sélectionnez la qualité avec les touches de direction flèche haut et flèche bas, et confirmez avec la touche OK. • « Superfine » (Superfin) pour la meilleure qualité avec une utilisation mémoire maximale • « Fine » (Fin) pour une qualité et utilisation mémoire moyenne •... -
Page 108: Sélectionner Un Pilote
5.10 Sélectionner un pilote La caméra utilise le pilote MASS par défaut. Activez le mode réglage avec la touche Sélectionnez l’option « Driver Type » (Type de lecteur), et confirmez avec la touche OK. Sélectionnez le type de pilote désiré avec les touches , et confirmez avec la touche OK. -
Page 109: Afficher Des Photos Sur Un Téléviseur
Attention Les photos protégées ne sont pas effacées mais peuvent être formatées. 5.12 Afficher des photos sur un téléviseur Connectez la sortie TV de la caméra à l’entrée vidéo du téléviseur avec le câble fourni. Connectez l’entrée audio du téléviseur à la prise de casque de la caméra. -
Page 110: Sélectionner Un Logo
Modifiez l’heure. Sélectionnez le paramètre désiré avec les touches de direction . Modifiez ensuite la valeur avec les touches de direction Confirmez les modifications avec la touche OK. Le jour et l’heure de la caméra ne peuvent être affichés qu’en mode lecture. -
Page 111: Installation Du Logiciel
6 Installation du logiciel 6.1 Systèmes d'exploitation supportés • Windows 98 (Second Edition incl.) • Windows Me • Windows 2000 • Windows XP Les systèmes d’exploitation Microsoft Windows 98, Windows 98 SE, Windows 2000 Professional, Windows Me ou Windows XP sont préinstallés. - Page 112 Si la caméra est en mode MASS et connectée à l’ordinateur, le message « New hardware found » (Nouveau matériel détecté) est affiché sur l’écran de votre ordinateur. Cliquez sur « Next » (Suivant) pour passer à la fenêtre suivante. Sélectionnez «...
-
Page 113: Installation Du Pilote En Mode Twain
Cliquez sur « Finish » (Terminer) afin de conclure l'installation. Pendant l’installation, il est possible que l’ordinateur vous demande d’insérer le CD-ROM Windows 98 : 6.2.2 Installation du pilote en mode TWAIN Connectez la caméra à l’ordinateur. Le système devra reconnaître un nouveau périphérique automatiquement. - Page 114 Lorsque vous installez le pilote sous Windows XP, le système affiche le message « New hardware found » (Nouveau matériel détecté). Sélection- nez « Install the software automatically (recommended) » (Installer le logiciel automatiquement (recommandé)). La fenêtre suivante peut apparaître : Cliquez sur «...
-
Page 115: Transférer Des Fichiers Sur L'ordinateur
7 Transférer des fichiers sur l’ordinateur Après l’installation des pilotes, vous pouvez transférer vos photos, films et enregistrements audio sur un ordinateur à l’aide du câble USB fourni. Vous pouvez afficher, lire et modifier vos fichiers. La caméra entre automatiquement en mode USB. Mettez votre ordinateur sous tension. -
Page 116: Caractéristiques Techniques
8 Caractéristiques techniques Senseur 1/2" CMOS Pixel 3,1 millions Résolution effective 2048x1536, 1600x1200, 1024x768, 800x600 Résolution interpolée 2560x1920, 2304x1728 Photo : JPEG (E X1F2.1 Version) Format de fichier Vidéo : AVI/Motion JPEG 640*480 Son : Format WAV Effets spéciaux Mode standard, mode noir et blanc, mode sépia Grossissement Zoom numérique 8x Écran LCD... -
Page 117: Capacité De Stockage Requise
9 Capacité de stockage requise Taille de Résolution Qualité 16MB 32MB 64MB 128MB l'image env. 830 Extra-fine env. 600 2560x1920 Fine env. 510 Standard env. 620 Extra-fine env. 480 2304x1728 Fine env. 400 Standard env. 530 Extra-fine env. 400 2048x1536 Fine env. -
Page 118: Elimination Des Pannes
10 Elimination des pannes Vérifiez les points suivants si vous avez des problèmes lors de l'utilisation de votre caméra. Si vous ne pouvez pas résoudre le problème, contactez votre revendeur. Symptôme Causes et solutions Cause : L’intensité lumineuse est insuffisante. Erreur A La caméra ne prend pas Modifiez l’angle de la caméra pour plus de... -
Page 119: Informations Supplémentaires
11 Informations supplémentaires 11.1 Consignes de sécurité Nous nous engageons à vous fournir des produits sûrs. Veuillez toutefois respecter les remarques et avertissements suivants. Avertissement 1. Ne pas modifier ou désassembler la caméra. 2. Contacter votre revendeur pour des réparations ou inspections. 3. -
Page 120: Conseil Photo
11.3 Conseil photo Pour créer des photos de haute qualité, lisez les instructions suivantes : • Ne déplacez pas rapidement la caméra pour éviter des flous. Maintenez la caméra stable lorsque vous prenez une photo. Ne déplacez pas la caméra directement après avoir actionné le déclencheur. Attendez que le signal sonore est émis avant de déplacer la caméra. - Page 121 • En cas de basses températures (à partir de −10 °C), la capacité et la durée de vie des piles diminuent (notamment pour les piles alcalines). • En cas de basse température, rechauffez les piles avant de les utiliser (p.ex. dans votre poche). •...