Whirlpool 3LWED4830FW Instructions D'installation

Whirlpool 3LWED4830FW Instructions D'installation

Masquer les pouces Voir aussi pour 3LWED4830FW:
Table des Matières

Publicité

Les langues disponibles
  • FR

Les langues disponibles

  • FRANÇAIS, page 20

Liens rapides

DRYER INSTALLATION INSTRUCTIONS
INSTRUCTIONS D'INSTALLATION DU SECHE-LINGE
Modèles de 737 mm (29") de largeur - À gaz et Électrique
INSTRUCCIONES DE INSTALACIÓN DE LA SECADORA
Modelos de 737 mm (29") - A gas y eléctrica
ISTRUZIONI DI INSTALLAZIONE DELL'ASCIUGATRICE
TROCKNER - INSTALLATIONSANWEISUNGEN
737 mm (29 Zoll) breite Modelle - Gas und Elektro
DRYER SAFETY ........................................................................... 2
SPECIFICATIONS ......................................................................... 4
INSTALLATION REQUIREMENTS ............................................... 5
ELECTRIC DRYER POWER HOOKUP ........................................ 7
INSTALL LEVELING LEGS ........................................................... 8
GAS DRYER POWER HOOKUP .................................................. 8
VENTING ..................................................................................... 10
SÉCURITÉ DU SECHE-LINGE .................................................. 19
CARACTERISTIQUES ................................................................ 21
EXIGENCES D'INSTALLATION ................................................. 22
DU SECHE-LINGE ÉLECTRIQUE .............................................. 25
INSTALLATION DES PIEDS DE NIVELLEMENT ...................... 26
RACCORDEMENT D'UN SECHE-LINGE À GAZ ...................... 26
L'ÉVACUATION........................................................................... 28
SEGURIDAD DE LA SECADORA .............................................. 38
ESPECIFICACIONES ................................................................. 40
REQUISITOS DE INSTALACIÓN ............................................... 41
INSTALACIÓN DE LAS PATAS NIVELADORAS........................ 45
VENTILACIÓN ............................................................................ 48
CONEXIÓN DEL SUMINISTRO DE GAS................................... 51
SICUREZZA DELL'ASCIUGATRICE .......................................... 58
SPECIFICHE ............................................................................... 60
REQUISITI PER L'INSTALLAZIONE .......................................... 61
ALL'ALIMENTAZIONE ............................................................... 63
ALL'ALIMENTAZIONE ................................................................ 64
SICHERHEIT DES TROCKNERS............................................... 75
SPEZIFIKATIONEN .................................................................... 77
INSTALLATIONSANFORDERUNGEN ....................................... 78
STELLFÜSSE INSTALLIEREN ................................................... 81
ENTLÜFTUNGSSYSTEM ........................................................... 83
W10849532B
737 mm (29") Wide Models - Gas & Electric
Modelli da 737 mm (29") - A gas ed elettrici
TABLE OF CONTENTS

TABLE DES MATIÈRES

INHALTSVERZEICHNIS
MAKE GAS CONNECTION ........................................................ 13
CONNECT VENT ........................................................................ 14
LEVEL DRYER ............................................................................ 14
POWER CORD INSTALLATION ................................................. 15
COMPLETE INSTALLATION CHECKLIST ................................ 15
REVERSE DOOR SWING (OPTIONAL) ..................................... 16
TROUBLESHOOTING ................................................................ 18
RACCORDEMENT AU GAZ ....................................................... 32
RACCORDEMENT DU CONDUIT D'ÉVACUATION ................. 32
RÉGLAGE DE L'APLOMB DU SECHE-LINGE .......................... 33
INSTALLATION DU CORDON D'ALIMENTATION .................... 33
ACHEVER L'INSTALLATION - LISTE DE VÉRIFICATION ........ 34
INVERSION DU SENS DE L'OUVERTURE
DE LA PORTE (FACULTATIF) ..................................................... 35
DÉPANNAGE .............................................................................. 37
ÍNDICE
CONEXIÓN DEL DUCTO DE ESCAPE...................................... 52
NIVELACIÓN DE LA SECADORA.............................................. 52
INSTALACIÓN DEL CABLE ELÉCTRICO ................................. 53
LISTA DE CONTROL DE LA INSTALACIÓN TERMINADA ...... 54
CAMBIO DEL SENTIDO DE ABERTURA
DE LA PUERTA (OPCIONAL)..................................................... 54
SOLUCIÓN DE PROBLEMAS .................................................... 57
SOMMARIO
SISTEMA DI SFIATO .................................................................. 66
COLLEGAMENTO ALL'IMPIANTO A GAS ................................ 69
COLLEGAMENTO ALLO SFIATO .............................................. 70
MESSA IN PIANO DELL'ASCIUGATRICE ................................. 70
INSTALLAZIONE DEL CAVO DI ALIMENTAZIONE .................. 71
COMPILAZIONE DELLA CHECKLIST DI INSTALLAZIONE .... 71
INVERSIONE DELL'APERTURA DELLO SPORTELLO (OPZIONALE) ... 72
RISOLUZIONE DEI PROBLEMI ................................................. 74
GASANSCHLUSS HERSTELLEN .............................................. 86
ENTLÜFTUNGS ANSCHLIESSEN ............................................. 87
TROCKNER NIVELLIEREN........................................................ 87
INSTALLATION DES NETZKABELS .......................................... 88
KOMPLETTE INSTALLATIONS-CHECKLISTE ......................... 88
TÜRANSCHLAG WECHSELN (OPTIONAL) .............................. 89
FEHLERBEHEBUNG .................................................................. 91

Publicité

Table des Matières
loading

Sommaire des Matières pour Whirlpool 3LWED4830FW

  • Page 1: Table Des Matières

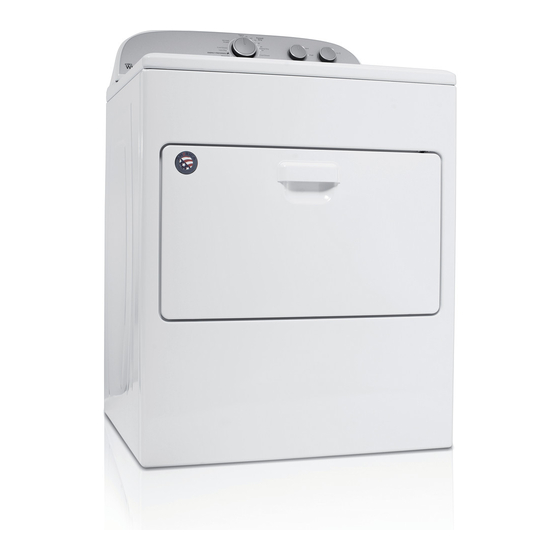
    DRYER INSTALLATION INSTRUCTIONS 737 mm (29") Wide Models – Gas & Electric INSTRUCTIONS D’INSTALLATION DU SECHE-LINGE Modèles de 737 mm (29") de largeur – À gaz et Électrique INSTRUCCIONES DE INSTALACIÓN DE LA SECADORA Modelos de 737 mm (29") – A gas y eléctrica ISTRUZIONI DI INSTALLAZIONE DELL’ASCIUGATRICE Modelli da 737 mm (29") –...
  • Page 2: Dryer Safety

    DRYER SAFETY CAUTION – RISK OF FIRE FLAMMABLE MATERIALS This is an additional safety alert symbol that alerts you to the risk of re.
  • Page 3: For Your Safety

    FOR YOUR SAFETY 1. DO NOT USE OR STORE PETROL OR OTHER FLAMMABLE MATERIALS IN THIS APPLIANCE OR NEAR THIS APPLIANCE. 2. DO NOT SPRAY AEROSOLS IN THE VICINITY OF THIS APPLIANCE WHILE IT IS IN OPERATION. 3. DO NOT MODIFY THIS APPLIANCE. IMPORTANT SAFETY INSTRUCTIONS IMPORTANT SAFETY INSTRUCTIONS WARNING:...
  • Page 4: Specifications

    This appliance is marked according to the European directive 2012/19/EU on Waste Electrical and Electronic Equipment (WEEE). By ensuring this product is disposed of correctly, you will help avoid potential negative consequences for the environment and human health, which could otherwise be caused by inappropriate waste handling of this product. The symbol on the product, or on the documents accompanying the product, indicates that this appliance may not be treated as household waste.
  • Page 5: Installation Requirements

    INSTALLATION REQUIREMENTS Tools needed for gas installations: Tools and Parts Gather the required tools and parts before starting installation. Tools needed for all installations: 203 mm or 254 mm 203 mm or 254 mm (8" or 10") pipe wrench (8" or 10") adjustable wrench (for gas connections) Flat-blade screwdriver #2 Phillips screwdriver...
  • Page 6: Location Requirements

    Dryer Dimensions Location Requirements 737 mm 737 mm 29" 29" (29") (29") (737 mm) (737 mm) 1102 mm 1102 mm " " ⁄ ") (1102 mm) ⁄ ") (1102 mm) " 13 mm " 38 mm (38 mm) (13 mm) ⁄...
  • Page 7: Electric Dryer Power Hookup

    Installation spacing for recessed area or closet NOTE: In accordance with the European EMC Directive (2004/108/EC), the maximum electricity supply system The dimensions shown are for the minimum spacing allowed. impedance to which the electric dryer should be connected n  A dditional spacing should be considered for ease of is declared to be 0.054 Ohm + j0.034 Ohm.
  • Page 8: Install Leveling Legs

    INSTALL LEVELING LEGS GAS DRYER POWER HOOKUP Gas Supply Requirements Prepare dryer for leveling legs To avoid damaging floor, use a large flat piece of cardboard from dryer carton; place under entire back edge of dryer. Firmly grasp dryer body (not console panel) and gently lay dryer down on cardboard.
  • Page 9: Gas Supply Connection Requirements

    Gas supply line Dryer gas pipe 13 mm (1/2") NPT pipe is recommended. The gas pipe that comes out through the rear of your dryer has a 9.5 mm (3/8") male pipe thread. 9.5 mm (3/8") approved tubing is acceptable for lengths under 6.1 m (20 ft.) if local codes and gas supplier permit.
  • Page 10: Earthing Instructions

    Electrical Requirements VENTING Venting Requirements 120-Volt, 60-Hz., AC-only, 15- or 20-amp fused electrical supply is required. A time-delay fuse or circuit breaker is WARNING: To reduce the risk of fire, this dryer MUST BE recommended. It is also recommended that a separate EXHAUSTED OUTDOORS.
  • Page 11: Plan Vent System

    Exhaust hoods: Plan Vent System Must be at least 305 mm (12") from ground or any object that may obstruct exhaust (such as flowers, rocks, bushes, Recommended exhaust installations or snow). Recommended Styles: Typical installations vent the dryer from the rear of the dryer. Other installations are possible.
  • Page 12: Venting Kits

    Special provisions for mobile home installations: Alternate installations for close clearances The exhaust vent must be securely fastened to a noncombustible Venting systems come in many varieties. Select the type best portion of the mobile home structure and must not terminate for your installation.
  • Page 13: Make Gas Connection

    Vent System Chart MAKE GAS CONNECTION (Long Vent Models Only) Number of Connect gas supply to dryer 90° turns Type Box/louvered, or elbows of vent or Angled hoods Rigid metal 36.6 m (120 ft.) Rigid metal 33.5 m (110 ft.) Rigid metal 30.5 m (100 ft.) Flared...
  • Page 14: Connect Vent

    CONNECT VENT LEVEL DRYER Connect vent to exhaust outlet Level dryer Check levelness of dryer from side to side. Repeat from front to back. NOTE: The dryer must be level for the moisture sensing system to operate correctly. Using a 102 mm (4") clamp, connect vent to exhaust outlet in dryer.
  • Page 15: Power Cord Installation

    POWER CORD INSTALLATION Secure power cord (on some models) IMPORTANT: To be performed by Whilrpool Corporation authorized service personnel only. Secure the power cord by seating the connection on the cord lock. Place the cord lock cover and push until it snaps. Make sure the power cord connection is seated on the cord lock and that the cord lock clamps correctly.
  • Page 16: Reverse Door Swing

    REVERSE DOOR SWING Lift door off top screws (OPTIONAL) NOTE: Magnetized screwdriver is helpful. Lift door until top screws in dryer cabinet are in large part of Place towel on dryer hinge slot. Pull door forward off screws. Set door (handle side up) on top of dryer.
  • Page 17 Attach door hinges Switch door catch, bezel, and plug Plug Catch and bezel Remove the door catch, bezel, and plug from the inside of the inner door by squeezing and pulling/pushing them. Place the door catch, bezel, and plug on the sides opposite from where they were.
  • Page 18 Remove and transfer Check door strike alignment hinge hole plugs Use a small, flat-blade screwdriver to gently remove 4 hinge hole plugs on left side of dryer cabinet. Transfer plugs into Close door and check that door strike aligns with door hinge holes on opposite side of dryer cabinet.
  • Page 19: Sécurité Du Seche-Linge

    SÉCURITÉ DU SECHE-LINGE MISE EN GARDE – ’ RISQUE D INCENDIE DE MATÉRIAUX INFLAMMABLES C’est un symbole supplémentaire d’alerte de sécurité qui des alertes vous au risque d’incendie.
  • Page 20 IMPORTANT SAFETY INSTRUCTIONS IMPORTANTES INSTRUCTIONS DE SECURITE AVERTISSEMENT : WARNING: Afin de réduire le risque d’incendie, de choc électeiue ou de blessures corporellles lors de l’utilisation To reduce the risk of re, electric shock, or injury to persons when using the dryer, follow basic du sèche-linge, il convient d’observer certaines précautions fondamentales, notamment : precautions, including the following: Lire toutes les instructions avant d’utiliser le sèche-linge.
  • Page 21: Pour Votre Securite

    POUR VOTRE SECURITE 1. NE PAS UTILISER OU REMISER D’ESSENCE OU AUTRES MATÉRIAUX INFLAMMABLES DANS CET APPAREIL MÉNAGER O U À PROXIMITÉ DE CELUI-CI. 2. NE PAS VAPORISER D’AÉROSOLS À PROXIMITÉ DE CET APPAREIL MÉNAGER LORSQU’IL EST EN FONCTIONNEMENT. 3. NE PAS MODIFIER CET APPAREIL MÉNAGER. Le marquage de l’appareil est conforme à...
  • Page 22: Exigences D'installation

    EXIGENCES D’INSTALLATION Outillage et pièces Rassembler les outils et composants nécessaires avant d’entreprendre l’installation. Outils nécessaires pour toutes les installations : Couteau utilitaire Couteau à mastic Outils nécessaires aux installations au gaz : Tournevis à lame plate Tournevis Phillips n° 2 Clé...
  • Page 23: Exigences D'emplacement

    Espacements d’installation : Exigences d’emplacement L’emplacement doit être assez grand pour permettre d’ouvrir complètement la porte du sèche-linge. Ne pas installer derrière une porte verrouillable, une porte coulissante ou une porte avec une charnière sur le côté faisant face à celle du sèche-linge d’une manière qui gênerait l’ouverture complète de la porte du sèche-linge.
  • Page 24: Espacement Pour Une Installation Dans Un Encastrement Ou Dans Un Placard

    Espacement pour une installation dans Installation dans une maison mobile – exigences un encastrement ou dans un placard supplémentaires Les dimensions correspondent à l’espacement minimum permis. Ce sèche-linge peut être installé dans une maison mobile. L’installation doit satisfaire aux critères du codes locaux. Prévoir davantage d’espace pour faciliter l’installation et l’entretien.
  • Page 25: Raccordement À L'alimentation Électrique Du Seche-Linge Électrique

    RACCORDEMENT À L’ALIMENTATION ÉLECTRIQUE DU SECHE-LINGE ÉLECTRIQUE Spécifications électriques Cet appareil est un sèche-linge à 3 conducteurs qui doit être relié à la terre. Ce sèche-linge est livré sans cordon d’alimentation électrique et sans prise. Il doit être raccordé par un électricien compétent à...
  • Page 26: Installation Des Pieds De Nivellement

    Pour utilisation en maison mobile INSTALLATION DES PIEDS Les sèche-linges à gaz doivent être solidement fixés au plancher. DE NIVELLEMENT Les installations en maison mobile nécessitent un ensemble d’ancrage au sol pour installation en maison mobile. Pour le processus de commande, consulter les Guide d’utilisation et d’entretien.
  • Page 27: Canalisation De Gaz

    Conversion pour l’alimentation au propane : Option 2 (méthode alternative) Conduit d’aluminium ou de cuivre approuvé : Un technicien qualifié doit effectuer la conversion. Ne pas entreprendre de convertir le sèche-linge pour l’utilisation Pour les longueurs supérieures à 6,1 m (20 pi), d’un gaz différent de celui indiqué...
  • Page 28: L'évacuation

    Spécifications électriques L’ÉVACUATION Exigences concernant l’évacuation L’appareil doit être alimenté par un circuit de 120 V, CA seulement, 60 Hz, 15 ou 20 ampères, protégé par un fusible. AVERTISSEMENT : On recommande l’emploi d’un fusible ou d’un disjoncteur Pour réduire le risque d’incendie, temporisé.
  • Page 29: Planification Du Système D'évacuation

    Clapets de décharge : Planification du système d’évacuation Doit se situer à au moins 305 mm (12") au-dessus du sol ou de tout objet susceptible d’obstruer l’évacuation Installations d’évacuation recommandées (par exemple fleurs, roches, arbustes ou neige). Styles recommandés : Les installations typiques consistent à...
  • Page 30: Installations Alternées Pour Dégagements Étroits

    Installations alternées pour dégagements étroits Numéro Descriptions de pièces Il existe de nombreux systèmes d’évacuation. Choisir le type le mieux adapté à votre installation. Sur l’illustration : les 4396727RP Conduit d’évacuation souple pour sèche-linge installations à double dégagement. Se rapporter aux instructions de 8' avec brides du fabricant.
  • Page 31: Raccorder Le Conduit D'évacuation Au Clapet

    Le “Tableau des systèmes d’évacuation” fournit les spécifications Installation du circuit d’évacuation d’évacuation qui vous aideront à atteindre la meilleure performance de séchage. Installer le clapet d’évacuation Tableau des systèmes d’évacuation Nombre Type de Clapets de 305 mm min. 12" min. (305 mm) (12"...
  • Page 32: Raccordement Au Gaz

    RACCORDEMENT AU GAZ RACCORDEMENT DU CONDUIT D’ÉVACUATION Raccorder l’alimentation en gaz au sèche-linge Raccorder le conduit d’évacuation à la bouche d’évacuation Raccord mâle Raccord mâle conique non conique Retirer le capuchon rouge de la canalisation de gaz. À l’aide d’une clé pour serrer, raccorder l’alimentation en gaz au sèche-linge.
  • Page 33: Réglage De L'aplomb Du Seche-Linge

    (sur certains modèles) Régler l’aplomb du sèche-linge IMPORTANT : à effectuer uniquement par un personnel de service Whirlpool Corporation agréé. Vérifier l’aplomb du sèche-linge d’un côté à l’autre. Répéter l’opération de l’avant vers l’arrière. REMARQUE : Le sèche-linge doit être d’aplomb pour que le système de détection d’humidité...
  • Page 34: Fixer Le Cordon D'alimentation

    ACHEVER L’INSTALLATION – Fixer la prise LISTE DE VÉRIFICATION Vérifier que toutes les pièces sont maintenant installées. S’il reste une pièce, passer en revue les différentes étapes pour découvrir laquelle aurait été oubliée. Vérifier la présence de tous les outils. Éliminer/recycler les matériaux d’emballage.
  • Page 35: Inversion Du Sens De L'ouverture De La Porte (Facultatif)

    INVERSION DU SENS Soulever la porte pour la DE L’OUVERTURE dégager des vis supérieures DE LA PORTE (FACULTATIF) REMARQUE : Un tournevis aimanté serait utile. Soulever la porte jusqu’à ce que les vis supérieures situées dans la caisse du sèche-linge se trouvent dans la partie évasée de l’encoche de charnière.
  • Page 36: Fixer Les Charnières De Porte

    Inversion du côté d’installation de Fixer les charnières de porte la gâche, du boîtier et du bouchon d’obturation de la porte Bouchon Gâche et d’obturation boîtier de la porte Retirer la gâche de porte, le boîtier et le bouchon d’obturation du côté...
  • Page 37: Dépannage

    Retirer les bouchons Contrôler l’alignement d’obturation de charnière du piton de la porte et les transférer Fermer la porte et vérifier que le piton de la porte est aligné avec le piton de retenue de la porte. Au besoin, faire glisser la gâche de la porte vers la gauche ou vers la droite à...
  • Page 38: Seguridad De La Secadora

    SEGURIDAD DE LA SECADORA Su seguridad y la seguridad de los demás es muy importante. Hemos incluido muchos mensajes importantes de seguridad en este manual y en su electrodoméstico. Lea y obedezca siempre todos los mensajes de seguridad. Este es el símbolo de alerta de seguridad. Este símbolo le llama la atención sobre peligros potenciales que pueden ocasionar la muerte o una lesión a usted y a los demás.
  • Page 39 IMPORTANT SAFETY INSTRUCTIONS INSTRUCCIONES IMPORTANTES DE SEGURIDAD ADVERTENCIA: WARNING: A fin de reducir el riesgo de incendio, choque eléctrico o de daño a las personas que usen la secadora, To reduce the risk of re, electric shock, or injury to persons when using the dryer, follow basic deben seguirese las precauciones básicas, incluidas las siguientes: precautions, including the following: Lea todas las instrucciones antes de usar la secadora.
  • Page 40: Para Su Seguridad

    PARA SU SEGURIDAD 1. NO USE NI GUARDE GASOLINA NI OTROS MATERIALES INFLAMABLES DENTRO DE ESTE APARATO NI CERCA DEL MISMO. 2. NO ROCÍE CON AEROSOLES EN LA PROXIMIDAD DE ESTE APARATO MIENTRAS ESTÉ EN FUNCIONAMIENTO. 3. NO MODIFIQUE ESTE APARATO. Este electrodoméstico está...
  • Page 41: Requisitos De Instalación

    REQUISITOS DE INSTALACIÓN Herramientas y piezas Reúna las herramientas y piezas necesarias antes de comenzar la instalación. Herramientas necesarias para todas las instalaciones: Pinzas Nivel Destornillador de hoja Destornillador Phillips # 2 plana Llave ajustable que Pistola y masilla para se abra a 25 mm (1") o calafateo (para instalar el llave de cubo de cabeza...
  • Page 42: Requisitos De Ubicación

    Herramientas necesarias para las instalaciones a gas: Requisitos de ubicación Llave para tubos Llave de tuercas ajustable de 203 mm ó 254 mm de 203 mm ó 254 mm (8" ó 10") (8" ó 10") Pegamento para tuberías Usted necesitará: resistente a gas LP Una ubicación que permita una instalación adecuada del ducto de escape.
  • Page 43: Dimensiones De La Secadora

    Espacios para la instalación: Espacio para la instalación La ubicación debe ser lo suficientemente grande para poder 76 mm* abrir completamente la puerta de la secadora. (3") 3"* No instale el aparato detrás de una puerta con cerradura, (76 mm) 14"...
  • Page 44: Conexión De Energía De La Secadora Électrica

    CONEXIÓN DE ENERGÍA DE LA SECADORA ÉLECTRICA Requisitos eléctricos Ésta es una secadora de 3 hilos y debe estar conectada a tierra. Esta secadora se suministra sin cable eléctrico ni enchufe. Debe Si los códigos lo permiten y se emplea una ligadura de conexión ser conectada por un electricista competente a un suministro a tierra adicional, es recomendable que un electricista calificado eléctrico monofásico al voltaje mostrado en la placa, usando una...
  • Page 45: Instalación De Las Patas Niveladoras

    INSTALACIÓN DE LAS PATAS Atornille las patas niveladoras NIVELADORAS Con una llave inglesa y cinta métrica, atornille las patas Prepare la secadora para en sus orificios hasta que la parte inferior de la pata esté las patas niveladoras a aproximadamente 13 mm (1/2") (para coincidir con la altura de la lavadora de 0,102 m³...
  • Page 46: Conexión De Energía De La Secadora A Gas

    Línea de suministro de gas CONEXIÓN DE ENERGÍA DE LA SECADORA A GAS Se recomienda un tubo IPS de 13 mm (1/2"). Es aceptable una tubería de 9,5 mm (3/8") para las longitudes menores de 6,1 m (20 pies) si lo permiten Requisitos del suministro de gas los códigos locales y del proveedor de gas.
  • Page 47: Requisitos De Entrada Del Quemador

    Si su secadora ha sido convertida para usar gas LP, se Requisitos Eléctricos puede usar tubería de cobre compatible con LP de 9,5 mm (3/8"). Si la longitud total de la línea de suministro es mayor que 20 pies (6,1 m), use un tubo más largo. NOTA: Deben usarse compuestos para uniones de tubería que sean resistentes a la acción del gas LP.
  • Page 48: Requisitos De Ventilación

    VENTILACIÓN Capotas de ventilación: Requisitos de ventilación Deberán estar a por lo menos 305 mm (12") desde el piso o cualquier objeto que pueda obstruir la salida (tales como flores, rocas, arbustos o nieve). Estilos recomendados: Capota tipo persiana Capota tipo caja Estilo aceptable: ADVERTENCIA: Para reducir el riesgo de incendio,...
  • Page 49: Planificación Del Sistema De Ventilación

    Instalaciones alternas para espacios limitados Planificación del sistema de ventilación Los sistemas de ventilación vienen en una amplia gama. Seleccione el tipo más apropiado para su instalación. A Seleccione su tipo de instalación de ventilación continuación se ilustran dos tipos de instalación para espacios limitados.
  • Page 50 Determinación de la vía del ducto de escape: Juegos de ventilación Seleccione la vía que proporcione el trayecto más recto ■ Para obtener más información, visítenos en y directo al exterior. www.applianceaccessories.com o contacte con el distribuidor Planifique la instalación a fin de usar el menor número ■...
  • Page 51: Conexión Del Suministro De Gas

    Cuadro del sistema de ventilación CONEXIÓN DEL SUMINISTRO DE GAS (Sólo los modelos con ducto de escape largo) Conecte la línea de suministro Capotas tipo de gas a la secadora No. de vueltas caja/persiana, de 90º o codos Tipo de ducto o angular Metal rígido 36,6 m (120 pies)
  • Page 52: Conexión Del Ducto De Escape

    NIVELACIÓN DE LA SECADORA CONEXIÓN DEL DUCTO DE ESCAPE Nivele la secadora Conecte el ducto de escape a la salida de escape Revise la nivelación de la secadora de lado a lado. Repita el procedimiento de adelante hacia atrás. NOTA: La secadora debe estar nivelada para que el sistema de detección de humedad funcione correctamente.
  • Page 53 Ensamble el enchufe ELÉCTRICO (en algunos modelos) IMPORTANTE: Sólo debe estar a cargo de personal de servicio autorizado de Whirlpool Corporation. Ensamble el enchufe dentro del extremo del cable eléctrico, ubicado en la parte posterior de la secadora. Asegure el cable eléctrico Seleccione el enchufe Asegure el cable de suministro de energía colocando la...
  • Page 54: Lista De Control De La Instalación Terminada

    LISTA DE CONTROL DE LA CAMBIO DEL SENTIDO INSTALACIÓN TERMINADA DE ABERTURA DE LA PUERTA (OPCIONAL) Verifique que todas las piezas estén ahora instaladas. Si hay alguna pieza extra, vuelva a revisar todos los pasos para ver qué se omitió. Verifique que tenga todas las herramientas.
  • Page 55: Dé Vuelta La Puerta

    Levante y quite la puerta de Cambie de lugar el seguro, bisel los tornillos de la parte superior y tapón de la puerta Seguro y bisel Tapón Levante la puerta hasta que los tornillos superiores de la carcasa estén en la parte grande de la ranura de la bisagra. Jale la puerta hacia adelante para separarla de los tornillos.
  • Page 56 Sujete las bisagras de la puerta Quite y transfiera los tapones de los orificios de la bisagra Use un destornillador pequeño de hoja plana para quitar cuidadosamente 4 tapones de los orificios de las bisagras en el lado izquierdo de la carcasa de la secadora. Mueva los tapones de los orificios de la bisagra al lado opuesto de la carcasa de la secadora.
  • Page 57: Solución De Problemas

    Revise el alineamiento del tope de la puerta Cierre la puerta y asegúrese de que el tope de la misma esté alineado con el seguro de la puerta. Si es necesario, deslice el seguro de la puerta hacia la izquierda o derecha dentro de la ranura a fin de ajustar la alineación.
  • Page 58: Sicurezza Dell'asciugatrice

    SICUREZZA DELL’ASCIUGATRICE AVVERTENZA – ’ RISCHIO D INCENDIO MATERIALI INFIAMMABILI Ciò è un simbolo supplementare di allarme di sicurezza che allarmi voi al rischio d’incendio. AVVERTENZA Pericolo di incendio La mancata osservanza degli avvisi di sicurezza può causare lesioni gravi, morte o danno alla proprietà.
  • Page 59: Per La Vostra Sicurezza

    PER LA VOSTRA SICUREZZA 1. NON USARE O RIPORRE BENZINA O MATERIALI INFIAMMABILI NELL’APPARECCHIO O NELLE SUE VICINANZE. 2. NON USARE PRODOTTI SPRAY IN PROSSIMITÀ DELL’APPARECCHIO MENTRE È UN FUNZIONE. 3. NON MODIFICARE L’APPARECCHIO. IMPORTANT SAFETY INSTRUCTIONS ISTRUZIONI IMPORTANTI PER LA SICUREZZA AVVERTENZA: WARNING: per ridurre il rischio di incendio, scossa elettrica o lesioni alle persone durante l’uso dell'asciugatrice,...
  • Page 60: Specifiche

    Questo elettrodomestico è stato contrassegnato in ottemperanza alla Direttiva Europea 2012/19/EU sulle Attrezzature Elettriche ed Elettroniche da Smaltire (WEEE). Assicurarsi che questo prodotto venga eliminato correttamente, in modo da evitare possibili conseguenze dannose per l’ambiente e la salute umana, che potrebbero altrimenti sorgere dalla gestione errata dello smaltimento dell’elettrodomestico stesso.
  • Page 61: Requisiti Per L'installazione

    REQUISITI PER L’INSTALLAZIONE Attrezzi richiesti per l’installazione a gas: Attrezzi e parti Preparare gli attrezzi e le parti richieste prima di iniziare l’installazione. Attrezzi richiesti per tutte le installazioni: Giratubi da 203 mm Chiave a rullino da o 254 mm (8" o 10") 203 mm o 254 mm (8"...
  • Page 62: Spazio Di Installazione

    Spazio di installazione: Requisiti per il posizionamento L’ubicazione deve essere sufficientemente ampia per consentire di aprire completamente lo sportello dell’asciugatrice. Non installare l’apparecchio dietro una porta chiudibile, una porta scorrevole o una porta incernierata sul lato opposto a quello dell’asciugatrice che possa impedire l’apertura completa dello sportello dell’apparecchio.
  • Page 63: Allacciamento Dell'asciugatrice Elettrica All'alimentazione

    Distanze di installazione per vani incassati o sgabuzzini n L’asciugatrice è dotata di una boccola di fissaggio del cavo che deve essere serrata al completamento del cablaggio. Le dimensioni illustrate si riferiscono alle distanze minime I morsetti di alimentazione elettrica di rete si trovano dietro richieste.
  • Page 64: Installazione Dei Piedini Di Messa In Piano

    Per l'uso in unità abitative mobili INSTALLAZIONE DEI PIEDINI Le asciugatrici a gas devono essere fissate saldamente DI MESSA IN PIANO al pavimento. Per le installazioni in unità abitative mobili si deve utilizzare il kit di fissaggio a terra per installazione in unità abitativa mobile. Per informazioni su come ordinare il kit, far riferimento alla Guida all'uso e alla manutenzione.
  • Page 65: Requisiti Per L'ingresso Bruciatore

    Conduttura di alimentazione del gas Tubo del gas dell’asciugatrice Si raccomanda un tubo da 13 mm (1/2") NPT. Il tubo del gas che fuoriesce attraverso il lato posteriore dell’asciugatrice ha un filetto maschio di 9,5 mm (3/8"). È accettabile l’uso di tubi approvati da 9,5 mm (3/8") per lunghezze inferiori a 6,1 m (20 ft.) se consentito dalla normativa locale e dall’ente di fornitura del gas.
  • Page 66 Requisiti elettrici SISTEMA DI SFIATO Requisiti di sfiato Alimentazione elettrica a 120 Volt, 60 Hz., solo AC, con fusibile da 15A o 20A. Si raccomanda di usare un fusibile ritardato o un interruttore di circuito. Si raccomanda inoltre AVVERTENZA: di utilizzare un circuito separato che serva solo l’asciugatrice. per ridurre il rischio di incendio LO SCARICO DELL’ASCIUGATRICE DEVE ESSERE CONVOGLIATO ALL’ESTERNO.
  • Page 67 Cappe per lo sfiato: Pianificare il sistema di sfiato Devono essere collocate ad almeno 305 mm (12") da terra o da qualsiasi oggetto che potrebbe ostruire lo scarico Installazioni raccomandate per lo sfiato (ad esempio fiori, rocce, cespugli o neve). Tipi raccomandati: In genere l’asciugatrice l’asciugatrice viene installata in modo che lo sfiato si trovi sul retro dell’asciugatrice.
  • Page 68 Provvedimenti speciali per l’installazione in unità Installazioni alternative per gli spazi stretti abitative mobili: I sistemi di sfiato sono disponibili in una varietà di soluzioni. Selezionare il miglior tipo per l’installazione in corso. Sono Lo sfiato dello scarico deve essere fissato saldamente a una illustrate due installazioni in spazi stretti.
  • Page 69: Collegamento All'impiantoa Gas

    Tabella del sistema di sfiato COLLEGAMENTO ALL’IMPIANTO (Solo modelli con sfiato lungo) A GAS Numero di Tipo di sfiato Cappe a scatola/a curve o gomiti persiana o angolari Collegare l’alimentazione del gas a 90° all’asciugatrice Metallo rigido 36,6 m (120 ft.) Metallo rigido 33,5 m (110 ft.) Metallo rigido...
  • Page 70 COLLEGAMENTO ALLO SFIATO MESSA IN PIANO DELL’ASCIUGATRICE Collegare lo sfiato alla presa di scarico Messa in piano dell’asciugatrice Controllare la messa in piano dell’asciugatrice da lato a lato. Ripetere da davanti a dietro. NOTA: l’asciugatrice deve essere in piano affinché il sistema di sensori di umidità...
  • Page 71: Installazione Del Cavo Di Alimentazione

    INSTALLAZIONE DEL CAVO Fissare il cavo di alimentazione DI ALIMENTAZIONE (su alcuni modelli) IMPORTANTE: questa operazione deve essere eseguita esclusivamente da personale di assistenza autorizzato da Whilrpool Corporation. Fissare il cavo di alimentazione poggiando la connessione sul fissa cavo. Collocare il coperchio del fissa cavo e spingere finché...
  • Page 72: Collocare Un Asciugamano Sull'asciugatrice

    INVERSIONE DELL’APERTURA Sollevare lo sportello dalle viti DELLO SPORTELLO (OPZIONALE) superiori NOTA: è consigliabile usare un cacciavite magnetico. Collocare un asciugamano Sollevare lo sportello fino a quando le viti del telaio sull’asciugatrice dell’asciugatrice sono nel foro largo dell’asola della cerniera. Tirare lo sportello in avanti per sganciarlo dalle viti.
  • Page 73: Applicare Le Cerniere Dello Sportello

    Applicare le cerniere dello Invertire la serratura e il tappo sportello Serratura Tappo Rimuovere la serratura e il tappo dal lato interno dello sportello interno schiacciando e premendo/tirando. Posizionare la serratura e il tappo sui lati opposti corrispondenti. Ruotare lo sportello esterno Riapplicare le cerniere dello sportello allo sportello dell’asciugatrice in modo che il foro più...
  • Page 74: Risoluzione Dei Problemi

    Rimuovere e spostare i tappi Controllare l’allineamento del foro delle cerniere del battente dello sportello Usare un piccolo cacciavite a testa piatta per rimuovere delicatamente i 4 tappi dei fori delle cerniere sul lato sinistro del telaio dell’asciugatrice. Spostare i tappi sui fori delle Chiudere lo sportello e controllare che il battente della cerniere sul lato opposto del telaio dell’asciugatrice.
  • Page 75: Sicherheit Des Trockners

    SICHERHEIT DES TROCKNERS ACHTUNG - Brandgefahr - Die Installation des Wäschetrockners muss von einem qualifizierten Installateur ausgeführt werden. - Installieren Sie den Wäschetrockner gemäß den Anweisungen des Herstellers und den lokalen Vorschriften. - Installieren Sie für einen Wäschetrockner keine Abluftleitungen aus flexiblem Kunststoff oder flexibler Metallfolie.
  • Page 76: Für Ihre Sicherheit

    ACHTUNG Brandgefahr Bitte halten Sie die Warnhinweise unbedingt ein. Andernfalls besteht die Gefahr schwerer oder tödlicher Verletzungen oder von Sachschäden. Installieren Sie kein Zusatzgebläse für den Abluftkanal. Installieren Sie Wäschetrockner immer gemäß den Installationsanweisungen des Trocknerherstellers. FÜR IHRE SICHERHEIT 1. LAGERN UND VERWENDEN SIE KEIN BENZIN, GAS ODER ANDERE ENTFLAMMBARE STOFFE IN DER NÄHE DIESES GERÄTS ODER ANDERER GERÄTE.
  • Page 77: Spezifikationen

    Benutzen Sie keine Weichspüler und keine Produkte, Der letzte Teil des Trocknungsvorgangs erfolgt ohne welche die Statik eliminieren, es sei denn, es wird vom Hitze (Abkühlzyklus), um sicherzustellen, dass die Teile Hersteller des Weichspülers oder Produkts ausdrücklich bei einer Temperatur bleiben, die eine Beschädigung empfohlen.
  • Page 78: Installationsanforderungen

    INSTALLATIONSANFORDERUNGEN Für die Gasinstallation erforderliche Werkzeuge: Werkzeuge und Teile Legen Sie vor Beginn der Installation alle erforderlichen Werkzeuge und Teile griffbereit hin. Für alle Installation erforderliche Werkzeuge: 203 mm oder 254 mm (8" 203 mm oder 254 mm oder 10") Rohrzange (8"...
  • Page 79: Anforderungen An Den Aufstellraum

    Trockner-Abmessungen Anforderungen an den Aufstellraum 737 mm 737 mm 29" 29" (29") (29") (737 mm) (737 mm) 1102 mm 1102 mm " " ⁄ ") ⁄ ") (1102 mm) (1102 mm) " 13 mm " 38 mm (38 mm) (13 mm) ⁄...
  • Page 80: Elektrotrockner - Elektrischer Anschluss

    Installationsplatz für Nische oder Abstellkammer n Eine Kabelklemme wird mit dem Trockner mitgeliefert und muss nach Beendigung der Verdrahtung festgezogen Die angegebenen Abmessungen gelten für die zulässigen werden. Die Stromnetzklemmen befinden sich hinter der Mindestmaße. kleinen Zugangsklappe auf der Rückseite (Abdeckung n Z ur Erleichterung der Installation und des Kundendienstes des Klemmenblocks);...
  • Page 81: Stellfüsse Installieren

    Für Benutzer von Wohnmobilen STELLFÜSSE INSTALLIEREN Gastrockner müssen sicher am Boden befestigt werden. Für Wohnmobil-Installationen ist ein spezieller Halterungssatz für Wohnmobil-Installationen erforderlich. Nähere Informationen für Bestellungen finden Sie in der Bedienungsanleitung und in der Pflegeanleitung. GASTROCKNER – ELEKTRISCHER Bereiten Sie den Trockner für die ANSCHLUSS Stellfüße vor Anforderungen an die Gasversorgung...
  • Page 82 Gasversorgungsleitung Es muss eine 9,5 mm (3/8 Zoll), konisch, x 9.5 mm (3/8 Zoll) NPT Adapteranschluss zwischen der Trocknerrohrleitung und Es wird ein 13 mm (1/2 Zoll) NPT-Rohr empfohlen. der zugelassenen Leitung von 9,5 mm (3/8 Zoll) vorhanden sein. Eine zugelassene Rohrleitung von 9,5 mm (3/8 Zoll) ist für Längen unter 6,1 m zulässig, wenn es die örtlichen Bei Längen über 6,1 m sollte eine größere Leitung und ein Vorschriften und der Gaslieferant zulassen.
  • Page 83 Elektrische Anforderungen ENTLÜFTUNGSSYSTEM Anforderungen an das Entlüftungssystem ACHTUNG Brandgefahr Verwenden Sie einen Abluftkanal aus stabilem Metall. Verwenden Sie keinen Abluftkanal aus Kunststoff. Verwenden Sie keinen Abluftkanal aus Metallfolie. Befolgen Sie unbedingt diese Anweisungen. Andernfalls besteht die Gefahr tödlicher Verletzungen Es ist eine abgesicherte Stromversorgung 120 Volt, 60 oder Brandgefahr.
  • Page 84 Ablufthauben: Ebenes Entlüftungssystem Sie müssen sich mindestens 305 mm (12 Zoll) vom Boden bzw. von allen Objekten entfernt befinden, welche den Empfohlene Abluftinstallationen Luftaustritt blockieren können (wie beispielsweise Blumen, Steine, Büsche oder Schnee). Typische Entlüftungsinstallation, die den Trockner von der Empfohlene Konstruktionen: Rückseite entlüften.
  • Page 85 Alternative Installationen für geringe Freiräume um das Gerät Sondervorkehrungen für Installationen in Wohnmobilen: Abluftsysteme gibt es in vielen Varianten. Wählen Sie den Typ, Die Entlüftungsöffnung muss sicher an einem nicht brennbaren der für Ihre Installation am besten geeignet ist. Es sind zwei Strukturteil des Wohnmobils befestigt werden und darf nicht Installationen mit geringen Freiräume um das Gerät abgebildet.
  • Page 86: Gasanschluss Herstellen

    Entlüftungssystem – Tabelle GASANSCHLUSS HERSTELLEN (Nur Modelle mit langem Entlüftungssystem) Schließen Sie die Gasversorgung Anzahl von 90° Entlüftungsele- Ablufthauben, am Trockner an Krümmern oder ment, Typ kastenförmig/ Winkelelementen mit Be-/ Entlüftungsschlitzen oder gewinkelt Starres Metall 36,6 m Konischer Nicht- Starres Metall 33,5 m Anschluss, Konischer...
  • Page 87: Entlüftungs Anschliessen

    ENTLÜFTUNG ANSCHLIESSEN TROCKNER NIVELLIEREN Schließen Sie die Entlüftung am Trockner nivellieren Abluftauslass an Prüfen Sie die korrekte Nivellierung des Trockners von Seite zu Seite. Vorn vorn nach hinten wiederholen. HINWEIS: Der Trockner muss ganz gerade stehen, damit das System zur Erfassung der Feuchtigkeit korrekt funktioniert. Verwenden Sie eine Klemmschelle von 102 mm (4 Zoll) und schließen Sie die Entlüftungsleitung an den Abluftauslass in Ihrem Trockner an.
  • Page 88: Installation Des Netzkabels

    Netzkabel sichern (bei einigen Modellen) WICHTIG: Diese Arbeiten dürfen nur von einem autorisierten Kundendienst der Whirlpool Corporation ausgeführt werden. Sichern Sie das Netzkabel, indem Sie es in den Anschluss an der Kabelverriegelung einsetzen. Setzen Sie die Abdeckung der Kabelverriegelung auf und drücken Sie darauf, bis sie einrastet.
  • Page 89: Türanschlag Wechseln (Optional)

    TÜRANSCHLAG WECHSELN Heben Sie die Tür von den oberen (OPTIONAL) Schrauben ab HINWEIS: Ein magnetisierter Schraubenzieher ist hilfreich. Legen Sie ein Handtuch auf den Heben Sie die Tür an, bis sich die oberen Schrauben Trockner im Trocknergehäuse im größeren Abschnitt der Scharnieraussparung befinden.
  • Page 90 Bringen Sie die Türscharniere an Setzen Sie die Türverriegelung, die Blende und den Stopfen um Verriegelungshaken Stopfen und Blende Entfernen Sie den Türverriegelungshaken, die Blende und den Stopfen von der Innenseite der Innentür, indem Sie darauf drücken und sie herausziehen bzw. herausschieben. Setzen Sie den Türverriegelungshaken, die Blende und den Stopfen auf den entsprechenden gegenüber liegenden Seiten ein.
  • Page 91: Fehlerbehebung

    Entfernen Sie die Stopfen Prüfen Sie die Ausrichtung aus den Scharnieröffnungen des Türanschlags Entfernen Sie vorsichtig mit einem kleinen Schraubenzieher mit flacher Klinge die 4 Stopfen aus den Scharnieröffnungen auf der linken Seite des Trocknergehäuses. Versetzen Sie Schließen Sie die Tür und prüfen Sie, dass der Türanschlag die Stopfen in die Scharnieröffnungen auf der gegenüber korrekt auf den Türverriegelungshaken ausgerichtet ist.
  • Page 92 ™ © 2016 Whirlpool. All rights reserved. ™ © 2016 Whirlpool. Tous droits réservés. ™ © 2016 Whirlpool. Todos los derechos reservados. ™ © 2016 Whirlpool. Tutti i diritti riservati. W10849532B ™ © 2016 Whirlpool. Alle Rechte vorbehalten. 09/16...
  • Page 93 W10849532B 09/16 .‫. جميع الحقوق محفوظة‬Whirlpool 2016 © ™...
  • Page 95 ‫فك سدادات فتحات المفصالت وانقلها‬ ‫افحص محاذاة ترباس الباب‬ ‫استخدم مفكا صغيرا مسطح النصل إلزالة 4 سدادات لفتحة المفصالت برفق من على‬ ‫الجانب األيسر من خزانة المجفف. انقل السدادات إلى فتحات المفصالت على الجانب‬ .‫المعاكس لخزانة المجفف‬ ‫أغلق الباب، وتأكد أن الترباس محاذ لفتحته. إذا تطلب األمر، أزلق الترباس لليسار أو‬ .‫اليمين...
  • Page 96 ‫ركب مفصالت الباب‬ ‫حو ِّ ل مقبض الباب/الحواف والقابس‬ ‫المقبض والحافة‬ ‫القابس‬ ‫فك ترباس الباب والحافة والسدادة من الجزء الداخلي للباب بالضغط والسحب/الدفع. ضع‬ .‫ترباس الباب والحافة والسدادة على الجانب المعاكس الذي كان موجودا فيه‬ ‫أدر الباب الخارجي‬ ‫أعد تركيب مفصالت الباب على باب المجفف بحيث يصبح الجزء األكبر من الفتحة في‬ .‫أسفل...
  • Page 97 )‫عكس تأرجح الباب (اخياري‬ ‫فك البراغي العلوية للباب‬ .‫مالحظة: سيكون استخدام مفك ممغنط مفيدا‬ ‫ضع فوطة على المجفف‬ ‫ارفع الباب حتى تصبح البراغي العلوية لخزانة المجفف في الجزء األكبر من فتحة‬ )‫المفصلة. اسحب الباب لألمام بعيدا عن البراغي. اضبط الباب (المقبض الجانبي أعلى‬ .‫على...
  • Page 98 ‫تركيب كابل الطاقة‬ ‫صل كابل الطاقة‬ )‫(في بعض الموديالت‬ ‫هام: يجب تنفيذ هذا اإلجراء فقط باالستعانة بفني الخدمة المعتمد من‬ .Whilrpool Corporation ،‫اربط كابل الطاقة بوضع التوصيل على قفل كابل الطاقة. ضع غطاء قفل كابل الطاقة‬ ‫وادفعه حتى ينشبك. تأكد أن وصلة كابل الطاقة موضوعة على قفل الكابل، وأن قفل الكابل‬ .‫ينشبك...
  • Page 99 ‫صل المأخذ‬ ‫قم بتسوية المجفف‬ ‫قم بتسوية المجفف‬ ‫صل المأخذ على مخرج التصريف‬ .‫اضبط مستوى المجفف من جانب إلى جانب. كرر اإلجراء من األمام إلى الخلف‬ .‫مالحظة: يجب أي يكون المجفف مستويا لكي يعمل نظام حساس الرطوبة بطريقة صحيحة‬ ‫باستخدام مشبك 201 ملم (4")، صل المأخذ بمخرج التصريف في المجفف. في حالة‬ ‫التوصيل...
  • Page 100 ‫مخطط نظام المأخذ‬ ‫تنفيذ وصلة الغاز‬ )‫(فقط الموديالت ذات المأخذ الطويل‬ 90 ‫عدد االنحناءات بـ‬ ‫صل إمداد الغاز بالمجفف‬ ‫أغطية صندوق/أفقية أو بزاوية‬ ‫نوع المأخذ‬ ‫درجة أو الكيعان‬ )‫6.63 م (021 قدم‬ ‫معدني صلب‬ )‫5.33 م (011 قدم‬ ‫معدني صلب‬ )‫5.03 م...
  • Page 101 :‫اشتراطات خاصة للتركيب في المنازل المتنقلة‬ .‫انقل التركيبات بالتناوب في حالة الخلوص القريب‬ ،‫يجب ربط مأخذ التصريف ربطا آمنا إلى جزء غير قابل لالشتعال من هيكل المنزل المتنقل‬ ‫إن أنظمة المآخذ متنوعة. اختر الفئة المناسبة للتركيب المالئم لك. ي ُعرض تركيبان بخلوص‬ .‫ويجب...
  • Page 102 :‫أغطية التصريف‬ ‫نظام فتحات المآخذ المخططة‬ ‫يجب أن تكون على األقل بمسافة 503 ملم (21") من األرض أو أي شيء آخر قد يسد‬ ■ .)‫التصريف (مثل الزهور أو الصخور أو الشجيرات أو الثلج‬ ‫التركيبات الموصى بها للتصريف‬ :‫األنماط الموصى بها‬ .‫تقوم...
  • Page 103 ‫المتطلبات الكهربائية‬ ‫فتحات المآخذ‬ ‫متطلبات فتحات المآخذ‬ ‫مطلوب تيار متردد فقط 021 فولت، 06 هرتز، إمداد كهربائي مزود بمنصهر 51 أو‬ ■ ‫02 أمبير. ننصح باستخدام منهصر لتأخير الوقت أو قاطع دائرة لتأخير الوقت. ي ُنصح‬ :‫تحذير‬ .‫لخفض خطر نشوب حريق، يجب أن يتجه تصريف هذا المجفف إلى الخارج‬ .‫أيضا...
  • Page 104 ‫أنبوب غاز المجفف‬ ‫خط اإلمداد بالغاز‬ ‫إن أنبوب الغاز الذي يخرج من مؤخرة المجفف له أنبوب بأسنان ذكر مقاس 5.9 ملم‬ .)"2/1( ‫ مقاس 31 ملم‬NPT ‫نوصى باستخدام أنبوب‬ ■ ■ .)"8/3( ‫أنابيب بمقاس 5.9 ملم (3/8") مقبولة لألطوال األقل من 1.6 متر (02 قدم) إذا‬ ■...
  • Page 105 ‫التوصيالت الكهربائية للمجفف الذي يعمل بالغاز‬ ‫ركب سيقان التثبيت‬ ‫متطلبات إمدادات الغاز‬ ‫جهز المجفف بسيقان التسوية‬ ‫لتجنب إتالف األرضية استخدم قطع كبيرة ومستوية من الورق المقوى من صندوق‬ ‫المجفف؛ ضعها تحت كامل الحافة الخلفية للمجفف. اقبض بإحكام على جسم المجفف‬ .‫(وليس...
  • Page 106 ‫)، من المقرر أن تكون معاوقة‬EC/2004/108( ‫ األوروبي‬EMC ‫مالحظة: طبقا لتوجيه‬ ‫خلوص التركيب لمنطقة الوصول أو الغرفة‬ + ‫نظام إمداد الكهرباء القصوى الذي سوف يتم توصيل المجفف به بقيمة 450.0 أوم‬ .‫األبعاد المبينة هي المسافات الدنيا المسموح بها‬ .‫430.0 أوم‬ .‫■...
  • Page 107 .‫■ دائرة منفصلة بقدرة 03 أمبير للمجففات التي تعمل بالكهرباء‬ ‫943 ملم‬ " ‫875 ملم‬ )" .‫■ دائرة منفصلة بقدرة 51 أو 02 أمبير للمجففات التي تعمل بالغاز‬ ‫507 ملم‬ (349 mm) ‫507 ملم‬ " " )" )" " ‫■ إذا كنت تستخدم سلك إمداد الطاقة استخدم مأخذ كهربائي مؤرض موجود على بعد‬ )"...
  • Page 108 ‫متطلبات التركيب‬ :‫األدوات المطلوبة لتركيبات الغاز‬ ‫األدوات واألجزاء‬ .‫اجمع األدوات واألجزاء المطلوبة قبل بدء التركيب‬ :‫األدوات المطلوبة لجميع التركيبات‬ ‫مفتاح أنابيب 302 ملم أو 452 ملم‬ ‫مفتاح قابل للتعديل 302 ملم أو 452 ملم‬ )"10 ‫(8" أو‬ )‫(8" أو 01") (لتوصيالت الغاز‬ #2 ‫مفك...
  • Page 109 ‫المواصفات‬ ‫ت ُ باع هذه الوحدات في مناطق متعددة ذات متطلبات مختلفة من حيث استطاعة القياس. وفيما‬ :‫استطاعة الكتان الجاف‬ :‫يلي بعض من أشكال القياس الصالحة المبينة على هذا المنتج‬ )‫51 كغ (33 ليبرة‬ ‫استطاعة الكتان الجاف: وهو مقياس الوزن الذي يبين حجم الحمولة األقصى الذي يمكن‬ .‫تحميله...
  • Page 110 ‫حفاظا على سالمتك‬ .‫1. ال تستخدم البنزين أو المواد سريعة االشتعال أو تخزنها في هذا الجهاز أو بالقرب منه‬ .‫2. ال ترش الرذاذ (األيروسول) بالقرب من هذا الجهاز أثناء تشغيله‬ .‫3. ال تعدل هذا الجهاز‬ IMPORTANT SAFETY INSTRUCTIONS ‫إرشادات هامة للسالمة‬ :‫تحذير‬...
  • Page 111 ‫سالمة المجفف‬...
  • Page 112 ‫تعليمات تركيب المجفف‬ ‫الموديالت العريضة 737 ملم (92") - التي تعمل بالغاز والكهرباء‬ ‫جدول المحتويات‬ 13..................‫تنفيذ وصلة الغاز‬ 2..................‫سالمة المجفف‬ 14..................‫صل المأخذ‬ 4..................‫المواصفات‬ 14................‫قم بتسوية المجفف‬ 5..................‫متطلبات التركيب‬ 15................‫تركيب كابل الطاقة‬ 7................‫توصيل المجفف بالكهرباء‬ 15..............‫أكمل القائمة المرجعية للتركيب‬ 8.................‫ركب...

Ce manuel est également adapté pour:

3lwed4705fw3lwed4815fw

Table des Matières