
Manuels Connexes pour Airwell CDM Série


Sommaire des Matières pour Airwell CDM Série
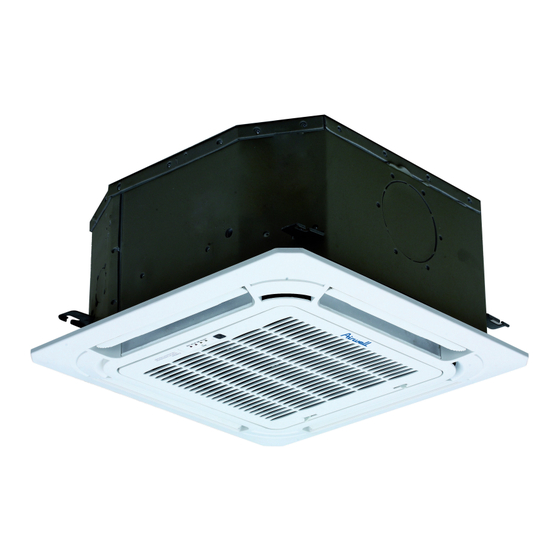
- Page 1 CDM - TYPE CASSETTE INSTALLATION MANUAL INSTALLATION MANUAL ENGLISH INSTALLATIEHANDLEIDING NEDERLANDS MANUEL D'INSTALLATION FRANÇAIS...
-
Page 2: Correct Disposal Of This Product
This product has been det ermined t o be in compliance wit h t he Low Volt age Direct ive (2014/35/EU), and t he Elect romagnet ic Compat ibilit y Direct ive ( 2014/30/EU) of t he European Union. Correct Disposal of This Product (Waste Electrical &... -
Page 3: Table Des Matières
CONTENTS 1. PREPARING FOR INSTALLATION ······································································ Safety Percautions ························································································· Accessories ·································································································· 2. INDOOR UNIT INSTALLATION ··········································································· Installation Site Choosing ················································································ Install The Suspension Bolts ············································································ Handing The Indoor Unit ·················································································· Install The Drain Pipe ····················································································· Install The Panel ···························································································· 3. OUTDOOR UNIT INSTALLATION ······································································... -
Page 4: Preparing For Installation
1. PREPARING FOR INSTALLATION 1.1 SAFETY PRECAUTIONS Installing, starting up, and servicing air-conditioning equipment can be hazardous due to system ressures, electrical components, and equipment location (roofs, elevated structures, etc.). Only trained, qualified installers and service mechanics should install, start-up, and serve this equipment. When working on the equipment, observe precautions in the literature and on tags, stickers, and labels attached to the equipment. -
Page 5: Accessories
1. PREPARING FOR INSTALLATION WARNING Never modify this unit by removing any of the safety guards or bypassing any of the safety interlock switches. In order to avoid a hazard due to inadvertent resetting of the thermal cut-out, this appliance must not be supplied through an external switching device, such as a timer, or connected to a circuit that is regularly switched on and off by the utility. -
Page 6: Indoor Unit Installation
1. PREPARING FOR INSTALLATION The following accessories are related to remote controller. Name of Accessories Q‘ty(pc) Shape Remote Controller To remote control the air conditioner Remote controller holder To hold the remote controller on the wall Tapped screw To fix the remote controller holder For remote controller Battery Note: The accessories related to remote controller will be unavailable for the models with wired... - Page 7 2. INDOOR UNIT INSTALLATION SPACE REQUIREMENT FOR INDOOR UNIT Clearance from the wall or other obstacles Unit: mm The size of Outline dimension Connecting port Connecting port Connecting port Connecting port of refrigerant pipe of drain pipe of refrigerant pipe of drain pipe 600mm(Ceiling hole) 545(Hook-location)
-
Page 8: Install The Suspension Bolts
2. INDOOR UNIT INSTALLATION CAUTION It is recommended to install the Y joint before installing the indoor unit When moving the unit during or after unpacking, make sure to lift by holding its hooks. Do not exert any pressure on other parts, especially the refrigerant piping and drain piping. 2.2 INSTALL THE SUSPENSION BOLTS 2.2.1 Mark the spots on the ceiling where you want to install the indoor unit. -
Page 9: Install The Drain Pipe
2. INDOOR UNIT INSTALLATION 2.4 INSTALL THE DRAIN PIPE Remove the cover of the drain hose connection port Insert the flexible hose (field supply,I.D.:Φ25) to the drain hose port. Fix it to the indoor unit with pipe clamp (field supply) securely. Install the flexible hose to the PVC water pipe securely with PVC adhesive. -
Page 10: Install The Panel
2. INDOOR UNIT INSTALLATION 2.5 INSTALL THE PANEL CAUTION Before installation of the panel, be sure to remove the cushion for transportation between the fan and orifice. Install the panel according to below instructure after piping and wiring work has completed. Joint the connecting sections of panel, ceiling surface and indoor unit closely. -
Page 11: Outdoor Unit Installation
3. OUTDOOR UNIT INSTALLATION 3.1 INSTALLATION SITE CHOOSING OUTDOOR UNIT ■ Where it is out of rain or direct sunlight. ■ Where it is well-ventilated and free from obstacles near the air inlet and air outlet. ■ Where does not increase the operating noise or vibration of the outdoor unit. ■... -
Page 12: Space Requirement For Outdoor Unit
3. OUTDOOR UNIT INSTALLATION 3.3 SPACE REQUIREMENT FOR OUTDOOR UNIT Single Unit Installation (Wall or obstacle) Air inlet >30cm Maintain channel Air inlet Fix with bolt >60cm Air outlet Parallel connect the front with rear sides. Parallel connect the two units or above unit:cm unit:cm >200... -
Page 13: Refrigerant Piping Work
4. REFRIGERANT PIPING WORK CAUTION Check if the height difference between indoor unit & outdoor unit and the total length of refrigerant pipe meet system requirement. Refrigerant piping work follows the indoor unit and outdoor unit installation, connect the pipe at the indoor side first, then the outdoor side. -
Page 14: Refrigerant Pipe
4. REFRIGERANT PIPING WORK 4.3 REFRIGERANT PIPE Allowable Max. Height Charge less Additional charge Model Liquid Side Gas Side pipe length (m) difference (m) length (m) per meter (R32) 12 g/m Φ6.35mm Φ9.52mm 12 g/m Φ6.35mm Φ12.7mm NOTE When the pipe length is over 5m, the additional refrigerant should be added according to the piping length. -
Page 15: Wiring
5. WIRING CAUTION All the electrical connections must be carried out by qualified installers and all the wirings must be connected according to the wiring diagram. Make ground connection prior to any other electrical connections. All power sources must be turned off before wiring work and do not turn on the power until you have made sure all the wirings have been safety checked. -
Page 16: Final Check And Trial Operation
6. FINAL CHECK AND TRIAL OPERATION 6.1 FINAL CHECK LIST To complete the installation, perform the following checks before the trial operation. Strength of the installation site for both indoor and outdoor sides, confirm no obstruction of the unit air outlet or return. - Page 17 Dit product voldoet aan de richtlijn voor laagspanning (2006/95/EG), en de richtlijn voor elektromagnetische compatibiliteit (2004/108/EG) van de Europese Unie. Correcte afvoer van dit product (afgedankte elektrische en elektronische apparatuur) (Wanneer deze airconditioner wordt gebruikt in Europa, moeten de volgende richtlijnen worden gevolgd) - Deze markering, zichtbaar op het product of de bijbehorende documentatie, geeft aan dat afgedankte elektrische en elektronische apparatuur (WEEE als in richtlijn 2012/19/EC) niet door het gewone huisvuil...
- Page 18 INHOUD 1. DE INSTALLATIE VOORBEREIDEN ................3 1.1 Veiligheidsmaatregelen ....................3 1.2 Accessoires ........................4 2. DE BINNENUNIT INSTALLEREN ................5 2.1 De installatielocatie bepalen ..................5 2.2 De ophangbouten plaatsen ................... 7 2.3 De binnenunit ophangen ....................7 2.4 De afvoerbuis installeren ....................8 2.5 Het paneel installeren ....................
-
Page 19: De Installatie Voorbereiden
1. DE INSTALLATIE VOORBEREIDEN 1.1 VEILIGHEIDSMAATREGELEN Het installeren en opstarten van en het onderhoud plegen aan airconditioningapparatuur kan gevaarlijk zijn als gevolg van systeemdruk, elektrische componenten en de locatie van de apparatuur (daken, verhoogde constructies enz.). Uitsluitend getrainde en gekwalificeerde installateurs en servicemonteurs mogen deze apparatuur installeren, opstarten en onderhouden. -
Page 20: Accessoires
1. DE INSTALLATIE VOORBEREIDEN WAARSCHUWING Verander deze unit nooit door een van de veiligheidsvoorzieningen te verwijderen of een van de vergrendelingsschakelaars te omzeilen. Om te voorkomen dat de thermische beveiliging onopzettelijk wordt gereset, mag dit apparaat niet worden gevoed via een extern schakelapparaat, zoals een timer, of worden aangesloten op een stroomkring die regelmatig door het hulpprogramma wordt aan- en uitgezet. -
Page 21: De Binnenunit Installeren
1. DE INSTALLATIE VOORBEREIDEN De volgende accessoires horen bij de afstandsbediening. Benaming accessoires Aantal(pc) Vorm Gebruik Afstandsbediening Voor de afstandsbediening van de airconditioner Houder afstandsbediening Om de afstandsbediening aan de wand te hangen Om de houder van de afstandsbediening te beves- Tapschroef tigen Batterij... - Page 22 2. DE BINNENUNIT INSTALLEREN BENODIGDE RUIMTE VOOR BINNENUNIT Vrije ruimte tussen de wand en andere obstakels Eenheid: mm De omtrek Aansluitpoort van Aansluitpoort van koelmiddelleiding Aansluitpoort van Aansluitpoort van koelmiddelleiding afvoerleiding afvoerleiding Paneel Plafond Uitlaat Uitlaat Inlaat 600mm(gat in plafond) Vloer 545 (haaklocatie) 570 (body van het apparaat)
-
Page 23: De Binnenunit Ophangen
2. DE BINNENUNIT INSTALLEREN VOORZICHTIG Het wordt aanbevolen om eerst het Y-stuk te installeren voordat u de binnenunit installeert. Als u de unit tijdens of na het uitpakken verplaatst, zorg er dan voor dat u hem bij zijn haken optilt. Oefen geen druk uit op andere onderdelen, vooral niet op de koelmiddelleiding en de afvoerleiding. -
Page 24: De Afvoerbuis Installeren
2. DE BINNENUNIT INSTALLEREN 2.4 DE AFVOERBUIS INSTALLEREN Verwijder de dop van de aansluitpoort van de afvoerslang Voer de flexibele slang (in de handel verkrijgbaar, binnendiameter Ø25) in de aansluitpoort van de afvoerslang. Zet deze met de buisklem (niet meegeleverd) goed vast op de binnenunit. Sluit de flexibele slang op de PVC waterleidingbuis stevig aan met PVC-kleefmiddel. -
Page 25: Het Paneel Installeren
2. DE BINNENUNIT INSTALLEREN 2.5 HET PANEEL INSTALLEREN VOORZICHTIG Voordat u het paneel installeert dient u zich ervan te verzekeren dat het transportkussen tussen ventilator en de opening is verwijderd. Installeer het paneel conform de navolgende instructie nadat u het drainage- en bedradingswerk heeft voltooid. -
Page 26: De Buitenunit Installeren
3. DE BUITENUNIT INSTALLEREN 3.1 DE INSTALLATIELOCATIE BEPALEN BUITENUNIT Waar geen regen of direct zonlicht bij kan. Waar het goed geventileerd is en vrij van obstakels in de buurt van de luchtinlaat en de ontluchtingsopening. Waar het geluidsniveau of de trillingen van de buitenunit in bedrijf niet worden versterkt. Waar geen afwateringsproblemen ontstaan door afvoerwater. -
Page 27: Benodigde Ruimte Voor Buitenunit
3. DE BUITENUNIT INSTALLEREN 3.3 BENODIGDE RUIMTE VOOR BUITENUNIT Installatie van één unit (Muur of obstakel) Luchtinlaat Onderhoudskanaal Met bout vastzetten Luchtinlaat Luchtuitlaat Sluit de twee units evenwijdig aan elkaar Sluit de voor- en achterkant evenwijdig aan zoals hierboven aan elkaar aan. eenheid:cm eenheid:cm 3.4 DE BUITENUNIT INSTALLEREN... - Page 28 4. KOELMIDDELLEIDING VOORZICHTIG Controleer of het hoogteverschil tussen de binnen- en buitenunit en de totale lengte van de koelmiddelleiding kloppen met de systeemvereisten. Het werk aan de koelmiddelleiding komt na de installatie van de binnen- en buitenunit; sluit de leiding eerst aan de binnenzijde aan, dan aan de buitenzijde.
-
Page 29: Koelmiddelleiding
4. KOELMIDDELLEIDING 4.3 KOELMIDDELLEIDING Max. Minder Extra toevoer Toegestane Model Vloeistofzijde Gaszijde hoogteverschil vullen per meter buislengte (m) lengte (m) (R32) Ø 6,35mm Ø 9,52mm 12 g/m Ø 6,35mm Ø 12,7mm 12 g/m OPMERKING Als de lengte van de leiding meer bedraagt dan 5m, moet er extra koelmiddel worden bijgevuld, al naar gelang de N.B. -
Page 30: Bedrading
5. BEDRADING VOORZICHTIG Alle elektrische aansluitingen dienen door gekwalificeerde installateurs te worden uitgevoerd en alle bedrading dient te worden aangesloten volgens het elektrische schema. Voordat u welke andere elektrische aansluitingen uitvoert, dient u eerst te aarden. Voordat u werk aan de bedrading uitvoert, dienen alle voedingsbronnen uitgeschakeld te zijn en u mag de stroom pas inschakelen als u zich ervan verzekerd heeft dat de veiligheid van alle bedradingen is gecontroleerd. -
Page 31: Checklist Voor Laatste Controle
6. LAATSTE CHECK EN TESTBEDRIJF 6.1 CHECKLIST VOOR LAATSTE CONTROLE Ter afronding van de installatie dient u voorafgaand aan het testbedrijf de volgende controles uit te voeren. Sterkte van de installatielocatie voor zowel de binnen- als de buitenunit, de bevestiging dat er geen sprake is van blokkade van de luchtuitlaat of -inlaat van de unit. - Page 32 Ce produit a été conçu en conformité avec la directive "Basse Tension" (2014/35/CE) et la directive sur la compatibilité électromagnétique (2014/30/CE) de l'Union eur opéenne. Élimination appropriée de ce produit (appareils électriques et électroniques usagés) (Lorsque vous utilisez ce climatiseur dans les pays européens, il convient d'appliquer les directives suivantes) - Le symbole apposé...
- Page 33 TABLE DES MATIÈRES 1. PRÉPARATION DE L'INSTALLATION.................3 1.1 Consignes de sécurité .....................3 1.2 Accessoires ........................4 2. INSTALLATION DE L'UNITÉ INTÉRIEURE ..............5 2.1 Choix de l'emplacement d'installation ................5 2.2 Installation des boulons de suspension ................7 2.3 Suspension de l'unité intérieure ..................7 2.4 Installation du tuyau d'évacuation ..................8 2.5 Installation du panneau ....................9 3.
-
Page 34: Préparation De L'installation
1. PRÉPARATION DE L'INSTALLATION 1.1 CONSIGNES DE SÉCURITÉ L'installation, la mise en service et l'entretien des équipements de climatisation peuvent s'avérer dangereux en raison de la pression du système, des composants électriques et de l'emplacement des équipements (toits, structures surélevées, etc.). Seul un installateur ou un technicien qualifié... -
Page 35: Accessoires
1. PRÉPARATION DE L'INSTALLATION AVERTISSEMENT Ne modifiez pas cet appareil en retirant une protection ou en contournant les dispositifs de verrouillage de sécurité. Pour éviter tout risque dû à la réinitialisation accidentelle du coupe-circuit thermique, cet appareil ne doit pas être alimenté par un dispositif de commutation externe, comme un temporisateur, ni connecté... -
Page 36: Installation De L'unité Intérieure
1. PRÉPARATION DE L'INSTALLATION Les accessoires suivants sont associés à la télécommande. Nom de l'accessoire Qté (pcs) Aspect Utilisation Télécommande Commande à distance du climatiseur Support de la télécommande Fixation murale pour la télécommande Vis taraudée Fixation du support de la télécommande Pile Alimentation de la télécommande Remarque : Les accessoires associés à... -
Page 37: Dimensions Globales
2. INSTALLATION DE L'UNITÉ INTÉRIEURE ESPACE REQUIS POUR L'UNITÉ INTÉRIEURE Espace libre par rapport au mur ou d'autres obstacles Unité : mm Dimensions globales Port de raccordement de la conduite de produit frigorigène Port de raccordement de la Port de raccordement Port de raccordement du tuyau d'évacuation conduite de produit frigorigène... -
Page 38: Installation Des Boulons De Suspension
2. INSTALLATION DE L'UNITÉ INTÉRIEURE ATTENTION Il est recommandé d'installer le joint en Y avant l'unité intérieure Lorsque vous manipulez l'appareil en le sortant de son emballage et par la suite, assurez-vous que vous le soulevez en le prenant par ses accroches. N'exercez aucune pression sur les autres parties, en particulier sur les tuyaux de produit frigorigène et d'évacuation. -
Page 39: Installation Du Tuyau D'évacuation
2. INSTALLATION DE L'UNITÉ INTÉRIEURE 2.4 INSTALLATION DU TUYAU D'ÉVACUATION Retirez le couvercle du port de raccordement de tuyau de vidange Insérez le tuyau flexible (à installer sur place, D.I :Ø25) dans le port du tuyau de vidange. Fixez-le fermement à l'unité intérieure avec le collier de serrage (à installer sur place). Installez solidement le tuyau flexible sur la conduite d'eau PVC avec de l'adhésif PVC. -
Page 40: Installation Du Panneau
2. INSTALLATION DE L'UNITÉ INTÉRIEURE 2.5 INSTALLATION DU PANNEAU ATTENTION Avant d'installer le panneau, veillez à retirer le tampon pour le transport situé entre le ventilateur et l'orifice. Installez le panneau comme indiqué ci-dessous, après avoir effectué les travaux de tuyauterie et de câblage. -
Page 41: Installation De L'unité Extérieure
3. INSTALLATION DE L'UNITÉ EXTÉRIEURE 3.1 CHOIX DE L'EMPLACEMENT D'INSTALLATION UNITÉ EXTÉRIEURE À l'abri de la pluie et de la lumière directe du soleil. Emplacement bien aéré et libre de tout obstacle qui puisse gêner l'entrée et la sortie d'air. Emplacement qui n'augmente pas les bruits de fonctionnement ou les vibrations de l'unité... -
Page 42: Espace Requis Pour L'unité Extérieure
3. INSTALLATION DE L'UNITÉ EXTÉRIEURE 3.3 ESPACE REQUIS POUR L'UNITÉ EXTÉRIEURE Installation d'une seule unité (Mur ou obstacle) Entrée d'air Canal à maintenir Fixer avec Entrée un boulon d'air Sortie d'air Raccordement parallèle de deux unités Raccordez les côtés avant et arrière en ou plus parallèle unité... -
Page 43: Travaux De Tuyauterie Pour Le Produit Frigorigène
4. TRAVAUX DE TUYAUTERIE POUR LE PRODUIT FRIGORIGÈNE ATTENTION Vérifiez si la différence de hauteur entre l'unité intérieure et l'unité extérieure et la longueur totale du tuyau de produit frigorigène répondent aux exigences du système. Les travaux de tuyauterie pour le produit frigorigène suivent l'installation des unités intérieure et extérieure. -
Page 44: Conduite De Produit Frigorigène
4. TRAVAUX DE TUYAUTERIE POUR LE PRODUIT FRIGORIGÈNE 4.3 CONDUITE DE PRODUIT FRIGORIGÈNE Charge Longueur de Différence Longueur supplémentaire Modèle Côté liquide Côté gaz tuyau autorisée de hauteur sans par mètre max. (m) charge (m) (R32) Ø6,35 mm Ø9,52 mm 12 g/m Ø6,35 mm Ø12,7 mm... -
Page 45: Câblage
5. CÂBLAGE ATTENTION Tous les raccordements électriques doivent être effectués par des installateurs qualifiés et tous les câbles doivent être connectés selon le schéma de câblage. Effectuez la mise à la terre avant tout autre branchement électrique. Toutes les sources d'alimentation doivent être éteintes avant le travail de câblage. Ne remettez l'alimentation en marche qu'une fois que vous avez effectué... -
Page 46: Vérification Finale Et Test De Fonctionnement
6. VÉRIFICATION FINALE ET TEST DE FONCTIONNEMENT 6.1 LISTE DE VÉRIFICATION FINALE Pour terminer l'installation, effectuez les vérifications suivantes avant le test de fonctionnement. Solidité de l'emplacement d'installation pour les deux unités, intérieure et extérieure. Non-obstruction de la sortie ou du retour d'air de l'unité. Étanchéité... - Page 47 10, rue du Fort de Saint Cyr, 78180 Montigny le Bretonneux tel : +33 (0)1 76 21 82 95 FROM MONDAY to FRIDAY from 9 am to 12:30 pm and from 2 to 5 pm...