Publicité

Les langues disponibles

Les langues disponibles

Liens rapides

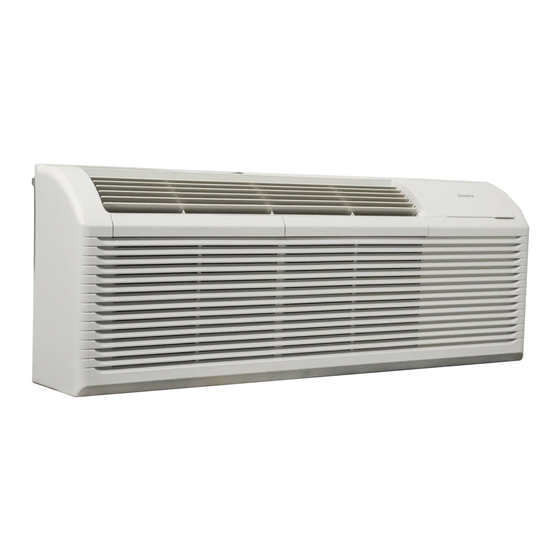
THROUGH-THE-WALL AIR CONDITIONER
Owner's Manual.............................1 - 11
CLIMATISEUR MURAL
Manual du propriétaire.................12 - 22
AIRE ACONDICIONADO DE PARED
Manual del propietario..................23 - 33
www.Danby.com
DANBY PRODUCTS LIMITED, ONTARIO, CANADA N1H 6Z9
DANBY PRODUCTS INC., FINDLAY, OHIO, USA 45840
OWNER'S MANUAL
MANUEL DU PROPRIÉTAIRE
MANUAL DEL PROPIETARIO
MODEL • MODÈLE • MODELO
DPTA090HEB1WDB
DPTA120HEB1WDB
DPTA150HEB1WDB
2019.12.11

Publicité

Table des Matières
loading

Sommaire des Matières pour Danby DPTA090HEB1WDB

  • Page 1 MODEL • MODÈLE • MODELO CLIMATISEUR MURAL DPTA090HEB1WDB Manual du propriétaire....12 - 22 DPTA120HEB1WDB DPTA150HEB1WDB AIRE ACONDICIONADO DE PARED Manual del propietario....23 - 33 DANBY PRODUCTS LIMITED, ONTARIO, CANADA N1H 6Z9 www.Danby.com DANBY PRODUCTS INC., FINDLAY, OHIO, USA 45840 2019.12.11...
  • Page 2: Need Help

    Welcome Welcome to the Danby family. We are proud of our quality products and we believe in dependable service. We suggest that you read this owner’s manual before plugging in your new appliance as it contains important operation information, safety information, troubleshooting and maintenance tips to ensure the reliability and longevity of your appliance.
  • Page 3: Grounding Instructions

    Important Safety Information READ AND FOLLOW ALL SAFETY INSTRUCTIONS ELECTRICAL REQUIREMENTS GROUNDING INSTRUCTIONS All wiring must comply with local and national This appliance must be grounded. Grounding codes and must be installed by a qualifi ed reduces the risk of electrical shock by providing an electrician.
  • Page 4: Dimensions

    INSTALLATION INSTRUCTIONS DIMENSIONS This appliance is 42 inches (106.7 cm) wide, 16 inches (40.8 cm) high and 23.9 inches (60.6 cm) deep. WALL SLEEVE All wall sleeves used to install the air conditioner must be in good structural condition and have a rear grille that securely attaches to the sleeve or the fl...
  • Page 5: Installation Instructions

    INSTALLATION INSTRUCTIONS DIP SWITCHES Dip switch controls are located behind the front panel through an opening below the control panel. Remove the front panel to access the dip switches. Dip switches are accessible without opening the control box. The appliance should be unplugged before making adjustments to the dip switches.
  • Page 6 INSTALLATION INSTRUCTIONS DIP SWITCH CONFIGURATIONS BY PANEL CONTROL 1. Turn off the appliance. 2. Press and hold the increase and decrease buttons at the same time for 3 seconds to activate the dip switch confi guration by panel control. 3. See the table below for dip switch confi gurations and functions by panel control. 4.
  • Page 7 INSTALLATION INSTRUCTIONS WALL THERMOSTAT TERMINAL PTAC Other Wall Thermostat Note: Using a wall thermostat is optional. Remove the two screws as shown and take the cover panel down. Important: Only trained, qualifi ed personnel should access the electrical panel on the appliance and install electrical accessories.
  • Page 8: Additional Requirements

    INSTALLATION INSTRUCTIONS FRONT DESK CONTROL ADDITIONAL REQUIREMENTS • Use 4-way terminal for heat pump connection Note: Using the front desk control is optional. only. The controller can handle a switch signal from • Wall thermostat must be heating changeover FC(L) and FC(N) input, called front desk control. 4-way valve.
  • Page 9: Control Panel

    OPERATING INSTRUCTIONS CONTROL PANEL OPERATING MODES 1. Remote control receiver There are three operating modes to choose from. Press the Mode Button repeatedly to choose the 2. Display Panel: Displays the set temperature. desired mode. The adjacent indicator light will When in fan mode, displays the ambient illuminate to show which mode has been selected.
  • Page 10: Care & Maintenance

    CARE & MAINTENANCE AIR FILTER CLEANING The air fi lter should be cleaned approximately every To avoid possible electric shock, ensure that the 2 weeks. The air fi lter may require more frequent appliance is unplugged before performing any cleaning if there is signifi cant dander or fur in the cleaning or maintenance.
  • Page 11 TROUBLESHOOTING Danby Consumer Care: 1-800-263-2629 Hours of operation: Monday to Thursday 8:30 am - 6:00 pm Eastern Standard Time Friday 8:30 am - 4:00 pm Eastern Standard Time Information in this manual is subject to change without notice. PROBLEM POSSIBLE CAUSE Appliance will not operate •...
  • Page 12 Nothing within this warranty shall imply that Danby will be responsible or liable for any spoilage or damage to food or other c...
  • Page 13: Besoin D'assistance

    Bienvenue Bienvenue à la famille Danby. Nous sommes fi ers de la qualité de nos produits et nous croyons en le service fi able. Nous vous suggérons de lire ce manual d’utilisation avant de brancher votre nouvel appareil car il contient des informations inportantes sur l’utilisation, la sécurité, le dépannage et la maintenance, afi...
  • Page 14: Lire Et Suivre Toutes Les Instructions De Sécurité

    Informations importantes de sécurité LIRE ET SUIVRE TOUTES LES INSTRUCTIONS DE SÉCURITÉ EXIGENCES ÉLECTRIQUES INSTRUCTIONS DE MISE À LA TERRE Tout le câblage doit être conforme aux codes locaux Cet appareil doit être mis à la terre. La mise à et nationaux et doit être installé...
  • Page 15 INSTRUCTIONS D’INSTALLATION DIMENSIONS Cet appareil mesure 42 pouces (106,7 cm) de largeur, 16 pouces (40,8 cm) de hauteur et 23,9 pouces (60,6 cm) de profondeur. DOUILLE MURALE Tous les manchons muraux utilisés pour installer le climatiseur doivent être en bon état structurel et dotés d’une grille arrière qui s’attache solidement au manchon ou à...
  • Page 16: Interrupteur Dip

    INSTRUCTIONS D’INSTALLATION INTERRUPTEUR DIP Les commandes du commutateur DIP sont situées derrière le panneau avant par une ouverture située sous le panneau de commande. Retirez le panneau avant pour accéder aux commutateurs DIP. Les commutateurs DIP sont accessibles sans ouvrir le boîtier de commande.
  • Page 17: Configurations De Dip Switch Par Commande De Panneau

    INSTRUCTIONS D’UTILISATION CONFIGURATIONS DE DIP SWITCH PAR COMMANDE DE PANNEAU 1. Éteignez l’appareil. 2. Appuyez simultanément sur les boutons d’augmentation et de diminution et maintenez-les enfoncés pendant 3 secondes pour activer la confi guration du commutateur DIP via le panneau de commande. 3.
  • Page 18 INSTRUCTIONS D’UTILISATION TERMINAL DE THERMOSTAT MURAL PTAC Autre Thermostat Mural Remarque: L’utilisation d’un thermostat mural est Retirez les deux vis comme indiqué et abaissez le facultative. panneau de protection. Important: Seul le personnel formé et qualifi é doit accéder au panneau électrique de l’appareil et installer les accessoires électriques.
  • Page 19: Exigences Supplémentaires

    INSTRUCTIONS D’UTILISATION COMMANDE DE BUREAU AVANT EXIGENCES SUPPLÉMENTAIRES • Utilisez un terminal à 4 voies pour le Remarque: l’utilisation du commande de bureau raccordement de la pompe à chaleur avant est facultative. uniquement. Le contrôleur peut gérer un signal de commutation •...
  • Page 20: Panneau De Contrôle

    INSTRUCTIONS D’UTILISATION PANNEAU DE CONTRÔLE MODES DE FONCTIONNEMENT 1. Panneau d’affi chage: Affi che la température Vous avez le choix entre trois modes de défi nie. En mode ventilateur, affi che la fonctionnement. Appuyez plusieurs fois sur le température ambiante. Pour modifi er l’échelle bouton Mode pour choisir le mode souhaité.
  • Page 21: Soins Et Entretien

    SOINS ET ENTRETIEN FILTRE À AIR NETTOYAGE Le fi ltre à air doit être nettoyé environ toutes les 2 Pour éviter tout risque d’électrocution, assurez-vous semaines. Le fi ltre à air peut nécessiter un nettoyage que l’appareil est débranché avant d’effectuer un plus fréquent s’il contient beaucoup de pellicules ou nettoyage ou une maintenance.
  • Page 22: Dépannage

    DÉPANNAGE Danby soins du consommateur: 1-800-263-2629 Heures d’ouverture: Lundi à Jeudi 8 h 30 à 18 h, heure normale de l’Est Vendredi de 8 h 30 à 16 h, heure normale de l’Est Les informations contenues dans ce manuel sont sujettes à modifi cation sans préavis.
  • Page 23 Aucune partie de la garantie ne prévoit implicitement que le fabricant sera tenu responsable des dommages subis par les aliments ou Nothing within this warranty shall imply that Danby will be responsible or liable for any spoilage or damage to food or other c ontents of this appliance, whether due d’autres types de contenu, qu’ils soient causés par la défectuosité...
  • Page 24 Bienvenido Bienvenido a la familia Danby. Estamos orgullosos de nuestros productos de calidad y creemos en un servicio confi able. Sugerimos que lea este manual del propietario antes de conectar el nuevo aparato ya que contiene información importante sobre la operación, información de seguridad, solución de problemas y consejos de mantenimiento para garantizar la fi...
  • Page 25 Informacion de Seguridad Importante LEA Y SIGA TODAS LAS INSTRUCCIONES DE SEGURIDAD REQUISITOS ELÉCTRICOS INSTRUCCIONES DE CONEXION A TIERRA Todo el cableado debe cumplir con los códigos Este aparato debe estar conectado a tierra. La locales y nacionales y debe ser instalado por puesta a tierra reduce el riesgo de descarga un electricista califi...
  • Page 26 INSTRUCCIONES DE INSTALACIÓN DIMENSIONES Este aparato tiene 42 pulgadas (106.7 cm) de ancho, 16 pulgadas (40.8 cm) de alto y 23.9 pulgadas (60.6 cm) de profundidad. MANGA DE PARED Todas las fundas de pared utilizadas para instalar el aire acondicionado deben estar en buenas condiciones estructurales y tener una rejilla trasera que se adhiera fi...
  • Page 27: Interruptores Dip

    INSTRUCCIONES DE INSTALACIÓN INTERRUPTORES DIP Los controles del interruptor dip se encuentran detrás del panel frontal a través de una abertura debajo del panel de control. Retire el panel frontal para acceder a los interruptores dip. Los interruptores dip son accesibles sin abrir la caja de control.
  • Page 28 INSTRUCCIONES DE OPERACIÓN CONFIGURACIONES DEL INTERRUPTOR DIP POR CONTROL DE PANEL 1. Apague el aparato. 2. Mantenga presionados los botones de aumento y disminución al mismo tiempo durante 3 segundos para activar la confi guración del interruptor dip mediante el control del panel. 3.
  • Page 29 INSTRUCCIONES DE OPERACIÓN TERMOSTAL DE TERMOSTATO DE PARED PTAC Otro termostato de pared Nota: El uso de un termostato de pared es opcional. Retire los dos tornillos como se muestra y baje el panel de la cubierta. Importante: Solo personal capacitado y califi cado debe acceder al panel eléctrico del electrodoméstico e instalar accesorios eléctricos.
  • Page 30 INSTRUCCIONES DE OPERACIÓN CONTROL DE ESCRITORIO DELANTERO REQUERIMIENTOS ADICIONALES • Use el terminal de 4 vías solo para la conexión Nota: El uso del control de escritorio delantero es de la bomba de calor. opcional. • El termostato de pared debe estar calentando la El controlador puede manejar una señal de válvula de cambio de 4 vías.
  • Page 31: Panel De Control

    INSTRUCCIONES DE OPERACIÓN PANEL DE CONTROL MODOS DE FUNCIONAMIENTO 1. Panel de visualización: muestra la temperatura Hay tres modos de operación para elegir. Presione establecida. Cuando está en modo ventilador, el botón Modo varias veces para elegir el modo muestra la temperatura ambiente. Para cambiar deseado.
  • Page 32: Cuidado Y Mantenimiento

    CUIDADO Y MANTENIMIENTO FILTRO DE AIRE LIMPIEZA El fi ltro de aire debe limpiarse aproximadamente Para evitar posibles descargas eléctricas, asegúrese cada 2 semanas. El fi ltro de aire puede requerir de que el aparato esté desenchufado antes de una limpieza más frecuente si hay una considerable realizar cualquier limpieza o mantenimiento.
  • Page 33: Solución De Problemas

    SOLUCIÓN DE PROBLEMAS Danby cuidado del consumidor: 1-800-263-2629 Horas de operación: Lunes a Jueves 8:30 am - 6:00 pm Hora estándar del este Viernes 8:30 am - 4:00 pm Hora estándar del este La información de este manual está sujeta a cambios sin previo aviso.
  • Page 34 Los cargos por transporte desde y hacia el lugar en que se efectúe el servicio técnico no están cubiertos por esta garantía y son de responsabilidad del comprador. Nothing within this warranty shall imply that Danby will be responsible or liable for any spoilage or damage to food or other c ontents of this appliance, whether due Nada dentro de esta garantía implica que Danby será...
  • Page 35 NOTES / REMARQUES / NOTAS : __________________________________________________________________________________________ __________________________________________________________________________________________ __________________________________________________________________________________________ __________________________________________________________________________________________ __________________________________________________________________________________________ __________________________________________________________________________________________ __________________________________________________________________________________________ __________________________________________________________________________________________ __________________________________________________________________________________________ __________________________________________________________________________________________ __________________________________________________________________________________________ __________________________________________________________________________________________ __________________________________________________________________________________________ __________________________________________________________________________________________ __________________________________________________________________________________________ __________________________________________________________________________________________ __________________________________________________________________________________________ __________________________________________________________________________________________ __________________________________________________________________________________________ __________________________________________________________________________________________ __________________________________________________________________________________________ __________________________________________________________________________________________...
  • Page 36 MODEL • MODÈLE • MODELO DPTA090HEB1WDB DPTA120HEB1WDB DPTA150HEB1WDB Printed in China Danby Products Limited, Guelph, ON, Canada N1H 6Z9 Imprimé en Chine Danby Products Inc., Findlay, Ohio, USA 45840 Impreso en China...

Ce manuel est également adapté pour:

Dpta120heb1wdbDpta150heb1wdb

Table des Matières