
Manuels Connexes pour Cameo CL 200


Sommaire des Matières pour Cameo CL 200
- Page 1 USER´S MANUAL BEDIENUNGSANLEITUNG MANUEL D`UTILISATION MANUAL DE USUARIO INSTRUKCJA OBSŁUGI MANUALE D‘ USO CL 200 LED SPOT LIGHT WITH 200W COB LED CLCL200...
-
Page 2: Table Des Matières
CONTENTS / INHALTSVERZEICHNIS / CONTENU / CONTENIDO / TREŚĆ / CONTENUTO ENGLISH ESPAÑOL PREVENTIVE MEASURES MEDIDAS DE SEGURIDAD 31-32 INTRODUCTION INTRODUCCIÓN CONNECTIONS, OPERATING AND DISPLAY ELEMENTS CONEXIONES, ELEMENTOS DE MANEJO Y ELEMENTOS OPERATION DE VISUALIZACIÓN 33-34 SET-UP AND INSTALLATION FUNCIONAMIENTO 34-37 FLAP INSTALACIÓN Y MONTAJE... -
Page 3: English
We have designed this product to operate reliably over many years. Please read this User‘s Manual carefully, so that you can begin making optimum use of your Cameo Light product quickly. Learn more about Cameo Light on our website WWW.CAMEOLIGHT.COM. -
Page 4: Introduction
to the power IN connection of an additional device. Make sure that the total current consumption of all connected devices does not exceed the specified value on all connected devices (label on the device). Make sure to keep power cable connections as short as possible. CAUTION: To reduce the risk of electric shock, do not remove cover (or back). -
Page 5: Connections, Operating And Display Elements
Blue power input socket for power supply to the device. A suitable power cable is included. POWER OUT White power output socket for the power supply of additional CAMEO spotlights. Ensure that the total current consumption of all connected devices does not exceed the value specified on the device in amperes (A). -
Page 6: Operation
OPERATION As soon as the spotlight is correctly connected to the power supply, the following will be displayed in succession: "Welcome to Cameo", the model name and the software version. After this process, the spotlight is ready for operation and starts in the previously selected mode. If the DMX operating mode is activated and there is no DMX signal at the DMX input, the display will start to flash after a few seconds. - Page 7 SYSTEM SETTINGS (settings) To access system settings, press the MODE button repeatedly until "Menu" appears in the top line of the display. Now select the menu item "Menu Settings" using UP and DOWN and press ENTER. Select the desired sub-menu item using UP and DOWN once again, and confirm with ENTER (see tables, note sub-menus).
-
Page 8: Set-Up And Installation
SYSTEM INFORMATION (System) In order to view system information, press the MODE button repeatedly until "Menu" appears in the top line of the display. If necessary, select the menu item "Menu System" using UP and DOWN and press ENTER. Use UP and DOWN to select the desired sub-menu item, and press ENTER to display the relevant information. -
Page 9: Flap
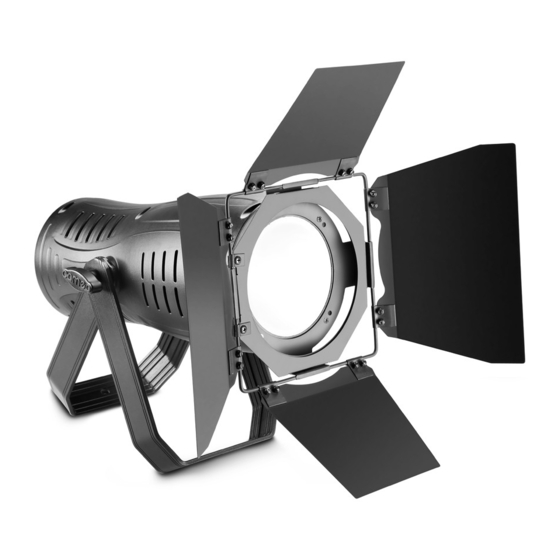
FLAP In order to mount the flap included, remove the four screws from the lens attachment frame (see arrows in the figure below), place the flap on the frame and screw it into place using the screws previously removed. The flap can also be attached on the spotlight at a 90° rotation. DMX TECHNOLOGY DMX-512 DMX (Digital Multiplex) is the designation for a universal transmission protocol for... -
Page 10: Pin Assignment
DMX TERMINATORS (TERMINATING RESISTORS) To prevent system errors, the last device in a DMX chain needs to be equipped with a terminating resistor (120 ohm, 1/4 Watt). 3-pin XLR connector with a terminating resistor: K3DMXT3 5-pin XLR connector with a terminating resistor: K3DMXT5 Pin Assignment 3-pin XLR connector: 5-pin XLR connector:... -
Page 11: Manufacturer's Declarations
Housing cooling: temperature controlled fan Dimensions (W x H x D, 170 x 170 x 380 mm without mounting bracket): Weight: 4.2 kg Additional features: adjustable mounting bracket or stand, securing lug, power cable and flap supplied MANUFACTURER´S DECLARATIONS MANUFACTURER‘S WARRANTY & LIMITATIONS OF LIABILITY You can find our current warranty conditions and limitations of liability at: https://cdn-shop.adamhall.com/media/pdf/Manufacturers-Decla- rations-CAMEO_DE_EN_ES_FR.pdf. -
Page 12: Deutsch
Dieses Gerät wurde unter hohen Qualitätsanforderungen entwickelt und gefertigt, um viele Jahre einen reibungslosen Betrieb zu gewähr- leisten. Bitte lesen Sie diese Bedienungsanleitung sorgfältig, damit Sie Ihr neues Produkt von Cameo Light schnell und optimal einsetzen können. Weitere Informationen über Cameo Light erhalten Sie auf unserer Website WWW.CAMEOLIGHT.COM. -
Page 13: Einführung
36. Der Abstand zu brennbaren Materialien muss mindestens 0,5 m betragen. 37. Netzleitungen zur Spannungsversorgung mehrerer Geräte müssen mindestens 1,5 mm² Aderquerschnitt aufweisen. In der EU müssen die Leitungen H05VV-F, oder gleichartig, entsprechen. Geeignete Leitungen werden von Adam Hall angeboten. Mit diesen Leitungen können Sie mehrere Geräte über den Power out Anschluss mit dem Power IN Anschluss eines weiteren Gerätes verbinden. -
Page 14: Anschlüsse, Bedien- Und Anzeigeelemente
Blaue Netzeingangsbuchse für die Spannungsversorgung des Geräts. Ein geeignetes Netzkabel befindet sich im Lieferumfang. POWER OUT Weiße Netzausgangsbuchse für die Netzversorgung weiterer CAMEO Scheinwerfer. Achten Sie darauf, dass die gesamte Stromaufnahme aller angeschlossenen Geräte den auf dem Gerät in Ampere (A) angegebenen Wert nicht überschreitet. -
Page 15: Bedienung
BEDIENUNG Sobald der Scheinwerfer korrekt am Stromnetz angeschlossen ist, werden während des Startvorgangs nacheinander „Welcome to Cameo“, die Modellbezeichnung und die Software Version im Display angezeigt. Nach diesem Vorgang ist der Scheinwerfer betriebsbereit und startet in der Betriebsart, die zuvor angewählt war. Ist die DMX-Betriebsart aktiviert und es liegt kein DMX-Signal am DMX-Eingang an, beginnt das Display nach wenigen Sekunden zu blinken. - Page 16 SYSTEMEINSTELLUNGEN (Settings) Um Systemeinstellungen vornehmen zu können, drücken Sie die MODE-Taste so oft, bis in der oberen Zeile des Displays „Menu“ angezeigt wird. Wählen Sie nun den Menüpunkt „Menu Settings“ mit Hilfe der Tasten UP und DOWN aus und drücken auf ENTER. Den gewünschten Untermenüpunkt wählen Sie jetzt abermals mit Hilfe der Tasten UP und DOWN aus und bestätigen mit ENTER (siehe Tabellen, Untermenüs beachten).
-
Page 17: Aufstellung Und Montage
SYSTEMINFORMATIONEN (System) Um Systeminformationen ablesen zu können, drücken Sie die MODE-Taste so oft, bis in der oberen Zeile des Displays „Menu“ angezeigt wird. Wählen Sie nun gegebenenfalls den Menüpunkt „Menu System“ mit Hilfe der Tasten UP und DOWN aus und drücken auf ENTER. Den gewünschten Untermenüpunkt wählen Sie jetzt abermals mit Hilfe der Tasten UP und DOWN aus und lassen die entsprechende Information durch Drücken auf ENTER anzeigen. -
Page 18: Torblende
TORBLENDE Zum Montieren der beiliegenden Torblende entfernen Sie die vier Schrauben im Halterahmen der Linse (siehe Pfeile in der Abbildung unten), setzen die Torblende auf den Rahmen und schrauben sie mit Hilfe der zuvor entfernten Schrauben am Rahmen fest. Die Torblende kann auch um 90°... -
Page 19: Technische Daten
Steckerbelegung: DMX-Kabel mit 3-Pol XLR-Steckern: DMX-Kabel mit 5-Pol XLR-Steckern (Pin 4 und 5 sind nicht belegt.): Shield Shield DMX-ABSCHLUSSSTECKER (TERMINATOR): Um Systemfehler zu vermeiden, ist das letzte Gerät einer DMX-Kette mit einem Abschlusswiderstand zu bestücken (120 Ohm, 1/4 Watt). 3-Pol XLR-Stecker mit Abschlusswiderstand: K3DMXT3 5-Pol XLR-Stecker mit Abschlusswiderstand: K3DMXT5 Steckerbelegung: 3-Pol XLR-Stecker:... -
Page 20: Herstellererklärungen
Stromversorgungsanschluss: blaue Netzeingangsbuchse weiße Netzausgangsbuchse (max. 6A) Sicherung: F3AL / 250V (5 x 20mm) Umgebungstemperatur (in Betrieb): 0°C - 40°C Relative Luftfeuchtigkeit: <85% nicht kondensierend Gehäusematerial: Metall Gehäusefarbe: schwarz Gehäusekühlung: temperaturgesteuerter Lüfter Abmessungen (B x H x T, 170 x 170 x 380mm ohne Montagebügel): Gewicht: 4,2kg... -
Page 21: Francais
Cet appareil a été développé et fabriqué en appliquant des exigences de qualité très élevées: il garantit des années de fonctionnement sans problème.Veuillez lire attentivement ce Manuel Utilisateur : vous apprendrez rapidement à utiliser votre appareil Cameo Light de façon optimale. -
Page 22: Introduction
34. L‘appareil ne doit pas être alimenté lors de son installation (cordon secteur non relié à la prise murale). 35. Poussière et autres dépôts à l‘intérieur de l‘appareil sont susceptibles de l‘endommager. Si les conditions environnementales sont difficiles (présence de poussière, de nicotine, de gouttelettes d‘eau...), il est recommandé de le confier à un personnel spécialisé pour entretien et nettoyage (non pris en charge par la garantie), afin d‘éviter toute surchauffe et défaillance. -
Page 23: Raccordements, Éléments De Commande Et D'affichage
Prise d'entrée bleue pour l'alimentation de l'appareil. Un câble réseau adapté est fourni. POWER OUT (SORTIE D'ALIMENTATION) Prise de sortie blanche pour l'alimentation d'autres projecteurs CAMEO. Assurez-vous que la consommation totale de tous les appareils connectés ne dépasse pas la valeur en ampères (A) indiquée sur l'appareil. -
Page 24: Œillet Pour Câble De Retenue
UTILISATION Dès que le projecteur est correctement raccordé à l'alimentation secteur, un message de bienvenue(« Welcome to Cameo »), la désignation du modèle et la version du logiciel s'affichent successivement à l'écran pendant la phase de démarrage. À l'issue de cette phase, le projecteur est opérationnel et passe au mode précédemment sélectionné. - Page 25 Menu ENTER Mode DMX Mode DMX Mode DMX Mode ENTER Mode 2CH_1 2CH_2 UP/DOWN DMX Mode DMX Mode ENTER Mode ENTER Slave Mode ENTER Warm Colde Dimmer Strobe Static white white UP/DOWN ENTER - UP/DOWN ENTER - UP/DOWN ENTER - UP/DOWN ENTER - UP/DOWN Dimmer Strobe...
- Page 26 Menu ENTER Settings ENTER Backlight Backlight Settings Display UP/DOWN UP/DOWN ENTER ENTER Settings ENTER DMX Fail DMX Fail DMX Fail Hold Blackout UP/DOWN ENTER ENTER ENTER Settings DimCurve DimCurve DimCurve DimCurve DimCurve Linear S-Curve UP/DOWN ENTER ENTER ENTER ENTER Settings ENTER DimResp DimResp...
-
Page 27: Installation Et Montage
Menu ENTER System V1.xx ENTER System Firmware UP/DOWN System ENTER Temp Temp Temp °C/°F UP/DOWN ENTER ENTER - UP/DOWN Unit Unit xxx°C/°F °C °F ENTER ENTER RESET Pour réinitialiser les paramètres du projecteur sur les valeurs par défaut, appuyez sur la touche MODE et maintenez-la enfoncée durant environ 5 secondes. -
Page 28: Volet Coupe-Flux
VOLET COUPE-FLUX Pour monter le volet coupe-flux fourni, retirez les quatre vis du cadre de maintien de la lentille (voir les flèches sur la figure ci-dessous), placez le volet coupe-flux sur le cadre et vissez-le au cadre à l'aide des vis retirées précédemment. Le volet coupe-flux peut également être fixé... -
Page 29: Caractéristiques Techniques
Pour éviter tout dysfonctionnement, le dernier appareil d'une chaîne DMX doit être équipé d'une résistance de terminaison (120 Ohms, 1/4 Watt). Connecteur XLR 3 points avec résistance de terminaison : K3DMXT3 Connecteur XLR 5 points avec résistance de terminaison : K3DMXT5 Assignation des contacts Connecteur XLR 3 points Connecteur XLR 5 points... -
Page 30: Garantie Fabricant & Limitation De Responsabilité
Matériau du boîtier : Métal Couleur du boîtier : Noir Refroidissement du boîtier : Ventilateur thermorégulé Dimensions (L x H x P, 170 x 170 x 380 mm sans étrier de montage) : Poids : 4,2 kg Autres caractéristiques : Étrier de montage ou fixe réglable inclus, œillet de fixation, câble réseau, volet coupe-flux inclus DECLARATIONS GARANTIE FABRICANT &... -
Page 31: Español
Este equipo está diseñado y fabricado con los estándares de calidad más exigentes, para garantizar un correcto funcionamiento durante muchos años.Lea atentamente este manual de usuario para poder aprovechar rápidamente toda la funcionalidad de su nuevo producto de Cameo Light. Más información sobre Cameo Light en la web WWW.CAMEOLIGHT.COM. MEDIDAS DE SEGURIDAD 1. -
Page 32: Introducción
34. Al montar el equipo, asegúrese de que no está alimentado eléctricamente (el enchufe no debe estar conectado a la red eléctrica). 35. La acumulación de polvo y otras partículas en el interior del equipo puede causar daños. Dependiendo de las condiciones ambientales (polvo, nicotina, niebla, etc.), deberá... -
Page 33: Conexiones, Elementos De Manejo Y Elementos De Visualización
POWER OUT Toma de salida de red de color blanco para la alimentación eléctrica de otros focos CAMEO. Compruebe que el consumo de corriente total de todos los equipos conectados no supere el valor en amperios (A) indicado en el equipo. -
Page 34: Funcionamiento
En cuanto el foco esté correctamente conectado a la red eléctrica, durante el proceso de arranque se mostrarán de forma consecutiva en pantalla el mensaje «Welcome to Cameo» (Bienvenidos a Cameo), así como la denominación de modelo y la versión del software. Tras este procedimiento, el foco estará... - Page 35 Menu ENTER Mode DMX Mode DMX Mode DMX Mode ENTER Mode 2CH_1 2CH_2 UP/DOWN DMX Mode DMX Mode ENTER Mode ENTER Slave Mode ENTER Warm Colde Dimmer Strobe Static white white UP/DOWN ENTER - UP/DOWN ENTER - UP/DOWN ENTER - UP/DOWN ENTER - UP/DOWN Dimmer Strobe...
- Page 36 Menu ENTER Settings ENTER Backlight Backlight Settings Display UP/DOWN UP/DOWN ENTER ENTER Settings ENTER DMX Fail DMX Fail DMX Fail Hold Blackout UP/DOWN ENTER ENTER ENTER Settings DimCurve DimCurve DimCurve DimCurve DimCurve Linear S-Curve UP/DOWN ENTER ENTER ENTER ENTER Settings ENTER DimResp DimResp...
-
Page 37: Instalación Y Montaje
Menu ENTER System V1.xx ENTER System Firmware UP/DOWN System ENTER Temp Temp Temp °C/°F UP/DOWN ENTER ENTER - UP/DOWN Unit Unit xxx°C/°F °C °F ENTER ENTER RESET Para restablecer los ajustes del foco a los valores de fábrica, mantenga pulsado el botón MODE durante unos 5 segundos. INSTALACIÓN Y MONTAJE Gracias al soporte doble integrado, el foco puede instalarse en un lugar adecuado sobre una superficie nivelada. -
Page 38: Juego De Aletas
JUEGO DE ALETAS Para montar el juego de aletas suministrado, retire los cuatro tornillos del bastidor de fijación de la lente (véanse las flechas en la figura de abajo), coloque el juego de aletas sobre el bastidor y atorníllelo al mismo con los tornillos que había retirado. El juego de aletas también se puede fijar al foco en posición girada 90°. -
Page 39: Datos Técnicos
TERMINACIÓN DMX (TERMINADOR): Para evitar errores de sistema, debe conectarse una resistencia de terminación (120 ohmios, 1/4 W) en el último equipo de la cadena DMX. XLR aéreo de 3 pines con resistencia de terminación: K3DMXT3 XLR aéreo de 5 pines con resistencia de terminación: K3DMXT5 Asignación de pines: Conector XLR aéreo de 3 pines: Conector XLR aéreo de 5 pines:... -
Page 40: Declaraciones Del Fabricante
Humedad relativa: <85 % sin condensación Material de la carcasa: Metal Color de la carcasa: Negro Refrigeración de la carcasa: Ventilador controlado por temperatura Dimensiones (anchura x altura x 170 x 170 x 380 mm profundidad, sin soporte de montaje): Peso: 4,2 kg Otras características: Soporte ajustable de apoyo o de montaje incluido, cáncamo de seguridad, cable de red, juego de... -
Page 41: Polski
To urządzenie zostało zaprojektowane i wyprodukowane przy zastosowaniu najwyższych kryteriów jakościowych w celu zapewnienia wieloletniej bezawaryjnej eksploatacji. Proszę starannie przeczytać niniejszą instrukcję obsługi, aby móc jak najszybciej zacząć użytkować ten produkt marki Cameo Light. Więcej informacji na temat Cameo Light znajdą Państwo na naszej stronie internetowej pod adresem WWW.CAMEOLIGHT.COM. -
Page 42: Wprowadzenie
33. W przypadku zagrożenia uderzeniem pioruna lub jeśli urządzenie przez dłuższy czas nie jest używane, należy wyjąć kabel sieciowy i adapter sieciowy z gniazda. 34. Instalacja urządzenia powinna odbywać się, gdy urządzenie nie jest podłączone do źródła zasilania (należy wyjąć wtyczkę z gniazda). 35. -
Page 43: Przyłącza, Elementy Obsługowe I Wskaźniki
POWER IN Niebieskie gniazdo sieciowego zasilania urządzenia. Kabel sieciowy znajduje się w zestawie. POWER OUT Białe gniazdo do zasilania dodatkowego reflektora Cameo. Całkowity pobór prądu wszystkich podłączonych urządzeń nie może przekroczyć wartości w amperach (A) podanej na urządzeniu. FUSE Podstawa bezpiecznikowa. Bezpiecznik: F3AL / 250 V (5 x 20 mm). WAŻNA WSKAZÓWKA: Bezpiecznik wymieniać wyłącznie na bezpiecznik tego samego typu i o tej samej wartości. -
Page 44: Obsługa
Po prawidłowym podłączeniu reflektora do sieci zasilania podczas procesu uruchamiania jest wyświetlana następująca sekwencja komuni- katów: „Welcome to Cameo”, nazwa modelu oraz wersja oprogramowania. Po tej procedurze reflektor jest gotowy do pracy i przełącza się na ostatnio wybrany tryb. Jeśli jest aktywny tryb DMX i na wejściu DMX nie ma sygnału, wyświetlacz zacznie migać po kilku sekundach. Po ok. 1 sekundzie nieaktywności na wyświetlaczu automatycznie pokaże się... - Page 45 Menu ENTER Mode DMX Mode DMX Mode DMX Mode ENTER Mode 2CH_1 2CH_2 UP/DOWN DMX Mode DMX Mode ENTER Mode ENTER Slave Mode ENTER Warm Colde Dimmer Strobe Static white white UP/DOWN ENTER - UP/DOWN ENTER - UP/DOWN ENTER - UP/DOWN ENTER - UP/DOWN Dimmer Strobe...
- Page 46 Menu ENTER Settings ENTER Backlight Backlight Settings Display UP/DOWN UP/DOWN ENTER ENTER Settings ENTER DMX Fail DMX Fail DMX Fail Hold Blackout UP/DOWN ENTER ENTER ENTER Settings DimCurve DimCurve DimCurve DimCurve DimCurve Linear S-Curve UP/DOWN ENTER ENTER ENTER ENTER Settings ENTER DimResp DimResp...
-
Page 47: Ustawianie I Montaż
Menu ENTER System V1.xx ENTER System Firmware UP/DOWN System ENTER Temp Temp Temp °C/°F UP/DOWN ENTER ENTER - UP/DOWN Unit Unit xxx°C/°F °C °F ENTER ENTER RESET Aby przywrócić ustawienia fabryczne w reflektorze, naciśnij i przytrzymaj przez ok. 5 sekund przycisk MODE. USTAWIANIE I MONTAŻ... -
Page 48: Wrota Reflektora
WROTA REFLEKTORA Aby zamontować dołączone wrota reflektora, należy usunąć cztery śruby z ramki mocującej do soczewki (patrz strzałki na rysunku poniżej), umieścić wrota na ramce i przymocować je za pomocą usuniętych wcześniej śrub. Wrota można także zamocować na reflektorze w pozycji obróconej o 90°. -
Page 49: Dane Techniczne
TERMINATOR DMX: Aby zapobiec awariom systemu, należy wyposażyć ostatnie urządzenie w łańcuchu DMX w terminator (120 Ω, 1/4 W). 3-stykowa wtyczka XLR z terminatorem: K3DMXT3 5-stykowa wtyczka XLR z terminatorem: K3DMXT5 Przyporządkowanie wtyczek: 3-stykowa wtyczka XLR: 5-stykowa wtyczka XLR: ADAPTER DMX: Możliwa jest także kombinacja urządzeń... -
Page 50: Deklaracje Producenta
Materiał obudowy: metal Kolor obudowy: czarny Chłodzenie obudowy: Wentylator sterowany temperaturą Wymiary (szer. x wys. x gł., 170 x 170 x 380 mm bez uchwytu montażowego): Waga: 4,2 kg Pozostałe cechy: regulowany uchwyt do montażu lub stojak w zestawie, ucho zabezpieczające, przewód zasilający, wrota reflektora w zestawie DEKLARACJE PRODUCENTA GWARANCJA PRODUCENTA I OGRANICZENIE ODPOWIEDZIALNOŚCI... -
Page 51: Italiano
Questo dispositivo è stato sviluppato e prodotto in conformità con elevati standard qualitativi che ne garantiscono il regolare funzionamento per molti anni. Leggete attentamente questo manuale d‘uso per utilizzare al meglio il vostro nuovo prodotto Cameo Light. Per maggiori informazioni su Cameo Light consultare la nostra pagina Web WWW.CAMEOLIGHT.COM. -
Page 52: Introduzione
nicotina, nebbia ecc.) il dispositivo deve essere sottoposto a regolari interventi di manutenzione e pulizia da parte di personale specializzato (senza garanzia, interventi a carico del proprietario) per evitare surriscaldamento e malfunzionamenti. 36. La distanza dai materiali infiammabili deve essere di almeno 0,5 m 37. -
Page 53: Connessioni, Elementi Di Comando E Visualizzazione
Presa di ingresso blu per l'alimentazione elettrica dell'apparecchio. L'apposito cavo di alimentazione è fornito in dotazione. POWER OUT Presa di uscita bianca per l'alimentazione elettrica di altri proiettori CAMEO. Assicurarsi che il consumo totale di tutti i dispositivi collegati non superi il valore in ampere (A) indicato sull'apparecchio. -
Page 54: Utilizzo
Non appena il faro è correttamente allacciato alla rete elettrica, durante la procedura di avvio sul display appaiono in successione il messaggio "Welcome to Cameo", l'indicazione del modello e la versione del software. Al termine della procedura il proiettore è pronto per l'uso e si avvia nella modalità... - Page 55 IMPOSTAZIONI DI SISTEMA (Settings) Per effettuare le impostazioni di sistema, premere il tasto MODE fino a quando nella riga superiore del display non appare "Menu". Con i tasti UP e DOWN selezionare quindi la voce di menu "Menu Settings" e premere ENTER. Per selezionare la voce di sottomenu desiderata, premere di nuovo i tasti UP e DOWN e confermare con ENTER (v. tabelle, seguire i sottomenu).
- Page 56 Curve dimmer lineare esponenziale logaritmica Curva S Valore DMX Valore DMX Valore DMX Valore DMX INFORMAZIONI DI SISTEMA (System) Per leggere le informazioni di sistema, premere il tasto MODE fino a quando nella riga superiore del display non appare "Menu". Con i tasti UP e DOWN selezionare eventualmente la voce di menu "Menu System"...
-
Page 57: Installazione E Montaggio
INSTALLAZIONE E MONTAGGIO Grazie alla doppia staffa integrata, il proiettore può essere collocato in un punto indicato su una superficie piana. Il montaggio a una traversa viene effettuato tramite un apposito dispositivo di fissaggio (non in dotazione). Assicurarsi che la staffa di montaggio sia fissata saldamente e assicurare il faro facendo passare un cavo di sicurezza adatto dall’occhiello di sicurezza (A). -
Page 58: Tecnologia Dmx
TECNOLOGIA DMX DMX512 DMX (Digital Multiplex) è la sigla di un protocollo di trasmissione universale per la comunicazione tra dispositivi e controller. Un controller DMX invia dati DMX ai dispositivi DMX collegati. I dati DMX vengono sempre trasmessi come flusso di dati seriale, che viene inoltrato da un dispositivo collegato al successivo attraverso le connessioni (connettori XLR) DMX IN e DMX OUT presenti per ogni dispositivo DMX compatibile, per un massimo di 32 dispositivi. -
Page 59: Dati Tecnici
DATI TECNICI Denominazione modello: CLCL200 Tipologia di prodotto: Faro a LED Tipo: Interni Spettro cromatico LED: Bianco freddo - Bianco caldo Numero di LED: Tipo di LED: 200W Temperatura di colore LED: 7800K - 3200K Frequenza di ripetizione: 17500 Hz Angolo di dispersione: 25°... -
Page 60: Controllo Dmx
DMX CONTROL / DMX STEUERUNG / PILOTAGE DMX / CONTROL DMX / STEROWANIE DMX / CONTROLLO DMX 1CH Mode Function Values Dimmer 0% to 100% 2CH Mode 1 Function Values Dimmer 0% to 100% CT off / Full on depending on Dimmer Colour Temperature 7800K - 3200K 2CH Mode 2... - Page 64 WWW.CAMEOLIGHT.COM Adam Hall GmbH | Daimlerstrasse 9 | 61267 Neu-Anspach | Germany Tel. +49(0)6081/9419-0 | Fax +49(0)6081/9419-1000 web : www.adamhall.com | e-mail : mail@adamhall.com REV: 01...