Table des Matières
Publicité
Liens rapides
2013 Thermaltake Technology Co., Ltd. All Rights Reserved. A-2013.10
C
All other registered trademarks belong to their respective companies.
Tested To Comply
With FCC Standards
FOR HOME OR OFFICE USE
www.thermaltake.com
U U U r r r b b b n n n D D D 1 1 1
U r r b b n n D D 1 1
U
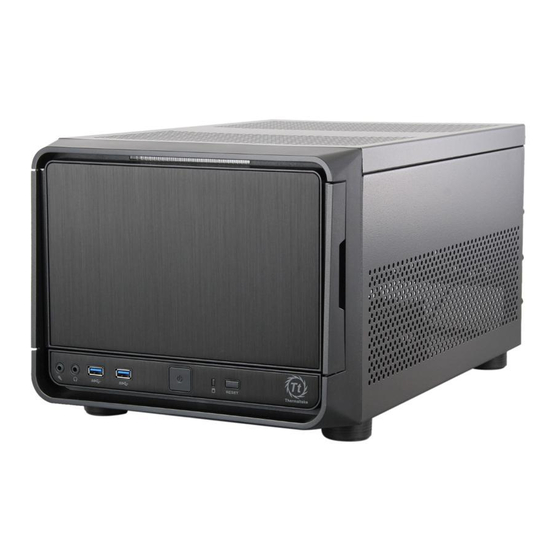
Simple, Yet Elegant
User's Manual
Benutzerhandbuch
Mode d'emploi
Manual del usuario
Manuale dell'utente
Manual do Utilizador
安裝說明書
用戶手冊
ユーザーズマニュアル
Руководство пользователя
kullanıcı elkitabı
(EEE Yönetmeliğine Uygundur)
คู ่ ม ื อ การใช้
Publicité
Table des Matières

Manuels Connexes pour Thermaltake Urban SD1


Sommaire des Matières pour Thermaltake Urban SD1
- Page 1 Manuale dell’utente Manual do Utilizador 安裝說明書 用戶手冊 ユーザーズマニュアル Руководство пользователя 2013 Thermaltake Technology Co., Ltd. All Rights Reserved. A-2013.10 All other registered trademarks belong to their respective companies. www.thermaltake.com kullanıcı elkitabı (EEE Yönetmeliğine Uygundur) Tested To Comply คู ่ ม ื อ การใช้...
-
Page 2: Table Des Matières
Thumb screw Backup Audio Connection 14-19 Space support Motherboard Buzzer Motherboard Chapter 4. Other Movable tie Arrange wire Thermaltake Power Supply Series (Optional) Strap tie Arrange wire 2.5" Tool-free clip 2.5" HDD Radiator Bracket For 12 or 14 cm Radiator... -
Page 3: Warning And Notice
Warning and Notice Atenção!! CPU Cooler Height Limitation VGA ( Add-on card) Length Limitation - Limite de altura para o dissipador do CPU: O limite de altura para o dissipador do CPU é 90 mm (3,3 polegadas). - Limite de comprimento para VGA (placa gráfica): O limite de comprimento para VGA (placa gráfica) é... -
Page 4: Top Panel Disassembly
Motherboard & PCI Card Installation Top Panel Disassembly English / 繁體中文 / 1. Loosen the screws with a screwdriver. 1. 用螺絲起子將螺絲取下. 2. Slide the outer cover off according to 2. 依箭頭指示方向將外蓋移出. the direction of the arrow. Español / English / 1. -
Page 5: 3.5" Devices Installation
5.25" & 3.5” Devices Installation 繁體中文 / 1. 用螺絲起子將螺絲取下. 2. 拉取扣環並將主機板拖盤滑開。 3. 將主機板放置在合適的位置並用零件包中之螺絲固定。 4. 將擴充卡放置在合適的位置並用螺絲固定。 简体中文 / 1. 用螺丝起子将螺丝取下. 2. 拉取扣环并将主板拖盘滑开。 3. 在合适的位置安装主板并以螺丝安全固定。 4. 将扩充卡放置在合适的位置并用螺丝固定。 日本語 / 1. ドライバーでねじを緩めます。 2. リングを強く引っ張って、マザーボードトレイを 引き出します。 3. マザーボードを適切な場所に取り付け、ねじで固 定します。 English / Español / カードを適切な場所に取り付け、ねじで固 1. -
Page 6: Hdd Installation
3.5" HDD Installation 繁體中文 / 1. 將螺絲取下並移除磁架。 2. 移除5.25”擴充槽的擋板。 3. 移除3.5”擴充槽的擋板。 4. 插入5.25”裝置並用螺絲鎖上。 5. 插入3.5”裝置並用螺絲鎖上。 简体中文 / 1. 将螺丝取下并移除磁架。 2. 卸下 5.25” 驱动器槽盖。 3. 卸下 3.5” 驱动器槽盖。 4. 插入5.25”装置并用螺丝锁上。 5. 插入3.5”装置并用螺丝锁上。 日本語 / 1. ねじを緩め、ブラケットを取り外します。 2. 5.25" ドライブベイのカバーを取り外します 3. 3.5" ドライブベイのカバーを取り外します 4. -
Page 7: Hdd Installation
2.5" HDD Installation PSU Installation Type A Type B English / 繁體中文 / 1. Loosen the screw and remove the bracket. 1. 將螺絲取下並移除磁架。 2. Place the power supply in proper location and 2. 將電源供應器放在正確的位置,並用螺絲固定鎖 secure it with screws. 上。 Deutsch / 简体中文... -
Page 8: 120 Or 140Mm Radiator Installation
Leads Installation Guide 120 or 140mm Radiator Installation English Leads Installation Guide Type A Type B Case LED Connection / On the front of the case, you can find some LEDs and switch leads. Please consult your user manual of your motherboard manufacturer, then connect these leads to the panel header on the motherboard. USB 3.0 connection / Please consult your motherboard manual to find out the section of “USB connection”. - Page 9 Français Italiano Guida di installazione dei contatti Guide d'installation des fils Connessione del LED del case / Nella parte anteriore del case, sono presenti alcuni contatti per interruttori e LED. Connexion des voyants du boîtier / Sur la face avant du boîtier, vous trouverez plusieurs voyants et les fils des Consultare il manuale utente del produttore della scheda madre, quindi connettere i contatti alla parte superiore del boutons.
- Page 10 日 本 語 繁體中文 線材安裝說明 リード線の取り付けガイド 機殼LED連接方式 / 在機殼前方的面板後面,可以找到一些LED與開關線材(POWER Switch….),請參考主機板使用說明書, ケース LED の接続 / ケース前面には、LEDとスイッチリード線があります。 マザーボードメーカーのユーザーマニュアル 並將機殼上的線材正確地連接到主機板上,這些線材通常都會印有標籤在上面,如果沒有的話,請找出機殼前方面板上線材原 を参照し、これらのリード線をマザーボードのパネルヘッダに接続してください。 本的位置以知道正確的來源。 USB 3.0 の接続 / マザーボードのマニュアルを参照して、「USB接続」のセクションを探します。 USB 3.0 連接 / 請參考主機板使用手冊找出主機板上的USB連接孔位 オーディオ接続 / オーディオコネクタの次の図とマザーボードのユーザーマニュアルを参照してください。AC’97または 音效連接 / 請根據下面的音源接頭圖示與主機板使用手冊來連接音效裝置,請確認主機板上的音效裝置是支援AC' 97音效或是 HDオーディオ(Azalia)を使用するマザーボードを選択してください(オーディオがAC’97またはHDオーディオ(Azalia)をサポ HD音效(Azalia),裝置錯誤可能會導致主機板音效裝置的毀損,某些主機板的音效裝置不會與下方的圖示完全相同,請參酌主 ートしていることを確認してください)。サポートしていないと、デバイスが損傷します)。 機板使用手冊以得到正確的安裝資訊 简体中文...
-
Page 11: Thermaltake Power Supply Series (Optional)
Quality From Within คู ่ ม ื อ การติ ด ตั ้ ง สายไฟ Every power supply units from Thermaltake should pass a very strict quality control before sent to การเชื ่ อ มต่ อ ไฟ LED ของเคส / ที ่ ด ้ า นหน้ า ของเคส คุ ณ จะเห็ น ไฟ LED และสายไฟของสวิ ต ซ์... - Page 12 Note:...