Rittal 9982.200 Notice De Montage Et D'emploi
Baies ts it pro
Table des Matières
Liens rapides
Assembly and operating instructions
Notice de montage et d'emploi
Instrucciones de montaje y funcionamiento
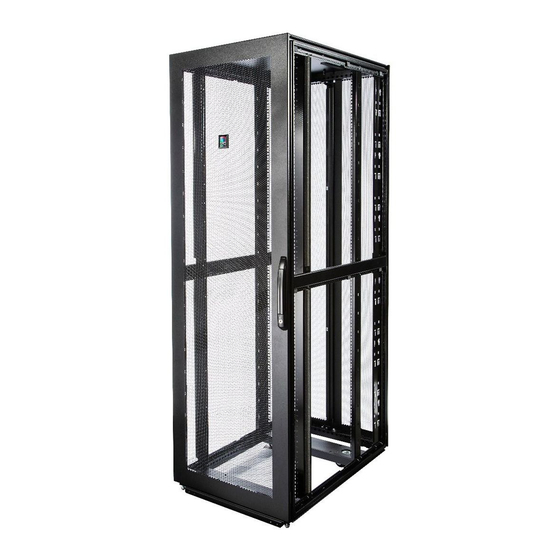
TS IT Pro enclosure system
Baies TS IT Pro
Sistema de racks TS IT Pro
9982.200
9982.210
9982.201
9982.211
9982.202
9982.212
9982.203
9982.213
9982.204
9982.214
9982.205
9982.215
9982.206
9982.216
9982.207
9982.217
9982.208
9982.218
9982.209
9982.219
9982.220
9982.221
9982.226
9982.227
9982.228
9982.229
9982.230
9982.231
9982.232
9982.233
Table des Matières

Manuels Connexes pour Rittal 9982.200


Sommaire des Matières pour Rittal 9982.200
- Page 1 TS IT Pro enclosure system Baies TS IT Pro Sistema de racks TS IT Pro 9982.200 9982.210 9982.220 9982.201 9982.211 9982.221 9982.202 9982.212 9982.226 9982.203 9982.213 9982.227 9982.204 9982.214 9982.228 9982.205 9982.215 9982.229 9982.206 9982.216 9982.230 9982.207 9982.217 9982.231 9982.208 9982.218...
-
Page 2: Table Des Matières
Contents Page Page Page Notes on documentation 4.3.3 Removing the Bonding connection points and enclosure panels 16 – 18 accessory kit for bonding Declarations of conformity and approvals – Removing the front doors Re-installing the removed enclosure panels 32 – 35 Storing the documents –... - Page 3 Sommaire Page Page Page Remarques relatives 4.3.3 Démonter les Points de connexion, à la documentation pièces plates 16 – 18 protection par mise à la masse, avis pour la sécurité électrique, Déclarations de conformité et – Démonter la porte avant kits d’accessoires pour la homologations –...
- Page 4 Índice Page Page Page Informaciones sobre 4.3.3 Desmontaje Puntos de conexión, la documentación de las piezas planas 16 – 18 puesta a tierra, indicaciones para la seguridad eléctrica, Declaraciones de conformidad y – Desmontar juegos de accesorios para homologaciones las puertas frontales la puesta a tierra Conservación –...
- Page 5 Contents Sommaire Índice 6 – 14, 27 – 28, 36 – 42 90° 180° 33 – 35 TS IT Pro enclosure system / Baies TS IT Pro / Sistema de racks TS IT Pro...
-
Page 6: Notes On Documentation
Les certifi cations du produit sont disponibles Los certifi cados de producto pueden descar- ding on the Rittal website. pour téléchargement sur le site Internet de garse de la página web de Rittal. Rittal. 1.2 Storing the documents 1.2 Conservación de la documentación As well as safety instructions, these assembly 1.2 Conservation des documents... -
Page 7: Safety Instructions
Class 1 devices. Rittal accessories may be used to upgrade the TS IT Pro to meet more stringent requirements. In this regard, the specifi cations for the accessories must be observed. -
Page 8: Consignes De Sécurité
à des pièces sous tension et qui sert d’armoire mise à la masse pour des appareils de classe 1. La baie TS IT Pro peut être équipée d’accessoires Rittal pour répondre à d’autres exigences. Il faut respecter pour cela les caractéristiques des accessoires. -
Page 9: Instrucciones De Seguridad
1. Los accesorios de Rittal permiten actualizar el TS IT Pro para adaptarlo a nuevos requisitos. Para ello deben tenerse en cuenta las especifi caciones de los acces- orios. -
Page 10: De Sécurité
2. Safety instructions 2. Instrucciones de seguridad 2. Consignes de sécurité Warning against Risk of tipping due to Caution: closing movements for Caution: Caution: Caution: displacement of centre Obstructions in head mechanical parts of a Sharp object Obstructions on fl oor Heavy loads of gravity area... -
Page 11: Device Description
Rittal y piezas instructions, Rittal key 12321 and small d’emploi, des clés Rittal et des accessoires pequeñas de montaje installation parts de montage Encontrará los datos técnicos del TS IT Pro en Technical specifi... -
Page 12: Labelling
ID ID de confi guration confi guración #51| Serial number #51| Numéro de série #51| Número de serie Example: http://rittal.us/?9982202 TS IT Pro enclosure system / Baies TS IT Pro / Sistema de racks TS IT Pro... -
Page 13: Scope Of Supply
3. Description de la baie 3. Descripción de la unidad 3.3 Scope of supply 3.3 Composition de la livraison 3.3 Unidad de envase 1070 1200 1070 1200 9982.200 9982.204 9982.201 9982.208 Model No. TS IT Pro 9982.206 9982.205 9982.202 9982.209 Référence TS IT Pro... -
Page 14: Herramientas Necesarias
4. Assembly and siting 4. Montage et implantation 4. Montaje e instalación 4.1 Site requirements 4.1 Exigences concernant le lieu 4.1 Requisitos del lugar de instalación Caution: The TS IT Pro is only intended for d’implantation Atención: el TS IT Pro está concebido única- use indoors. -
Page 15: Unpacking
4. Assembly and siting 4. Montage et implantation 4. Montaje e instalación 4.3.1 Unpacking 4.3.1 Déballer 4.3.1 Desembalar This description refers to the standard packaging. The packaging for pre-installed racks (“ship loadable” solution) diff ers from this. In such cases, please observe the additional information provided. La présente description concerne un emballage standard. -
Page 16: Removing The
4. Assembly and siting 4. Montage et implantation 4. Montaje e instalación 4.3.3 Removing the enclosure panels (only with selected models) 4.3.3 Démonter les pièces plates (sur certains modèles uniquement) 4.3.3 Desmontaje de las piezas planas (sólo algunos modelos) Removing the front doors Démonter la porte avant Desmontar las puertas frontales TS IT Pro enclosure system / Baies TS IT Pro / Sistema de racks TS IT Pro... -
Page 17: Removing The Rear Doors
4. Assembly and siting 4. Montage et implantation 4. Montaje e instalación 4.3.3 Removing the enclosure panels (only with selected models) 4.3.3 Démonter les pièces plates (sur certains modèles uniquement) 4.3.3 Desmontaje de las piezas planas (sólo algunos modelos) Removing the rear doors Démonter les portes arrière Desmontar las puertas posteriores TS IT Pro enclosure system / Baies TS IT Pro / Sistema de racks TS IT Pro... -
Page 18: Removing The Side Panels
4. Assembly and siting 4. Montage et implantation 4. Montaje e instalación 4.3.3 Removing the enclosure panels 4.3.3 Démonter les pièces plates 4.3.3 Desmontaje de las piezas planas Removing the side panels Démonter les panneaux latéraux Desmontar los laterales TS IT Pro enclosure system / Baies TS IT Pro / Sistema de racks TS IT Pro... -
Page 19: Removing Any Accessories Supplied Loose
4. Assembly and siting 4. Montage et implantation 4. Montaje e instalación 4.3.4 Removing any accessories supplied loose 4.3.4 Ôter les accessoires éventuellement joints 4.3.4 Retirar los accesorios suministrados sin montar SW13 4. Assembly and siting 4. Montage et implantation 4. -
Page 20: Moving The Rack To The Installation Site
4. Assembly and siting 4. Montage et implantation 4. Montaje e instalación 4.3.6 Moving the rack to the installation site 4.3.6 Déplacer la baie sur le lieu d’implantation 4.3.6 Mover el rack al lugar de instalación max. 10° ◾ To be able to move the TS IT Pro safely, you will need at least two instructed or skilled persons. -
Page 21: Preparing For Installation
SW17+19 SW6+19 4. Assembly and siting 4. Montage et implantation 90° 4. Montaje e instalación 4.3.7 Preparing for installation 4.3.7 Préparer la mise en place 4.3.7 Preparar el lugar de instalación The levelling feet must be evenly adjusted in the height. A maximum height diff erence of 5 mm is admissible while positioning. -
Page 22: Depth Adjustment Of The
TX30 4. Assembly and siting 4. Montage et implantation 4. Montaje e instalación 4.3.7 Preparing for installation 4.3.7 Préparer la mise en place 4.3.7 Preparar el lugar de instalación Depth adjustment of the 482.6 mm (19˝) level, rack width 600 mm, rack depth 1070/1200 mm Réglage en profondeur du plan 19˝, largeur de baie 600 mm, profondeur de baie 1070/1200 mm Ajuste de la profundidad del nivel de 19˝,... - Page 23 TX30 4. Assembly and siting 4. Montage et implantation 4. Montaje e instalación 4.3.7 Preparing for installation 4.3.7 Préparer la mise en place 4.3.7 Preparar el lugar de instalación Depth adjustment of the 482.6 mm (19˝) level, rack width 750 mm, rack depth 1070/1200 mm Réglage en profondeur du plan 19˝, largeur de baie 750 mm, profondeur de baie 1070/1200 mm Ajuste de la profundidad del nivel de 19˝,...
-
Page 24: Baying The Rack (Optional)
TX30 4. Assembly and siting 4. Montage et implantation 4. Montaje e instalación 4.3.8 Baying the rack (optional) 4.3.8 Juxtaposer les baies (en option) 4.3.8 Ensamblaje del rack (opcional) TS IT Pro to TS IT Pro TS IT Pro à TS IT Pro TS IT Pro a TS IT Pro 600 mm 24˝... -
Page 25: Securing The Rack To The Fl Oor
TX25 4. Assembly and siting 4. Montage et implantation 4. Montaje e instalación 4.3.9 Securing the rack to the fl oor 4.3.9 Fixer la baie au sol 4.3.9 Fijar el rack al suelo 5.5 x 13 Ø 14 = 3.7 ft-lb / 5 Nm F = max. -
Page 26: Transport
5. Transport 5. Transport 5. Transporte The TS IT Pro must be secured to prevent it La baie TS IT Pro doit être bloquée pour El TS IT Pro debe asegurarse durante el trans- tipping over during transportation and must éviter tout basculement lors du transport et porte para evitar el vuelco y solo debe trans- only be shipped in an empty state. -
Page 27: Installation
6. Installation 6. Installation 6. Instalación Installation examples: Exemples d’installation : Ejemplos de instalación: Slide rail, depth-variable 482.6 mm (19˝) component shelf, telescopic Glissière réglable en profondeur Tablette d’appareillage 19˝ Guía deslizante, télescopique variable en profundidad Bandeja para aparatos de 19˝, telescópica 6. -
Page 28: Installation Du Matériel Du Client
6. Installation 6.1 Installation du matériel du client ◾ Placer toujours les composants les plus ◾ Attention lors de l’utilisation de rails Il faut respecter les charges des composants lourds dans le bas de la baie TS IT Pro. Cela télescopiques : La baie TS IT Pro doit être à... -
Page 29: Installing The Power And
6. Installation 6. Installation 6. Instalación 6.2 Installing the power and network cables 6.2 Installation du câblage de puissance et de réseau 6.2 Instalación del cableado de alimentación y de red Cable entry in the roof Introduction des câbles dans le toit Entrada de cables a través del techo TS IT Pro enclosure system / Baies TS IT Pro / Sistema de racks TS IT Pro... -
Page 30: Removing/Assembling
6. Installation 6. Installation 6. Instalación 6.2 Installing the power and network cables 6.2 Installation du câblage de puissance et de réseau 6.2 Instalación del cableado de alimentación y de red Removing/assembling the roof plate (optional) Démontage / montage du toit (en option) Desmontaje/Montaje de la chapa de techo (opcional) M12 x 20 = 5 Nm... -
Page 31: Bonding Connection Points And Accessory Kit For Bonding
6. Installation 6. Installation 6. Instalación 6.3 Bonding connection points and accessory kit for bonding 6.3 Points de connexion, protection par mise à la masse, avis pour la sécurité électrique, kits d’accessoires pour la protection par mise à la masse 6.3 Puntos de conexión, puesta a tierra, indicaciones para la seguridad eléctrica, juegos de accesorios para la puesta a tierra... -
Page 32: Re-Installing The Removed Enclosure Panels
6. Installation 6. Installation 6. Instalación 6.4 Re-installing the removed enclosure panels 6.4 Remonter à nouveau les pièces plates démontées 6.4 Montar las piezas planas desmontadas Re-installing the side panels Remonter les panneaux latéraux Montar los laterales 6. Installation 6. Installation 6. -
Page 33: Installing The Front Door - L/H Door Hinge
6. Installation 6. Installation 6. Instalación 6.4 Re-installing the removed enclosure panels 6.4 Remonter à nouveau les pièces plates démontées 6.4 Montar las piezas planas desmontadas Re-installing the front door – l/h door hinge Remonter la porte avant – porte avec charnières à gauche Montar la puerta frontal –... - Page 34 TX25 TX30 180° 6. Installation 6. Installation 6. Instalación 6.4 Re-installing the removed enclosure panels 6.4 Remonter à nouveau les pièces plates démontées 6.4 Montar las piezas planas desmontadas Re-installing the front door – r/h door hinge (swapping hinge to opposite side) Remonter la porte avant –...
- Page 35 TX20 TX25 180° 6. Installation 6. Installation 6. Instalación 6.4 Re-installing the removed enclosure panels 6.4 Remonter à nouveau les pièces plates démontées 6.4 Montar las piezas planas desmontadas Re-installing the front door – r/h door hinge (swapping hinge to opposite side) Remonter la porte avant –...
-
Page 36: Commissioning
7. Commissioning 7. Mise en service 7. Puesta en marcha Before commissioning, the TS IT Pro or bayed La baie TS IT Pro ou la rangée de baies Antes de la puesta en marcha debe equi- TS IT Pro must be correctly equipped with the TS IT Pro doivent être équipées des pièces parse el TS IT Pro o el ensamblaje de racks previously dismantled enclosure panels and... -
Page 37: Troubleshooting
9. Fallos y soluciones For technical queries, please contact / Pour tout incident techique veuillez vous adresser à / En caso de incidencias técnicas puede dirigirse a Canada Mexico RITTAL North America LLC RITTAL Systems Ltd. RITTAL, S.A. de C.V. Schaumburg Mississauga Toluca, México... -
Page 38: Technical Specifi Cations
12. Datos técnicos Further technical information are available on De plus amples informations techniques Encontrará más información técnica en la the Rittal website. fi gurent sur le site Internet de Rittal. página web de Rittal. lbs/kg lbs/kg Max. admissi- Nominal dimensions... - Page 39 12. Datos técnicos Further technical information are available on De plus amples informations techniques Encontrará más información técnica en la the Rittal website. fi gurent sur le site Internet de Rittal. página web de Rittal. Protection category Indice de protection...
- Page 40 12. Datos técnicos Further technical information are available on De plus amples informations techniques Encontrará más información técnica en la the Rittal website. fi gurent sur le site Internet de Rittal. página web de Rittal. lbs/kg lbs/kg Max. admissi- Nominal dimensions...
- Page 41 12. Datos técnicos Further technical information are available on De plus amples informations techniques Encontrará más información técnica en la the Rittal website. fi gurent sur le site Internet de Rittal. página web de Rittal. Protection category Indice de protection...
-
Page 42: Spare Parts
13. Spare parts 13. Pièces de rechange 13. Piezas de recambio A current overview is available on the Rittal Une version actualisee de cette notice est En la página web de Rittal encontrará una website. disponible sur le site Internet de Rittal. - Page 43 Notes/Notas TS IT Pro enclosure system / Baies TS IT Pro / Sistema de racks TS IT Pro...
- Page 44 ◾ Climate Control ◾ IT Infrastructure ◾ Software & Services You can fi nd the contact details of all Rittal companies throughout the world here. www.rittal.com/contact RITTAL GmbH & Co. KG Auf dem Stuetzelberg · 35745 Herborn · Germany Phone +49 2772 505-0...