Publicité
Les langues disponibles
Les langues disponibles
Liens rapides
Helios Ventilatoren
MONTAGE- UND BETRIEBSVORSCHRIFT
INSTALLATION AND OPERATING INSTRUCTIONS
NOTICE DE MONTAGE ET D'UTILISATION
Elektrische Nachheizung
Electrical auxiliary heater
Batterie de chauffe électrique
AIR1-ENH
für AIR1 Lüftungsgeräte
for AIR1 ventilation units
pour les centrales AIR1
DE
EN
FR
Publicité
Chapitres

Manuels Connexes pour Helios AIR1-ENH


Sommaire des Matières pour Helios AIR1-ENH
- Page 1 Helios Ventilatoren MONTAGE- UND BETRIEBSVORSCHRIFT INSTALLATION AND OPERATING INSTRUCTIONS NOTICE DE MONTAGE ET D’UTILISATION Elektrische Nachheizung Electrical auxiliary heater Batterie de chauffe électrique AIR1-ENH für AIR1 Lüftungsgeräte for AIR1 ventilation units pour les centrales AIR1...
-
Page 2: Table Des Matières
Montage- und Betriebsvorschrift Elektrische Nachheizung AIR1-ENH DEUTSCH Inhaltsverzeichnis KAPITEL 1 ALLGEMEINE HINWEISE . . . . . . . . . . . . . . . . . . . . . . . . . . . . . . . . . . . . . . . . . . . . . . . . . . . . . . . . . . . Seite 2 Wichtige Informationen . -
Page 3: Wichtige Informationen
Wenn die nachfolgenden Ausführungen nicht beachtet werden, entfällt die Gewährleistung. Gleiches gilt für Haftungs- ansprüche an den Hersteller. Der Gebrauch von Zubehörteilen, die nicht von Helios empfohlen oder angeboten werden, ist nicht statthaft. Even tuell auftretende Schäden unterliegen nicht der Gewährleistung. -
Page 4: Allgemeine Montagehinweise
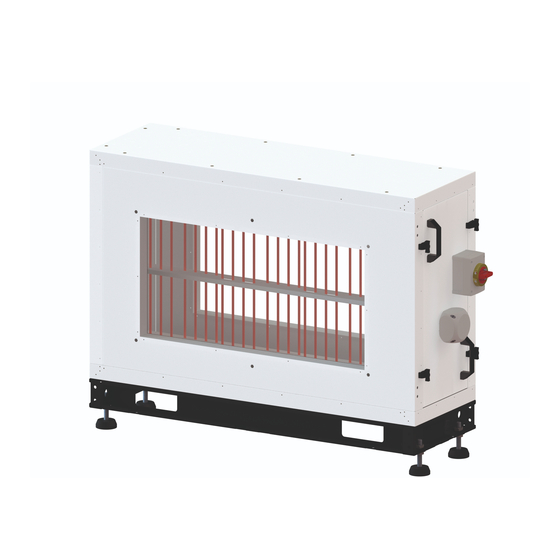
Abmessungen externe elektrische Nachheizung Abb .1 Maße (mm) Type Art.-Nr. Type AIR1-ENH RH 5000 1240 – – 03618 AIR1-ENH RH 5000 780 1240 960 AIR1-ENH RH 6000 1360 1010 – – 03625 AIR1-ENH RH 6000 830 1360 1010 300 1610... -
Page 5: Transport
Montage- und Betriebsvorschrift Elektrische Nachheizung AIR1-ENH 2 .0 .3 Transport Der Transport muss sorgfältig durchgeführt werden. Es wird empfohlen das Gerät bis zur Aufstellung in der Originalver- packung zu belassen, um mögliche Beschädigungen und Verschmutzungen zu vermeiden. Der Transport muss von geschultem und erfahrenem Personal durchgeführt werden und es müssen die notwendigen Sicherheitsvorkehrungen getroffen werden, um ein Umkippen und Verrutschen des Geräts zu verhindern. - Page 6 Montage- und Betriebsvorschrift Elektrische Nachheizung AIR1-ENH Abb .2 2. Schrauben der mittleren Serviceklappe lösen (s. Abb. 3). Abb .3 3. Serviceklappe in Richtung des Klemmenkastens entfernen (s. Abb. 4). Abb .4 4. Ggf. Stützblech entfernen (s. Abb. 5). Abb .5...
-
Page 7: Elektrische Nachheizung Für Air1 Xh Und Rh (1500, 2000, 3000) Geräte
Montage- und Betriebsvorschrift Elektrische Nachheizung AIR1-ENH Abb .6 6. Elektrische Nachheizung über Stecker anschließen (s. Abb. 7). Abb .7 7. Nach der Installation des Heizregisters die Einstellungen im Inbetriebnahme-Assistenten vornehmen. Hierzu das entsprechende Kapitel der Montage- und Betriebsvorschrift des jeweiligen AIR1-Lüftungsgeräts beachten. -
Page 8: Elektrische Nachheizung Für Air1 Rh Geräte (5000, 6000, 8000, 9500, 1200, 1500)
Montage- und Betriebsvorschrift Elektrische Nachheizung AIR1-ENH 2. Elektrische Nachheizung einsetzen (s. Abb. 9). Aufkleber mit der Luftströmungsrichtung beachten. Abb .9 3. Elektrische Nachheizung über Stecker anschließen (s. Abb. 10). Abb .10 4. Nach der Installation des Heizregisters die Einstellungen im Inbetriebnahme-Assistenten vornehmen. Hierzu das entsprechende Kapitel der Montage- und Betriebsvorschrift des jeweiligen AIR1-Lüftungsgeräts beachten. - Page 9 Montage- und Betriebsvorschrift Elektrische Nachheizung AIR1-ENH 1. Dichtungsstreifen dort auftragen, wo das Modul mit dem AIR1-Gerät aneinandergefügt wird (s. Abb. 12). Abb .12 2. Schraubenabdeckungen am Gerät entfernen, bevor das Modul installiert wird (s. Abb. 13). Abb .13 3. Temperatursensor von der Gerätezuleitung entfernen. Modul und Gerät nahe zusammen bringen und den Geräte- stecker mit dem elektrischen Nachheizmodul verbinden (s.
- Page 10 Montage- und Betriebsvorschrift Elektrische Nachheizung AIR1-ENH Abb .16 6. Die Schraube fest anziehen. (Abb. 17). Abb .17 7. Blechteile auf dem Modul montieren. Gerät wie folgt mit dem Modul verbinden (s. Abb. 18). Abb .18 8. Abdeckung des Hauptschalters öffnen. Kabeldicke, die für den Stromanschluss verwendet wird, überprüfen (s.
-
Page 11: Service Und Wartung
Montage- und Betriebsvorschrift Elektrische Nachheizung AIR1-ENH 9. Abdeckung des Klemmenkastens öffnen. Kabeldicke, die für den Stromanschluss verwendet wird, überprüfen. Die Kabel an die Klemmen anschließen und die Abdeckung des Klemmenkastens schließen (s. Abb. 20). Die Kabelverbindungen sind den Anschlussplänen der entsprechenden Montage- und Betriebsvorschrift des AIR1-Geräts zu entnehmen . - Page 12 Montage- und Betriebsvorschrift Elektrische Nachheizung AIR1-ENH Abb .21 2. Reset-Schalter ziehen, um die elektrische Nachheizung zurücksetzen (s. Abb. 22). Abb .22 Elektrische Nachheizung für AIR1 XH und RH Geräte (1500, 2000, 3000) 1. Öffnen Sie die Verriegelung und drehen Sie die Handgriffe in Richtung gegen den Uhrzeigersinn, um die Türe zu öff- nen (Abb.
- Page 13 Montage- und Betriebsvorschrift Elektrische Nachheizung AIR1-ENH Abb .24 Elektrische Nachheizung für AIR1 RH Geräte (5000, 6000, 8000, 9500, 12000, 15000) 1. Die Schrauben lösen und die elektrische Heizung entfernen, um zu dem Reset-Schalter zu gelangen. 2. Den Reset-Schalter nach oben drücken, um eine manuelle Rückstellung zu erzielen (Abb. 25).
- Page 14 Installation and Operating Instructions Electrical auxiliary heater AIR1-ENH ENGLISH Table of Contents CHAPTER 1 GENERAL INFORMATION . . . . . . . . . . . . . . . . . . . . . . . . . . . . . . . . . . . . . . . . . . . . . . . . . . . . . . . . . Page 2 Important information .
-
Page 15: Important Information
If the preceding instructions are not observed, all warranty claims shall be excluded. This also applies for liability claims against the manufacturer. The use of accessories, which are not recommended or offered by Helios, is not permitted. Any possible damages are not covered by the warranty. -
Page 16: General Installation Instructions
Installation and Operating Instructions Electrical auxiliary heater AIR1-ENH Product name Power max . Power Phases Operating Frequency Weight (kg) Protection protection (kW) consumption voltage (V) (Hz) class (w/o class (with max . (A) rain repellent rain repellent roof) roof) AIR1 RH internal electrical auxiliary heater AIR1-ENH RH 1500 6.06... -
Page 17: Shipping
Installation and Operating Instructions Electrical auxiliary heater AIR1-ENH 2 .0 .3 Shipping The shipping must be carried out carefully. It is recommended to leave the unit in the original packaging until installation to avoid possible damages and contamination. The shipping must be carried out by trained and experienced personnel and the necessary safety precautions should be taken to prevent overturning and slipping of the device. - Page 18 Installation and Operating Instructions Electrical auxiliary heater AIR1-ENH Fig .2 2. Unscrew the screws of the middle service door (see Fig. 3). Fig .3 3. Remove service door in direction of the terminal box (see Fig. 4). Fig .4 4. Remove support plate if necessary (see Fig. 5).
-
Page 19: Electrical Auxiliary Heater For Air1 Xh And Rh (1500, 2000, 3000) Units
Installation and Operating Instructions Electrical auxiliary heater AIR1-ENH Fig .6 6. Connect electrical auxiliary heater via plugs (see Fig. 7). Fig .7 7. After installing the heating register, adjust the settings in the commissioning assistant. For this purpose, please refer to corresponding chapter in the installation and operating instructions for the respective AIR1 ventilation unit. -
Page 20: Electrical Auxiliary Heater For Air1 Rh Units (5000, 6000, 8000, 9500, 1200, 1500)
Installation and Operating Instructions Electrical auxiliary heater AIR1-ENH 2. Insert electrical auxiliary heater (see Fig. 9). Note label with the air flow direction. Fig .9 3. Connect electrical auxiliary heater via plugs (see Fig. 10). Fig .10 4. After installing the heating register, adjust the settings in the commissioning assistant. For this purpose, please refer to corresponding chapter in the installation and operating instructions for the respective AIR1 ventilation unit. - Page 21 Installation and Operating Instructions Electrical auxiliary heater AIR1-ENH 1. Apply sealing strips where the module joins the AIR1 unit (see Fig. 12). Fig .12 2. Remove screw covers on the unit before installing the module (see Fig. 13). Fig .13 3.
- Page 22 Installation and Operating Instructions Electrical auxiliary heater AIR1-ENH Fig .16 6. Tighten the screws. (Fig. 17). Fig .17 7. Fix sheet metal parts to the module. Connect unit to the module as follows (see Fig. 18). Fig .18 8. Open main switch cover. Check cable thickness for the power connection (see Fig. 19). Connect the cables to the terminals and close the main switch cover.
-
Page 23: Service And Maintenance
Installation and Operating Instructions Electrical auxiliary heater AIR1-ENH 9. Open terminal box cover. Check cable thickness for power connection. Connect the cables to the terminals and close the terminal box cover (see Fig. 20). The cable connections can be found in the the wiring diagrams in the corresponding installation and operating instructions for the AIR1 unit . - Page 24 Installation and Operating Instructions Electrical auxiliary heater AIR1-ENH Fig .21 2. Pull the reset switch to reset the electrical auxiliary heater (see Fig. 22). Fig .22 Electrical auxiliary heater for AIR1 XH and RH units (1500, 2000, 3000) 1. Open the latch and turn the handles counter clockwise to open the doors (Fig. 23).
- Page 25 Installation and Operating Instructions Electrical auxiliary heater AIR1-ENH Fig .24 Electrical auxiliary heater for AIR1 RH units (5000, 6000, 8000, 9500, 12000, 15000) 1. Loosen the screws and remove the electrical heater to access the reset switch. 2. Press the reset switch up for a manual reset (Fig. 25).
- Page 26 Notice de montage et d’utilisation Batterie de chauffe électrique AIR1-ENH FRANÇAIS Sommaire CHAPITRE 1 INFORMATIONS GÉNÉRALES . . . . . . . . . . . . . . . . . . . . . . . . . . . . . . . . . . . . . . . . . . . . . . . . . . . Page 2 Informations importantes .
-
Page 27: Chapitre 1 Informations Générales
Si les consignes figurant dans cette notice ne sont pas correctement respectées, la garantie s’annule. Il en est de même pour toute implication de responsabilité du fabricant. L’utilisation d’accessoires non conseillés ou proposés par Helios n’est pas permise. Les dégâts causés par cette mau- vaise utilisation ne sont pas inclus dans la garantie. -
Page 28: Consignes De Montage Générales
Notice de montage et d’utilisation Batterie de chauffe électrique AIR1-ENH Désignation du produit Puissance Intensité Phases Tension de Fréquence Poids (kg) Indice de Indice de max . (kW) absorbée fonctionne- (Hz) protection protection max . (A) ment (V) (sans toiture... -
Page 29: Stockage
Notice de montage et d’utilisation Batterie de chauffe électrique AIR1-ENH 2 .0 .2 Stockage Pour un stockage de longue durée et pour éviter toute détérioration préjudiciable, il convient de se conformer aux instructions suivantes : Protéger avec un emballage sec, étanche à l’air et à la poussière (sac en matière synthétique contenant des sachets déshydrateurs et un indicateur d’humidité). - Page 30 Notice de montage et d’utilisation Batterie de chauffe électrique AIR1-ENH Fig . 2 2. Desserrer les vis de la trappe de visite centrale (voir fig. 3). Fig . 3 3. Faire glisser la trappe de visite en direction du boîtier électrique pour la retirer (voir fig. 4).
- Page 31 Notice de montage et d’utilisation Batterie de chauffe électrique AIR1-ENH Fig . 6 6. Raccorder la batterie électrique à l’aide du connecteur (voir fig. 7). Fig . 7 7. Après l’installation de la batterie de chauffe, procéder aux réglages dans l’assistant de mise en service. Pour ce faire, veuillez consulter le chapitre correspondant de la notice de montage et d’utilisation de la centrale AIR1...
- Page 32 Notice de montage et d’utilisation Batterie de chauffe électrique AIR1-ENH 2. Installer la batterie électrique (voir fig. 9). Respecter la direction indiquée sur l’étiquette pour les flux d’air. Fig . 9 3. Raccorder la batterie électrique à l’aide du connecteur (voir fig. 10).
- Page 33 Notice de montage et d’utilisation Batterie de chauffe électrique AIR1-ENH 1. Appliquer des bandes d’étanchéité aux endroits où le module est accolé à la centrale AIR1 (voir fig. 12). Fig . 12 2. Retirer les cache-vis de la centrale avant d’installer le module (voir fig. 13).
- Page 34 Notice de montage et d’utilisation Batterie de chauffe électrique AIR1-ENH 5. Monter les éléments d’assemblage du module sur la centrale et le module (voir fig. 16). Fig . 16 6. Bien serrer la vis (voir fig. 17). Fig . 17 7.
-
Page 35: Entretien Et Maintenance
Notice de montage et d’utilisation Batterie de chauffe électrique AIR1-ENH 9. Ouvrir le couvercle du boîtier électrique. Vérifier la section du câble utilisé pour le raccordement électrique. Raccorder les câbles aux bornes et fermer le couvercle du boîtier électrique (voir fig. 20). -
Page 36: Batterie De Chauffe Électrique Pour Les Centrales Air1 Xh Et Rh (1500, 2000, 3000)
Notice de montage et d’utilisation Batterie de chauffe électrique AIR1-ENH Fig . 21 2. Appuyer sur le bouton de réinitialisation (Reset) pour réinitialiser le chauffage électrique (voir fig. 22). Fig . 22 Batterie de chauffe électrique pour les centrales AIR1 XH et RH (1500, 2000, 3000) 1. -
Page 37: Batterie De Chauffe Électrique Pour Les Centrales Air1 Rh (5000, 6000, 8000, 9500, 1200, 1500)
Notice de montage et d’utilisation Batterie de chauffe électrique AIR1-ENH Fig . 24 Batterie de chauffe électrique pour les centrales AIR1 RH (5000, 6000, 8000, 9500, 12000, 15000) 1. Desserrer les vis et retirer le chauffage électrique pour accéder au bouton de réinitialisation. - Page 38 Notice de montage et d’utilisation Batterie de chauffe électrique AIR1-ENH...
- Page 39 Notice de montage et d’utilisation Batterie de chauffe électrique AIR1-ENH...
- Page 40 HELIOS Ventilatoren GmbH + Co KG · Lupfenstraße 8 · 78056 VS-Schwenningen HELIOS Ventilateurs · Le Carré des Aviateurs · 157 avenue Charles Floquet · 93155 Le Blanc Mesnil Cedex CH HELIOS Ventilatoren AG · Tannstrasse 4 · 8112 Otelfingen GB HELIOS Ventilation Systems Ltd.