Channel Master STEALTHtenna Mode D'emploi
Liens rapides
STEALTHtenna Instruction Sheet
STEALTHtenna Hoja de Instrucciones
STEALTHtenna Mode d'emploi
WATCH FOR WIRES!
WARNING: INSTALLATION
OF THIS PRODUCT NEAR
POWERLINES IS DANGEROUS.
FOR YOUR SAFETY, FOLLOW THE
INSTALLATION DIRECTIONS
Follow These Procedures for
the Safest Installation
1. Perform as much antenna assembly on the ground
as possible.
2. Watch out for overhead power lines. Check
the distance to the power lines before you start
installing. WE RECOMMEND YOU STAY A MINIMUM
OF TWICE THE MAXIMUM LENGTH OF THE ANTENNA
ASSEMBLY AWAY FROM ALL POWER LINES.
3. Do not use a metal ladder.
4. Remember, even the slightest touch of an antenna
to a power line can cause a fatal shock.
5. Do NOT try to do the job on a windy day.
6. Have a friend as a spotter when you're on the roof.
They can see things you can't.
7. If you start to drop an antenna, move away from it
and let it fall.
8. If any part of the antenna should come into contact
with a power line CALL YOUR LOCAL POWER
COMPANY! DO NOT TRY TO REMOVE IT YOURSELF!
They will remove it safely.
Contents:
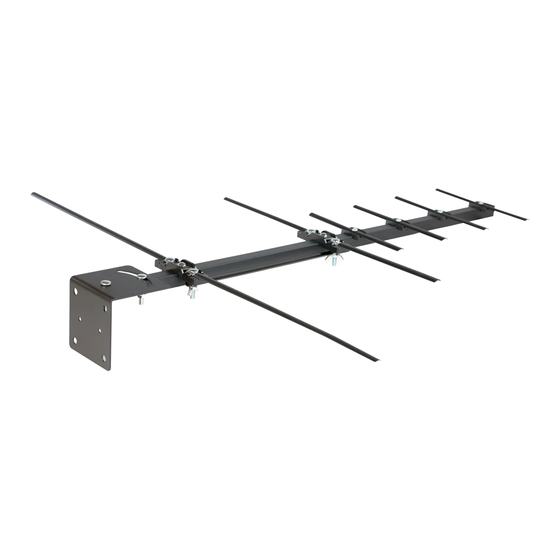
1. CM-3010HD STEALTHtenna
2. Balun Matching Transformer
3. Mounting Bracket
4. Two (25mm) carriage bolts with flange nuts for
attachment to mounting bracket and adjusting
direction.
5. Two (90mm) U-bolts with four hexagon nuts for
assembly of J-mount and mast.
6. Instruction Sheet
Contenido:
1. CM-3010HD STEALTHtenna antena
2. Balún Transformador Matching
3. Soporte de montaje
4. Dos (25mm) pernos del carro con tuercas de la brida para la fijación
a soporte de montaje y dirección de ajuste.
5. Dos (90mm) pernos en U con cuatro tuercas hexagonales para el
montaje de J-montaje y el mástil.
6. Hoja de Instrucciones
Contenu:
1. CM-3010HD STEALTHtenna antenne
2. Balun Transformateur correspondants
3. Support de fixation
4. Deux (25mm) boulons de carrosserie avec écrous de la bride de
fixation au support de montage et le réglage de direction.
5. Deux (90mm) boulons en U avec quatre écrous hexagonaux pour
l'assemblage de J-montage et le mât.
6. Mode d'emploi
4.
3.
2.
5.
ChannelMaster.com
| 877.746.7261
9. Mast, lead-in, and metal guy wires are excellent
conductors of electrical current - - keep them away
from power lines too.
10. B e sure your family and friends understand the
danger of touching an overhead power line.
Tell them never to try to remove any object in
contact with a power line (TV antenna, mast or
anything else).
11. M ake sure that the antenna mast assembly is
properly grounded.
For more information, visit
www.channelmaster.com/support.
Para la Instalacion mas Segura, Siga Estos Procedimientos
1.
Realice la mayor parte de las tareas de montaje de la antena en el
piso.
2.
Cuídese de los cables aéreos de alta tensión. Verifique la distancia
que lo separa de los cables de alta tensión antes de iniciar la
instalación LE RECOMENDAMOS QUE SE MANTENGA A UNA
DISTANCIA MINIMA DE LOS CABLES DE ALTA TENSIÓN IGUAL AL
DOBLE DEL LARGO DEL CONJUNTO DE LA ANTENA.
3.
No utilice una escalera metálica.
4.
Recuerde que hasta el contacto más leve entre la antena y los
cables de alta tensión pueden provocar un descargo mortal.
5.
No intente realizar esta tarea en un día ventoso.
6.
Cuente con la presencia de otra persona para que lo observe
mientras se encuentra en el techo. Esta persona puede ver cosas
que usted no ve.
7.
Si la antena comienza a caerse, aléjese y déjela caer.
8.
¡Si cualquier parte de la antena entra en contacto con un cable
de alta tensión - - Comuníquese CON SU Compañía LOCAL DE
ELECTRICIDAD! ¡NO INTENTE RETIRARLA USTED MISMO! Ellos la retirarán
de manera segura.
9.
El mástil, los cables de acometida y los cables metálicos de retenido
son excelentes conductores de la corriente eléctrica - manténgalos
alejados de los cables de alta tensión.
Installation:
1. Determine which direction to point your
STEALTHtenna. If you need assistance, visit
www.antennaweb.org and enter your zip code
and street address. The display will show you what
channels are available in your area, as well as your
distance and relative location from the broadcast
tower. STEALTHtenna will receive signals from
yellow, green, light green and red color-coded
channels unless blocked by a structure such as a
tree, building or mountain.
2. Select a location on the exterior of your home that
has a clear line of site in the direction determined
from AntennaWeb, and in close proximity to a
coax cable terminal if you will be using a pre-wired
connection to your TV. If applicable, using the same
mounting mast and cable terminal from a previous
satellite system is the easiest solution.
1.
3. Install the mounting
bracket using
the two screws
6.
provided. Unfold
four elements and
tighten attached
Instruction
wing nuts.
Sheet
© 2017 Channel Master L.L.C. Channel Master is a registered trademark. Specifications subject to change. All rights reserved. © 2017 Channel Master. Channel Master es una marca registrada. Especificaciones sujetas a cambio. Todos los derechos reservados. © Channel
Master, 2017. Channel Master est une marque déposée. Les caractéristiques peuvent être modifiées sans préavis. Tous droits réservés. Pub CM3010HD.IS.201710
¡CUIDADO CON LOS CABLES!
ADVERTENCIA: LA INSTALACIÓN DE ESTE PRODUCTO
CERCA DE LÍNEAS ELÉCTRICAS ES PELIGROSO. PARA SU
SEGURIDAD, SIGA LAS INSTRUCCIONES DE INSTALACIÓN
AntennaWeb.org
Zip Code:
AntennaWeb.org
Stations:
KAPT 3.1
263º
KAPQ 5.1
263º
KAPE 6.1
263º
10. Asegúrese de que sus familiares y amigos comprendan el peligro
que implica tocar un cable aéreo de alta tensión. Dígales que
nunca intenten retirar ningún objeto que se encuentre en contacto
común cable de alta tensión - - una antena de CB, de TV o
cualquier otro elemento.
11. Asegúrese de que el conjunto del mástil de la antena cuente con
una conexión a tierra adecuada. Para obtener más información,
visite www.channelmaster.com/support.
ATTENTION AUX CÂBLES!
AVERTISSEMENT: INSTALLATION DE CE PRODUIT PRES
PowerLines EST DANGEREUX. POUR VOTRE SÉCURITÉ, SUIVRE
LES INSTRUCTIONS D'INSTALLATION
Suivez Ces Directives Pour Obtenir L'Installation la Plus Sûre
1.
Effectuez le plus possible la plus grande partie de l'assemblage au
sol.
2.
Repérez les câbles électriques aériens. Avant de commencer
l'installation, vérifiez la distance entre l'antenne et les câbles.
NOUS RECOMMANDONS DE LAISSER UNE DISTANCE D'AU MOINS
LE DOUBLE DE LA LONGUEUR MAXIMALE DE L'ANTENNE ENTRE
L'ANTENNE ET LES CÂBLES ÉLECTRIQUES.
3.
N'utilisez pas d'échelle en métal.
4.
N'oubliez pas : même le plus léger contact entre l'antenne et un
câble électrique peut entraîner une décharge mortelle.
5.
N'essayez PAS d'installer l'antenne par temps de grand vent.
6.
Ayez toujours une autre personne à proximité lorsque vous êtes sur le
toit; elle peut voir des choses que vous ne voyez pas.
7.
Si vous lâchez une antenne par mégarde, éloignez-vous et laissez-la
tomber.
8.
Si une pièce de l'antenne a touché un câble électrique, N'ESSAYEZ
PAS DE RETIRER L'ANTENNE VOUS-MÊME! APPELEZ LA COMPAGNIE
D'ÉLECTRICITÉ! Ses agents le feront en toute sécurité.
9.
Le mât, le câble de descente et les fils de hauban sont d'excellents
conducteurs de courant électrique; gardez-les également éloignés
des câbles électriques.
10. Assurez-vous que votre famille et vos amis comprennent bien le
danger qu'il y a à toucher un câble électrique aérien. Dites-leur de
ne jamais toucher un objet en contact avec un câble, que ce soit
une antenne de CB, de télé ou autre.
11. Assurez-vous que le mât de l'antenne est correctement relié à la
terre. Pour plus d'informations, visitez le site www.channelmaster.
com/support.
4. Attach the STEALTHtenna to the desired surface
(eave or mast) using the U-bolts and nuts.
OR
o / ou
5. Position the antenna in the desired direction using
the adjustment screw, and tighten everything to
complete the mounting.
U-BOLTS ON MAST
Pernos en U sobre mástil
U-boulons sur mât
MOUNTING
BRACKET
soporte de montaje
support de fixation
6. Connect the Balun Matching Transformer to the
STEALTHtenna as shown on back, then connect
a coaxial cable to run from the antenna directly
to the television set (if you are using the Channel
Master DVR+, the cable should connect directly to
the DVR+, not the television set). If you will split the
signal to multiple televisions, be sure to use a high
quality splitter or amplifier with multiple outputs. If
you are utilizing an existing pre-wired infrastructure
from a pay-TV service, it is important to remove any
other devices, such as a satellite switch, that are in-
line between the STEALTHtenna and the television.
– Installation instructions continued on back.
STEALTHtenna

Manuels Connexes pour Channel Master STEALTHtenna


Sommaire des Matières pour Channel Master STEALTHtenna
- Page 1 – Installation instructions continued on back. © 2017 Channel Master L.L.C. Channel Master is a registered trademark. Specifications subject to change. All rights reserved. © 2017 Channel Master. Channel Master es una marca registrada. Especificaciones sujetas a cambio. Todos los derechos reservados. © Channel ChannelMaster.com...
- Page 2 (4) devolverá el importe que el cliente pagó por modification ou une amélioration à l’équipement, lors de la production suivante, sans encourir time of the repair. CHANNEL MASTER will use its best efforts to ensure that the cost of such los servicios.