Table des Matières
Publicité
Les langues disponibles
Les langues disponibles
Liens rapides
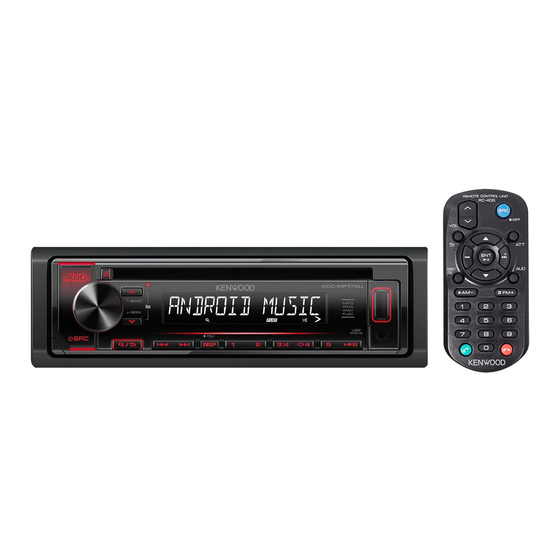
KDC-MP172U
CD-RECEIVER
INSTRUCTION MANUAL
AMPLI-TUNER LECTEUR DE CD
MODE D'EMPLOI
REPRODUCTOR DE DISCOS COMPACTOS RECEPTOR DE FM/AM
MANUAL DE INSTRUCCIONES
For your records
Record the serial number, found on the back of the unit, in the spaces designated on the warranty card, and in the space provided below.
Refer to the model and serial numbers whenever you call upon your Kenwood dealer for information or service on the product.
Model KDC-MP172U
Serial number
US Residents Only
Register Online
Register your Kenwood product at http://www.kenwood.com/usa/
© 2017 JVC KENWOOD Corporation
B5A-2089-00 (KN)
Publicité
Chapitres
Table des Matières
Dépannage

Manuels Connexes pour Kenwood KDC-MP172U


Sommaire des Matières pour Kenwood KDC-MP172U
- Page 1 Record the serial number, found on the back of the unit, in the spaces designated on the warranty card, and in the space provided below. Refer to the model and serial numbers whenever you call upon your Kenwood dealer for information or service on the product.
-
Page 2: Table Des Matières
CONTENTS BEFORE USE BEFORE USE IMPORTANT • To ensure proper use, please read through this manual before using this product. It is especially important that you read and observe BASICS Warning and Caution in this manual. • Please keep the manual in a safe and accessible place for future reference. GETTING STARTED 1 Select the display language WARNING... -
Page 3: Basics
BASICS Faceplate Remote control (RC-406) Volume knob Loading slot Display window Remote sensor (Do not expose to bright sunlight.) Pull out the insulation sheet when using for the first time. * Not used Detach button Attach Detach How to reset How to replace the battery Your preset adjustments will be erased except stored radio stations. -
Page 4: Getting Started
GETTING STARTED To set the date Turn the volume knob to select [DATE FORMAT], then press the knob. Turn the volume knob to select [DD/MM/YY] or [MM/DD/YY], then press the knob. Turn the volume knob to select [DATE SET], then press the knob. Turn the volume knob to make the settings, then press the knob. -
Page 5: Radio
MANUAL : Manually search for a station. For details on how to update the firmware, visit • To store a station: Press and hold one of the number buttons (1 to 6). <www.kenwood.com/cs/ce/>. • To select a stored station: Press one of the number buttons (1 to 6) (or CLOCK press one of the number buttons (1 to 6) on the remote control). - Page 6 RADIO Other settings CLOCK TIME SYNC ON: Synchronizes the unit’s time to the Radio Data System station time. ; Press the volume knob to enter [FUNCTION]. OFF: Cancels. Turn the volume knob to select an item (see the following table), then press the knob. Repeat step until the desired item is selected/activated or follow Available Program Type for [PTY SEARCH]...
-
Page 7: Cd/Usb/Android
When connecting an Android device, “Press [VIEW] to install KENWOOD MUSIC PLAY APP” is shown. Follow the instructions to install the application. You can also install the latest version of KENWOOD MUSIC PLAY application on your Android device before connecting. For more information, visit <www.kenwood.com/cs/ce/>. -
Page 8: Alphabet Search
While in ANDROID source, press 5 repeatedly. BROWSE MODE : Control Android device from this unit via Turn the volume knob quickly to browse through the list quickly. KENWOOD MUSIC PLAY application installed in Skip Search (applicable only for ANDROID source) the Android device. -
Page 9: Other Settings
CD/USB/ANDROID Preparation: Other settings Select [ON] for [BUILT-IN AUX] in [SOURCE SELECT]. ( 5) Press the volume knob to enter [FUNCTION]. Turn the volume knob to select an item (see the following table), Start listening then press the knob. Connect a portable audio player (commercially available). Repeat step until the desired item is selected or activated. -
Page 10: Audio Settings
AUDIO SETTINGS While listening to any source... EQ PRO (This setting is stored to [USER].) Press AUD to enter [AUDIO CONTROL] directly. BASS ADJUST BASS CTR FRQ 60/80/100/200: Selects the center frequency. Turn the volume knob to select an item (see the following table), BASS LEVEL –8 to +8 (+2): Adjusts the level. -
Page 11: Display Settings
DISPLAY SETTINGS AUDIO SETTINGS LPF SUBWOOFER THROUGH: All signals are sent to the subwoofer. ; 85HZ/120HZ/160HZ: Audio signals with frequencies lower than 85 Hz/120 Hz/160 Hz are sent to the subwoofer. SUB-W PHASE REVERSE (180°)/NORMAL (0°): Selects the phase of the subwoofer output to be in line with the speaker output for optimum performance. (Selectable only if a setting other than [THROUGH] is selected for [LPF SUBWOOFER].) FADER... -
Page 12: Troubleshooting
TROUBLESHOOTING DISPLAY SETTINGS Default: XX Symptom Remedy DISPLAY • Adjust the volume to the optimum level. Sound cannot be heard. • Check the cords and connections. DIMMER Dim the illumination. ON: Dimmer is turned on. ; OFF: Cancels. “MISWIRING CHECK WIRING Turn the power off, then check to be sure the terminals of the speaker DIMMER TIME: Set the dimmer on and off time. - Page 13 • If this does not solve the problem, the connected Android device is unable to route the audio signal to unit. ( 14) • Make sure KENWOOD MUSIC PLAY APP is installed on the Cannot playback at [BROWSE MODE].
-
Page 14: References
– Any other latest information • Some Android devices (with OS 4.1 and above) may not fully support Android Open Accessory Visit <www.kenwood.com/cs/ce/>. (AOA) 2.0. • If the Android device supports both mass storage class device and AOA 2.0, this unit always General playback via AOA 2.0 as priority. -
Page 15: Installation/Connection
INSTALLATION/CONNECTION REFERENCES Change the display information Warning Each time you press DISP, the display information changes. • The unit can only be used with a 12 V DC power supply, negative ground. • If the information is unavailable or not recorded, “NO TEXT”, “NO INFO”, or other information •... - Page 16 INSTALLATION/CONNECTION Installing the unit (in-dash mounting) How to remove the unit 1 Detach the faceplate. 2 Fit the catch pin on the extraction keys into the holes on both sides of the trim plate, then pull it out. 3 Insert the extraction keys deeply into the slots on each side, then follow the arrows as shown on the illustration.
-
Page 17: Wiring Connection
To the terminal that is grounded when the Gray telephone rings or during conversation (Mute control wire) To front speaker (right) Gray/Black ( 13) (To connect the Kenwood navigation Green system, refer your navigation manual.) To rear speaker (left) Green/Black Purple To rear speaker (right) -
Page 18: Specifications
SPECIFICATIONS FM Frequency Range 87.5 MHz — 108.0 MHz (50 kHz space) USB Standard USB 1.1, USB 2.0 Full Speed Usable Sensitivity (S/N = 26 dB) 8.2 dBf (0.71 μV/75 Ω) File System FAT12/16/32 Maximum Supply Current DC 5 V 1 A Quieting Sensitivity 17.2 dBf (2.0 μV/75 Ω) (DIN S/N = 46 dB) MP3 Decode Compliant with MPEG-1/2 Audio Layer-3 Frequency Response (±3 dB) 30 Hz —... -
Page 20: Avant L'utilisation
TABLE DES MATIERES AVANT L’UTILISATION AVANT L’UTILISATION IMPORTANTES • Pour utiliser correctement l’appareil, veuillez ce manuel complément avant de l’utiliser. Il est particulièrement important que vous lisiez et acceptiez les avertissements et les FONCTIONNEMENT DE BASE 3 précautions de ce manuel. •... -
Page 21: Fonctionnement De Base
FONCTIONNEMENT DE BASE Façade Télécommande (RC-406) Capteur de télécommande Bouton de volume Fenêtre d’affichage Fente d’insertion (Ne l’exposez Pas à la lumière directe du soleil.) Retirez la feuille d’isolant lors de la première utilisation. Non utilisé Touche de détachement Attachez Détachez Comment réinitialiser Comment remplacer la pile... -
Page 22: Prise En Main
PRISE EN MAIN Pour régler la date Tournez le bouton de volume pour choisir [DATE FORMAT] , puis appuyez sur le bouton. Tournez le bouton de volume pour choisir [DD/MM/YY] [MM/DD/YY] puis appuyez sur le bouton. Tournez le bouton de volume pour choisir [DATE SET] , puis appuyez sur le bouton. -
Page 23: Radio
MANUAL : Recherche manuellement une station. Pour en savoir plus sur la mise à niveau du micrologiciel, consultez • Pour mémoriser une station: Maintenez pressée une des touches numériques <www.kenwood.com/cs/ce/>. à • Pour choisir une station mémorisée: Appuyez sur une des touches numériques CLOCK à ... -
Page 24: Light M (Musique), Classics , Other Mnation M (Musique), Oldies , Folk M
RADIO Autres paramètres CLOCK TIME SYNC Appuyez sur le bouton de volume pour entrer [FUNCTION] : Synchronise l’heure de l’appareil à l’heure de la station Radio Data System. ; Tournez le bouton de volume pour sélectionner un élément (voir le : Annulation. tableau suivant), puis appuyez sur le bouton. Répétez l’étape jusqu’à... -
Page 25: Cd/Usb/Android
ALL RANDOM Lors de la connexion d’un périphérique Android, “Press [VIEW] to install KENWOOD MUSIC PLAY APP” apparaît. Suivez les instructions pour installer l’application. Vous pouvez aussi intaller la dernière version de l’application KENWOOD MUSIC PLAY sur votre périphérique Android avant la connexion. Pour plus d’informations, consultez <www.kenwood.com/cs/ce/>. - Page 26 BROWSE MODE : Commandez le périphérique Android à partir de cet appareil Tournez rapidement le bouton de volume pour parcourir la liste rapidement. via l’application KENWOOD MUSIC PLAY installée sur le Recherche à saut (applicable uniquement pour la source ANDROID) périphérique Android.
-
Page 27: Aux
CD/USB/ANDROID Préparation: Autres paramètres Sélectionnez [ON] pour [BUILT-IN AUX] dans [SOURCE SELECT] ( 5) Appuyez sur le bouton de volume pour entrer [FUNCTION] Tournez le bouton de volume pour sélectionner un élément (voir le Démarrez l’écoute tableau suivant), puis appuyez sur le bouton. Connectez un lecteur audio portable (en vente dans le commerce). -
Page 28: Réglages Audio
RÉGLAGES AUDIO Pendant l’écoute de n’importe quelle source... EQ PRO [USER] (Ce réglage est mémorisé sur Appuyez sur pour accéder directement à [AUDIO CONTROL] BASS ADJUST BASS CTR FRQ : Choisit la fréquence centrale. Tournez le bouton de volume pour sélectionner un élément (voir le tableau suivant), puis appuyez sur le bouton. -
Page 29: Réglages D'affichage
RÉGLAGES D’AFFICHAGE RÉGLAGES AUDIO LPF SUBWOOFER THROUGH : Tous les signaux sont envoyés au caisson de grave. ; 85HZ 120HZ 160HZ : Les signaux audio avec des fréquences inférieures à 85 Hz/120 Hz/160 Hz sont envoyés sur le caisson de grave. SUB-W PHASE REVERSE (180°)/ NORMAL (0°): Sélectionne la phase de la sortie du caisson de grave à... -
Page 30: Guide De Dépannage
GUIDE DE DÉPANNAGE RÉGLAGES D’AFFICHAGE Défaut: Symptôme Remède DISPLAY • Le son ne peut pas être entendu. Ajustez le volume sur le niveau optimum. • Vérifiez les cordons et les connexions. DIMMER Assombrit l’ é clairage. : Le gradateur est activé. ; : Annulation. - Page 31 Si cela ne résout pas le problème, c’ e st que le périphérique Android connecté ne peut pas diriger le signal audio sur l’appareil. ( 14) • Lecture impossible en mode Assurez-vous que KENWOOD MUSIC PLAY APP est installée sur le [BROWSE MODE] périphérique Android. ( 7) •...
-
Page 32: Références
À propos du périphérique Android – Autres informations récentes • Cet appareil prend en charge Android OS 4.1 et ultérieur. Consultez <www.kenwood.com/cs/ce/>. • Certains périphériques Android (avec OS 4.1 et ultérieur) peuvent ne pas prendre en charge complétement Android Open Accessory (AOA) 2.0. -
Page 33: Installation/Raccordement
INSTALLATION/RACCORDEMENT RÉFÉRENCES Changez l’information sur l’affichage Avertissement DISP Chaque fois que vous appuyez sur , les informations affichées changent. • L’appareil peut uniquement être utilisé avec une alimentation de 12 V CC, à masse négative. • Si aucune information n’ e st disponible ou si aucune information n’ e st enregistrée, “NO TEXT”, “NO INFO”, ou une autre •... -
Page 34: Installation De L'appareil (Montage Encastré)
INSTALLATION/RACCORDEMENT Installation de l’appareil (montage encastré) Comment retirer l’appareil Retirez la façade. Insérez le loquet des clés d’ e xtraction dans les trous de chaque côté de la plaque d’assemblage, puis tirez vers l’ e xtérieur. Insérez les clés d’ e xtraction profondément dans les fentes de chaque côté, puis suivez les flèches indiquées sur l’illustration. -
Page 35: Connexions
(Câble de contrôle de la À l’ e nceinte avant (droite) ( 13) Gris/Noir sourdine) (Pour connecter au système de navigation Kenwood, Vert reportez-vous à votre manuel de navigation.) À l’ e nceinte arrière (gauche) Vert/Noir Violet À... -
Page 36: Spécifications
SPÉCIFICATIONS FM Plage de fréquences 87,5 MHz — 108,0 MHz (intervalle de 50 kHz) Standard USB USB 1.1, USB 2.0 Vitesse maximale Système de fichiers FAT12/16/32 Sensibilité utilisable (S/B = 26 dB) 8,2 dBf (0,71 μV/75 Ω) Courant d’alimentation maximum CC 5 V 1 A Seuil de sensibilité (DIN S/N = 46 dB) 17,2 dBf (2,0 μV/75 Ω) Décodage MP3 Compatible avec le format MPEG-1/2 Audio Layer-3... -
Page 38: Antes Del Uso
CONTENIDO ANTES DEL USO ANTES DEL USO IMPORTANTE • Antes de utilizar este producto y para asegurar su uso correcto, lea completamente este manual. En especial, lea y observe las Advertencias y Precauciones incluidas en este PUNTOS BÁSICOS manual. • Guarde el manual en un lugar seguro y accesible para futuras consultas. -
Page 39: Puntos Básicos
PUNTOS BÁSICOS Placa frontal Mando a distancia (RC-406) Sensor remoto (DO lo exponga Ventanilla de visualización Rueda de volumen Ranura de carga a la luz solar brillante.) Retire la hoja aislante cuando se utilice por primera vez. Sin utilizar Botón de liberación Fijar Desmontar Cómo reinicializar... -
Page 40: Procedimientos Iniciales
PROCEDIMIENTOS INICIALES Para ajustar la fecha Gire la rueda de volumen para seleccionar [DATE FORMAT] y, a continuación, pulse la rueda. Gire la rueda de volumen para seleccionar [DD/MM/YY] [MM/DD/YY] y, a continuación, pulse la rueda. Gire la rueda de volumen para seleccionar [DATE SET] y, a continuación, pulse la rueda. -
Page 41: Radio
: Se cancela (la actualización no se activa). AUTO2 : Busca una emisora presintonizada. Para obtener información sobre cómo actualizar el firmware, visite MANUAL : Buscar manualmente una emisora. <www.kenwood.com/cs/ce/>. • Para programar una emisora: Pulse y mantenga pulsado uno de los botones numéricos ( a ... - Page 42 RADIO Otros ajustes CLOCK TIME SYNC Pulse la rueda de volumen para ingresar en [FUNCTION] : Sincroniza la hora de la unidad con la hora de la emisora Radio Data System. ; Gire la rueda de volumen para seleccionar un elemento (consulte la : Se cancela.
-
Page 43: Cd/Usb/Android
Cuando conecte un dispositivo Android, se mostrará “Press [VIEW] to install KENWOOD MUSIC PLAY APP”. Siga las instrucciones para instalar la aplicación. Antes de la conexión, también puede instalar la versión más reciente de la aplicación KENWOOD MUSIC PLAY en su dispositivo Android. Para obtener más información, visite <www.kenwood.com/cs/ce/>. - Page 44 : Controla el dispositivo Android desde esta unidad a través Gire la rueda de volumen rápidamente para navegar por la lista con rapidez. de la aplicación KENWOOD MUSIC PLAY instalada en el Búsqueda por Salto (aplicable solo para fuente ANDROID) dispositivo Android.
-
Page 45: Aux
CD/USB/ANDROID Preparativos: Otros ajustes Seleccione [ON] para [BUILT-IN AUX] [SOURCE SELECT] ( 5) Pulse la rueda de volumen para ingresar en [FUNCTION] Gire la rueda de volumen para seleccionar un elemento (consulte la Comience a escuchar siguiente tabla), y, a continuación, pulse la rueda. Conecte un reproductor de audio portátil (disponible en el mercado). -
Page 46: Ajustes De Audio
AJUSTES DE AUDIO Mientras se escucha desde cualquier fuente... EQ PRO [USER] (Este ajuste se guarda en Pulse para acceder directamente a [AUDIO CONTROL] BASS ADJUST BASS CTR FRQ : Selecciona la frecuencia central. Gire la rueda de volumen para seleccionar un elemento (consulte la siguiente tabla), y, a continuación, pulse la rueda. -
Page 47: Ajustes De Visualización
AJUSTES DE VISUALIZACIÓN AJUSTES DE AUDIO LPF SUBWOOFER THROUGH 85HZ 120HZ 160HZ : Todas las señales se envían al subwoofer. ; : Las señales de audio con frecuencias inferiores a 85 Hz/120 Hz/160 Hz se envían al subwoofer. SUB-W PHASE REVERSE NORMAL (180°)/ (0°): Selecciona la fase de la salida del subwoofer de acuerdo con la salida de los altavoces, para lograr un desempeño óptimo. -
Page 48: Localización Y Solución De Problemas
LOCALIZACIÓN Y SOLUCIÓN DE PROBLEMAS AJUSTES DE VISUALIZACIÓN Predeterminado: Síntoma Solución DISPLAY • El sonido no se escucha. Ajuste el volumen al nivel óptimo. • Inspeccione los cables y las conexiones. DIMMER Oscurece la iluminación. : El dimmer está activado. ; : Se cancela. Aparece “MISWIRING CHECK WIRING Apague la unidad y luego compruebe que los terminales de los cables de altavoz estén DIMMER TIME... -
Page 49: Silencio Cuando Se Recibe Una Llamada Telefónica
Si con esto no se consigue resolver el problema, el dispositivo Android conectado no podrá enviar la señal de audio a la unidad. ( 14) • No se puede reproducir en Asegúrese de que KENWOOD MUSIC PLAY APP esté instalado en el [BROWSE MODE] dispositivo Android. ( 7) •... -
Page 50: Referencias
– Cualquier otra información más reciente • Algunos dispositivos Android (con OS 4.1 y superior) pueden no ser completamente compatibles con Android Open Visite <www.kenwood.com/cs/ce/>. Accessory (AOA) 2.0. • Si el dispositivo Android es compatible con dispositivos de clase de almacenamiento masivo y con AOA 2.0, esta General unidad siempre reproducirá... -
Page 51: Instalación/Conexión
INSTALACIÓN/CONEXIÓN REFERENCIAS Cambiar la información en pantalla Advertencia DISP Cada vez que pulsa , la información en pantalla cambia. • La unidad puede utilizarse solamente con una fuente de alimentación de 12 V CC con negativo a masa. • Si la información no está disponible o no está registrada, aparecerá “NO TEXT”, “NO INFO”, u otra información (por ej., •... -
Page 52: Lista De Piezas Para La Instalación
INSTALACIÓN/CONEXIÓN Instalación de la unidad (montaje en el tablero) Cómo desmontar la unidad Desmonte la placa frontal. Enganche las uñas de agarre dispuestas en las herramientas de extracción, en los orificios a ambos lados de la placa embellecedora y, a continuación, extráigala. Inserte las herramientas de extracción hasta el fondo de las ranuras a ambos lados y, a continuación, siga la dirección de las flechas, como se muestra en la ilustración. -
Page 53: Conexión Del Cableado
Gris durante la conversación ( 13) (Silenciar cable del control) Al altavoz delantero (derecho) Gris/negro (Para conectar el sistema de navegación Kenwood, consulte el manual del sistema de navegación.) Verde Al altavoz trasero (izquierdo) Verde/negro Púrpura Al altavoz trasero (derecho) Púrpura/negro... -
Page 54: Especificaciones
ESPECIFICACIONES FM Gama de frecuencias 87,5 MHz — 108,0 MHz (espacio 50 kHz) Estándar USB USB 1.1, USB 2.0 Alta velocidad Sistema de archivos FAT12/16/32 Sensibilidad útil 8,2 dBf (0,71 μV/75 Ω) (Relación señal/ruido = 26 dB) Corriente máxima de alimentación 5 V CC 1 A Sensibilidad de silenciamiento 17,2 dBf (2,0 μV/75 Ω) MP3 decodificado... -
Page 56: Fcc Warning
Los equipos eléctricos y electrónicos al final de la vida útil, deberán ser reciclados en instalaciones que puedan dar el tratamiento adecuado a JVC KENWOOD Corporation estos productos y a sus subproductos residuales correspondientes. Póngase en contacto con 2967-3, ISHIKAWA-MACHI, su administración local para obtener información sobre el punto de recogida más cercano.