KitchenAid 5K45SS Mode D'emploi

KitchenAid 5K45SS Mode D'emploi

Pour service intense
Masquer les pouces Voir aussi pour 5K45SS:
Table des Matières

Publicité

Les langues disponibles
  • FR

Les langues disponibles

  • FRANÇAIS, page 28

Liens rapides

h
d
eavy
G
ebruiksaanwijzinG
M
i
ixer
nstructions
r
obots de cuisine
G
ebrauchsanleitunG
i
'
struzioni d
uso
i
nstrucciones de las batidoras
uty
M
ixers
: M
'
ode d
eMploi
- k
üchenMaschine
0
1 2 4 6
8 10

Publicité

Table des Matières
loading

Sommaire des Matières pour KitchenAid 5K45SS

  • Page 1 eavy ebruiksaanwijzinG ixers ixer nstructions ’ obots de cuisine ode d eMploi ebrauchsanleitunG üchenMaschine ’ struzioni d nstrucciones de las batidoras 1 2 4 6 8 10...
  • Page 3 oor intensief Gebruik ebruiksaanwijzinG ixers ixer nstructions ’ obots de cuisine ode d eMploi ebrauchsanleitunG üchenMaschine ’ struzioni d nstrucciones para batidora 1 2 4 6 8 10 9706978B...
  • Page 4: Table Des Matières

    Inhoudsopgave Belangrijke veiligheidsvoorschriften ..............2, 3 Wat u moet weten over uw mixer Onderdelen van mixer model 5K45SS ............4, 5 Onderdelen van mixer model 5K5SS/5KPM5 ..........6, 7 Gebruik van de hulpstukken van KitchenAid ® ...........8 Speling tussen garde en kom ................8 Onderhoud en reinigen ..................8...
  • Page 5 5. Extra voorzichtigheid is geboden wanneer meer dan de volgende hoeveelheden het apparaat door of in de buurt van nodig zijn: Model 5K45SS – 1,12 kg (8 kinderen wordt gebruikt. koppen) bloem of 840 g (6 koppen) 6. Haal de stekker uit het stopcontact volkorenbloem.
  • Page 6: Onderdelen Van Mixer Model 5K45Ss

    Onderdelen van mixer model 5K45SS Hulpstuknaaf Motorkop Hulpstukknop Hendel voor vergrendeling van motorkop (niet afgebeeld) Snelheids- regelaar As van garde Platte garde Roestvrij- stalen kom van 4,3 L (4,5 qt) Klemplaat voor kom Roestvrijstalen draadgarde Deeghaak...
  • Page 7 VERGRENDELEN VAN DE MOTORKOP IN GEHEVEN STAND BEVESTIGEN VAN KOM • Duw de hendel omhoog naar de stand • Controleer of de snelheidsregelaar op OFF UNLOCK [ONTGRENDELEN] en houd (UIT) staat. hem daar. • Trek de motorkap achterover. • Kantel de motorkop naar achteren. •...
  • Page 8: Onderdelen Van Mixer Model 5K5Ss/5Kpm5

    Onderdelen van mixer model 5K5SS / 5KPM5 Hulpstuknaaf Motorkop Hulpstukknop Hendel voor omhoog- brengen van kom (niet afgebeeld) Snelheidsregelaar 1 2 4 6 8 1 0 Veerslot en pen voor kom As van (niet afgebeeld) garde Paspennen Komsteunen Platte garde Roestvrijstalen kom van 4,8 liter (5 quart) Roestvrijstalen...
  • Page 9 BEVESTIGEN VAN KOM • Controleer of de snelheidsregelaar op OFF [UIT] staat. • Zet de hendel voor het omhoogbrengen van de kom in de stand Omlaag. • Breng de komsteunen over de paspennen. • Duw de achterzijde van de kom naar beneden totdat de pen van de kom in het veerslot springt.
  • Page 10: Gebruik Van De Hulpstukken Van Kitchenaid

    Gebruik van de hulpstukken van KitchenAid ® Zie de Gebruiks- en Onderhoudshandleiding voor de Hulpstukken van de Staande Mixer voor de snelheidsinstellingen en de gebruikstijden. Draadgarde voor mengsels waar Platte garde voor normale tot dikke mengsels, zoals bijvoorbeeld voor: lucht in geslagen moet worden, zoals...
  • Page 11: Planetaire Mixbeweging

    Planetaire mixbeweging Uw KitchenAid ® mixer werkt sneller en Tijdens het mixen maakt de grondiger dan de meeste andere elektrische platte menghaak mixers. Daarom moet de mixingtijd in de ronddraaiende bewegingen meeste recepten worden aangepast om over- in de kom en tegelijkertijd mixen te voorkomen.
  • Page 12: Tips

    2. bevestig kom en deeghaak. Vergrendel de kop van de mixer (model 5K45SS) of breng de kom omhoog (model 5K5SS/5KPM5). Zet de mixer op stand 2 en meng gedurende ongeveer 15 seconden of totdat de ingrediënten...
  • Page 13: Eiwit

    6. Ontgrendel de kop (van model 5K45SS) en breng hem omhoog of laat de kom (van model 5K5SS/5KSM5) zakken en verwijder het deeg van de haak. N.B.: Deze aanwijzingen geven een voorbeeld van het maken van brood met de snelle mixmethode.
  • Page 14: Wanneer U Service Nodig Hebt

    KITCHENAID IS NIET AANSPRAKELIJK VOOR SCHADE VAN INCIDENTELE AARD OF VOORTVLOEIEND UIT HET GEBRUIK VAN DE MIXER. Technische gegevens kunnen zonder voorafgaande kennisgeving gewijzigd worden. KitchenAid Europa, Inc.
  • Page 15 eavy ebruiksaanwijzinG ixers ixer nstructions ’ obots de cuisine ode d eMploi ebrauchsanleitunG üchenMaschine ’ struzioni d nstrucciones para batidora 1 2 4 6 8 10 9706978B...
  • Page 16: Important Safety Instructions

    Table of Contents Important Safety Instructions ................2, 3 About Your Mixer Model 5K45SS Mixer Features ................4, 5 Model 5K5SS/5KPM5 Mixer Features .............6, 7 Using your KitchenAid ® Attachments ..............8 Beater To Bowl Clearance ..................8 Care and Cleaning ....................8 Planetary Mixing Action ..................9 Mixer Use ......................9...
  • Page 17 20. ELECTRICAL REQUIREMENTS: Your during operation to prevent injury, and/ KitchenAid ® Mixer operates on a regular or damage to the mixer. 220-240 volt A.C., 50-60 hertz house 8. Do not operate mixer unattended or current.
  • Page 18 5K45SS Mixer Features Attachment Hub Motor Head Attachment Knob Motor Head Locking Lever Speed (not shown) Control Beater Shaft Lever Flat Beater 4.5 Qt (4.3 L) Stainless Steel Bowl Wire Whip Bowl Clamping Plate Dough Hook...
  • Page 19 TO LOCK MOTOR HEAD IN RAISED POSITION TO ATTACH BOWL • Push locking lever up into UNLOCK • Be sure speed control is OFF. position and hold. • Tilt motor head back. • Tilt motor head back. • Place bowl on bowl-clamping plate. •...
  • Page 20 5K5SS/5KPM5 Mixer Features Motor Head Attachment Hub Attachment Knob Speed Control Lever 1 2 4 6 8 1 0 Bowl Lift Handle (not shown) Spring Latch and Bowl Pin (not shown) Beater Shaft Locating Pins Bowl Support Flat Beater Wire Whip Dough Hook 5 Qt (4.8 L) Stainless Steel Bowl...
  • Page 21 TO ATTACH BOWL • Be sure speed control is OFF. • Place bowl lift handle in down position. • Fit bowl supports over locating pins. • Press down on back of bowl until bowl pin snaps into spring latch. • Sit pouring shield on bowl. •...
  • Page 22: Using Your Kitchenaid ® Attachments

    Using Your KitchenAid Attachments ® See the Stand Mixer Attachments Use and Care Guide for speed settings and operating times. Wire Whip for mixtures which need to Flat Beater, for normal to heavy mixtures, incorporate air, such as: such as:...
  • Page 23: Planetary Mixing Action

    Planetary Mixing Action Your KitchenAid ® Mixer will mix faster During operation, the and more thoroughly than most other flat beater moves around electric mixers. Therefore, the mixing the stationary bowl, at time in most recipes must be adjusted to the same time turning in avoid overbeating.
  • Page 24: Mixing Tips

    The Pouring Shield can be used to The mixing instructions found in this book simplify adding ingredients. can be used to convert your favorite recipes for use with your KitchenAid ® NOTE: If ingredients in very bottom Mixer. of bowl are not thoroughly mixed, the To help determine a mixing procedure, beater is not far enough into the bowl.
  • Page 25: Egg Whites

    6. Unlock and raise head on 5K45SS or lower bowl on 5K5SS/5KSM5 and remove dough from hook. NOTE: These instructions illustrate bread making with the Rapid Mix method. When using the conventional method, dissolve yeast in warm water in warmed bowl. Add remaining liquids and dry ingredients –...
  • Page 26: When You Need Service

    Authorized KitchenAid misuse, abuse, or Service Center. installation/operation not in accordance with local electrical codes. KITCHENAID DOES NOT ASSUME ANY RESPONSIBILITY FOR INCIDENTAL OR CONSEQUENTIAL DAMAGES. Specifications subject to change without notice. KitchenAid Europa, Inc. Nijverheidslaan 3 Box 5 Strombeek-Bever (Brussels) 1853 BELGIUM ©...
  • Page 27 our service intense ebruiksaanwijzinG ixers ixer nstructions ’ obots de cuisine ode d eMploi ebrauchsanleitunG üchenMaschine ’ struzioni d nstrucciones para batidora 1 2 4 6 8 10 9706978B...
  • Page 28: Mesures De Sécurité Importantes

    Table des matières Mesures de sécurité importantes ...............2, 3 Votre robot Caractéristiques du robot modèle 5K45SS .............4, 5 Caractéristiques du robot modèle 5K5SS/5KMP5 ..........6, 7 Utilisation de vos accessoires KitchenAid ® ............8 Distance batteur bol ....................8 Entretien et nettoyage ..................8 Mouvement planétaire ..................9...
  • Page 29 5. Surveillez les enfants de près : modèle 5K45SS - 1,12 kg (8 tasses) lorsqu’ils utilisent l’appareil ou lorsque de farine ou 840 gr (6 tasses) de farine l’appareil est utilisé...
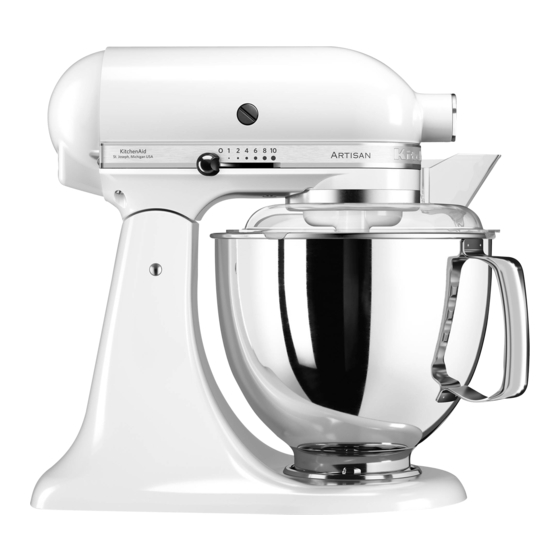
  • Page 30: Caractéristiques Du Robot Modèle 5K45Ss

    Caractéristiques du robot modèle 5K45SS Moyeu de fixation des accessoires Bouton de fixation Tête des accessoires Levier de verrouillage de la Levier de tête (non illustré) contrôle de Axe du batteur la vitesse Batteur plat Bol en acier inoxydable de 4,25...
  • Page 31 MARCHE ARR T VERROUILLER LE COMPARTIMENT MOTEUR EN POSITION LEVÉE POUR ATTACHER LE BOL • Poussez le levier de verrouillage vers • Assurez-vous que le levier de contrôle le haut dans la position UNLOCK de la vitesse est sur OFF (ARR T). (DÉVERROUILLÉ) et maintenez-le dans •...
  • Page 32 Caractéristiques des robots modèles 5K5SS/5KPM5 Tête Moyeu de fixation des accessoires Bouton de fixation des accessoires Levier de contrôle de la vitesse 1 2 4 6 8 1 0 Levier de levée Crochet à ressort et de la tête (non goupille du bol (non illustré) illustrés)
  • Page 33 POUR ATTACHER LE BOL • Assurez-vous que le levier de contrôle de la vitesse est sur OFF (ARR T). • Placez le levier de levée de la tête en position basse. • Placez les supports du bol sur les goupilles de positionnement. •...
  • Page 34: Utilisation De Vos Accessoires Kitchenaid

    Utilisation de vos accessoires KitchenAid ® Voir le Guide d’utilisation et d’entretien des accessoires du batteur sur socle pour les réglages de vitesse et les durées de fonctionnement. Le fouet pour les mélanges légers Le batteur plat pour les mélanges comme : normaux ou épais comme :...
  • Page 35: Mouvement Planétaire

    Mouvement planétaire Votre robot KitchenAid ® mélange plus Lorsqu’il est en rapidement et plus complètement que la mouvement, le batteur plupart des autres robots. La durée de tourne autour du bol fixe malaxage de la plupart des recettes doit tout en tournant autour être donc ajustée pour éviter de trop...
  • Page 36: Conseils

    N.B. : Si les ingrédients liquides sont ajoutés 2. Attachez le bol et le crochet pétrisseur. trop rapidement, ils forment un puits autour Verrouillez la tête du 5K45SS ou levez du crochet pétrisseur et ralentissent le le bol du 5K5SS/KPM5. Réglez à la mélange.
  • Page 37: Blancs En Neige

    6. Déverrouillez et levez la tête du 5K45SS ou descendez le bol du 5K5SS/5KSM5 et décollez la pâte du crochet. N.B. : Ces instructions illustrent la fabrication de la pâte à pain selon la méthode rapide. Pour la méthode conventionelle, dissolvez la levure dans un bol d’eau tiède,...
  • Page 38: Service Après-Vente

    électriques. Le service après-vente doit être effectué 3. Si le batteur plat tape dans le bol, arrêtez par un centre régional agréé KitchenAid ® . le robot. Voir “Distance batteur/bol”. Contacter le revendeur chez qui vous avez acheté...
  • Page 39 ® leistunGsstark ebruiksaanwijzinG ixers ixer nstructions ’ obots de cuisine ode d eMploi ebrauchsanleitunG üchenMaschine ’ struzioni d nstrucciones para batidora 1 2 4 6 8 10 9706978B...
  • Page 40: Wichtige Sicherheitshinweise

    Inhaltsverzeichnis Wichtige Sicherheitshinweise ................2, 3 Über Ihre Küchenmaschine Ausstattung Ihrer Küchenmaschine (Modell 5K45SS) ........4, 5 Ausstattung Ihrer Küchenmaschine (Modell 5K5/5KPM5) ......6, 7 Benutzung Ihrer KitchenAid ® -Zusatzgeräte ............8 Abstand vom Schläger zur Schüssel ..............8 Pflege und Säuberung ..................8 Planetmischverfahren ..................9 Benutzung der Küchenmaschine .................9...
  • Page 41 Teig herstellen, benutzen Sie nie Rezepte, die Küchenmaschine zu betätigen oder mit ihr zu mehr als die folgenden Mengen verlangen: spielen. Modell 5K45SS – 1,12 kg Allzweckmehl oder 5. Sorgfältige Aufsicht ist notwendig, wenn 840 g Vollkornweizenmehl. Modelle 5K5SS, Haushaltsgeräte von Kindern oder in der 5KPM5 und 5KSM5 –...
  • Page 42: Ausstattung Ihrer Küchenmaschine (Modell 5K45Ss)

    Ausstattung Ihrer Küchenmaschine (Modell 5K45SS) Zusatzgerätenabe Motorkopf Zusatzgeräteknopf Motorkopfverrie- gelungshebel (nicht abgebildet) Geschwindig- keitskontroll- Schlägerwelle hebel Flachschläger 4,28-Liter- Edelstahlschüssel Schneebesen Schüsselverriegelungsplatte Knethaken...
  • Page 43 ZUR ENTFERNUNG DES FLACHSCHLÄGERS, DES SCHNEEBESENS ODER DES KNETHAKENS • Schalten Sie den Geschwindigkeitshebel auf AUS. • Kippen Sie den Motorkopf zurück. • Drücken Sie den Schläger so weit wie möglich nach oben und drehen Sie ihn nach links. • Ziehen Sie den Schläger von der Welle. ZUR BEFESTIGUNG DER SCHÜSSEL •...
  • Page 44: Ausstattung Ihrer Küchenmaschine (Modell 5K5/5Kpm5)

    Ausstattung Ihrer Küchenmaschine (Modell 5K5SS/5KPM5) Motorkopf Zusatzgerätenabe Zusatz- geräteknopf Geschwindigkeits- kontrollhebel 1 2 4 6 8 1 0 Schüsselhe- begriff (nicht Federverriegelung abgebildet) und Schüsselstift (nicht abgebildet) Schläger- welle Haltestifte Schüsselhalter 4,8-Liter- Flachschläger Edelstahl- Knethaken Schneebesen Schüssel...
  • Page 45 ZUR BEFESTIGUNG DER SCHÜSSEL • Achten Sie darauf, dass die Geschwindigkeitskontrolle auf AUS geschaltet ist. • Stellen Sie den Schüsselgriff nach unten. • Setzen Sie die Schüsselträger auf die Haltestifte. • Drücken Sie den hinteren Teil der Schüssel nach unten, bis der Schüsselstift in die Federverriegelung einrastet.
  • Page 46: Benutzung Ihrer Kitchenaid ® -Zusatzgeräte

    Benutzung Ihrer KitchenAid -Zubehörteile ® Hinweise zu Geschwindigkeitseinstellungen und Zubereitungsdauer finden Sie in der Gebrauchsanleitung für die Aufsätze der Küchenmaschine. Schneebesen für Mischungen, welche Luft Flachschläger für normale bis schwere Mischungen wie z.B.: enthalten müssen, wie z.B.: Eier Biskuitteig Kuchenteig...
  • Page 47: Planetmischverfahren

    Planetmischverfahren komplette Schüssel erreicht. Ihre KitchenAid ® - Während des Betriebes Küchenmaschine kann schneller und gründlicher bewegt sich der Flachschläger rühren als die meisten anderen elektrischen in der feststehenden Schüssel Küchenmaschinen. Deshalb muß die Rührzeit bei so, dass er sich gleichzeitig...
  • Page 48: Mischen Und Kneten Von Hefeteig

    Die Gebrauchsanweisungen in diesem dann liegt der Schläger nicht tief genug in der Buch können dazu benutzt werden, Ihre Schüssel. Siehe „Abstand vom Schläger zur Lieblingsrezepte an die KitchenAid ® - Schüssel“. Küchenmaschine anzupassen. Um Ihnen dabei Kuchenmischungen zu helfen, eine Rührmethode zu entwickeln, sind...
  • Page 49: Eiweiß

    6. Entriegeln und heben Sie den Kopf (bei Modell 5K45SS) oder senken Sie die Schüssel (bei Modell 5K5SS/5KSM5) und entfernen Sie den Teig vom Haken. ANMERKUNG: Diese Illustrationen zeigen Brotherstellung nach der Rapid-Mix-Methode. Wenn die konventionelle Methode benutzt wird, lösen Sie die Hefe in warmem Wasser in einer angewärmten Schüssel auf.
  • Page 50: Inanspruchnahme Des Kundendiensts

    Missbrauch, unsachgemäße Benutzung oder dadurch entstanden sind, dass der Einbau/Betrieb nicht den örtlichen elektrischen Normen entsprach. KITCHENAID HAFTET NICHT FÜR BEILÄUFIG ENTSTANDENE ODER FOLGESCHÄDEN. Änderungen vorbehalten. KitchenAid Europa, Inc. Nijverheidslaan 3 Box 5 Strombeek-Bever (Brüssel) 1853 BELGIEN ®Die Marke sowie die Silhouette der Küchenmaschine...
  • Page 51 er uso intenso ebruiksaanwijzinG ixers ixer nstructions ’ obots de cuisine ode d eMploi ebrauchsanleitunG üchenMaschine ’ struzioni d nstrucciones para batidora 1 2 4 6 8 10 9706978B...
  • Page 52: Importanti Precauzioni Di Sicurezza

    Indice Importanti precauzioni di sicurezza ..............2, 3 Il vostro Mixer Caratteristiche del Mixer Modello 5K45SS ............4,5 Caratteristiche del Mixer Modello 5K5SS/5KPM5 ...........6,7 Uso degli accessori KitchenAid ® .................8 Spazio tra fruste e ciotola ..................8 Cura e pulizia .......................8 Moto planetario ....................9 Uso del Mixer ......................9...
  • Page 53 Modello 5K45SS: 1,12 kg (8 tazze) di farina dovrà esercitare un’attenta supervisione. Non lasciare il mixer incustodito quando è in 00 oppure 840 gr (6 tazze) di farina integrale.
  • Page 54: Caratteristiche Del Mixer Modello 5K45Ss

    Caratteristiche del Mixer 5K45SS Alloggiamento per accesori Testa del Manopola di sicurezza motore per accessori Leva per il blocco del Leva di motore (non regolazione visibile) della Albero dello velocità sbattitore Frusta piatta Ciotola in acciaio inox da 4,3 litri...
  • Page 55 SPENTO ACCESO PER SERRARE LA TESTA DEL MOTORE IN POSIZIONE RIALZATA COME MONTARE LA CIOTOLA • Premere la leva di bloccaggio in alto nella • Assicurarsi che il dispositivo di velocità sia posizione UNLOCK (APERTO) e tenere spento (OFF). fermo. •...
  • Page 56: Caratteristiche Del Mixer Modello 5K5Ss/5Kpm5

    Caratteristiche del mixer 5K5SS/5KPM5 Testa del motore Alloggiamento per accessori Manopola di sicurezza per accessori Leva di regolazione della Leva di velocità 1 2 4 6 8 1 0 solle va mento della ciotola (non visibile) Fermo a molla e perno Albero della ciotola (non visibile) dello...
  • Page 57 COME MONTARE LA CIOTOLA • Accertarsi che il dispositivo di regolazione della velocità sia spento (OFF). • Abbassare la leva di sollevamento della ciotola. • Mettere is supporti della ciotola sopra i perni di posizionamento. • Spingere verso il basso la parte posteriore della ciotola, fino a quando il perno della COME MONTARE LA FRUSTA PIATTA, ciotola entri in uno scatto del dispositivo di...
  • Page 58: Uso Degli Accessori Kitchenaid

    Uso degli accessori KitchenAid ® Consultare la Guida di utilizzo e manutenzione degli accessori del mixer per le impostazioni della velocità e i tempi di funzionamento. Frusta piatta: per preparati normali o Frusta per montare: per preparati che devono incorporare aria, quali:...
  • Page 59: Moto Planetario

    Moto planetario percorso della frusta nella ciotola. Il Mixer Durante il funzionamento, KitchenAid ® mescolerà più rapidamente la frusta piatta si muove e in modo più completo di altri mixer all’interno della ciotola, elettrici. Di conseguenza, i tempi necessari che rimane fissa, ruotando...
  • Page 60: Come Mescolare E Impastare Paste Lievitate

    2. Montare la ciotola e la frusta per impastare. Bloccare la testa del motore del Mixer 5K45SS o alzare la ciotola del mixer 5K5SS/5KSM5. Mescolare per circa 15 secondi a velocità 2, fino a quando tutti gli ingredienti si saranno amalgamati.
  • Page 61: Albumi

    6. Sbloccare e sollevare la testa del motore nel modello 5K45SS o abbassare la ciotola neimodelli 5K5SS/5KSM5 e staccare l’impasto dalla frusta. NOTA: queste istruzioni illustrano la preparazione del pane con il metodo Rapid Mix. Sciogliere il lievito in acqua tiepida nella ciotola preriscaldata quando si usa il metodo convenzionale.
  • Page 62: Quando Rivolgersi Al Servizio Assistenza Tecnica

    LA KITCHENAID NON SI ASSUME ALCUNA RESPONSABILITÀ PER DANNI ACCIDENTALI O CONSEQUENZIALI. Le specifiche sono soggette a modifiche senza preavviso. KitchenAid Europa, Inc. Nijiverheidslaan 3 box 5...
  • Page 63 ® uso pesado ebruiksaanwijzinG ixers ixer nstructions ’ obots de cuisine ode d eMploi ebrauchsanleitunG üchenMaschine ’ struzioni d nstrucciones para batidora 1 2 4 6 8 10 9706978B...
  • Page 64: Instrucciones Importantes De Seguridad

    Índice Instrucciones importantes de seguridad .............2, 3 Acerca de su batidora Características de la batidora 5K45SS .............4, 5 Características de la batidora 5K5SS/5KPM5 ..........6, 7 Usando sus accesorios KitchenAid ® ..............8 Espacio entre el batidor y el bol .................8 Cuidado y limpieza ....................8 Acción planetaria de batido .................9...
  • Page 65 5. Se requiere una supervisión estrecha Modelo 5K45SS - 1.12 kg (8 tazas) de cuando cualquiera de los artefactos harina de uso múltiple u 840 gr (6 tazas) se use por o cerca de los niños.
  • Page 66: Características De La Batidora 5K45Ss

    Características de la batidora 5K45SS Base para fijación de accesorios Perilla de fijación Cabezal con motor de accesorios Palanca de ajuste del cabezal con motor (no se muestra) Palanca de control de Eje del batidor velocidad Batidor plano Bol de acero...
  • Page 67 • Levante el cabezal con motor. • Presione el batidor hacia arriba tanto como sea posible y rote hacia la izquierda. • Tire del batidor en dirección contraria al eje del mismo. SOLTAR FIJAR PARA ENGANCHAR EL BOL • Asegúrese de que el control de velocidad esté...
  • Page 68: Características De La Batidora 5K5Ss/5Kpm5

    Características de la batidora 5K5SS/5KPM5 Cabezal con motor Base para fijación de accesorios Perilla de fijación de accesorios Palanca de control de velocidad 1 2 4 6 8 1 0 Manivela para elevar el bol (no Clavija del bol y se muestra) resorte de fijación (no...
  • Page 69 PARA ENGANCHAR EL BOL • Asegúrese de que el control de velocidad esté APAGADO (OFF). • Coloque la manija de levantar el bol en la posición inferior. • Coloque los soportes del bol sobre las clavijas de colocación. • Presione hacia abajo la parte posterior del bol hasta que la clavija del bol calce dentro del cierre a resorte.
  • Page 70: Cuidado Y Limpieza

    Usando sus aditamentos de KitchenAid ® Consulte el Manual de uso y cuidado para ver los ajustes de velocidad y tiempos de funcionamiento de los aditamentos de la batidora con base. Batidor de alambre para masas que Batidor plano para mezclas normales a pesadas, tales como: necesitan la incorporación de aire, tales...
  • Page 71: Uso De La Batidora

    Acción planetaria de mezclado Su batidora KitchenAid ® mezclará más rápida El batidor plano se mueve y completamente que la mayoría de las alrededor del bol fijo otras batidoras eléctricas. Por consiguiente, durante la operación y al la duración de mezclado en la mayoría de...
  • Page 72 “charco” alrededor del gancho de masa y 2. Enganche el bol y el gancho de masa. Calce retardarán el proceso de mezclado. el cabezal del 5K45SS o eleve el bol de 5K5SS/5KPM5. Accione la velocidad 2 y mezcle por aproximadamente 15 segundos o hasta que los ingredientes se hayan combinado.
  • Page 73: Clara De Huevo

    6. Suelte y eleve el cabezal en el 5K45SS o baje el bol en el 5K5SS/5KPM5 y extraiga la masa del gancho. NOTA: Estas instrucciones ilustran la elaboración de pan con el método Rapid Mix. Cuando use el método convencional disuelva la levadura en agua caliente en el bol calentado.
  • Page 74: Cuando Usted Requiera Servicio

    3. Si el batidor plano golpea el tazón, apague la por un centro de servicio autorizado de batidora. Vea “Espacio entre batidor y tazón”. KitchenAid. Llame al representante de quien fue Si su batidora funcionara mal o fallara en comprada la unidad para obener el nombre de la instalación autorizada de servicio más cercana...
  • Page 76 KitchenAid Europa, Inc. Nijverheidslaan 3 Box 5 Strombeek-Bever (Brussels) 1853 BELGIUM Form No. 9706978 Rev. B...

Ce manuel est également adapté pour:

5k5ss5kpm5

Table des Matières