JVC KD-R332 Manuel D'instructions
Table des Matières
Les langues disponibles
Les langues disponibles
Having TROUBLE with operation?
Please reset your unit
Refer to page of How to reset your unit
Vous avez des PROBLÈMES de fonctionnement?
Réinitialisez votre appareil
Référez-vous à la page intitulée Comment réinitialiser votre appareil
EN, FR
© 2011 JVC KENWOOD Corporation
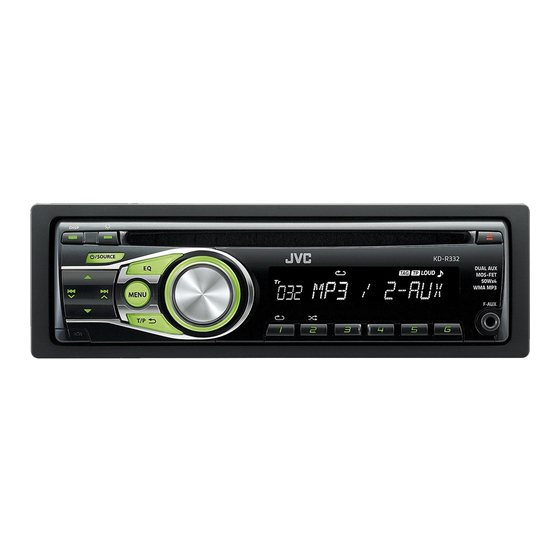
KD-R332/KD-R331
CD RECEIVER / RÉCEPTEUR CD
For canceling the display demonstration, see page 4. / Pour annuler la démonstration des
affichages, référez-vous à la page 4.
For installation and connections, refer to the separate manual.
Pour l'installation et les raccordements, se référer au manuel séparé.
0811DTSMDTJEIN
INSTRUCTIONS
MANUEL D'INSTRUCTIONS
ENGLISH
FRANÇAIS
GET0758-003A
[E/EU]
Chapitres
Table des Matières
Dépannage

Manuels Connexes pour JVC KD-R332


Sommaire des Matières pour JVC KD-R332
- Page 16 Merci pour avoir acheté un produit JVC. Veuillez lire attentivement toutes les instructions avant d’utiliser l’appareil afin de bien comprendre son fonctionnement et d’obtenir les meilleures performances possibles. IMPORTANT POUR PRODUITS LASER 1. PRODUIT LASER CLASSE 1 2. ATTENTION: N’ouvrez pas le couvercle supérieur. Il n’y a aucune pièce réparable par l’utilisateur à...
-
Page 17: Comment Attacher/Détacher Le Panneau De Commande
Comment attacher/détacher le TABLE DES MATIERES panneau de commande 3 Comment attacher/détacher le panneau de commande 3 Comment réinitialiser votre appareil 3 Comment forcer l’éjection d’un disque À propos des disques Comment réinitialiser votre appareil Annulation des démonstrations Vos ajustements préréglés des affichages sont aussi effacés. -
Page 18: Annulation Des Démonstrations Des Affichages
Annulation des démonstrations des affichages Mise sous tension de l’appareil. Choisissez <DEMO OFF>. [Maintenez pressée] [Maintenez pressée] (Réglage initial) Terminez la procédure. (Réglage initial) Réglage de l’horloge Mise sous tension de l’appareil. Ajustez les minutes. [Maintenez pressée] [Maintenez pressée] (Réglage initial) Choisissez <CLOCK>. -
Page 19: Opérations De Base
Opérations de base Fente d’insertion Molette de commande Fenêtre d’affichage Éjection d’un disque Retrait du panneau Prise d’entrée auxiliaire avant Quand vous appuyez ou maintenez pressées les touches suivantes... Touche Opérations générales • Met l’appareil sous/hors tension [Maintenez pressé]. / SOURCE •... -
Page 20: Écoute De La Radio
Écoute de la radio • [Appuyez sur la touche] Recherche Ÿ des stations automatiquement. • [Maintenez pressée] Recherche des ] “FM” ou “AM” stations manuellement. “M” clignote, puis appuyez sur la touche répétitivement. “ST” s’allume lors de la réception d’une émission FM stéréo avec un signal suffisamment fort. Amélioration de la réception FM Préglage manuel (FM/AM) Vous pouvez prérégler un maximum de 18... -
Page 21: Recherche De Votre Programme Fm Radio Data System Préféré
• Pour mettre en service l’attente de réception, Les fonctionnalités suivantes sont accordez une autre station diffusant les accessibles uniquement pour les signaux Radio Data System nécessaire pour stations FM Radio Data System. l’attente de réception TA. • Pour mettre hors service l’attente de réception, Recherche de votre programme appuyez de nouveau sur T/P FM Radio Data System préféré—... -
Page 22: Écoute D'un Disque
Écoute d’un disque Ÿ La lecture démarre automatiquement. ] “CD” Toutes les plages sont reproduites répétitivement jusqu’à ce que vous changiez la source ou éjectiez le disque. Arrête de la lecture et éjection du Sélection d’une plage/dossier à disque partir de la liste Si le disque éjecté... -
Page 23: Connexion D'autres Appareils Extérieurs
Connexion d’autres appareils extérieurs Vous pouvez connecter un appareil extérieur à la prise d’entrée auxiliaire sur le panneau de commande (F-AUX) et/ou à l’arrière de l’appareil (R-AUX). Résumé de l’utilisation des appareils extérieurs par les prises d’entrée auxiliaire. Préparation Câble de Prise Nom de la connexion/... -
Page 24: Sélection D'un Mode Sonore Préréglé
Sélection d’un mode sonore préréglé Vous pouvez sélectionner un mode sonore préréglé adapté à votre genre de musique. FLAT = NATURAL = DYNAMIC = VOCAL BOOST ] <PRO EQ> ] <BASS/ MIDDLE/ = BASS BOOST = USER = TREBLE> (retour au début) Pendant l’écoute, vous pouvez ajuster le niveau du caisson de grave et le niveau de tonalité... - Page 25 Article de menu Réglages pouvant être choisis, [Réglage initial: Souligné] DIMMER SET AUTO : Change l’éclairage de l’affichage et des touches entre les réglages Jour et Nuit dans le réglage <BRIGHTNESS> quand vous allumez ou éteignez les feux du véhicule * ON : Choisit le réglage Nuit dans le réglage <BRIGHTNESS>...
- Page 26 Article de menu Réglages pouvant être choisis, [Réglage initial: Souligné] AMP GAIN * LOW POWER : VOLUME 00 – VOLUME 30 (Choisissez ce réglage si la puissance maximum de chaque enceinte est inférieure à 50 W pour éviter tout dommage des enceintes.) / HIGH POWER : VOLUME 00 –...
-
Page 27: Guide De Dépannage
(page 3) aucune opération ne peut être réalisée. Si le message ne disparaît, consultez votre revendeur d’autoradio JVC ou la société qui fabrique les kits. Cet autoradio ne fonctionne pas du tout. Réinitialisez l’appareil. (page 3) Cochez le réglage <SRC SELECT> = <F-AUX / R-AUX>. -
Page 28: Utilisation De Périphériques Bluetooth
Utilisation de périphériques Bluetooth ® Pour les opérations Bluetooth, il faut connecter l’adaptateur Bluetooth, KS-BTA100 (non fournis) à la prise d’entrée auxiliaire (R-AUX/BT ADAPTER) à l’arrière de cet appareil. (page 9) • Pour en savoir plus, référez-vous aussi aux instructions fournies avec l’adaptateur Bluetooth et le périphérique Bluetooth. -
Page 29: Spécifications
Spécifications SECTION DE L’AMPLIFICATEUR SECTION DU LECTEUR CD AUDIO Type : Lecteur de disque compact Système de détection du signal : Capteur Puissance de sortie maximum : optique sans contact (laser semi-conducteur) Avant/Arrière : 50 W par canal Nombre de canaux : 2 canaux (stéréo) Puissance de sortie en mode continu (RMS) : Réponse en fréquence : 5 Hz à...