Denon AVR-1604 Mode D'emploi
Table des Matières
Les langues disponibles
Les langues disponibles
Liens rapides
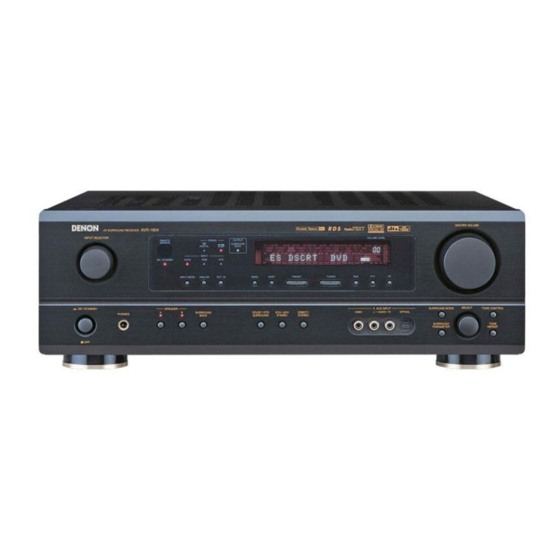
AV SURROUND RECEIVER
RÉCEPTEUR AUDIO-VIDÉO
AVR-1604/684
OPERATING INSTRUCTIONS
MODE D'EMPLOI
FOR ENGLISH READERS
PAGE
We greatly appreciate your purchase of this unit.
2
To be sure you take maximum advantage of all the
2
features this unit has to offer, read these instructions
carefully and use the set properly. Be sure to keep this
manual for future reference should any questions or
problems arise.
"SERIAL NO.
PLEASE RECORD UNIT SERIAL NUMBER ATTACHED TO
THE REAR OF THE CABINET FOR FUTURE REFERENCE"
2 ~ PAGE
62, 122 ~ 126
POUR LES LECTEURS FRANCAIS
Nous vous remercions pour l'achat de cet appareil.
2
Pour être sûr de profiter au maximum de toutes les
2
caractéristiques qu'offre cet appareil, lire avec soin ces
instructions et bien utiliser l'appareil. Toujours
conserver ce mode d'emploi pour s'y référer
ultérieurement en cas de question ou de problème.
"NO. DE SERIE
PRIERE DE NOTER LE NUMERO DE SERIE DE L'APPAREIL
INSCRIT A L'ARRIERE DU COFFRET DE FAÇON A POUVOIR
LE CONSULTER EN CAS DE PROBLEME."
PAGE 2, 63 ~ PAGE 126
Chapitres
Table des Matières
Dépannage

Manuels Connexes pour Denon AVR-1604


Sommaire des Matières pour Denon AVR-1604
- Page 1 AV SURROUND RECEIVER RÉCEPTEUR AUDIO-VIDÉO AVR-1604/684 OPERATING INSTRUCTIONS MODE D’EMPLOI FOR ENGLISH READERS PAGE 2 ~ PAGE 62, 122 ~ 126 POUR LES LECTEURS FRANCAIS PAGE 2, 63 ~ PAGE 126 We greatly appreciate your purchase of this unit. Nous vous remercions pour l’achat de cet appareil.
-
Page 63: Avant L'utilisation
FRANCAIS INTRODUCTION Nous vous remercions d‘avoir choisi l’ampli-tuner A/V Surround de DENON. Ce remarquable composant a été fabriqué pour fournir une superbe écoute de sons d’ambiance avec des sources de cinéma domestique telles que DVD, ainsi que pour assurer une formidable reproduction haute fidélité de vos sources musicales favorites. -
Page 64: Précautions D'installation
Surround, un nouveau format multi-canaux développé par Digital fois que ce signal est reçu. Theater Systems Inc. L’AVR-1604/684 peut aussi être décodé avec le DTS Neo:6, un 7. Prises 6CH EXT. IN (prises d’entrée 6 canaux extérieures) mode surround permettant la lecture 6.1 canaux de sources Cet appareil est équipé... -
Page 65: Nomenclature Et Fonctions
FRANCAIS 5 NOMENCLATURE ET FONCTIONS Panneau avant • Pour les détails sur les fonctions de ces pièces, se reporter aux pages données entre parenthèses ( ). @0 !9 !5 !6 Interrupteur de mise en marche .......(77, 91, 110) Sélecteur de SELECT ..........(93, 98, 108) Prise de casque d’écoute (PHONES) ........(94) Touche TONE DEFEAT ............(93) Touche INPUT MODE..........(92, 95, 102) -
Page 66: Unité De Télécommande
RETURN ........(88, 102) Touche de tonalité d’essai ....(96) Sélecteur d’enceintes SPEAKER ..(91) Touche VIDEO SELECT......(94) Touche DIMMER........(94) Sélecteurs de mode d’entrée........(92, 95) REMARQUE: • Les touches rayées ne fonctionnent pas avec le AVR-1604/684. (Rien ne se passe lorsqu’elles sont enfoncées.) -
Page 67: A Lire En Premier
FRANCAIS 6 A LIRE EN PREMIER Ce récepteur d’ambiance AV doit être réglé avant l’utilisation selon les étapes suivantes. Etape 1 (page 67 à 74) Choisir le meilleur emplacement pour l’installation des enceintes et la connexion des composants. Etape 2 (page 75) Ensuite, insérer les piles dans la télécommande. -
Page 68: Connexions
(ON-STANDBY) à l’aide de la télécommande. sur le réglage de cette borne. Lorsque l’AVR-1604/684 est en mode de veille, les prises sont désactivées. Ne jamais connecter d’équipement dont la capacité totale est supérieure à 120 W (1 A). -
Page 69: Connexion Des Composants Vidéo
FRANCAIS Connexion des composants vidéo Pour connecter le signal vidéo, connecter en utilisant un câble de signal vidéo de 75 Ω/ohms. L’utilisation d’un mauvais câble peut entraîner une baisse de la qualité du son. Connexion d’un téléviseur/tuner DBS Prise de sortie de moniteur (MONITOR OUT) Téléviseur/DBS Téléviseur ou tuner DBS... -
Page 70: Connexion D'un Composant Vidéo Équipé De Prises Vidéo S
FRANCAIS Connexion d’un jeu vidéo Jeu vidéo • Connecter les jacks de sortie du jeu vidéo au jacks V. AUX OUTPUT INPUT de cet appareil. OPTICAL VIDEO OUT Connexion d’un caméscope Caméscope • Connecter les jacks de sortie du caméscope au jacks V. AUX OUTPUT INPUT de cet appareil. - Page 71 FRANCAIS Connexion d’un composant vidéo équipé de prises vidéo (lecteur de DVD) (Composant - Y, ) avec différence de couleur • Lors des connexions, se reporter également aux instructions d’utilisation des autres composants. • Les signaux entrés aux prises vidéo (composant) avec différence de couleur ne sont pas sortis par la prise de sortie vidéo (VIDEO) (jaune) ou la prise de sortie vidéo S (S-VIDEO).
-
Page 72: Connexion Des Bornes D'antennes
FRANCAIS Connexion des bornes d’antennes ANTENNE-CADRE AM (Accessoire) DIRECTION DE STATION DE RADIODIFFUSION ANTENNE FM CABLE COAXIAL 75 Ω/ohms ANTENNE EXTERIEURE AM Antenne intérieure FM TERRE (Accessoire) Ensemble d’antenne-cadre AM Connexion des antennes AM Connecter aux bornes d’antenne AM. 1. Appuyer sur 2. -
Page 73: Connexions Du Système D'enceintes
FRANCAIS Connexions du système d’enceintes • Connecter les bornes d’enceinte aux enceintes en respectant les polarités Impédance d’enceinte (< au <, > au >). Si les polarités ne sont pas respectées, un son central • Lorsque des systèmes d’enceinte A et B sont utilisés séparément, les enceintes ayant une impédance de 6 à... -
Page 74: Circuit De Protection
Si le circuit de protection est à nouveau activé bien qu’il n’y ait pas de problème de câblage ou de ventilation autour de l’appareil, couper l’alimentation, et contacter un centre d’entretien DENON. Remarque sur l’impédance des enceintes •... -
Page 75: Utilisation De La Télécommande
FRANCAIS 9 UTILISATION DE LA TÉLÉCOMMANDE En suivant la procédure expliquée ci-dessous, insérer les piles avant d’utiliser la télécommande. Plage d’utilisation de la télécommande Diriger la télécommande vers le détecteur de télécommande de la manière indiquée sur le diagramme de gauche. REMARQUES: •... -
Page 76: Installation Du Systéme
FRANCAIS 10 INSTALLATION DU SYSTEME • Une fois que toutes les connexions avec les autres composants AV ont été faites comme indiqué dans “CONNEXIONS” (voir pages 68 à 74), faire les différents réglages décrits ci-dessous sur l’affichage. Ces réglages sont nécessaires pour configurer le système de chambre d’écoute AV centré autour de cette unité. Régler le commutateur coulissant vers “AUDIO”. - Page 77 FRANCAIS Avant de configurer le système Vérifier que tous les composants sont en bon état, puis appuyez sur l’interrupteur de mise en marche POWER sur l’unité principale ou la touche POWER sur la télécommande pour allumer l’alimentation. (Unité principale) (Unité de télécommande) Appuyer sur la touche SYSTEM SETUP pour accéder aux réglages.
- Page 78 FRANCAIS Utiliser les touches (gauche) et (droit) pour sélectionner le type d’enceinte d’ambiance arrière. (Initial) NONE LARGE SMALL 4 S.BACK SMALL touche (gauche) touche (droit) Appuyer sur la touche ENTER ou (bas) pour passer au réglage du subwoofer. REMARQUES: • Lorsque petit “Small” a été sélectionné pour les enceintes surround, grand “Large” ne peut pas être sélectionné pour les enceintes d’ambiance arrière.
-
Page 79: Réglage Du Mode De Subwoofer Et De La Fréquence De Croisement
FRANCAIS Réglage du mode de subwoofer et de la fréquence de croisement Utiliser les touches (gauche) et (droit) pour sélectionner le mode de sortie de graves. (Initial) NORM +MAIN 6 SW MODE NORM touche (gauche) touche (droit) Appuyer sur la touche ENTER ou (bas) pour entrer le réglage et commuter au réglage de la fréquence de croisement. -
Page 80: Reglage De La Distance Des Haut-Parleurs
FRANCAIS Reglage de la distance des haut-parleurs • Entrer la distance entre la position d’écoute et les différentes enceintes pour régler le temps de retard du mode d’ambiance. Préparations: Centre Mesurer les distances entre la position d’écoute et les enceintes (L1 à L5) sur le diagramme de droite). - Page 81 FRANCAIS Utiliser les touches (gauche) et (droit) pour régler la distance entre les haut-parleurs surround L et le centre d’écoute. 11 SURR.L 10ft • Le chiffre de distance change d’un pied (ft) à chaque pression sur une des touches. Choisir la valeur la plus proche de la distance mesurée.
-
Page 82: Réglage De La Tonalité D'essai
FRANCAIS Réglage de la tonalité d’essai • Utiliser ce réglage pour ajuster pour que le niveau de lecture entre les différents canaux soit égal. • De la position d’écoute, écouter les tonalités d’essai produites par les enceintes pour ajuster le niveau. •... - Page 83 FRANCAIS Utiliser les touches (gauche) et (droit) pour régler la niveau de cannal du surround R. (Initial) -12dB +12dB AUTO-SR touche (gauche) touche (droit) Appuyer sur la touche (bas) pour passer la niveau de cannal du enceinte d’ambiance arrière (mode manual).
- Page 84 FRANCAIS Réglage de l’assignation d’entrée numérique “Digital In Assignment” Sélectionner le type d’appareil connecté aux bornes de l’entrée numérique. Utiliser les touches (gauche) et (droit) pour attribuer la fonction d’entrée connectée à la borne d’entrée COAXIAL (COAXIAL). (Initial) 16 COAX touche (gauche) touche (droit) •...
-
Page 85: Réglage Du Mode Auto Surround
FRANCAIS Réglage du mode Auto Surround Pour les trois types de signaux d’entrée indiqués ci-dessous, le mode d’ambiance lu en dernier est sauvegardé dans la mémoire. A la prochaine entrée du même signal, le mode d’ambiance mémorisé est sélectionné automatiquement et le signal est lu. Noter que le réglage du mode d’ambiance est également mémorisé... -
Page 86: Unité De Télécommande
FRANCAIS 11 UNITE DE TELECOMMANDE Utilisation des composants audio DENON • Mettre les différents composants sous tension avant de les utiliser. Régler le commutateur de mode 1 sur “AUDIO”. Régler le commutateur de mode 2 à la position du composant à... -
Page 87: Mémoire Préréglée
FRANCAIS Mémoire préréglée DENON et d’autres fabricants de composants peuvent être actionnés en réglant la mémoire préréglée. La télécommande peut être utilisée pour faire fonctionner les composants d’autres marques sans utiliser la fonction d’apprentissage en enregistrant la marque du composant comme indiqué sur la liste de codes préréglés (page 122~126). -
Page 88: Rappel Des Station Avec Les Touches Prétéglées
: Mise sous/attente tension (ON/SOURCE) : Recherche manuelle (ON/SOURCE) (en avant et en arrière) : Mise hors tension de DVD : Arrêt DENON : Recherche manuelle : Lecture : Recherche automatique (en avant et en arrière) (repérage) : Arrêt : Pause... - Page 89 REMARQUES: • Pour ce composant CD, CDR, MD et TAPE, les touches peuvent être utilisées de la même manière que pour les composants audio DENON (page 86). • Le téléviseur peut être utilisé lorsque le commutateur est en position DVD/VDP, VCR, TV.
-
Page 90: Tension De Pénétration (Punch Through)
FRANCAIS Tension de pénétration (Punch Through) • “Punch Through” (tension de pénétration) est une fonction permettant d’utiliser les touches PLAY, STOP, MANUAL SEARCH et AUTO SEARCH des composants CD, TAPE, CDR/MD ou VCR en mode DBS/CABLE ou TV. Le réglage par défaut est sur aucun composant. Régler le commutateur de mode 1 sur “VIDEO”. -
Page 91: Opération
FRANCAIS 12 OPERATION Avant l’utilisation Préparatifs: Vérifier que toutes les connexions sont bonnes. Allumer l’alimentation. Appuyer sur la touche ON/STANDBY sur l’unité principale ou sur la touche ON/SOURCE sur la télécommande pour la mettre sous tension. (Unité principale) (Unité de télécommande) •... -
Page 92: Lecture De La Source De Programme Analogique
FRANCAIS Lecture de la source de programme analogique Sélectionner la source d’entrée à jouer. Exemple: CD (Unité principale) (Unité de télécommande) Sélectionner le mode d’entrée. • Sélection du mode analogique Fonction de sélection de mode d’entrée Appuyer sur la touche ANALOG pour passer à l’entrée Différents modes d’entrée peuvent être sélectionnés pour les analogique. - Page 93 FRANCAIS Affichage du mode d’entrée Sélectionner le mode de lecture. Un de ceux-ci s’allume selon le signal d’entrée. Appuyer sur la touche SURROUND MODE, puis tourner le • En mode AUTO sélecteur SELECT. INPUT AUTO DIGITAL ANALOG Exemple: Stereo • En mode DIGITAL PCM INPUT AUTO DIGITAL...
- Page 94 FRANCAIS [2] Ecoute avec casque REMARQUE: Afin d’éviter une perte de l’ouïe, ne pas augmenter excessive ment le niveau du volume lors de l’utilisation d’écouteurs. Brancher la fiche de casque dans la PHONES prise. Connecter le casque à la prise PHONES.
-
Page 95: Enregistrement D'un Programme Source (Enregistrement De La Source Avec Contrôle Simultané)
FRANCAIS Lecture en utilisant les prises d’entrée externe (EXT. IN) Passer au mode d’entrée externe (EXT. IN). Appuyer sur EXT. IN pour changer l’entrée externe. (Unité principale) (Unité de télécommande) Une fois cette sélection effectuée, les signaux d’entrée, connectés aux canaux FL (avant gauche), FR (arrière droit), C (central), SL (surround gauche) et SR (surround droit) des jacks EXT.IN, sont envoyés directement aux systèmes d’enceinte avant (gauche et droit), central et surround (gauche... -
Page 96: Ambiance
FRANCAIS 13 AMBIANCE Avant la lecture utilisant la fonction d’ambiance • Avant d’effectuer une lecture avec la fonction d’ambiance sonore, s’assurer d’utiliser auparavant les tonalités de test pour ajuster les réglages niveaux de reproduction de chacune des enceintes. Ce réglage peut être effectué avec la télécommande (décrite) ci-dessous. •... - Page 97 FRANCAIS • Après le réglage utilisant les tonalités d’essai, ajuster les niveaux des canaux en fonction des sources de lecture ou selon votre convenance personnelle, comme décrit ci-dessous. Sélectionner l’enceinte dont vous voulez ajuster le niveau. (Unité de télécommande) Le canal change de la manière indiquée ci-dessous chaque fois que la touche est enfoncée.
- Page 98 FRANCAIS Mode Dolby Surround Pro Logic Sélectionner la fonction se rapportant au composant que vous désirez écouter. Exemple: DVD (Unité principale) (Unité de télécommande) 4, 6 5, 7 Sélectionner le mode Dolby Surround Pro Logic Le mode Dolby Surround Pro Logic Cinema ou Music peut être...
- Page 99 FRANCAIS • Réglage TONE DEFEAT Régler les paramétrages d'ambiance sonore. TONE DEF. • Réglage CINEMA EQ CINEMA EQ OFF • Réglage SURROUND BACK SPEAKER • Réglage PANORAMA PANORAMA • Réglage DEFAULT DEFAULT • Réglage DIMENSION DIMENSION Sélectionner “Yes” pour retourner aux valeurs d'usine par défaut.
- Page 100 FRANCAIS Sélectionner le mode DTS NEO:6. Régler les paramétrages d'ambiance sonore. • Réglage CINEMA EQ CINEMA EQ OFF (Unité principale) (Unité de télécommande) • Le mode se commute à chaque pression sur la touche comme indiqué ci-dessous. • Réglage CENTER IMAGE DOLBY PL cinema C.IMAGE 0.2...
-
Page 101: Mode Dts Neo
FRANCAIS Paramètres d’ambiance q Mode Pro Logic Le mode Cinéma peut être utilisé pour les émissions de télévision en stéréo et tous les programmes enregistrés en Dolby Surround. Le mode Music est recommandé comme mode standard pour les systèmes musicaux à son automatique (pas de vidéo) et optionnel pour le système A/V. -
Page 102: Mode Dolby Digital (Uniquement Avec Entrée Numérique) Et Le Mode D'ambiance Dts (Uniquement Avec Entrée Numérique)
FRANCAIS Mode Dolby Digital (uniquement avec entrée numérique) et le mode d’ambiance DTS (uniquement avec entrée numérique) Sélectionner la source d’entrée. Reproduire avec une entrée numérique q Sélectionner une source d’entrée réglée à numérique (COAXIAL/OPTICAL) (voir page 84). Exemple: DVD (Unité... - Page 103 FRANCAIS Utiliser les touches (gauche) et (droit) pour régler CINEMA EQ. (Initial) CINEMA EQ OFF (Unité de télécommande) touche (gauche) touche (droit) Appuyer sur la touche SURROUND PARAMETER ou (bas) pour passer au réglage D. COMP. (Unité de télécommande) Utiliser les touches (gauche) et (droit) pour régler la compression de la gamme dynamique (D.COMP).
- Page 104 FRANCAIS Pour remettre le système en configuration par défaut, utiliser les touches (gauche) et (droit) pour que “Yes” s’affiche. DEFAULT (Unité de télécommande) touche (gauche) touche (droit) Appuyer sur la touche SURROUND PARAMETER ou (bas) pour passer au réglage CINEMA EQ. (Unité...
-
Page 105: Simulation D'ambiance Dsp
FRANCAIS 14 SIMULATION D’AMBIANCE DSP • Ce appareil est équipé d’un DSP (processeur numérique de signal) de haute précision qui utilise le traitement des signaux numériques pour recréer de manière synthétique le champ sonore. Un des 7 modes d’ambiance préréglés peut être sélectionné en fonction de la source programme, et les paramètres peuvent être ajustés en fonction des conditions de la salle d’écoute pour obtenir un son puissant et plus réaliste. - Page 106 FRANCAIS Simulation d’ambiance DSP • Pour utiliser les modes surround et régler leurs paramètres à l’aide de la télécommande. Sélectionner le mode d’ambiance pour le canal d’entrée. (Unité de télécommande) Le mode d’ambiance commute dans l’ordre suivant chaque fois que la touche DSP SIMULATION est enfoncée: MONO MOVIE ROCK ARENA MATRIX...
- Page 107 FRANCAIS (3) DELAY TIME Utiliser les touches (gauche) et (droit) pour régler le délai. (Initial) 30ms 110ms DELAY 30ms (Unité de télécommande) touche (gauche) touche (droit) (4) D. COMP. Utiliser les touches (gauche) et (droit) pour régler la compression de la gamme dynamique (D.COMP). (Initial) HIGH D.COMP.
- Page 108 FRANCAIS • Pour utiliser les modes surround et régler leurs paramètres à partir du panneau de commande de l’unité principale. Tourner le bouton SELECT pour sélectionner le mode surround. (Unité principale) 1, 3 • Lorsqu’il est tourné dans le sens horaire DIRECT STEREO DOLBY PRO LOGIC II...
- Page 109 FRANCAIS Modes d’ambiance et paramètres Sortie de canal En cas de En cas de En cas de En cas de reproduction reproduction reproduction reproduction de signaux de signaux de signaux de signaux SURROUND SURROUND SUB- Dolby Digital ANALOG Mode FRONT L/R CENTER (96k) BACK...
-
Page 110: Mémoire Préréglée Automatique
FRANCAIS 15 ECOUTER DE LA RADIO Mémoire préréglée automatique Cet appareil est équipé d’une fonction de recherche automatique d’émissions de radiodiffusion en FM et de leur stockage dans la mémoire préréglée. Lorsque l’ interrupteur d’alimentation de l’appareil principal est activé en même temps que le touche de réglage PRESET D D , l’appareil commence automatiquement à... -
Page 111: Syntonisation Automatique
FRANCAIS Syntonisation automatique Régler la source d’entrée sur “TUNER”. (Unité principale) (Unité de télécommande) En regardant l’affichage, appuyer sur la touche BAND (bande) pour sélectionner la bande désirée (AM ou FM). (Unité principale) (Unité de télécommande) Appuyer sur la touche MODE (mode) pour régler le mode de syntonisation automatique. -
Page 112: Stations Préréglée
FRANCAIS Stations préréglée Préparatifs: Utiliser l’opération de “Syntonisation automatique” ou de “Syntonisation manuelle” pour syntoniser la station à prérégler dans la mémoire. Appuyer sur la touche MEMORY (mémoire). (Unité de télécommande) Appuyer sur la touche SHIFT, et sélectionner le bloc de mémoire désiré... -
Page 113: Mémoire De Dernière Fonction
FRANCAIS 16 MEMOIRE DE DERNIERE FONCTION • Cet appareil est équipé d’une mémoire de dernière fonction qui stocke les conditions des réglages d’entrée et de sortie telles qu’elles étaient immédiatement après la mise hors tension. • L’appareil est également équipé d’une mémoire de sauvegarde. Cette fonction fournit approximativement une semaine de stockage de mémoire lorsque l’unité... -
Page 114: Informations Supplémentaires
FRANCAIS 18 INFORMATIONS SUPPLEMENTAIRES Son d’ambiance optimal pour sources différentes Il y a actuellement divers types de signaux de canaux multiples (signaux ou formats avec plus de deux canaux). Types de signaux de canaux multiples Dolby Digital, Dolby Pro Logic, DTS, signaux 3-1 haute définition (son Hi-Vision Japan MUSE), DVD-Audio, SACD (Super Audio CD), audio de canaux multiples MPEG, etc. -
Page 115: Enceintes D'ambiance Arrière
6.1 canaux, mais également avec des sources conventionnelles à 2 ou 5.1 canaux. Tous les modes d’ambiance originaux de DENON (voir page 113) sont compatibles avec la lecture à 6.1 canaux;... -
Page 116: Exemples De Réglage D'enceintes
FRANCAIS Exemples de réglage d’enceintes Nous décrivons ici un nombre de réglages d’enceintes pour différents buts. Utiliser ces exemples pour installer votre système en fonction du type d’enceintes utilisées et du principal objectif d’utilisation. 1. Système compatible DTS-ES (utilisant des enceintes d‘ambiance arrière) (1) Réglage de base pour surtout voir des films •... - Page 117 2 Certaines sorties numériques DVD ont la fonction de commuter la méthode de sortie de signaux Dolby Digital entre “courant binaire” et “(convertir à) PCM”. En cas de reproduction en ambiance Dolby Digital sur le AVR-1604/684, commuter le mode de sortie du lecteur de DVD à...
- Page 118 (réglage de niveau de sortie, conversion de fréquence d’échantillonnage, etc.). Dans ce cas, les signaux encodés en DTS peuvent être traités de manière erronée, auquel cas ils ne peuvent pas être décodés par le AVR-1604/684 ou peuvent seulement générer des parasites.
- Page 119 FRANCAIS Ambiance Etendue DTS-ES (DTS-ES Extended Surround Ambiance Etendue DTS-ES un nouveau format multicanaux développé par Digital Theater Systems Inc. Tout en offrant une haute compatibilité avec le format d'ambiance numérique DTS conventionnel, l'Ambiance Etendue DTS-ES améliore grandement l'impression d'ambiance 360 degrés et l'expression de l'espace grâce aux signaux d'ambiance étendus d'avantage.
-
Page 120: Dépistage Des Pannes
FRANCAIS 19 DEPISTAGE DES PANNES Si un problème se produit, vérifier d’abord les points suivants: 1. Les connexions sont-elles correctes ? 2. L’ampli-tuner a-t-il été utilisé conformément au mode d’emploi ? 3. Les enceintes et les autres appareils fonctionnent-ils correctement ? Si cet appareil ne fonctionne pas correctement, vérifier les points énumérés dans le tableau ci-dessous. -
Page 121: Spécifications
FRANCAIS 20 SPECIFICATIONS Section audio • Amplificateur de puissance (8 Ω/ohms, 20 Hz ~ 20 kHz avec D.H.T. de 0,08%) Puissance de sortie nominale: Avant: 75 W + 75 W 110 W + 110 W (6 Ω/ohms. 1 kHz avec D.H.T. de 0,7%) (8 Ω/ohms, 20 Hz ~ 20 kHz avec D.H.T. - Page 126 ENGLISH FRANCAIS 048, 055, 056, 068 TAPE Realistic Denon *[111] Sierra I Aiwa 001, 002 Sierra II Carver Sierra III Harman/Kardon 002, 003 Sony 049, 067 004, 005 STS1 Kenwood STS2 Magnavox STS3 Marantz SRS4 Onkyo 016, 018 Technisat 077, 078, 079, 081, 082...
- Page 127 MEMO:...
- Page 128 16-11, YUSHIMA 3-CHOME, BUNKYO-KU, TOKYO 113-0034, JAPAN Telephone: (03) 3837-5321 Printed in China 511 4061 008...