Milwaukee HAWK 5362-1 Manuel De L'utilisateur
Table des Matières
Les langues disponibles
Les langues disponibles
Liens rapides
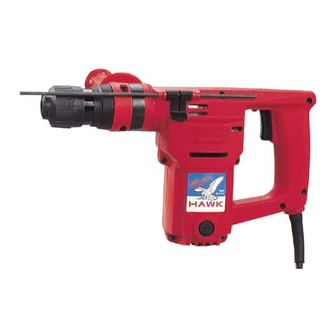
HAWK ROTARY HAMMERS
MARTEAU ROTATIF HAWK
ROTOMARTILLOS HALCON
TO REDUCE THE RISK OF INJURY, USER MUST READ AND UNDERSTAND OPERATOR'S MANUAL.
AFIN DE RÉDUIRE LE RISQUE DE BLESSURES, L'UTILISATEUR DOIT LIRE ET BIEN COMPRENDRE LE
MANUEL DE L'UTILISATEUR.
PARA REDUCIR EL RIESGO DE LESIONES, EL USUARIO DEBE LEER Y ENTENDER EL MANUAL DEL
OPERADOR.
OPERATOR'S MANUAL
MANUEL de L'UTILISATEUR
MANUAL del OPERADOR
Número de Catálogo
Catalog No.
No de Cat.
5362-1
5362-6
Table des Matières

Manuels Connexes pour Milwaukee HAWK 5362-1


Sommaire des Matières pour Milwaukee HAWK 5362-1
- Page 2 page 2...
-
Page 10: Entretien
RÈGLES GÉNÉRALES DE SÉCURITÉ POUR LES OUTILS ÉLECTRIQUE AVERTISSEMENT! LIRE SOIGNEUSEMENT TOUTES LES INSTRUCTIONS Le non respect des instructions ci-après peut entraîner des chocs électriques, des incendies et/ou des blessures graves. Le terme «outil électrique» figurant dans les avertissements ci-dessous renvoie à l’outil électrique à... -
Page 11: Règles De Sécurité Particulière
Entretenez les étiquettes et marques du fabricant. Les indications qu'elles contiennent sont précieuses. Si elles deviennent illisibles ou se détachent, faites-les remplacer gratuitement à un centre de service MILWAUKEE accrédité. AVERTISSEMENT! La poussière degagée par perçage, sciage et autres travaux de construction contient des substances chimiques reconnues comme pouvant causer le cancer, des malformations congénitales ou d’autres troubles de reproduction. -
Page 12: Mise À La Terre
état. Si tel est le cas, faites-les réparer dans un exemple, un cordon de calibre 14 a une meilleure conductivité qu’un centre-service MILWAUKEE accrédité avant de vous en cordon de calibre 16. Lorsque vous utilisez plus d’une rallonge pour servir. -
Page 13: Montage De L'outil
MONTAGE DE L'OUTIL AVERTISSEMENT! AVERTISSEMENT! Pour minimiser les risques de blessures, débranchez Pour minimiser les risques de blessures corporelles, utilisez toujours l’outil avant d’y faire des réglages, d’y attacher ou toujours la poignée laterérale lorsque vous maniez l’outil. d’en enlever les accessoires. L’usage d’accessoires autres Étayez-la ou maintenez-la solidement. - Page 14 UUtilisation de carottiers percutants (Fig. 6-9) Fig. 5 Les carottiers sont utiles pour percer de grands trous pour les conduits et les tuyaux. Les carottiers robustes de MILWAUKEE sont pourvus de parois Inverseur de Marche d’acier trempé et de dents carburées. Ces carottiers sont spécifiquement concus pour le forage rapide et précis en rotation avec percussion.
- Page 15 Insérez l’adaptateur dans le bec de l’outil tel que décrit sous la rubrique Lorsque le trou atteint la profondeur des dents du carottier, retirez la « Insertion des forets ». Placez la commande d’arrêt de rotation à la goupille de centrage et la plaque de guidage. Continuez ensuite à position de percussion avec rotation «...
-
Page 16: Accessoires
GARANTIE LIMITÉE DE L’OUTIL DE CINQ ANS et dommage à l'outil, n'immergez jamais l'outil et ne laissez pas de liquide s'y infiltrer. Tous les outils MILWAUKEE sont testés avant de quitter l’usine et sont garantis exempts de vice de matériau ou de fabrication. MILWAUKEE Nettoyage réparera ou remplacera (à... - Page 24 UNITED STATES CANADA MILWAUKEE Service Service MILWAUKEE MILWAUKEE prides itself in producing a MILWAUKEE est fier de proposer un produit de premium quality product that is ® première qualité N . Votre OTHING EAVY ® satisfaction est ce qui compte le plus!