Harvia Xenio Combi CX30C-U1 Instructions D'installation Et D'utilisation
Centre de controle
Masquer les pouces
Voir aussi pour Xenio Combi CX30C-U1:
- Instructions d'installation et d'utilisation (24 pages)
Table des Matières
Publicité
Liens rapides
HARVIA XENIO COMBI
CX30C-U1/CX30C-U3
Instructions for Installation and Use of Control Unit
Instructions d'installation et d'utilisation du centre de contrôle
01112016/Y05-0126
Dealer contact info:
Baltic Leisure
601 Lincoln Street, Oxford PA. 19363, United States of America
Phone (610) 932-5700 / 800-441-7147
Email saunas@balticleisure.com
www.balticleisure.com
Publicité
Table des Matières

Manuels Connexes pour Harvia Xenio Combi CX30C-U1


Sommaire des Matières pour Harvia Xenio Combi CX30C-U1
- Page 1 HARVIA XENIO COMBI CX30C-U1/CX30C-U3 Instructions for Installation and Use of Control Unit Instructions d'installation et d'utilisation du centre de contrôle Dealer contact info: Baltic Leisure 601 Lincoln Street, Oxford PA. 19363, United States of America Phone (610) 932-5700 / 800-441-7147 Email saunas@balticleisure.com...
-
Page 2: Table Des Matières
à la personne chargée de maintaining them. Congratulations on making an leur maintenance. Félicitations pour cet excellent excellent choice and choosing a Harvia control choix ! unit! HARVIA XENIO CONTROL UNIT (CX30C-U1 / CENTRE DE CONTRÔLE HARVIA XENIO... -
Page 3: Harvia Xenio
1. HARVIA XENIO 1.1. General 1.1. Généralités The Harvia Xenio control unit consists of a control Le centre de contrôle Harvia Xenio se compose d’un panel, a power unit, a temperature sensor and a panneau de commande, d’un bloc d’alimentation, humidity sensor. -
Page 4: Troubleshooting
The humidity sensor WX325 measures et d’une thermistance NTC de détection de • temperature and relative humidity. température (22 kΩ/T=77 ºF (25 °C)). Dimensions: 2.0” x 2.9” x 1.1” (51 mm x Le capteur d’humidité WX325 mesure la • • 73 mm x 27 mm) température et l’humidité... -
Page 5: Instructions For Use
2.1.1. Heater and/or Steamer On 2.1.1. Poêle et/ou évaporateur allumés Heater and steamer are switched on and off inde- La poêle et l’évaporateur sont allumés et éteints pendently (only with the Harvia Xenio CX30C-U1 indépendamment. (uniquement avec le modèle model). Harvia Xenio CX30C-U1). -
Page 6: Heater And/Or Steamer Off
2.1.2. Heater and/or Steamer Off 2.1.2. Poêle et/ou évaporateur éteint The heater and/or steamer turn off and the control Le poêle et/ou l’évaporateur s’éteint et le centre de unit switches to standby-mode when contrôle passe en mode veille lorsque the I/O button is pressed le bouton E/S est enfoncé... - Page 7 IPX4 HL(S)11U3(Q) 10,5 kW CERTIFIED TO B1 (default/défaut), B2, B3, B4, B5 CAN/CSA STD HARVIA OY, FINLAND *Q = includes built-in contactor / contient le contacteur integré 3159549 E60335-2-53-05 C1, C2, C3, C4, C5 D1, D2, D3, D4, D5 E1, E2, E3, E4, E5, E6 Control unit in standby mode Centre de contrôle en mode veille.
- Page 8 Control unit in standby mode Centre de contrôle en mode veille. La lumière de fond des boutons E/S s’allume dans le I/O button’s background light glows on the tableau de commande. control panel. Ouvrez le menu réglages en appuyant simul- Open the settings menu by simultaneously pressing the locations of the buttons –, tanément sur les emplacements des boutons...
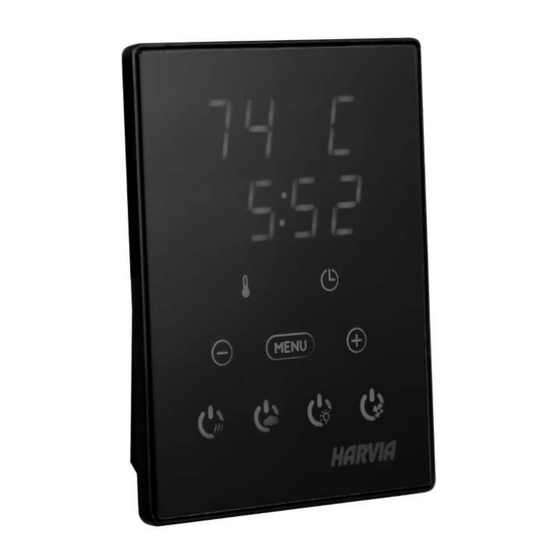
- Page 9 Mode basique (poêle et évaporateur allumés) Basic mode (heater and steamer on) The top row shows the sauna room La ligne supérieure montre la température du temperature. The bottom row shows the sauna. La ligne inférieure montre la valeur humidity level (or remaining on-time, if the d’humidité...
-
Page 10: Instructions For Installation
3. INSTRUCTIONS FOR INSTALLATION 3. INSTRUCTIONS D’INSTALLATION The electrical connections of the control unit may Les connexions électriques du centre de contrôle peu- only be made by a licensed professional electrician vent uniquement être effectuées par un électricien pro- and in accordance with the current regulations. fessionnel agréé... -
Page 11: Installing The Control Panel
3.1. Installing the Control Panel 3.1. Installer le tableau de commande The control panel is splashproof and has a low Le panneau de commande est étanche aux écla- operating voltage. The panel can be installed in the boussures et présente une faible tension de fonc- dressing room, or in the living quarters. -
Page 12: Instructions For Installation
3.2.2. Instructions for Installation 3.2.2. Instructions d’installation The power unit of CX30C-U1 and CX30C-U3 is Le bloc d'alimentation de la CX30C-U1 et CX30C-U3 controlled by control panel Xenio. est commandé par le tableau de commande Xenio. Control panel is connected to power unit via Le tableau de commande est relié... - Page 13 K A1 Figure 6a. Electrical connections 240 V, 1Ph (CX30C-U1) Figure 6a. Connexions électriques 240 V, 1Ph (CX30C-U1)
- Page 14 L2 L3a K A1 Figure 6b. Electrical connections 208 V, 3Ph (CX30C-U3). Figure 6b. Connexions électriques 208 V, 3Ph (CX30C-U1).
-
Page 15: Power Unit Breaker Faults
3.2.3. Power Unit Breaker Faults 3.2.3. Défaillances du fusible du bloc Replace a blown breaker by a new one with the d’alimentation same resistance. The placement of the breakers in Un fusible grillé doit être remplacé par un fusible the power unit is shown in Figures 6a and 6b. neuf. -
Page 16: Installing The Humidity Sensor
3.4. Installing the Humidity Sensor 3.4. Installer le capteur d’humidité Fixez le capteur d’humidité sur le mur aussi loin Fasten the humidity sensor on the wall as far from the heater as possible and at a distance of 20–28’’ que possible du poêle et à une distance de 20–28’’ (500–700 mm) from the ceiling. - Page 17 A / D = Safety distance of heater 3 15/16” (Check from heater manual)/ (100 mm) Distance de sécurité du poêle (Vérifier dans le manuel du poêle) Temperature sensor Capteur de température Humidity sensor Temperature sensor Capteur d’humidité Capteur de température Permitted area for humidity sensor...
-
Page 18: Spare Parts
4. SPARE PARTS 4. PIÈCES DE RECHANGE Use only parts approved by the manufacturer! N'utiliser que des pièces approuvées par le fabricant ! Control panel Tableau de commande WX384 Data cable 5 m Câble de commandes 5 m WX311 Data cable extension 10 m (accessory) Câble de rallonge 10 m (accessoire) WX313 Temperature sensor... -
Page 19: Guarantee
15 jours suivant l’achat. La garantie s’applique uniquement à la première ins- tallation du produit et à l’acheteur d’origine. Harvia control unit model/ Modèle de centre de contrôle Harvia Model number/Numéro de modèle Date of purchase/Date d’achat Original purchaser/Acheteur d’origine Address/Adresse Purchased from/Acheté...