Fujitsu LifeBook E780 Guide D'utilisation

Manuels Connexes pour Fujitsu LifeBook E780


Sommaire des Matières pour Fujitsu LifeBook E780
- Page 1 Learn how to use your Fujitsu User’s Guide LifeBook E780 notebook Découvrez comment utiliser Guide d’utilisation votre ordinateur portable Fujitsu LifeBook E780...
- Page 198 Guide d’utilisation Découvrez comment utiliser votre ordinateur portable Fujitsu LifeBook E780...
-
Page 199: Informations Sur Les Droits D'auteurs Et Les Marques Commerciales
Fujitsu America, Incorporated s’est efforcée d’assurer la précision ainsi que l’intégralité de ce document ; toutefois, compte tenu de nos efforts de développement et d’amélioration constants des capacités de nos produits, nous ne sommes pas en mesure de garantir la précision du contenu de ce document. - Page 200 © Copyright 2009 Fujitsu America, Incorporated. Tous droits réservés. Aucune partie de cette publication ne peut être copiée, reproduite ou traduite sans le consentement préalable de Fujitsu. Aucune partie de cette publication ne peut être enregistrée ou transmise électroniquement sans le consentement écrit de Fujitsu.
-
Page 201: Consignes De Sécurité Importantes
Pour fonctionner, cet appareil nécessite un adaptateur secteur. Utilisez uniquement un adaptateur, homologué UL I.T.E., avec une sortie nominale de 19 V c.c. L’intensité du courant est déterminée par la carte graphique utilisée par le système et est indiquée sur l’étiquette de configuration Fujitsu située sous l’ordinateur. Polarité de sortie de l’adaptateur secteur : Pendant l’utilisation de l’ordinateur portable, observez toujours les consignes de sécurité... -
Page 202: Recyclage De La Batterie
Pour commander une nouvelle batterie compatible avec votre ordinateur portable Fujitsu, visitez le site www.shopfujitsu.com si vous résidez aux États-Unis ou www.fujitsu.ca/products/notebooks si vous résidez au Canada. ** La RBRC est une organisation indépendante dont Fujitsu finance une partie des activités de recyclage ; la RBRC n’est en aucune façon affiliée à Fujitsu. - Page 203 Conventions utilisées dans ce guide ......9 Coordonnées pour contacter Fujitsu......10 Chapitre 1 Présentation de votre ordinateur LifeBook...
- Page 204 Voyant d’accès au disque dur/lecteur optique ..... . 27 Voyant de verrouillage du pavé numérique (Verr num)....28 Voyant verrouillage des majuscules (Verr maj) .
- Page 205 Installation de Click Me! ........58 Utilitaire de mise à jour des pilotes Fujitsu Driver Update ... . 59 Gestion de l’alimentation .
- Page 206 Chapitre 3 Options installables par l’utilisateur Batterie au lithium-ion ......... 66 Procédure de recharge des batteries .
- Page 207 E-SATA Port ..........95 Port d’affichage .
- Page 208 Chapitre 6 Spécifications techniques Spécifications techniques du système ......143 Étiquette de configuration........143 Microprocesseur .
- Page 209 Désactivation/déconnexion de la carte réseau sans fil ....180 Désactivation avec le commutateur de dispositif sans fil ....181 Désactivation par l’icône dans la zone de notification .
- Page 210 Annexe B : Capteur d’empreintes digitales Présentation du capteur d’empreintes digitales optionnel ... . 192 Première mise en marche ........193 Installation d’OmniPass .
-
Page 211: Préface
Le texte contient plusieurs renvois vers des pages contenant des informations supplémentaires sur un sujet quelconque. Exemple : (« Voir Procédure d’installation en page 43 »). Les éléments des menus à l’écran sont indiqués en caractères gras. Exemple : « Cliquez sur Menu Fujitsu, puis faites votre sélection. »... -
Page 212: Coordonnées Pour Contacter Fujitsu
AVERTISSEMENTS Coordonnées pour contacter Fujitsu Service et assistance Plusieurs façons s’offrent à vous pour contacter l’équipe de service et assistance de Fujitsu : • Appel sans frais : 1-800-8Fujitsu (1-800-838-5487) • Site Internet : http://www.computers.us.fujitsu.com/support Avant de nous contacter, veuillez avoir les informations suivantes à portée de main pour que notre préposé... - Page 213 VOUS DEVEZ AVOIR UNE CONNEXION NTERNET ACTIVE Garantie limitée Votre ordinateur portable LifeBook est accompagné d’une garantie limitée internationale de Fujitsu. Pour connaître les conditions générales et la durée de votre garantie limitée, consultez la pochette de service livrée avec votre ordinateur.
-
Page 214: Chapitre 1 Présentation De Votre Ordinateur Lifebook
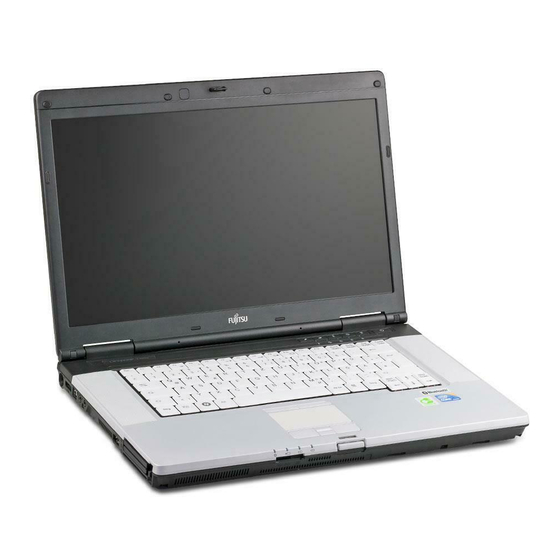
Cette section décrit les composants de votre ordinateur portable LifeBook E780 Fujitsu. Nous vous suggérons de la lire avant de commencer à utiliser l’ordinateur, même si vous avez déjà utilisé des ordinateurs de ce type. Figure 1. Ordinateur portable Fujitsu LifeBook E780... -
Page 215: Emplacement Des Commandes Et Des Connecteurs
Emplacement des commandes et des connecteurs Caméra Web Loquet de l'écran Microphone numérique Haut-parleur stéréo Écran Optional Quick Point Tableau de voyants d'état Cursor Control Tableau de sécurité et d’applications LifeBook Pavé tactile TouchPad Bouton d'alimentation/ veille/reprise Tableau de voyants d'état Haut-parleur stéréo Fente pour carte MemoryStick/SD Clavier... -
Page 216: Composants Supérieurs
Composants supérieurs Voici une courte description des composants se trouvant sur le dessus de votre ordinateur LifeBook. Caméra Web La caméra intégrée fonctionne avec une résolution de 1,3 mégapixels. Pour connaître les instructions d’utilisation de la caméra, consultez les fichiers d’aide fournis avec le logiciel de la YouCam. Loquet de l'écran Le loquet permet de verrouiller et de déverrouiller l'écran. -
Page 217: Fente Pour Carte Memory Stick/Sd
Clavier complet avec plusieurs touches spéciales Windows. Voir « Clavier » en page 29. Fente pour carte Memory Stick/SD La fente pour cartes mémoire MemoryStick/SD permet de connecter une carte MemoryStick/SD pour stocker des données. Cette architecture vous permet de transférer des données à partir d’une grande variété de périphériques numériques. -
Page 218: Composants Sur Le Côté Gauche De L'ordinateur
Fente pour carte ExpressCard Bouton d’éjection de Prise de microphone Port eSATA (fente supérieure) carte ExpressCard Fente pour carte Smart Card Alimentation c.c. Prise d’écouteurs Grilles de ventilation Bouton d’éjection de carte PC Card Prise IEEE 1394 Port USB 2.0 Fente pour carte PC Card (fente inférieure) -
Page 219: Fente Pour Carte Expresscard
Fente pour carte ExpressCard Permet d’installer une carte ExpressCard. Voir « Cartes PC Card/ExpressCard™ » en page 81. Bouton d’éjection de carte ExpressCard Le bouton d’éjection de carte ExpressCard permet de retirer une carte ExpressCard de la fente correspondante. Fente pour carte PC Card La fente pour carte PC Card prend les cartes de Type I ou de Type II : Voir «... - Page 220 OUR PROTÉGER VOTRE ORDINATEUR DES DOMMAGES ET OPTIMISER SES PERFORMANCES GARDEZ TOUJOURS LES GRILLES DE VENTILATION DÉGAGÉES PROPRES ET SANS DÉBRIS L EST POSSIBLE QUE ’ VOUS DEVIEZ LES NETTOYER PÉRIODIQUEMENT SELON L ENVIRONNEMENT DANS LEQUEL VOUS ’ UTILISEZ L ORDINATEUR ’...
-
Page 221: Composants Sur Le Côté Droit De L'ordinateur
Compartiment multifonction Ports USB 2.0 (x 3) Loquet de dégagement du Commutateur Marche/ Fente pour antivol compartiment multifonction Arrêt du dispositif sans fil Figure 4. Côté droit de l’ordinateur LifeBook Composants sur le côté droit de l’ordinateur Voici une courte description des composants se trouvant sur le côté droit de votre ordinateur LifeBook. Ports USB 2.0 Les ports USB 2.0 vous permettent de connecter des périphériques USB. -
Page 222: Commutateur Marche/Arrêt Du Dispositif Sans Fil
• Disque dur secondaire modulaire • Volet réducteur de poids Commutateur Marche/Arrêt du dispositif sans fil Ce commutateur permet de mettre sous et hors tension les dispositifs de réseau sans fil, Bluetooth et WUSB en option. Pour prolonger la longévité de la batterie, éteignez ces périphériques entre les utilisations. -
Page 223: Port Vidéo Externe
Port vidéo externe Le port vidéo externe permet de connecter un moniteur externe ou un projecteur ACL. Voir « Port vidéo externe » en page 101. Grilles de ventilation Les grilles permettent à l’air de circuler dans le système afin de refroidir les composants. OUR PROTÉGER VOTRE ORDINATEUR DES DOMMAGES ET OPTIMISER SES PERFORMANCES GARDEZ TOUJOURS LES GRILLES DE VENTILATION DÉGAGÉES... - Page 224 OUR DE PLUS AMPLES INFORMATIONS SUR LE MODEM CONSULTEZ LE SITE NTERNET DE UJITSU À FUJITSU COMPUTERS Port série Le port série permet de connecter des périphériques RS-232, notamment une imprimante série ou un scanner série. Voir « Port série » en page 96.
-
Page 225: Composants Sous L'ordinateur
Compartiment de batterie au Filtre anti-poussière lithium-ion Module de mémoire supplémentaire Connecteur pour Filtre antipoussière duplicateur de ports integré (un seul; l’emplacement dépend de la configuration du système.) Figure 6. Dessous de l’ordinateur portable LifeBook Composants sous l’ordinateur Voici une courte description des composants se trouvant sous votre ordinateur LifeBook. Compartiment de mémoire supplémentaire Votre ordinateur est équipé... -
Page 226: Compartiment De Batterie Au Lithium-Ion
Compartiment de batterie au lithium-ion Le compartiment de batterie contient la batterie interne au lithium-ion. Le couvercle de cette baie peut être ouvert pour enlever la batterie lorsque l’ordinateur doit être entreposé pendant une longue période ou pour remplacer une batterie à plat par une autre batterie chargée. Voir « Batterie au lithium-ion » en page 66. Connecteur pour duplicateur de ports Ce connecteur permet de brancher le duplicateur de ports en option sur votre ordinateur portable. -
Page 227: Tableau De Voyants D'état
Figure 7. Tableau de voyants d’état Tableau de voyants d’état Le tableau de voyantsd’état contient des symboles correspondant à divers composants de votre ordinateur LifeBook Fujitsu. Les diodes électroluminescentes (DEL) adjacentes à chaque symbole vous renseignent sur le fonctionnement des composants correspondants. Voyant d’alimentation Le voyant d’alimentation indique si le système est opérationnel. -
Page 228: Voyant De Charge Des Batteries
• Allumé en continu : l’ordinateur portable est sous tension et prêt à être utilisé. • Clignotant : Ceci indique que l'ordinateur est en mode veille. • Éteint : Le système est en mode “Enregistrement sur disque” ou éteint. Voyant de charge des batteries Indique l'état de charge de la ou des batteries. -
Page 229: Voyant De Sécurité
• Lorsque la batterie est installée et que l'ordinateur n'est pas sous tension, le voyant de charge de la pile s'affichera cinq secondes après le clignotement orange. • Lorsque l'adaptateur secteur n'est pas branché ou que la batterie n'est pas complètement chargée et que l'ordinateur se trouve en mode veille, le voyant clignote. -
Page 230: Voyant De Verrouillage Du Pavé Numérique (Verr Num)
Voyant de verrouillage du pavé numérique (Verr num) Le voyant Verr num indique que le clavier intégré est en mode pavé numérique à dix touches. Voyant verrouillage des majuscules (Verr maj) Le voyant Verr maj indique que le clavier est verrouillé pour que tous les caractères s'affichent en majuscules. -
Page 231: Clavier
Figure 8. Clavier Utilisation du clavier Votre ordinateur portable Fujitsu LifeBook est doté d’un clavier à 84 touches. Ce clavier exécute toutes les fonctions d’un clavier à 101 touches, y compris les touches Windows et diverses touches de fonction spéciales. Cette section décrit les touches suivantes. - Page 232 • Touches de curseur : Votre clavier contient quatre touches fléchées permettant de déplacer le curseur ou le point d’insertion vers la droite, vers la gauche, vers le haut ou vers le bas, dans les fenêtres, dans les applications et dans les documents. •...
-
Page 233: Touches De Fonction
Touches de fonction Votre ordinateur LifeBook comporte 12 touches de fonction, [F1] à [F12]. Les fonctions affectées à ces touches varient selon l’application. Pour les connaître, consultez la documentation du logiciel utilisé. • La touche [Fn] permet d’accéder à des fonctions supplémentaires de votre ordinateur portable. Elle est toujours utilisée conjointement avec une autre touche. -
Page 234: Pavé Tactile Touchpad
Pavé tactile TouchPad Commande Quick Point (en option) Bouton gauches Commande de curseur Bouton de défilement ou capteur d'empreintes digitales en option Bouton droit Figure 9. Pavé tactile TouchPad Votre ordinateur portable LifeBook possède un pavé tactile TouchPad intégré. Ce dispositif permet de commander le déplacement du pointeur et de sélectionner des éléments affichés à... -
Page 235: Cliquer
• E780 ’ ERTAINS ORDINATEURS SONT DOTÉS D UN BOUTON UICK OINT EN OPTION PERMETTANT ’ « C » DE CONTRÔLER LE CURSEUR OUR PLUS D INFORMATIONS VOIR OMMANDE UICK OINT EN OPTION PAGE • ’ E BOUTON DE DÉFILEMENT PEUT ÊTRE REMPLACÉ PAR UN CAPTEUR D EMPREINTES DIGITALES EN OPTION ... -
Page 236: Double-Cliquer
Double-cliquer Double-cliquer signifie cliquer rapidement, deux fois de suite, avec le bouton gauche. Cette procédure ne fonctionne pas avec le bouton droit. Pour effectuer un double-clic, placez le pointeur sur l’objet voulu et appuyez rapidement deux fois sur le bouton gauche. Vous pouvez également effectuer un double-clic en tapant deux fois légèrement sur le TouchPad. -
Page 237: Défiler
Défiler Le bouton de défilement permet de parcourir rapidement des pages sans avoir à utiliser les barres de défilement de la fenêtre. Cette fonction est particulièrement utile lorsque vous naviguez sur des sites Internet. Pour utiliser le bouton de défilement, appuyez sur le croissant en haut ou en bas du bouton et vous verrez la page défiler vers le haut ou vers le bas, selon le cas. -
Page 238: Réglage Du Volume
Réglage du volume Votre ordinateur LifeBook Fujitsu est doté de plusieurs commandes de volume fonctionnant en interaction. ES APPLICATIONS POUVANT REPRODUIRE DES FICHIERS AUDIO PROPOSENT ÉGALEMENT LEUR ). S PROPRE COMMANDE DE VOLUME COMMANDE LOGICIELLE I VOUS INSTALLEZ UN PÉRIPHÉRIQUE ’... -
Page 239: Périphériques Pour Le Compartiment Multifonction
Figure 10. Compartiment multifonction (baie modulaire) Périphériques pour le compartiment multifonction Votre ordinateur portable Fujitsu LifeBook est doté d’un compartiment multifonction (ou baie modulaire). Cette baie peut recevoir un lecteur optique, une batterie au lithium-ion, un disque dur secondaire modulaire ainsi qu’un réducteur de poids. - Page 240 ’ E COMPARTIMENT MULTIFONCTION NE DOIT JAMAIS ÊTRE VIDE LORSQUE L ORDINATEUR EST EN MARCHE I VOUS LA LAISSEZ VIDE DE LA POUSSIÈRE ET DES CORPS ÉTRANGERS PEUVENT ’ ’ INFILTRER DANS L ORDINATEUR Remplacement hors tension Pour remplacer à froid un périphérique modulaire dans le compartiment multifonction, procédez comme suit : Fermez tous les fichiers ouverts.
-
Page 241: Tableau De Sécurité Et D'applications Lifebook
Enter Bouton 1/ Bouton 3/ Bouton Entrée Bouton 2/ Bouton Soutien Utilitaire Display Manager Bouton 4/ Économiseur Verrouillage de l'écran d’énergie Figure 11. Tableau de sécurité et d’applications LifeBook Tableau de sécurité et d’applications LifeBook Fonction unique aux portables LifeBook, le tableau de sécurité et d’applications vous permet de protéger l’ordinateur contre une utilisation non autorisée. -
Page 242: Bouton Entrée
Bouton Entrée Après avoir entré les codes numérotés, appuyez sur ce bouton pour enregistrer le mot de passe dans l’ordinateur LifeBook. Mots de passe Des mots de passe d’utilisateur et de superviseur peuvent être définis sur l’ordinateur. Afin de faciliter la gestion des systèmes, le mot de passe de superviseur est habituellement le même sur tous les portables LifeBook d’un groupe de travail, d’un bureau ou d’une entreprise. - Page 243 Allez au menu Démarrer. Sélectionnez Tous les programmes. Sélectionnez Accessoires, puis [Exécuter]. Entrez : C:\Program Files\Fujitsu\Security Panel Application\Supervisor\FJSECS.EXE, puis appuyez sur [Entrée]. Suivez les instructions affichées à l’écran pour définir le mot de passe de superviseur. Définition du mot de passe d’utilisateur Allez au menu Démarrer.
-
Page 244: Utilisation Du Tableau De Sécurité Et D'applications De Votre Lifebook
Utilisation du tableau de sécurité et d’applications de votre LifeBook La fonction de verrouillage de sécurité est activée à la mise hors tension du système, de même qu’à sa reprise depuis le mode veille. Vous devrez entrer le mot de passe juste après avoir appuyé sur le bouton de veille/reprise. -
Page 245: Mises En Garde
Mises en garde Ouverture et fermeture du couvercle de l’écran Lorsque le couvercle est fermé, l’ordinateur portable se place automatiquement en mode veille. L’ouverture du couvercle ne met pas automatiquement le portable en mode de fonctionnement normal. C’est pourquoi vous devez entrer le mot de passe de sécurité après avoir enfoncé le bouton d’alimentation/ veille/reprise. -
Page 246: Utilisateur
Suppression de l’application Tableau de sécurité avec des mots de passe encore actifs L’utilisation de cette fonction ne permettra aucune modification du mot de passe. Selon la configuration de votre système d’exploitation, les procédures peuvent être légèrement différentes, comme décrit ci-dessous : A SUPPRESSION DES APPLICATIONS NE SUPPRIME PAS LE MOT DE PASSE ETTE OPÉRATION... -
Page 247: Lancement D'applications Avec Le Tableau De Sécurité Et D'applications
Si vous oubliez les deux mots de passe, veuillez communiquer avec le service à la clientèle et d’assistance de Fujitsu America, Incorporated, au 1-800-8FUJITSU (1-800-838-5487). La société Fujitsu Computer Systems exige des frais de service pour le déverrouillage d’un portable LifeBook protégé par mot de passe. -
Page 248: Configuration De Votre Tableau D'applications Lifebook
Bouton 2 / ECO Ce bouton vous permet d’accéder à l’utilitaire Économiseur d’énergie. Bouton 3 / Présentation Ce bouton ouvre le gestionnaire d’affichage Fujitsu, qui vous permet d’alterner entre les différents paramètres d’affichage de votre ordinateur. Ce bouton permet de verrouiller automatiquement votre ... - Page 249 Pour changer l’application associée à un bouton, cliquez sur l’onglet correspondant au bouton à reconfigurer – par exemple Soutien. Cliquez sur [Enregistrement de l’application…] à partir du menu Démarrer, cliquez sur l’application voulue dans la liste, puis sur [suivant]. Dans la fenêtre qui suit, vous pouvez demander au système d'émettre un son quand le programme sélectionné...
-
Page 250: Chapitre 2 Première Mise En Marche De Votre Ordinateur Portable Lifebook
LifeBook Prise d’alimentation c.c. Adaptateur secteur Figure 12. Connexion de l’adaptateur secteur Sources d’alimentation Votre ordinateur portable LifeBook Fujitsu peut utiliser trois sources d’alimentation différentes : une batterie au lithium-ion principale, un adaptateur secteur et un adaptateur auto/avion. -
Page 251: Connexion Des Adaptateurs D'alimentation
Connexion des adaptateurs d’alimentation L’adaptateur secteur et l’adaptateur auto/avion disponible en option permettent tous deux de faire fonctionner votre ordinateur portable et de charger les batteries. Connexion de l’adaptateur secteur Branchez le câble de sortie c.c. dans la prise d’alimentation c.c. de votre ordinateur. Branchez l’adaptateur secteur sur une prise électrique secteur (c.a.). -
Page 252: Écran
Figure 13. Ouverture de l’écran Écran Votre ordinateur portable LifeBook Fujitsu comporte un écran à rétro-éclairage permettant une lecture facile dans les environnements à forte luminosité. Cet écran offre également une excellente résolution grâce à une technologie de matrice active. -
Page 253: Réglage De La Luminosité De L'écran
Réglage de la luminosité de l’écran Lorsque vous avez allumé votre ordinateur portable, vous pouvez régler la luminosité de l’écran à un niveau plus confortable. Sur les systèmes Windows XP, la luminosité peut être réglée en utilisant le clavier. Sur les systèmes Windows Vista et Windows 7, il y a trois façons d’ajuster la luminosité : en utilisant le clavier, les Options d’alimentation ou le Centre de mobitilité... -
Page 254: Utilisation De La Gestion De L'alimentation Pour Contrôler La Luminosité De L'écran (Windows 7)
Utilisation de la Gestion de l'alimentation pour contrôler la luminosité de l'écran (Windows 7) Cliquez sur Démarrer -> Panneau de configuration. Dans « Affichage par : », sélectionnez un des affichages par icônes. Sélectionnez Écran puis cliquez sur Régler la luminosité dans le panneau de gauche. -
Page 255: Démarrage De Votre Ordinateur Portable Lifebook
Démarrage de votre ordinateur portable LifeBook Mise sous tension Bouton d’alimentation/veille/reprise Lorsque votre ordinateur portable LifeBook est éteint, le bouton d’alimentation/veille/reprise permet de l’allumer. Pour allumer votre ordinateur portable LifeBook, vous devez avoir connecté votre adaptateur secteur ou disposer d’une batterie au lithium-ion chargée. ’... -
Page 256: Procédure D'amorçage
BIOS. Chaque fois que vous démarrez ou redémarrez votre ordinateur, il exécute une procédure d’amorçage et l’écran affiche le logo Fujitsu jusqu’à ce que le système d’exploitation soit chargé. Cette procédure comporte diverses opérations dont un auto-test de mise sous tension. Si la procédure d’amorçage est exécutée sans échec et sans demande d’accès à... -
Page 257: Utilitaire De Configuration Du Bios
TrustedCore tel que décrit à la section suivante) : Allumez ou redémarrez votre ordinateur portable LifeBook. Pour accéder à l’utilitaire, appuyez sur la touche [F2] lorsque le logo Fujitsu apparaît à l’écran. Le menu principal de l’utilitaire de configuration du BIOS s’affichera avec les paramètres courants. -
Page 258: Démarrage Du Système
La première fois que vous allumez votre ordinateur portable LifeBook, l’écran affiche le logo Fujitsu. Si vous n’intervenez pas, l’ordinateur charge le système d’exploitation et lance la procédure ... - Page 259 Pour profiter au maximum de votre système d'exploitation Windows, il vous est suggéré de l'enregistrer lors de sa première utilisation. Premièrement, vous devrez lire et accepter les contrats de licence d’utilisation. • ’ I VOUS REFUSEZ D ACCEPTER LE CONTRAT DE LICENCE LE SYSTÈME VOUS DEMANDE DE REVOIR ’...
-
Page 260: Enregistrement De Votre Pc Tablette Lifebook Chez Fujitsu
Enregistrement de votre PC Tablette LifeBook chez Fujitsu Pour enregistrer votre ordinateur LifeBook, vous pouvez aller sur notre site Internet : us.fujitsu.com/computers. Pour vous enregistrer en ligne, vous devez avoir un compte valide auprès d’un fournisseur d’accès Internet. Installation de Click Me! ClickMe! ... -
Page 261: Utilitaire De Mise À Jour Des Pilotes Fujitsu Driver Update
Utilitaire de mise à jour des pilotes Fujitsu Driver Update Votre système dispose d’un outil pratique appelé Utilitaire de Mise à jour des pilotes Fujitsu (FDU ou Fujitsu Driver Update). Avec FDU, vous pouvez choisir d’aller automatiquement ou manuellement sur le site de Fujitsu pour obtenir les mises à... -
Page 262: Gestion De L'alimentation
Gestion de l’alimentation Votre ordinateur Fujitsu LifeBook possède plusieurs dispositifs permettant d’économiser l’énergie des batteries. Certains de ces dispositifs fonctionnent automatiquement et ne requièrent aucune intervention, notamment en ce qui concerne le modem interne. Cependant, d’autres dépendent de paramètres que vous pouvez configurer en fonction de vos conditions d’utilisation, notamment en ce qui concerne la luminosité... -
Page 263: Mode Sommeil
Mode sommeil Lorsque le mode sommeil est activé, Windows conserve le contenu de votre mémoire de système durant la période d’inactivité en maintenant l’alimentation de certains composants critiques. Ce mode éteint l’unité centrale, l’écran, le disque dur et tous les autres composants internes sauf ceux qui sont nécessaires pour conserver la mémoire du système et permettre son redémarrage. -
Page 264: Fonction De Veille Prolongée
Dans ces situations, la mémoire de système de l’ordinateur enregistre généralement le fichier sur lequel vous travaillez, des informations sur les applications ouvertes et d’autres données nécessaires aux opérations en cours. Lorsque vous quittez le mode sommeil, l’ordinateur est rallumé dans l’état exact où... -
Page 265: Gestion De L'alimentation Dans Windows
Activation et désactivation de la fonction de veille prolongée Dans Windows Vista/Windows 7 : Le mode veille prolongée est activé par défaut. Pour activer ou désactiver la fonction de veille prolongée, exécutez les opérations suivantes : Dans le menu Démarrer, ouvrez le panneau de configuration et cliquez sur l'icône Options d'alimentation. Puis sélectionnez «... -
Page 266: Mise Hors Tension
Dans Windows XP : Cliquez sur le bouton du menu Démarrer et cliquez sur Arrêter l’ordinateur. Dans la boîte de dialogue d’arrêt Windows qui apparaît, sélectionnez l’option Redémarrer. Enfin, cliquez sur OK. L’ordinateur s’arrête et redémarre. ’ I VOUS ARRÊTEZ VOTRE ORDINATEUR SANS FERMER INDOWS OU SI VOUS L ALLUMEZ MOINS DE ’... - Page 267 Si vous comptez entreposer votre ordinateur pendant un mois ou plus, consultez la section Entretien. • É ’ TEIGNEZ TOUJOURS VOTRE ORDINATEUR AVANT DE LE TRANSPORTER ET OU DE L EMBALLER PRÈS ’ AVOIR ÉTEINT LE SYSTÈME ATTENDEZ QUE LE PANNEAU DE VOYANTS D ÉTAT INDIQUE BIEN LE STATUT ’...
-
Page 268: Chapitre 3 Options Installables Par L'utilisateur
Chapitre 3 Options installables par l’utilisateur Batterie au lithium-ion Votre ordinateur portable LifeBook possède une batterie au lithium-ion qui en permet le fonctionnement lorsque vous n’avez pas accès à une source d’alimentation externe. Cette batterie est robuste et durable, mais elle ne doit pas être exposée à des températures extrêmes, à des tensions élevées, à des produits chimiques ou à... -
Page 269: Procédure De Recharge Des Batteries
• L’ ’ AUTONOMIE RÉELLE DE LA BATTERIE PEUT VARIER SELON LA LUMINOSITÉ DE L ÉCRAN SELON LES ’ APPLICATIONS LES FONCTIONS ET LES PARAMÈTRES DE GESTION DE L ALIMENTATION QUE VOUS ’ ’ UTILISEZ SELON L ÉTAT DE LA BATTERIE ET SELON D AUTRES PRÉFÉRENCES QUE VOUS POUVEZ . - Page 270 L’ ’ UTILISATION DE PÉRIPHÉRIQUES ÉNERGIVORES TELS QUE LE MODEM OU L ACCÈS FRÉQUENT AU LECTEUR DE PEUVENT EMPÊCHER UNE RECHARGE COMPLÈTE Batterie faible Lorsque la batterie est faible, le système affiche un avis de batterie faible. Si vous ne prêtez pas attention à...
-
Page 271: Batterie Court-Circuitée
Lorsque l’ordinateur est en mode veille de batterie épuisée, vos données peuvent être sauvegardées pendant une certaine période, mais si vous ne connectez pas rapidement une source d’alimentation valide, le voyant d’alimentation cesse de clignoter et s’éteint. Vous avez alors perdu toutes les données n’ayant pas été... - Page 272 Remplacement sous tension Pour remplacer la batterie alors que le système est sous tension, exécutez les opérations suivantes : ’ ’ VANT D ENLEVER LA BATTERIE ASSUREZ VOUS QUE L ADAPTATEUR SECTEUR EST BIEN CONNECTÉ L’ ’ ORDINATEUR NE DISPOSE D AUCUNE BATTERIE TEMPORAIRE POUR FAIRE FONCTIONNER LE SYSTÈME ’...
-
Page 273: Lecteur Optique
Touche d’éjection du lecteur multimédia Plateau du lecteur multimédia Ouverture d’urgence du plateau Figure 15. Lecteur optique Lecteur optique Différents supports sont disponibles pour être utilisés avec votre système, selon la configuration de système que vous avez sélectionnée. Les graveurs de DVD multiformat, les lecteurs Blu-ray ® RW et lecteurs de DVD-ROM sont regroupés sous le nom «... -
Page 274: Logiciels Du Lecteur Multimédia
VANT D UTILISER DES LECTEURS OPTIQUES VOUS DEVEZ INSTALLER LE LOGICIEL DE LECTURE ’ MULTIMÉDIA ÉFÉREZ VOUS AU FICHIER ISEZ MOI QUI SE TROUVE SUR LE DISQUE D APPLICATIONS ET DE PILOTES Logiciels du lecteur multimédia Modèle avec graveur de DVD multiformat double couche seulement : Grâce au graveur de DVD multiformat double couche et au logiciel de lecteur multimédia, vous pouvez écoutez des films DVD et des CD de musique sur votre portable LifeBook. -
Page 275: Installation D'un Disque Dans Votre Lecteur
• ’ ISITEZ RÉGULIÈREMENT LE SITE EB DE UJITSU À L ADRESSE US FUJITSU COMPUTERS POUR OBTENIR LES MISES À JOUR DE PILOTES LES PLUS RÉCENTES • DVD L OUS LES LECTEURS DE OOK SONT COMPATIBLES AVEC LES TITRES DE DONT LE NUMÉRO DE RÉGION EST... -
Page 276: Retrait D'un Disque
Figure 16. Chargement/éjection d’un disque Retrait d’un disque Appuyez et relâchez la touche d’éjection située à l’avant du lecteur optique. Le lecteur s’arrêtera et le plateau sortira légèrement de l’ordinateur LifeBook. Tirez doucement le plateau jusqu’à ce le disque puisse en être facilement retiré. Retirez doucement le disque du plateau de chargement. -
Page 277: Ouverture D'urgence Du Plateau
Ouverture d’urgence du plateau Si le bouton d’éjection ne fonctionne pas, vous pouvez ouvrir le plateau du lecteur média en insérant un trombone ou un outil similaire dans le trou d’éjection situé tout à droite sur le devant du plateau. Redressez une extrémité... -
Page 278: Ouverture Du Panneau De Configuration Du Lecteur Multimédia
Lorsque vous insérerez un film dans le tiroir du lecteur optique pour la première fois, on vous invitera à choisir ce que vous aimeriez que le système fasse lorsque les disques sont insérés (par exemple, démarrer automatiquement ou attendre le message-guide). Ce même message s’affichera chaque fois que vous insérerez un disque jusqu’à... -
Page 279: Utilisation Du Lecteur Multimédia Avec Alimentation Par Batterie
VOUS POUVEZ VOUS EN PROCURER UNE SOIT EN 1-877-372-3473. LIGNE À HTTP COMPUTERS FUJITSU SOIT EN APPELANT AU Pour regarder un film avec une alimentation par batterie : Ayez à votre disposition une batterie supplémentaire chargée à fond ou un adaptateur secteur. - Page 280 Mettez votre ordinateur hors tension et remplacez la batterie déchargée par la batterie supplémentaire chargée à fond. Si vous ne disposez pas d’une batterie supplémentaire, vous pouvez brancher un adaptateur secteur dès que vous voyez l’indicateur de faible batterie. Faites reprendre votre portable LifeBook en appuyant à nouveau sur le bouton d’alimentation/veille/reprise. Cette opération n’est pas nécessaire si vous avez connecté...
-
Page 281: Cartes Mémoire Memorystick/Secure Digital
Carte SD Memory Stick Figure 18. Installation d’une carte Memory Stick ou SD Cartes mémoire MemoryStick/Secure Digital Votre ordinateur portable LifeBook peut accueillir des cartes Memory Stick et Secure Digital (SD) sur lesquelles vous pouvez stocker et transférer des données vers et à partir de divers dispositifs numériques. Ces cartes utilisent une architecture de mémoire flash, ce qui veut dire que vous n’avez pas besoin d’une source d’énergie pour conserver les données. -
Page 282: Installation D'une Carte Memory Stick Ou Sd
Installation d’une carte Memory Stick ou SD Les cartes MemoryStick et SD s’installent dans le lecteur de carte prévu à cet effet. Pour installer une carte Memory Stick ou SD, procédez comme suit : L’ ’ INSERTION OU LE RETRAIT D UNE CARTE PENDANT QUE LE OOK EST EN COURS DE DÉMARRAGE ’... -
Page 283: Cartes Pc Card/Expresscard
Fente pour carte ExpressCard (fente supérieure uniquement) Boutons d’éjection Fente pour carte PC Card (fente inférieure seulement) Figure 19. Installation/retrait d’une carte PC Card Cartes PC Card/ExpressCard™ Votre ordinateur portable LifeBook accepte les cartes PC Card et ExpressCard de type I et de type II, lesquelles peuvent exécuter de nombreuses fonctions différentes selon le type de carte que vous installez. -
Page 284: Installation D'une Carte Pc Card
Installation d’une carte PC Card Les cartes PC Card sont insérées dans la fente de carte PC Card (fente inférieure). Pour insérer une carte PC Card, exécutez les opérations suivantes : • PC C ’ I VOUS INSÉREZ OU RETIREZ UNE CARTE ARD PENDANT LE PROCESSUS D ARRÊT OU DE ’... -
Page 285: Installation D'une Carte Expresscard
• ’ ’ PC C INDOWS DISPOSE D UNE PROCÉDURE D ARRÊT POUR LES CARTES ARD QUE VOUS DEVRIEZ ’ ’ SUIVRE AVANT DE RETIRER UNE CARTE LE GUIDE D UTILISATION DU SYSTÈME D EXPLOITATION ). V CONTIENT DES INFORMATIONS SUPPLÉMENTAIRES SUR CETTE PROCÉDURE OUS DEVRIEZ PRENDRE ’... - Page 286 Les cartes ExpressCard doivent être insérées dans la fente pour carte ExpressCard (fente supérieure). Carte ExpressCard de 54 mm Fente pour carte ExpressCard (fente supérieure) Carte ExpressCard de 34 mm Figure 20. Installation/retrait d’une carte ExpressCard • L’ ’ ’ INSTALLATION OU LE RETRAIT D UNE CARTE XPRESS...
-
Page 287: Retrait D'une Carte Expresscard
Pour installer une carte ExpressCard, suivez les étapes ci-après : Avant d’insérer votre carte, assurez-vous qu’aucune autre carte n’est déjà installée dans la fente. Si c’est le cas, consultez la rubrique Retrait d’une carte ExpressCard. Si la touche d’éjection est sortie, enfoncez-la jusqu’au déclic. Enfoncez la carte ExpressCard dans la fente, étiquette vers le haut. -
Page 288: Lecteur De Carte Smart Card (Carte Intelligente)
Lecteur de carte Smart Card (Carte intelligente) Votre LifeBook est doté d’un lecteur de cartes intelligentes, aussi appelées cartes à puce. Ces cartes ressemblent à des cartes de crédit mais elles contiennent une puce électronique. La puce peut stocker diverses informations et vous offre de nombreuses possibilités, comme faire des achats sécurisés, payer des appels téléphoniques, enregistrer des données de sécurité... -
Page 289: Module De Mémoire Additionnelle
La mémoire additionnelle doit être un module SDRAM (DIMM) à double rangée de connexions. Pour vous assurer d’avoir une compatibilité à 100 %, achetez le module SDRAM uniquement auprès de la boutique virtuelle Fujitsu à l’adresse suivante : www.shopfujitsu.com •... -
Page 290: Installation Des Modules De Mémoire Additionnelle
Installation des modules de mémoire additionnelle Coupez le courant de votre ordinateur portable et débranchez l’adaptateur d’alimentation (adaptateur secteur ou adaptateur auto/avion), le cas échéant. Retirez la batterie. Assurez-vous que tous les couvercles du connecteur sont fermés. Tournez l’ordinateur portable à l’envers et retirez la vis du compartiment du module de mémoire additionnelle. Retirez le couvercle. - Page 291 Insérez le module de mémoire additionnelle en oblique, à 45°. Poussez fermement le bord du connecteur du module vers le bas et appuyez sur le connecteur jusqu’à ce qu’il se loge sous la clé de serrage. Vous entendrez un clic lorsque celui-ci sera bien en place. Replacez le couvercle et les vis.
-
Page 292: Retrait D'un Module De Mémoire Additionnelle
Retrait d’un module de mémoire additionnelle Exécutez les étapes 1 à 4 de la section « Installation d’un module de mémoire additionnelle ». Tirez les attaches latérales en les orientant vers les côtés pour les éloigner du module. En maintenant les ergots écartés, retirez la barrette en la tirant vers à l’extérieur de l’ordinateur. Ergots Figure 24. -
Page 293: Vérification De La Capacité De Mémoire
Vérification de la capacité de mémoire Lorsque vous avez changé la capacité de mémoire du système en remplaçant le module installé par un module plus puissant, assurez-vous que votre ordinateur a reconnu le changement. Dans Windows 7 : Vérifiez la capacité de mémoire en cliquant sur [Démarrer] - Paramètres - Panneau de configuration, puis (mode d'affichage par catégories) en cliquant sur l'icône Système et Sécurité. -
Page 294: Ports De Périphériques
Ports de périphériques Votre ordinateur portable LifeBook Fujitsu et le duplicateur de port optionnel sont équipés de plusieurs ports auxquels vous pouvez brancher des dispositifs externes tels que : lecteurs de disque, claviers, modems, imprimantes, etc. Prise de téléphone modem (RJ-11) La prise de téléphone modem (RJ-11) est utilisée... - Page 295 Dans Windows Vista et Windows 7: Cliquez sur [Démarrer] -> Panneau de configuration. Sous Windows Vista, sélectionnez Affichage classique dans le panneau de gauche ; sous Windows 7, sélectionnez Grandes Icônes ou Petites Icônes en mode d'Affichage en : champ. Double-cliquez sur Phone and Modems (Téléphone et modems).
-
Page 296: Prise De Réseau Local (Rj-45) Interne
Prise de réseau local (RJ-45) interne La prise de réseau local interne (RJ-45) est utilisée pour une connexion de réseau local Gigabit Ethernet (10Base-T/100Base-Tx/1000Base-T). Il est possible que vous deviez configurer votre ordinateur portable selon les particularités de votre réseau (pour de plus amples informations sur la configuration de votre réseau, veuillez consulter votre administrateur de réseau). -
Page 297: E-Sata Port
e-SATA Port Le port E-SATA (External Serial Advanced Technology Attachment) est la version externe du système SATA, lequel connecte votre ordinateur au disque dur. Le porte E-SATA est idéal pour la sauvegarde de fichiers volumineux sur un disque dur externe. Pour brancher un périphérique E-SATA : Alignez le connecteur avec l'ouverture du port. -
Page 298: Port Série
Port série Le port série, ou port de communication, qui se trouve sur le système et sur le duplicateur de port optionnel vous permet de connecter des périphériques en série, tels que des imprimantes ou des scanneurs. Pour connecter un périphérique d’interface en série, suivez ces étapes faciles : Alignez le connecteur avec l’ouverture du port. -
Page 299: Ports Usb
Ports USB Les ports Universal Serial Bus 2.0 (USB) vous permettent de connecter divers périphériques USB tels que des tablettes de jeu externes, des dispositifs de pointage, des claviers et/ou des haut-parleurs. Votre LifeBook est doté de quatre ports USB 2.0 : deux à gauche et un à l'arrière. Pour connecter un dispositif d’interface parallèle, exécutez ces opérations : Alignez le connecteur avec l’ouverture du port. - Page 300 Figure 29. Connexion d’un périphérique USB 98 - Ports de périphériques...
-
Page 301: Port Ieee 1394
Port IEEE 1394 Le port 1394 à 4 broches vous permet de connecter des périphériques numériques compatibles avec la norme IEEE 1394. La norme IEEE 1394 facilite l’utilisation, ainsi que les connexions et déconnexions. Ce port permet un taux de transfert pouvant atteindre 400 Mbit/s. Une application tierce pourrait être ... -
Page 302: Prise D'écouteurs
Prise d’écouteurs La prise d’écouteurs permet de connecter des écouteurs ou des haut-parleurs externes amplifiés. Vos écouteurs ou haut-parleurs doivent être munis d’une mini-prise stéréo de 3,5 mm (1/8 po). Pour connecter des écouteurs ou des haut-parleurs, exécutez ces opérations simples : Alignez le connecteur avec l’ouverture du port. -
Page 303: Port Vidéo Externe
Port vidéo externe Le port vidéo externe vous permet de connecter un moniteur externe ou un projecteur ACL. Pour connecter un périphérique vidéo externe, effectuez ces opérations simples : Alignez le connecteur avec l’ouverture du port. Poussez la fiche de connexion dans le port jusqu’à ce qu’elle s’enclenche. -
Page 304: Chapitre 4 Dépannage De Votre Lifebook
Chapitre 4 Dépannage de votre LifeBook Dépannage Il est possible que vous rencontriez parfois des problèmes simples de configuration ou d’exploitation pouvant être résolus sur le champ, ou des problèmes au niveau d’un périphérique pouvant être résolus en remplaçant l’équipement. Les informations contenues dans cette section vous aideront à isoler et résoudre certains de ces problèmes simples et à... - Page 305 : Numéro sans frais : 1-800-8Fujitsu (1-800-838-5487) Site Web : http://www.computers.us.fujitsu.com/support. Avant de nous contacter, veuillez avoir les informations suivantes à portée de main pour que notre préposé du service à la clientèle puisse vous venir en aide le plus rapidement possible : •...
-
Page 306: Problèmes Spécifiques
Problèmes spécifiques Utilisation du tableau de dépannage Lorsque vous éprouvez des problèmes avec votre ordinateur portable LifeBook, essayez de trouver les symptômes sous la colonne Problème du tableau suivant pour la fonction qui vous cause des problèmes. Vous trouverez une description des causes communes pour ce symptôme sous la colonne Cause possible ; le cas échéant, ce que vous pouvez faire pour corriger la situation se trouve sous la colonne Solutions possibles. - Page 307 Le lecteur de logiciel Le pilote audio peut être installé ou réinstallé à l’aide du CD de n’est pas bien configuré. pilotes et d’applications livré avec votre Fujitsu. Consultez la documentation de votre application et de votre système d’exploitation pour obtenir de l’aide.
- Page 308 Problème Cause possible Solutions possibles Problèmes de lecteur DVD/CD-RW/CD-ROM L’ordinateur portable Le disque n’est pas bien Ouvrez le plateau du lecteur optique et réinstallez correctement le LifeBook ne reconnaît pas logé dans le cercle disque. les Blu-rayDVD/CD-RW/CD- surélevé au centre du ROM.
- Page 309 Problème Cause possible Solutions possibles Problèmes de duplicateur de ports Remarque : Assurez-vous d’arrêter votre ordinateur portable LifeBook avant d’ajouter une imprimante au port parallèle du duplicateur de ports. Le système ne démarre pas L’adaptateur c.a. du Alimentez le duplicateur de ports. s’il est installé...
- Page 310 Problème Cause possible Solutions possibles Problèmes de disque dur Vous ne pouvez pas Un mauvais Assurez-vous que la lettre d’unité utilisée par l’application est bien accéder à votre disque dur. identificateur d’unité a celle qu’utilise le système d’exploitation. Lorsque le système été...
- Page 311 Problème Cause possible Solutions possibles Vous avez connecté un Le logiciel de votre Consultez la documentation du périphérique et du système clavier externe ou une système d’exploitation d’exploitation, puis installez le pilote approprié. souris et il/elle semble n’est pas configuré avec bloquer le système.
- Page 312 Problème Cause possible Solutions possibles Problèmes de série et USB You have installed a parallel, Votre périphérique n’est Retirez et réinstallez votre périphérique. Voir « Ports de serial, o USB device. Votre pas bien installé. périphériques » en page 92. ordinateur portable LifeBook Votre périphérique Consultez la documentation relative à...
- Page 313 Problème Cause possible Solutions possibles Problèmes de carte PC Card/ExpressCard Retirez et réinstallez la carte. Une carte insérée dans la La carte est mal fente PC Card ou installée. Voir « Cartes PC Card/ExpressCard™ » en page 81. ExpressCard ne fonctionne La carte a peut-être été...
- Page 314 Problème Cause possible Solutions possibles Problèmes d’alimentation électrique Lorsque vous allumez le La batterie principale Vérifiez le tableau de voyants d’état pour déterminer la présence LifeBook, rien ne semble se installée est et l’état des batteries. Voir « Tableau de voyants d’état » en produire.
- Page 315 Problème Cause possible Solutions possibles Lorsque vous allumez le L’adaptateur de courant Essayez un autre adaptateur de courant ou installez une batterie LifeBook, rien ne semble se (secteur ou auto/avion) secondaire optionnelle chargée. produire. est défectueux. (suite) Votre ordinateur portable Les paramètres de Appuyez sur n’importe quelle touche sur le clavier, ou déplacez LifeBook s’éteint tout seul.
- Page 316 Problème Cause possible Solutions possibles Le LifeBook ne fonctionne Les batteries installées Vérifiez si les batteries sont bien connectées en les réinstallant. pas lorsqu’il est alimenté ne sont pas bien uniquement par batterie. connectées. (suite) Vos batteries installées Consultez le tableau de voyants d’état pour connaître l’état des batteries et remplacez ou retirez les batteries court-circuitées.
- Page 317 Problème Cause possible Solutions possibles Problèmes d’arrêt et de démarrage Le bouton de veille/reprise Le bouton Sous Windows XP, allez dans le Panneau de configuration, cliquez ne fonctionne pas. d’alimentation/veille/ sur -> Options d’alimentation puis sur l’onglet Avancé. Dans la reprise est désactivé.
- Page 318 Problème Cause possible Solutions possibles L’écran ne s’allume pas au Vous avez installé le Consultez les indicateurs d’état pour voir si l’icône de sécurité est démarrage ou à la sortie du Tableau de sécurité et affichée. Le cas échéant, entrez votre mot de passe Voir « Tableau mode sommeil/veille.
- Page 319 Problème Cause possible Solutions possibles L’ordinateur portable s’est L’auto-diagnostic de Communiquez avec le service d’assistance. mis en marche en émettant mise sous tension a une série de tonalités et détecté une anomalie votre écran est vide. qui ne permet pas à l’écran d’affichage de fonctionner.
- Page 320 Problème Cause possible Solutions possibles L’écran affiche des zones Si ces zones sont très Ne faites rien. claires ou sombres. petites et si leur nombre est restreint, cela est normal pour un grand écran ACL. Si les zones sont L’écran est défectueux : communiquez avec le service nombreuses ou d’assistance.
- Page 321 Problème Cause possible Solutions possibles Problèmes divers Un message d’erreur Les applications Consultez la documentation et l’aide de l’application. Tous les s’affiche sur l’écran durant génèrent souvent leurs messages n’indiquent pas des erreurs ; certains sont simplement l’exécution d’une propres messages des indicateurs d’état.
-
Page 322: Messages De L'auto-Diagnostic De Mise Sous Tension
Messages de l’auto-diagnostic de mise sous tension Voici une liste alphabétique des messages d’erreur et d’état que le BIOS Phoenix et/ou votre système d’exploitation peuvent générer ainsi qu’une explication pour chacun d’eux. Les messages d’erreurs sont marqués d’un *. Si un message d’erreur est affiché et ne se trouve pas dans la liste, prenez-le en note et vérifiez-le dans la documentation de votre système d’exploitation (à... - Page 323 *Bits défaillants : nnnn nombre hexadécimal nnnn Ceci est une carte des bits donnant l’adresse (mémoire système, mémoire étendue ou mémoire fantôme) où le test de mémoire a échoué. Chaque 1 (un) sur la carte indique un bit défaillant. Cette erreur est grave car elle pourrait vous causer une perte de données si vous continuez.
- Page 324 *Erreur du contrôleur de clavier Le test du contrôleur de clavier a échoué. Vous pourriez avoir besoin de remplacer votre clavier ou le contrôleur de votre clavier mais vous pourriez utiliser un clavier externe en attendant. Communiquez avec le service d’assistance. *Erreur de clavier Le clavier ne fonctionne pas.
- Page 325 *Contrôle de parité 2 nnnn Erreur de parité trouvée dans le bus d’entrée-sortie. Le BIOS essaye de localiser l’adresse et de l’afficher sur l’écran. S’il n’arrive pas à localiser l’adresse, l’écran affichera ???? Cette défectuosité risque de détruire des données. Communiquez avec le service d’assistance. *Appuyez sur <F1>...
- Page 326 *Batterie du système épuisée. Remplacez-la et exécutez la CONFIGURATION La batterie de rétention de la mémoire RAM du CMOS BIOS est épuisée. Celle-ci fait partie de votre BIOS et c’est une batterie enfichable qui requiert l’aide d’un technicien d’assistance pour la changer. Vous pouvez continuer d’utiliser votre ordinateur mais vous aurez à...
-
Page 327: Codes De Résultat Du Modem
BIOS vidéo doublé Le BIOS vidéo a été copié avec succès dans la mémoire RAM fantôme. Codes de résultat du modem Le système d’exploitation et le logiciel d’application qui est installé en usine détectent les caractéristiques du modem et fournissent les chaînes de commande nécessaires pour faire fonctionner le modem. Le fonctionnement du modem interne est contrôlé... -
Page 328: Restaurer Vos Logiciels Préinstallés
NTERNET DE LEUR FABRICANT Pour réinstaller des pilotes et/ou applications : Lancez le système et insérez le disque PRA après que Windows a démarré. Un écran d’installation Fujitsu s’affiche une fois que le disque est inséré. Lorsque vous avez lu le contrat de licence, cliquez sur [J’accepte]. -
Page 329: Restauration Du Système D'exploitation Pour Les Systèmes Windows
Une fenêtre apparaîtra contenant une liste d’applications, de pilotes et d’utilitaires que vous pouvez installer à partir du disque de pilotes et d’applications ’ ES COMPOSANTS CITÉS SONT CHROMOCODÉS EN FONCTION DE LEUR ÉTAT D INSTALLATION E BLEU INDIQUE QUE LE COMPOSANT PEUT ÊTRE INSTALLÉ E VERT INDIQUE QUE LE COMPOSANT DOIT ÊTRE INSTALLÉ... - Page 330 Vous pouvez également utiliser le menu TrustedCore pour savoir si l’utilitaire est pré-chargé en mettant l’ordinateur sous tension avec la touche [Entrée] lorsque le logo Fujitsu apparaît à l’écran. Le menu TrustedCore apparaîtra, et l’option Restauration et Utilitaires s’y affichera.
- Page 331 étapes suivantes : Mettez le système sous tension. Lorsque le logo Fujitsu apparaît à l’écran, appuyez sur la touche [Entrée] ou cliquez avec le bouton gauche de la souris ou du pavé tactile TouchPad. Le menu TrustedCore s’affichera.
- Page 332 Onglets Restauration et Utilitaires Onglet Diagnostics : L’outil de diagnostics est conçu pour être utilisé par des informaticiens professionnels. Il y a peu de chances que vous ayez besoin de l’utiliser. Lorsque vous sélectionnez des dispositifs dans la fenêtre Diagnostic et que vous cliquez ensuite sur [Exécuter], ceux-ci sont soumis à plusieurs tests.
-
Page 333: Téléchargement Automatique Des Mises À Jour De Pilotes
Téléchargement automatique des mises à jour de pilotes Votre système dispose d’un outil pratique appelé Utilitaire de Mise à jour des pilotes Fujitsu (FDU ou Fujitsu Driver Update). Avec FDU, vous pouvez choisir d’aller automatiquement ou manuellement sur le site de Fujitsu pour obtenir les mises à jour récentes de votre système. -
Page 334: Activer Les Notifications De Mises À Jour Automatiques
Après avoir cliqué sur l’icône, l’utilitaire FDU se connectera automatiquement au site Fujitsu pour vérifier les mises à jour et les télécharger. Pendant le processus de téléchargement, l’icône affiche une barre rouge indiquant qu’elle ne peut pas être utilisée pendant que le téléchargement est en cours. -
Page 335: Chapitre 5 Entretien
Entretien de votre ordinateur portable LifeBook Si vous prenez soin de votre ordinateur portable LifeBook Fujitsu, vous augmenterez sa durée de vie et sa fiabilité. Cette section fournit certains conseils relatifs à l’entretien de votre ordinateur portable et de ses dispositifs. - Page 336 Laissez-le sécher pendant 24 heures, ou plus si nécessaire. S’il ne démarre pas une fois sec, contactez le service d’assistance. • N’utilisez pas votre ordinateur portable LifeBook Fujitsu dans un environnement très humide (à proximité d’une baignoire, d’une piscine).
-
Page 337: Nettoyage De Votre Ordinateur Portable Lifebook
• Si vous transportez votre LifeBook dans un porte-documents, ou toute autre mallette, assurez-vous qu’aucun objet dans l’étui n’appuie sur le couvercle. • Ne placez jamais votre ordinateur portable de façon à ce que le lecteur optique supporte le poids du portable. - Page 338 Écran ACL Pour nettoyer l’écran, utilisez l’un des nettoyants suivants : • Kit de nettoyage pour ordinateur portable Office Depot® N° 154-616 • Lingettes Meridrew Enterprises Klear_Screen® * Convient aux écrans des PC Tablettes, PC convertibles avec protecteur ACL et ordinateurs portables standard.
-
Page 339: Nettoyage Du Couvercle Du Filtre Anti-Poussière
Nettoyage du couvercle du filtre anti-poussière Votre LifeBook est équipé de ventilateurs qui attirent l’air à l’intérieur pour refroidir les composants internes de l’ordinateur. Selon l’environnement d’utilisation, de la poussière et de la saleté peuvent pénétrer avec l’air. Si elles s’accumulent, elles peuvent nuire au bon fonctionnement du système. •... -
Page 340: Rangement De Votre Ordinateur Portable Lifebook
Loquet Figure 32. Retrait/installation le couvercle du filtre anti-poussière Mettez le couvercle du filtre à nouveau en place en insérant d’abord une extrémité (positionnez d’abord la clavette à l’intérieur), puis poussez jusqu’au bout jusqu’à ce qu’il s’enclenche. SSUREZ VOUS TOUJOURS QUE LE COUVERCLE DU FILTRE ANTI POUSSIÈRE EST INSTALLÉ... -
Page 341: Voyager Avec Votre Ordinateur Portable Lifebook
• Rangez votre LifeBook dans un endroit frais et sec. Les températures doivent être maintenues entre -25 °C et 60 °C (13 °F et 140 °F). Voyager avec votre ordinateur portable LifeBook • Ne transportez pas votre ordinateur portable pendant qu’il est en marche. •... -
Page 342: Entretien De Vos Batteries
Type de prise Emplacement Russie et Communauté des États indépendants (CEI), la plupart des pays d’Europe, certains Chine, Australie, pays d’Amérique Latine, Moyen-Orient, certains Nouvelle-Zélande pays d’Afrique, Hongkong, Inde, la plupart des pays de l’Asie du Sud Batteries Entretien de vos batteries •... -
Page 343: Entretien De Votre Lecteur Multimédia
• Mettez votre ordinateur portable en mode sommeil lorsqu’il est en marche et que vous n’êtes pas en train de l’utiliser. • Limitez votre accès au lecteur multimédia. • Désactivez la fonction de notification d’insertion automatique du lecteur média. • Utilisez toujours des batteries chargées complètement. •... -
Page 344: Entretien Du Lecteur Optique
Entretien du lecteur optique Votre lecteur optique est durable, mais vous devez en prendre soin. Veuillez faire attention aux points suivants : • Le lecteur fait pivoter le disque compact à une vitesse très élevée. Lorsqu’il fonctionne, ne le transportez pas d’un endroit à un autre, et évitez qu’il subisse un choc ou des vibrations. •... -
Page 345: Chapitre 6 Spécifications Techniques
Spécifications techniques du système Cette section présente les spécifications techniques du matériel et de l’environnement de votre ordinateur portable LifeBook Fujitsu. Selon les configurations, les spécifications techniques peuvent varier. Étiquette de configuration L’étiquette de configuration qui est située sur le dessous de votre ordinateur portable comporte des informations spécifiques à... -
Page 346: Microprocesseur
Microprocesseur Processeurs Intel® Core™ i5 ou i7 (reportez-vous à l’étiquette du système pour connaître la vitesse du processeur) Puce • Puces Intel QM57 Express Mémoire Mémoire système • Module mémoire vive à double canal SDRAM DDR3 1 066 MHz. • Deux fentes mémoire DIMM avec possibilité de mise à niveau jusqu’à 8 Go de mémoire totale (4 Go x 2). -
Page 347: Audio
• Port d'affichage: 2 650 x 1 600 • DVI (Duplicateur de port uniquement): 1 920 x 1 200 • Modèle TFT WXGA+ de 15,4 po : • Interne : Résolution 1 680 x 1 050 pixels, 16 mln couleurs •... -
Page 348: Options De Mémoire De Masse
Options de mémoire de masse Disque dur • Tampon de données ATA2 en série, 2.5”, 9.5 mm • Choix possible entre 160 Go or 320 Go (7200 t/min) ou 160 Go, 160 Go FDE, 320 Go, 500 Go (5400 t/min) Périphériques de baie modulaire Selon la configuration de votre système, un des lecteurs suivants est installé... -
Page 349: Ports De Périphériques
WebCam en option Caméra numérique 1,3 mégapixels, en option Puce Trusted Platform Module (TPM) Le LifeBook E780 est pourvu d’une puce Trusted Platform Module (TPM), installée pour plus de sécurité sur le système. Verrouillage antivol Deux fentes pour dispositifs antivol. -
Page 350: Clavier
• Un connecteur de réseau local (RJ-45) • Port de connexion (à 100 broches pour assurer la connexion avec le duplicateur de ports) • Une prise d'écouteurs stéréo ou une prise de sortie/écouteurs stéréo, selon la configuration du système. • Une prise de microphone mono ou une prise d’entrée de ligne/microphone stéréo, selon la configuration du système •... -
Page 351: Alimentation
• Touches supplémentaires : Fn • Deux touches Windows : Une touche Démarrage, une touche Applications • Pas de touche : 19 mm • Amplitude de frappe : 2.7 mm • Dispositif de pointage TouchPad intégré avec deux boutons gauches, deux boutons droits et une touche de défilement •... -
Page 352: Dimensions Et Poids
Stockage : 8 % à 85 % d’humidité relative, sans condensation Altitude Utilisation : 3 048 m (10 000 pieds) maximum Accessoires préférés des utilisateurs Pour commander des accessoires ou demander des informations supplémentaires, veuillez visiter notre site Internet à www.shopfujitsu.com ou appelez au 1-800-FUJITSU. 150 - Spécifications techniques... -
Page 353: Logiciels Préinstallés
• Google Tool Bar • Google Picasa • OmniPass (application de reconnaissance des empreintes digitales) • Utilitaire de mise à jour des pilotes Fujitsu Driver Update • Utilitaire PortShutter de Fujitsu • Microsoft® Office Ready avec Office Assistant Apprendre à utiliser vos logiciels Tutoriaux Tous les systèmes d’exploitation et la plupart des logiciels d’application ont des tutoriaux intégrés dès leur... - Page 354 Guides Sont compris dans votre portable, les guides d’utilisation pour vos logiciels du système d’exploitation et autres applications préinstallées. Tous les guides d’utilisation non présents sont disponibles en ligne par l’intermédiaire du système d’aide du logiciel. Nous vous recommandons de passer en revue ces guides d’utilisation pour obtenir des informations générales sur l’utilisation des logiciels.
- Page 355 Utilitaire PortShutter de Fujitsu Cet utilitaire permet d’améliorer la sécurité sur votre système en permettant aux utilisateurs de définir des politiques restreignant l’accès à certains ports de l’ordinateur pour les autres utilisateurs. Avec PortShutter, vous pouvez : préciser les périphériques USB qui peuvent être utilisés (s’ils sont susceptibles...
- Page 356 L’utilitaire Fujitsu Driver Update (FDU) est fourni avec votre système. Avec FDU, vous pouvez choisir d’aller automatiquement ou manuellement sur le site de Fujitsu pour obtenir les mises à jour récentes de votre système. Voir « Téléchargement automatique des mises à jour de pilotes » en page 131.
- Page 357 ® Fujitsu offre un kit de licence multimédia pour Microsoft Office Small Business (PME) 2007. Vous n’avez qu’à saisir votre clé de produit et le logiciel est immédiatement prêt à l’emploi! Vous pouvez aussi ® acheter un kit de licence Microsoft Office 2007 sans multimédia (MLK) auprès de votre détaillant de...
-
Page 358: Glossaire
Glossaire Affichage à cristaux liquides. Type d’écran produisant des images par contrôle de l’orientation de cristaux dans un liquide cristallin. ACPI (Advanced Configuration and Power Interface) Interface avancée de configuration et de gestion de l’énergie. Adaptateur auto/avion Un dispositif qui convertit le courant continu d’un allume-cigare de voiture ou une prise c.c. d’avion en courant continu à... - Page 359 Les quatre numéros dans une adresse IP sont utilisés de différentes façons pour identifier un réseau particulier et un serveur hôte. Trois registres régionaux Internet (ARIN, RIPE NCC et APNIC) attribuent des adresses Internet à partir des trois classes suivantes : Classe A : accepte 16 millions de serveurs sur chacun des 126 réseaux.
-
Page 360: Authentification À Clé Partagée
Authentification à clé partagée Méthode d’authentification réseau établie par la spécification 802.11, selon laquelle le point d’accès transmet au client un paquet texte que le client doit crypter avec la bonne clé de réseau et renvoyer au point d’accès. Si le client possède la mauvaise clé ou s’il n’en a pas, l’authentification échouera et il ne sera pas autorisé... -
Page 361: Configuration
Canal Plage de fréquences à bande étroite utilisée par la carte réseau sans fil pour transmettre des données. IEEE 802.11b/g : 11 canaux dans la bande de 22 MHz. CardBus Version 32 bits plus rapide de l’interface PC Card dont les performances sont similaires à celles de l’architecture PCI 32 bits. -
Page 362: Disque Dur
Décharge électrostatique. Décharge électrostatique soudaine provenant d’une charge statique qui s’est accumulée lentement. Exemple : la décharge reçue d’une poignée de porte ou les étincelles générées par un brossage des cheveux par temps sec. DHCP (Dynamic Host Configuration Protocol) Il s’agit d’un protocole qui permet à un ordinateur qui se connecte sur un réseau d’obtenir dynamiquement sa configuration. - Page 363 DVMT (Dynamic Video Memory Technology) Technologie DVMT ou de mémoire vive pour les fonctions vidéo. Topologie de mémoire vidéo permettant d’améliorer l’efficacité de la carte mère grâce à une utilisation innovante de la mémoire et à une exploitation en direct de l’AGP (port graphique accéléré). Entrée/Sortie.
- Page 364 IEEE 802.11b Norme de réseau sans fil autorisant un débit maximum théorique de 11 Mbit/s. Les cartes de norme 802.11b fonctionnent dans les bandes de fréquences ISM de 2,4 GHz. IEEE 802.11g Norme de réseau sans fil autorisant un débit maximum théorique de 54 Mbit/s. Les cartes de norme 802.11g fonctionnent dans les bandes de fréquences ISM de 2,4 GHz.
-
Page 365: Masque De Sous-Réseau
Masque de sous-réseau Le réseau TCP/IP est commandé à l’aide d’une division en plusieurs sous-réseaux. Une adresse IP se compose d’une adresse de sous-réseau et de l’adresse de l’ordinateur. Le masque de sous-réseau détermine le nombre de bits formant l’adresse de sous-réseau dans l’adresse IP. La même valeur doit être utilisée pour tous les ordinateurs qui doivent communiquer sur le réseau. - Page 366 Mégahertz 1 000 000 de cycles par seconde. Mémoire Dépôt de données et d’applications auquel l’unité centrale de votre ordinateur portable LifeBook a directement accès. Mémoire cache Bloc de mémoire intégré au microprocesseur, auquel il est beaucoup plus rapide d’accéder qu’à la mémoire vive et utilisé...
- Page 367 Pilote Programme qui traduit les commandes envoyées par les applications et le système d’exploitation aux périphériques externes dans la forme exacte exigée par une marque et un modèle particulier afin de produire les résultats voulus avec le matériel employé. Pixel Le plus petit élément d’affichage, point de couleur à...
-
Page 368: Périphérique
PPPoE (Point to Point Protocol over Ethernet) Littéralement, « Protocole Ethernet Point à Point » Protocole Ethernet faisant appel au protocole point à point (PPP) et utilisé pour la connexion à une ligne téléphonique. Programme Ensemble intégré de commandes codées indiquant à l’ordinateur ce qui doit être fait, ainsi que quand et comment le faire. - Page 369 Réinitialisation Le fait de charger à nouveau le système d’exploitation. Une réinitialisation efface toutes les informations stockées dans la mémoire vive. SDRAM Mémoire vive dynamique synchrone. C’est un type de mémoire vive. Sommeil Mode dans lequel l’ordinateur est temporairement inactif. Votre LifeBook utilise plusieurs modes de veille afin de réduire la consommation électrique et de prolonger la charge de votre batterie.
- Page 370 TFT (Thin Film Transistor) Abréviation de « Thin Film Transistor ». Technologie d’écrans plats qui utilise une mince matrice de transistors pour commander individuellement chaque pixel de l’écran. UL (Underwriters Laboratories) L’« Underwriters Laboratories » est un organisme indépendant qui effectue les tests de sécurité électrique des appareils et accorde les homologations correspondantes.
-
Page 371: Renseignements Sur La Réglementation
Renseignements sur la réglementation Avis Les changements ou modifications qui ne sont pas expressément approuvés par Fujitsu pourraient interdire aux utilisateurs d’utiliser le matériel. AVIS DE LA FCC Avis aux utilisateurs de postes radio et de téléviseurs Cet appareil a été testé et jugé conforme aux limites établies pour le matériel numérique de classe B, selon la Partie 15 des règlements de la FCC. - Page 372 Avis aux utilisateurs du réseau téléphonique américain. Cette installation est conforme à la partie 68 de la réglementation de la FCC, ainsi qu’aux normes techniques relatives au raccordement des réseaux téléphoniques publiées par l’ACTA (Administrative Council for Terminal Attachments). Sous l’appareil se trouve une étiquette indiquant, entre autres, le numéro d’immatriculation FCC et le numéro d’équivalence sonnerie (NES) de cet appareil ou un identifiant du produit au format US:AAAEQ##TXXXX.
- Page 373 Fujitsu Computer Systems. Si l’équipement brouille les communications du réseau téléphonique, l’entreprise de téléphone peut vous demander de débrancher l’installation jusqu’à...
- Page 374 Les réparations sur un appareil de télécommunication doivent être effectuées par un centre d’entretien canadien agréé. Toute réparation ou modification non approuvée par Fujitsu, ainsi que tout dysfonctionnement de matériel, peuvent conduire une entreprise de téléphone à demander à l’usager de débrancher l’appareil de la ligne de téléphone.
- Page 375 Repairs to telecommunication equipment should be made by a Canadian authorized maintenance facility. Any repairs or alterations not expressly approved by Fujitsu or any equipment failures may give the telecommunication company cause to request the user to disconnect the equipment from the telephone line.
-
Page 376: Annexe A : Guide D'utilisation De La Carte De Réseau Local Sans Fil
Annexe A : Guide d’utilisation de la carte de réseau local sans fil Renseignements sur la réglementation de la FCC Veuillez prendre note des renseignements suivants sur la réglementation relative à la carte réseau sans fil en option. Remarques et déclarations réglementaires Santé... -
Page 377: Renseignements Sur La Réglementation Et Avis De Non-Responsabilité
Renseignements sur la réglementation et avis de non-responsabilité Cette carte réseau sans fil doit être installée et utilisée conformément aux instructions de la documentation livrée avec le produit. Toute modification apportée sans l’approbation expresse du fabricant peut annuler le droit de l’utilisateur de s’en servir. -
Page 378: Déclaration Concernant La Réglementation De La Fcc Sur L'exposition Aux Radiofréquences
(1) cet appareil ne doit pas causer d’interférence nuisible ; (2) cet appareil doit accepter toutes les interférences reçues, y compris celles pouvant causer un mauvais fonctionnement de l’appareil. Toute modification n’ayant pas été expressément approuvée par la société Fujitsu Computer Systems peut annuler le droit de l’utilisateur de se servir du matériel. Avis pour le Canada Le matériel destiné... -
Page 379: Avant D'utiliser La Carte Réseau Sans Fil En Option
Avant d’utiliser la carte réseau sans fil en option Ce guide explique comment installer et configurer correctement la carte réseau sans fil mini-PCI intégrée (disponible en option), ci-après désignée sous le nom de « carte réseau sans fil ». Avant d’utiliser la carte réseau sans fil, lisez attentivement le présent guide afin de bien comprendre son fonctionnement. -
Page 380: Modes De Réseau Sans Fil Compatibles Avec Cette Carte
Modes de réseau sans fil compatibles avec cette carte Mode Ad hoc Le mode Ad hoc désigne une topologie de réseau sans fil dans laquelle la connectivité entre les divers ordinateurs est établie sans périphérique central de réseau sans fil, ou point d’accès. La connectivité est établie uniquement à... -
Page 381: Mode Point D'accès (Infrastructure)
Mode point d’accès (Infrastructure) Le mode Infrastructure désigne une topologie de réseau sans fil dans laquelle les appareils communiquent au sein d’un réseau sans fil ou câblé par l’intermédiaire d’un point d’accès. En mode Infrastructure, les appareils sans fil peuvent communiquer directement entre eux ou sur un réseau câblé. Les réseaux sans fil d’entreprise fonctionnent en mode Infrastructure car ils nécessitent une connexion au réseau local sans fil pour accéder aux ordinateurs, aux périphériques et aux services (par exemple, serveurs de fichier, imprimantes et bases de données). -
Page 382: Désactivation/Déconnexion De La Carte Réseau Sans Fil
Manipulation de la carte réseau sans fil La carte réseau local sans fil est un dispositif en option qui peut être fourni avec votre ordinateur portable. Normalement, vous ne devriez pas avoir besoin de la retirer ou de la réinstaller. Le système d’exploitation de l’ordinateur est déjà... -
Page 383: Désactivation Avec Le Commutateur De Dispositif Sans Fil
’ ’ VANT D UTILISER VOTRE CARTE RÉSEAU SANS FIL VOUS DEVEZ D ABORD INSTALLER LICK POUR « I VOUS ASSURER QUE LE BON PROGRAMME DE CARTE EST INSTALLÉ NSTALLATION DE LICK ! » EN PAGE Désactivation avec le commutateur de dispositif sans fil La carte réseau sans fil peut être désactivée rapidement et efficacement en mettant le commutateur correspondant en position OFF (arrêt). -
Page 384: Activation De La Carte Réseau Sans Fil
Activation de la carte réseau sans fil La carte réseau sans fil peut être activée de la même façon que pour sa désactivation. • Avec le commutateur correspondant • Sous Windows, en cliquant à l’aide du bouton droit de la souris l’icône de la carte réseau sans fil puis en cliquant sur «... -
Page 385: Configuration De La Carte Réseau Sans Fil
Configuration de la carte réseau sans fil La carte réseau sans fil en option peut être configurée pour établir la connectivité du réseau sans fil en utilisant le logiciel intégré dans Windows Vista. Il prend également en charge la plupart des solutions de sécurité... -
Page 386: Configuration Du Réseau Local Sans Fil Avec Windows Xp
Configuration du réseau local sans fil avec Windows XP Procédure Cliquez sur le bouton Démarrer, puis sélectionnez Panneau de configuration. Si le Panneau de configuration n'est pas en affichage classique, sélectionnez « Basculer vers l'affichage classique » sur le panneau de gauche. Double-cliquez sur l'icône Connexions réseau. Sélectionnez l'assistant «... -
Page 387: Dépannage De La Carte Réseau Sans Fil
Dépannage de la carte réseau sans fil Dépannage Le tableau ci-dessous présente les causes possibles et les mesures correctives pour différents problèmes de réseau sans fil. Problème Cause possible Solution possible Réseau Nom de réseau Connexion en mode Ad hoc : Assurez-vous que le SSID et la clé indisponible ... - Page 388 Problème Cause possible Solution possible Réseau L’ordinateur à Vérifiez si l’ordinateur est allumé. indisponible connecter est connexion éteint (suite) Interférences RF L’utilisation de canaux RF identiques ou se chevauchant peut nuire au provenant de fonctionnement de la carte réseau sans fil. Changez le canal de votre points d’accès ou point d’accès en tenant compte du canal du périphérique nuisible.
-
Page 389: Spécifications De La Carte Réseau Sans Fil
Spécifications de la carte réseau sans fil Spécifications Élément Spécification Type de réseau Les cartes réseau sans fil Centrino Advanced-N 6200 (802.11agn 2x2) et Atheros XSPAN 801.11bgn respectent les normes IEEE 802.11a, 802.11b/g et 802.11n sur les applications Wi-Fi*. Débit (Commutation automatique) débit maximum de 54 Mbit/s (IEEE 802.11n à... - Page 390 Nombre maximum recommandé 10 ou moins**** d’ordinateurs connectés au réseau local sans fil (en mode Ad hoc) * « Type Wi-Fi » indique que le test d’interconnectivité de la Wi-Fi Alliance (organisation garantissant l’interconnectivité des réseaux sans fil) a réussi. ** La portée peut varier selon certains facteurs (par exemple, nombre de murs, réflectivité...
-
Page 391: Utilisation De Bluetooth
Dans Windows XP : Pour accéder au fichier d’aide, cliquez sur Démarrer -> Tous les programmes, puis sur Fujitsu. Sélectionner Bluetooth, puis Guide d'utilisation. Dans Windows Vista : Pour accéder au fichier d’aide, cliquez sur Démarrer -> Tous les programmes, Bluetooth, puis sur Guide d'utilisation. -
Page 392: Garantie
Les utilisateurs ne sont pas autorisés à modifier ce produit. Toute modification annule la garantie. Cet équipement ne peut être modifié, altéré ou changé en aucune façon sans l’autorisation écrite de Fujitsu. Toute modification non autorisée annulera les autorisations d’équipement de la FCC et d’Industrie Canada, de même que la garantie. -
Page 393: Utilisation D'un Périphérique Uwb
Utilisation d’un périphérique UWB Le module certifié Wireless USB intégré est un composant offert en option pour les ordinateurs portables Fujitsu. Que signifie l’expression « Certifié Wireless USB » ? Le protocole Wireless USB (ci-après « WUSB ») sert à établir des communications hautes fréquences, à... -
Page 394: Annexe B : Capteur D'empreintes Digitales
Annexe B : Capteur d’empreintes digitales Présentation du capteur d’empreintes digitales optionnel Il est possible que votre LifeBook soit équipé d’un capteur d’empreintes digitales sous le pavé tactile TouchPad, entre les boutons gauche et droit. Ce capteur sert aussi de bouton de défilement. Figure 34. -
Page 395: Première Mise En Marche
Grâce au capteur d’empreintes digitales, il n’est plus nécessaire de saisir votre nom d’utilisateur et votre mot de passe chaque fois que vous voulez : • Ouvrir une session dans Windows • Reprise à partir du mode sommeil • Annuler un économiseur d’écran protégé par mot de passe •... -
Page 396: Installation D'omnipass
Installation d’OmniPass Si l’application OmniPass a déjà été installée sur votre système, sautez cette section et allez directement à « Enregistrement des utilisateurs » en page 196. Pour savoir si l’application OmniPass est déjà installée, vérifiez si les éléments suivants sont présents : •... -
Page 397: Vérification Des Informations Concernant Votre Version D'omnipass
Une fois l’installation d’OmniPass terminée, vous serez invité à redémarrer votre système. Vous pourrez ensuite utiliser OmniPass. Si vous décidez de ne pas redémarrer votre système immédiatement après l’installation, OmniPass ne sera pas disponible avant le prochain redémarrage. Le programme d’installation place automatiquement une icône (Softex OmniPass) dans le panneau de configuration Windows, ainsi qu’une icône dorée en forme de clé... -
Page 398: Désinstallation D'omnipass
Désinstallation d’OmniPass L’ ’ UTILISATEUR DÉSIRANT DÉSINSTALLER ASS DOIT DISPOSER DE DROITS D ADMINISTRATEUR ’ DANS LE SYSTÈME I VOUS N AVEZ PAS DE TELS DROITS FERMEZ LA SESSION ET OUVEZ EN UNE ’ AUTRE AVEC UN NOM D UTILISATEUR POSSÉDANT CES DROITS AVANT DE POURSUIVRE LA ’O DÉSINSTALLATION D Pour supprimer l’application OmniPass de votre système :... -
Page 399: Enregistrement De Base
Exemple : Un utilisateur, Jean, installe OmniPass sur son système (son ordinateur de maison) et inscrit un utilisateur OmniPass avec le nom d’utilisateur « Jean_01 » et mot de passe « freq14 ». Il se rend ensuite sur son site Internet de courriel pour ouvrir une session dans son compte. Il entre, comme d’habitude, son nom d’utilisateur et son mot de passe (par exemple, «... -
Page 400: Enregistrement D'une Empreinte Digitale
Cliquez sur [Enregistrement] pour procéder à la vérification de l’utilisateur et du mot de passe. Par défaut, l’Assistant d’enregistrement entre les informations d’identification de l’utilisateur Windows actuellement connecté. Entrez le mot de passe qui vous sert à ouvrir une session dans Windows. Il deviendra le « mot de passe principal »... - Page 401 Pendant la procédure d’enregistrement initial de l’utilisateur, vous serez invité à sélectionner le doigt qui sera enregistré. Les doigts déjà enregistrés seront marqués d’un crochet vert. Le doigt sélectionné pour l’enregistrement sera marqué d’une flèche rouge. OmniPass vous permet de réenregistrer un doigt. Si vous choisissez un doigt qui a déjà...
-
Page 402: Utilisation D'omnipass
Utilisation d’OmniPass Vous pouvez maintenant commencer à utiliser OmniPass. Son utilisation régulière vous permettra de simplifier vos procédures d’authentification. Remplacement du mot de passe Vous utiliserez souvent la fonction de remplacement du mot de passe. Lorsque vous allez sur un site Internet à... -
Page 403: Association D'un Nom Convivial
Mémorisation d’un mot de passe OmniPass peut mémoriser toute application, toute interface graphique ou toute autre ressource protégée par un mot de passe. À l’aide de la procédure suivante, vous pourrez sauvegarder dans OmniPass toutes les informations permettant de vous identifier. Ces informations seront ensuite associées à votre « mot de passe principal » ou à... - Page 404 La deuxième option est moins sécuritaire : Entrer automatiquement sur ce site protégé par mot de passe lorsqu’il est activé. Ne pas demander d’authentification. Cochez la case supérieure pour sélectionner ce choix. Ensuite, chaque fois que vous vous connectez à ce site, OmniPass vous donnera accès sans vous demander de vous authentifier E PARAMÈTRE EST PLUS PRATIQUE CAR DÈS QUE VOUS DEMANDEZ UN SITE QUI Y EST ASSOCIÉ...
- Page 405 Avec mot de passe principal Lorsque vous retournez à un site mémorisé avec OmniPass, il se peut que le système vous demande un mot de passe principal. Entrez votre mot de passe principal et vous serez autorisé à accéder au site. Connexion à...
-
Page 406: Identités D'utilisateur Omnipass
Les deux cases à cocher dans Gérer les mots de passe déterminent si OmniPass vous invite à vous authentifier ou vous connecte directement au site mémorisé. Si vous tentez d’utiliser Mémoriser le mot de passe sur un site déjà connu, OmniPass efface les anciennes informations d’identification. - Page 407 Pour définir l’identité par défaut, mettez en surbrillance l’identité souhaitée puis cliquez sur [Définir par défaut] et cliquez sur [Appliquer] pour vérifier que les paramètres sont bien enregistrés. Si vous accédez à OmniPass à l’aide d’un capteur d’empreintes digitales, vous serez automatiquement connecté à l’identité par défaut de l’utilisateur OmniPass associé...
-
Page 408: Configuration D'omnipass
Configuration d’OmniPass Cette section vous donne un aperçu de la fonction Exportation/Importation et du Centre de contrôle OmniPass. Exportation et importation d’utilisateurs OUS NE POUVEZ PAS IMPORTER UN UTILISATEUR DANS ASS SI UN UTILISATEUR PORTANT LE MÊME NOM Y EST DÉJÀ ENREGISTRÉ Vous pouvez importer et exporter des utilisateurs dans et hors d’OmniPass à... - Page 409 Exporter un profil d’utilisateur OmniPass Pour exporter un profil utilisateur, ouvrez le Centre de contrôle OmniPass et cliquez sur [Importer/ exporter un utilisateur] sous Gérer les utilisateurs. Cliquez sur Exporter un profil utilisateur OmniPass. OmniPass vous invitera à vous authentifier. Une fois l’authentification réussie, vous devez nommer le profil utilisateur OmniPass et décider où...
-
Page 410: Centre De Contrôle Omnipass
Exemple : J’ai un utilisateur Windows avec le nom d’utilisateur « Thomas » et le mot de passe « Soleil » sur mon système. J’ai enregistré « Thomas » dans OmniPass et mémorisé des mots de passe. Je veux transférer tous mes mots de passe vers le nouveau système. J’exporte le profil utilisateur OmniPass de Thomas. -
Page 411: Paramètres Utilisateur
Si vous cliquez sur [Ajouter un nouvel utilisateur à OmniPass], vous démarrez l’Assistant d’enregistrement OmniPass. L’Assistant d’enregistrement est expliqué dans « Enregistrement des utilisateurs » en page 196. Si vous cliquez sur [Supprimer un utilisateur OmniPass], vous êtes invité à vous authentifier. Authentifiez-vous à... -
Page 412: Dépannage
Paramètres de système Vous trouverez l’interface Options de démarrage dans l’onglet « Paramètres de système ». Les options de cette interface vous permettent de spécifier la manière dont votre ouverture de session OmniPass est associée à votre ouverture de session Windows. La première option, Se connecter automatiquement à... - Page 413 Impossible d’ajouter un utilisateur avec un mot de passe vide dans OmniPass Si vous rencontrez des difficultés pour ajouter un utilisateur avec un mot de passe vide dans OmniPass, vous devrez peut-être modifier vos paramètres de sécurité locale. Essayez d’abord la procédure expliquée dans la section Impossible d’ajouter un utilisateur Windows dans OmniPass.
-
Page 414: Index
Index recharge remplacement À propos de ce guide remplacement hors tension Adaptateur auto/avion voyants de niveau Alimentation voyant de niveau de charge adaptateur auto/avion BIOS adaptateur secteur guide gestion utilitaire de configuration mise hors tension Bluetooth mise sous tension - Informations supplémentaires panne Bouton d'alimentation/veille/reprise problèmes... - Page 415 Étiquette de configuration Graveur de DVD multiformat modulaire installation périphériques remplacement hors tension Fente de dispositif antivol retrait Fonction de veille prolongée Conventions utilisées dans ce guide activation/désactivation Coordonnées pour contacter Fujitsu Curseur Garantie Gestion de l'alimentation Glisser...
- Page 416 Hard Disk Drive Mode sommeil (veille) access indicator Modem Haut-parleurs incorporés problèmes Haut-parleurs stéréo NumLk Installation Ordinateur portable Fujitsu LifeBook Lecteur de disquette externe rangement problèmes voyager avec votre ordinateur Lecteur de DVD Ouverture d'urgence du plateau ouverture du plateau problèmes Lecteur multimédia...
- Page 417 Prise de modem Spécifications Prise de réseau local (RJ-45) Alimentation Prise de réseau local interne Audio Problèmes d’alimentation électrique Clavier Dimensions et poids Environnement d’exploitation Redémarrage Mémoire Réglage du volume Microprocesseur Remplacement hors tension Puce Réseau local sans fil Vidéo Avant d'utiliser la carte réseau sans fil Connexion au réseau Dépannage...
- Page 418 Touches de curseur Touches Windows Touche Application Touches Démarrer problèmes Utilitaire de mise à jour des pilotes Fujitsu Driver Update Voyant de charge des batteries Voyant de niveau de charge...